retrofitting projectors into stock headlights


#52
 07-29-2010

Join Date: Jan 2009
Location: Orange County, California
Posts: 533
Likes: 0
Received 0 Likes
on
0 Posts


#54
07-29-2010
Join Date: Jan 2009
Location: Orange County, California
Posts: 533
Likes: 0
Received 0 Likes
on
0 Posts

#56
07-29-2010
Join Date: Jan 2009
Location: Orange County, California
Posts: 533
Likes: 0
Received 0 Likes
on
0 Posts
Chrome housing+chrome shroud = too much chrome
EDIT: did you have a certain projector kit in mind?

#64
07-29-2010
Join Date: Jan 2009
Location: Orange County, California
Posts: 533
Likes: 0
Received 0 Likes
on
0 Posts
honestly i was worried about prying the lights open too but that was the least of my worries compared to everything else. It really is easy, just know that your headlights wont melt in the oven and leave them in for like 15 to 20 min... i left mine in for longer on 225 and they were fine
#65
07-29-2010
#66
08-06-2010
I was considering getting the same kit as Andrew, but the mounting is the thing that baffles me. I'm not sure how but I want to use a more robust mounting method (kind of like Andrew wished he did)
I have been thinking constantly about this for 2 days, I really need to stumble onto something.
I have been thinking constantly about this for 2 days, I really need to stumble onto something.
#67
08-06-2010

#68
08-06-2010
JP7 If you get the kit Rob has it goes up further and uses the 9007 socket lock to be held secure. (not going anywhere) The ones Andrew installed are 99% custom you have to cut a hole and all that stuff... (better secure it good or you'll have leaks)
Personally, if I did the mod I'd get some like robs but I don't want the lil light rings... I just want projectors
Personally, if I did the mod I'd get some like robs but I don't want the lil light rings... I just want projectors
#69
08-07-2010
JP7 If you get the kit Rob has it goes up further and uses the 9007 socket lock to be held secure. (not going anywhere) The ones Andrew installed are 99% custom you have to cut a hole and all that stuff... (better secure it good or you'll have leaks)
Personally, if I did the mod I'd get some like robs but I don't want the lil light rings... I just want projectors
Personally, if I did the mod I'd get some like robs but I don't want the lil light rings... I just want projectors
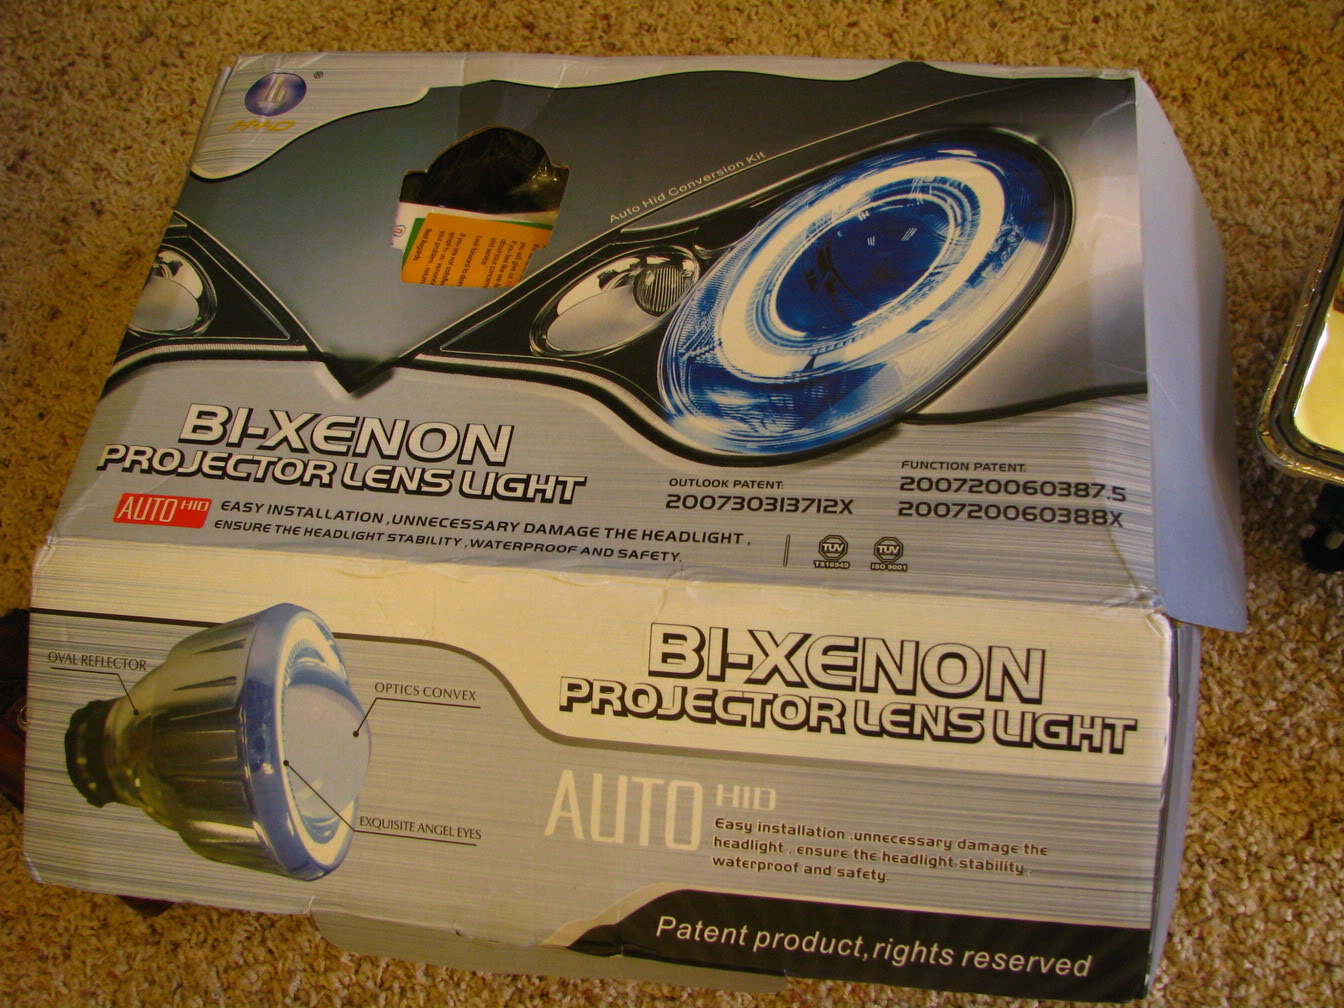
I see 2 problems with this style kit.
1 - the bulbs that go into this style kit are a special bulb that no OEM uses, so when the bulbs die of any causes its going to be more difficult to get replacement parts. If the company that makes these goes out of business its going to be damn near impossible. Right now with my plugin style 9007 High/Low HIDs, there are 20394823 sellers on the internet that sell perfectly working replacement bulbs. If I switch to projectors I'm going to want the part availability of a wide ranger of sellers on the internet. The morimoto mini projectors that Andrew here used work with your standard style H1 Bulb, and this is a plain-jane style bulb that you can buy from 2398438 websites on the internet.
2 - The projection width and cutoff isn't as wide as the morimoto mini's.
See the aftermarket G1's:

aftermarket G3's

Morimoto Mini H1's

The Mini H1's are way wider, and way prettier. I know I have to custom mount these though, which is a huge negative. I can make my own LED halos, I'm not worried about that. Also there is a litany of shroud choices for the Mini H1's.
#72
08-11-2010
#73
08-13-2010
Join Date: Jan 2009
Location: Orange County, California
Posts: 533
Likes: 0
Received 0 Likes
on
0 Posts
Update!!!!
Sorry for not updating this thread in a while. I have been extremely busy and haven't had time to do anymore work on them. I have
had a few issues as far as aligning the lights, they light output is
level but the cut off lines ( each projector has a cutoff ) do not meet in the middle like they should. I will post output pics explaining what I mean. These projectors have such a wide and beautiful beam it's unbelievable how far these things can go. I'm going to be re aligning them tomorrow so expect a bunch of pics.
JP7- I'm on my iPhone so I am limited but you asked how I sealed up the back. Well basically I got som jb weld and smuthered it everywhere. I cut freehand holes using a dremel to try and get a tight fit off the bat with the projectors. I used no screws only jb weld and some 500 farienheit degree putty (you can find all this at lowes) then i did cut pretty wide hole to fit the obscure shape of the projector as deep in the housing as i could. Like i said before i used no screws and i had to experiment with this, at first i thought there was no way i could NOT use screws but lets say i would screw into the top right hole, then the bottom left hole. The screws would always offset each other and the light beam would never be parallel, so i used a putty to hold the projectors in place and aligned then used the jb weld to secure it up. Now for those of you who think some jb weld will not hold projectors in the housing, especially being the projectors way twice as much as the housings itself.. well they have not moved on me whatsoever, i have personally hit as many bumps and holes as i can to try and make them move.. but no... I also experimented with different types of glues and epoxies but within 5 minutes of the projectors being on they all melted on me. So for those of you going to try a retrofit, MAKE SURE YOU USE A HIGH TEMPERATURE GLUE ( i went with 500 degree glue, even though the projectors only get to 225) The way i cut the holes in the housing, used the putty, and jb weld these things are not moving.
EDIT: PICTURES!!
6k LOWS

6k BRIGHTS


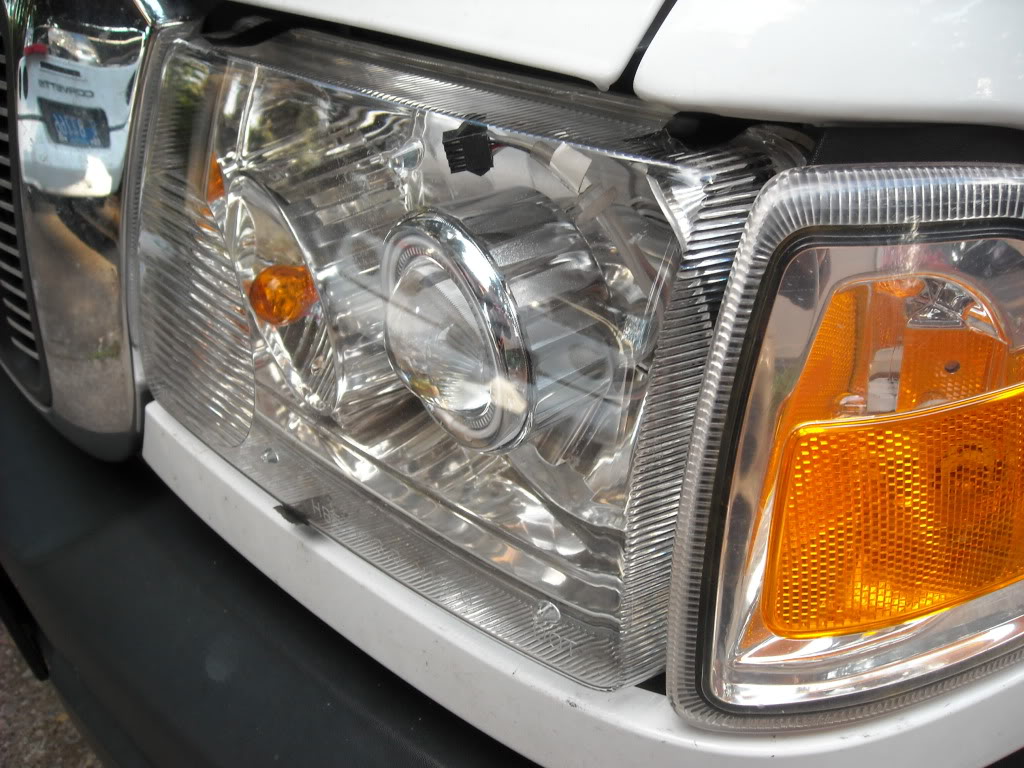
I wasn't aware there was some people doing retrofits because of this thread so i wanted to help out and show some more pics. There is a little bit of a reflection that shines back into the housing from the projector light hitting the housing lens, there is no way to get rid of it. I also used some foil tape to wrap up the projector so no light escapes the "vent holes" on the shroud.
I have also just purchased some CCFL Angel Eyes 70mm here is what they look like, i will also post pictures when i get them installed.

For those wondering how i am going to install these angel eyes when everything is sealed up. Well this would be the 7th time i have opened up my headlights and taken out the projectors and whatnot, so i have developed a sort of routine. I have taken the jb weld off once before because when drying they moved a slight bit (fixed the slight moving while drying by using the putty) it takes about an hour total to get the jb weld off, its not hard using an exacto knife just time consuming. During this process i will take pictures so everyone can see how it works. This all seems like a ton of work but with my girlfriend helping me and the output results i can't resist it :P
Sorry for not updating this thread in a while. I have been extremely busy and haven't had time to do anymore work on them. I have
had a few issues as far as aligning the lights, they light output is
level but the cut off lines ( each projector has a cutoff ) do not meet in the middle like they should. I will post output pics explaining what I mean. These projectors have such a wide and beautiful beam it's unbelievable how far these things can go. I'm going to be re aligning them tomorrow so expect a bunch of pics.
JP7- I'm on my iPhone so I am limited but you asked how I sealed up the back. Well basically I got som jb weld and smuthered it everywhere. I cut freehand holes using a dremel to try and get a tight fit off the bat with the projectors. I used no screws only jb weld and some 500 farienheit degree putty (you can find all this at lowes) then i did cut pretty wide hole to fit the obscure shape of the projector as deep in the housing as i could. Like i said before i used no screws and i had to experiment with this, at first i thought there was no way i could NOT use screws but lets say i would screw into the top right hole, then the bottom left hole. The screws would always offset each other and the light beam would never be parallel, so i used a putty to hold the projectors in place and aligned then used the jb weld to secure it up. Now for those of you who think some jb weld will not hold projectors in the housing, especially being the projectors way twice as much as the housings itself.. well they have not moved on me whatsoever, i have personally hit as many bumps and holes as i can to try and make them move.. but no... I also experimented with different types of glues and epoxies but within 5 minutes of the projectors being on they all melted on me. So for those of you going to try a retrofit, MAKE SURE YOU USE A HIGH TEMPERATURE GLUE ( i went with 500 degree glue, even though the projectors only get to 225) The way i cut the holes in the housing, used the putty, and jb weld these things are not moving.
EDIT: PICTURES!!
6k LOWS

6k BRIGHTS


I wasn't aware there was some people doing retrofits because of this thread so i wanted to help out and show some more pics. There is a little bit of a reflection that shines back into the housing from the projector light hitting the housing lens, there is no way to get rid of it. I also used some foil tape to wrap up the projector so no light escapes the "vent holes" on the shroud.
I have also just purchased some CCFL Angel Eyes 70mm here is what they look like, i will also post pictures when i get them installed.
For those wondering how i am going to install these angel eyes when everything is sealed up. Well this would be the 7th time i have opened up my headlights and taken out the projectors and whatnot, so i have developed a sort of routine. I have taken the jb weld off once before because when drying they moved a slight bit (fixed the slight moving while drying by using the putty) it takes about an hour total to get the jb weld off, its not hard using an exacto knife just time consuming. During this process i will take pictures so everyone can see how it works. This all seems like a ton of work but with my girlfriend helping me and the output results i can't resist it :P
Last edited by andddrew says; 08-13-2010 at 03:30 PM.
#74
08-13-2010
Join Date: Jan 2009
Location: Orange County, California
Posts: 533
Likes: 0
Received 0 Likes
on
0 Posts
That was the one problem I found with these projectors but I went to my local hardware store and picked up a big piece of heatshrink then basically slid the bulb through that into the projector bulb slot then used a heat gun the shrink the wrap to make a water tight fit. And yes I tested it pouring a waterbottle on it then turning It on and it was fine
#75
08-13-2010
That was the one problem I found with these projectors but I went to my local hardware store and picked up a big piece of heatshrink then basically slid the bulb through that into the projector bulb slot then used a heat gun the shrink the wrap to make a water tight fit. And yes I tested it pouring a waterbottle on it then turning It on and it was fine


