
Bed Rack for a 2000 Stepside Ranger

Thread Starter
|
Member

Joined: Jun 2008
Posts: 155
Likes: 0
From: Tucson, AZ
Bed Rack for a 2000 Stepside Ranger
I have had fielded a couple of questions regarding the custom bed rack that I designed so I have decided to put together a post on it. First of all, let me state that it is not complete. I have it mounted and it serves it's purpose but it still needs to be dressed up.
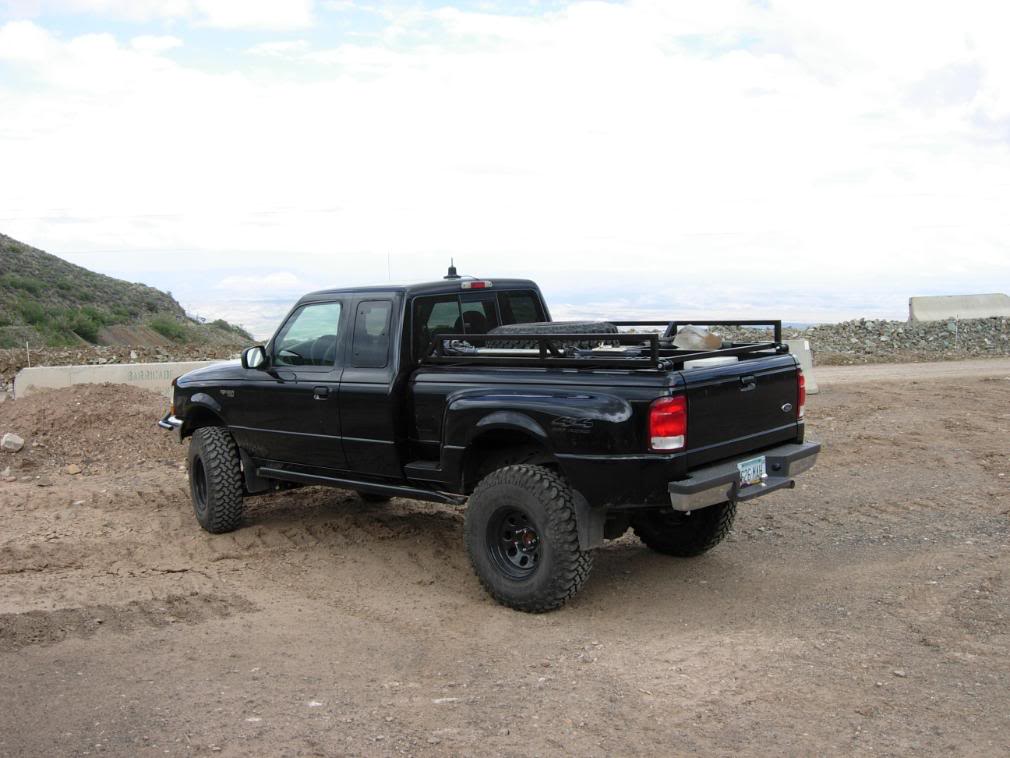
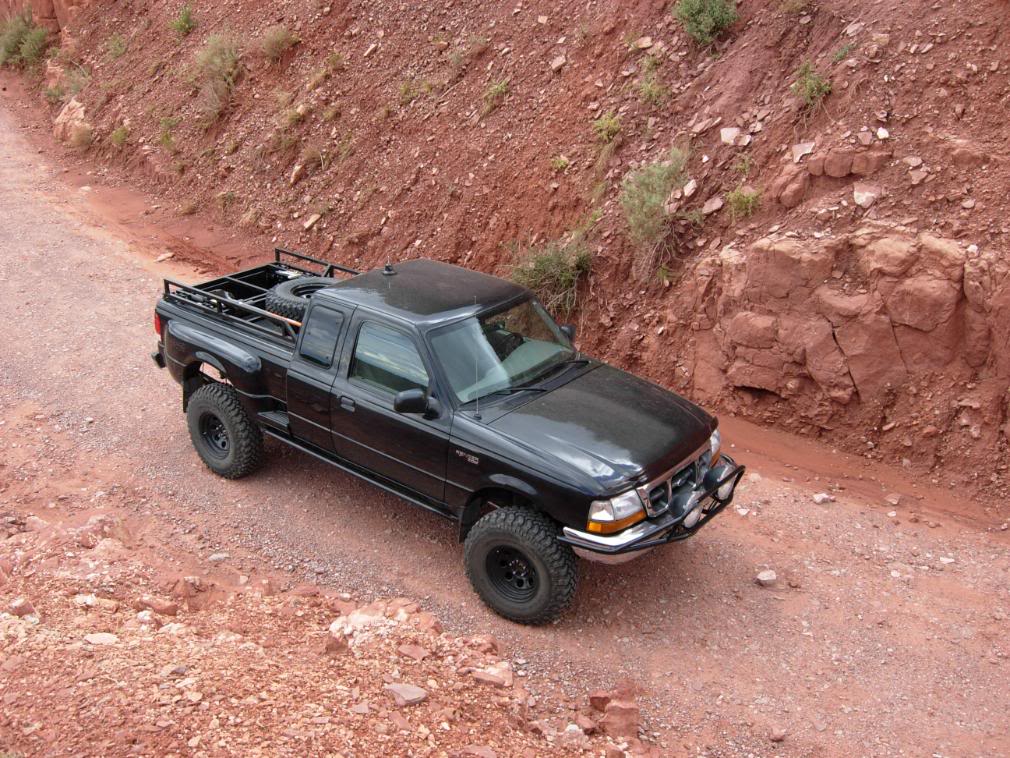
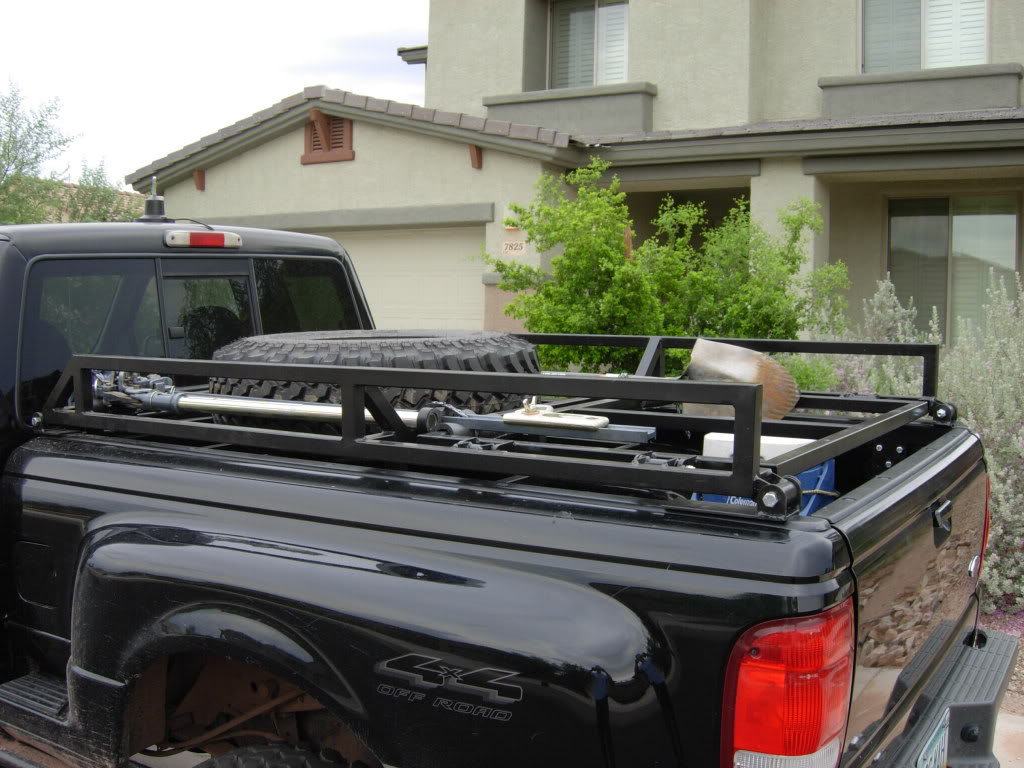
To start out, here are a couple of shots of the rack in action.
As for the design, after lifting the truck and adding 33's the rear tire no longer fit under the bed. Leaving the tire laying in the bottom of the bed was not an option since I routinely use my truck for camping and other trips that require the use of my bed for gear. I contemplated hitch gate and rear bumper vertical mount designs before finally settling on a top mount option.
I abandoned the hitch gate (TireGate) option after realizing that the step side did not offer enough width to allow the gate to swing when mounted prerunner style. I abandoned the hitch mount option after reading an article on www.ExpeditionsWest.com where the author had to reinforce the frame of his Taco to support the cantilevered weight of the bumper mounted tire. After choosing a top mount design, I quickly realized that a top mounted tire would render my rear view mirror and rear window useless. To address this issue I decided to recess the tire basket 6" into the truck bed. This left the top of the tire roughly 1/2 way up the rear window. At this height I still have visibility out of the mirror and rear window.
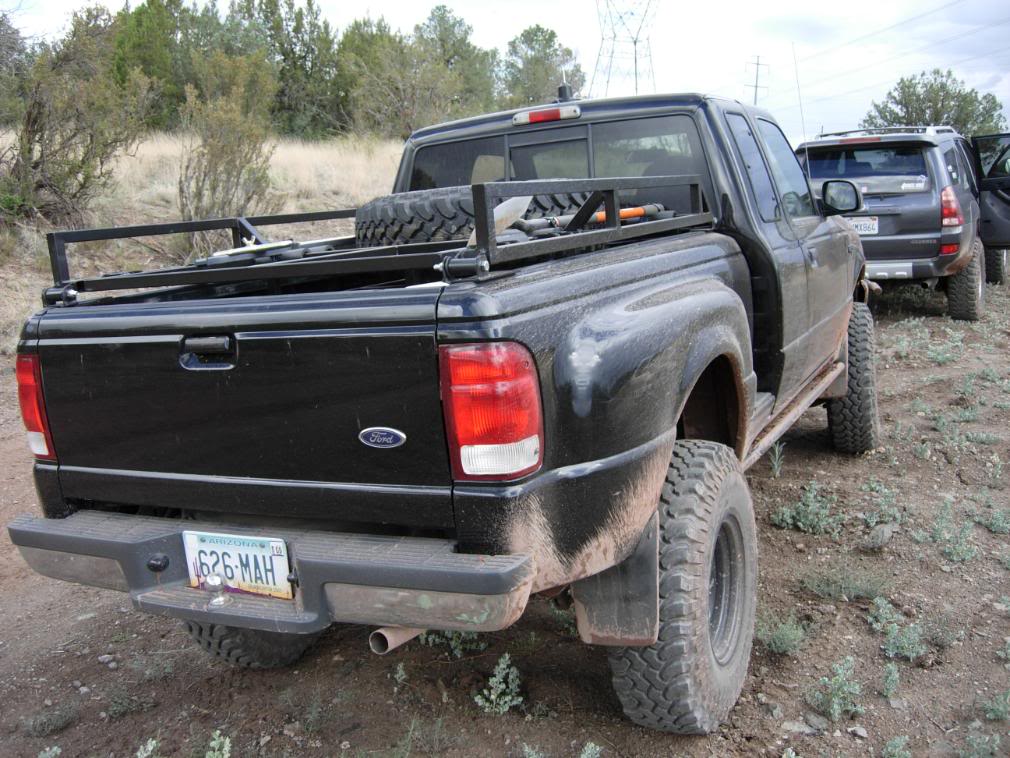
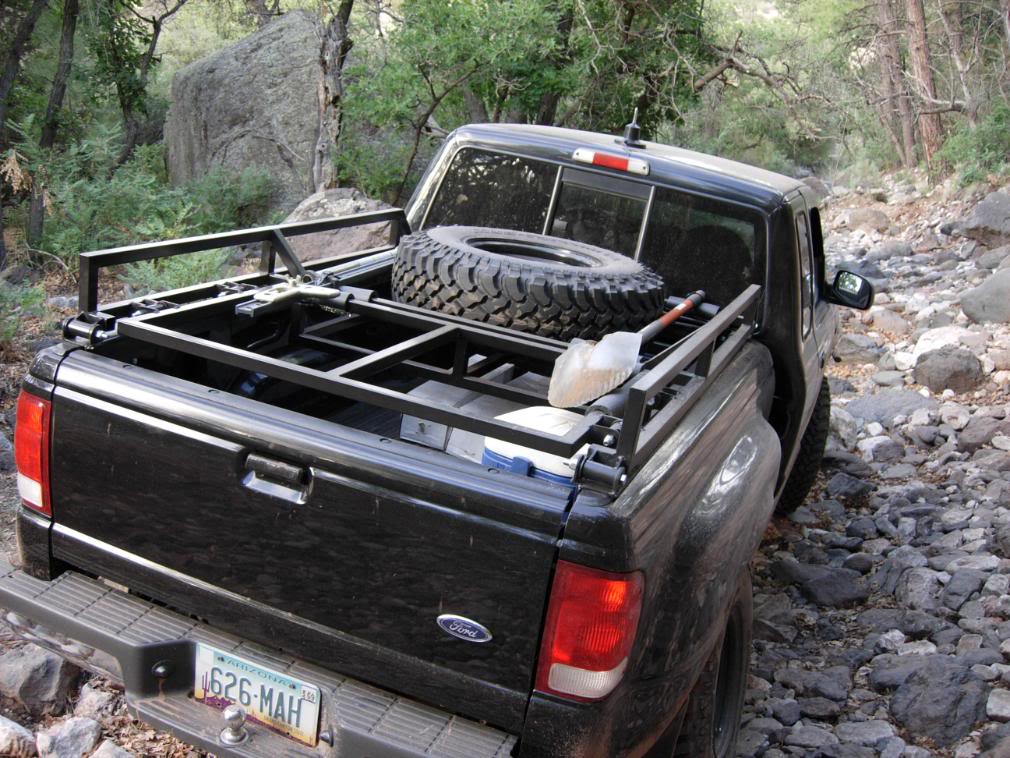
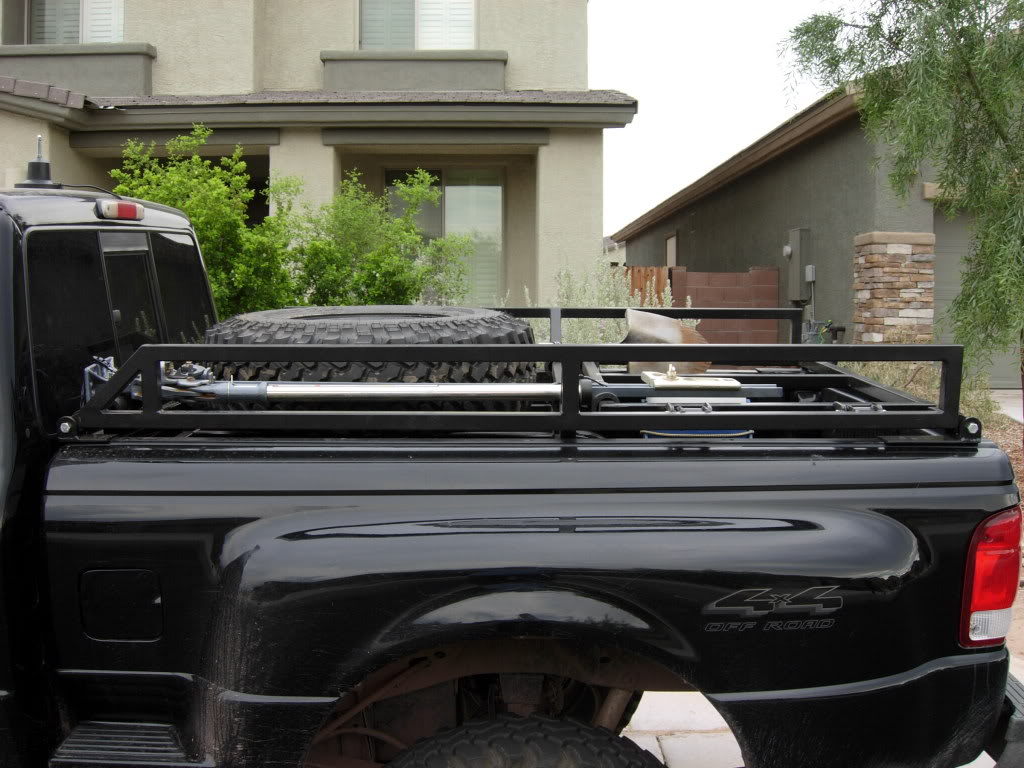
These two pictures show the relationship of the mounted tire to the rear window.
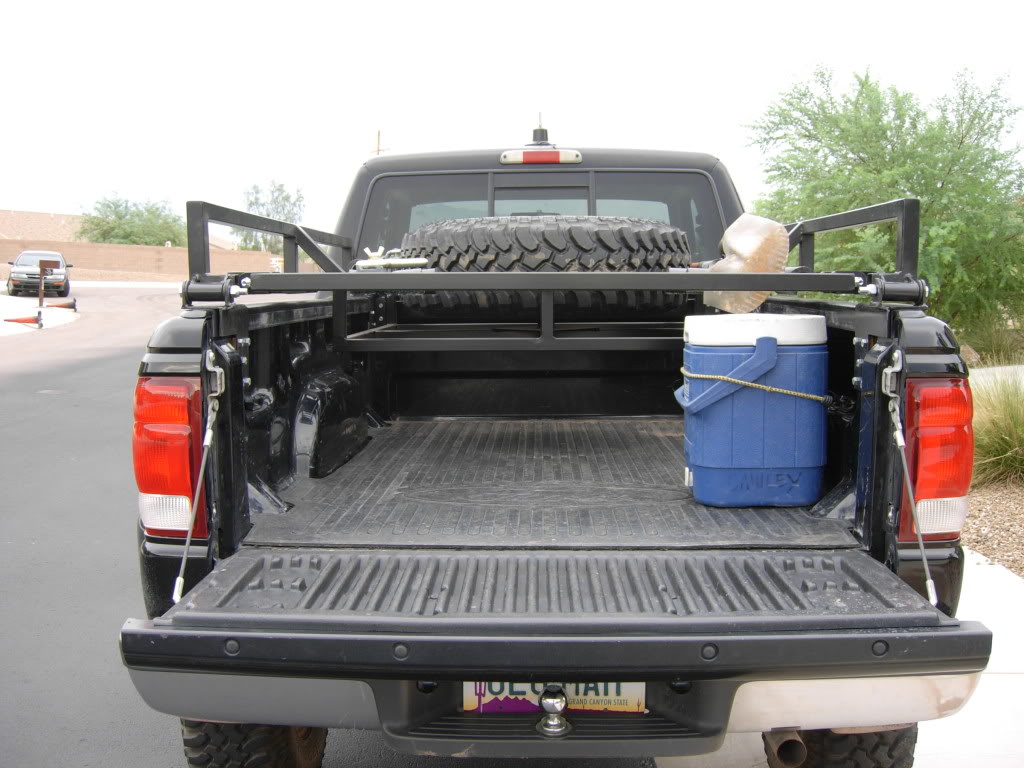
This picture shows the bed clearance under the tire basket.
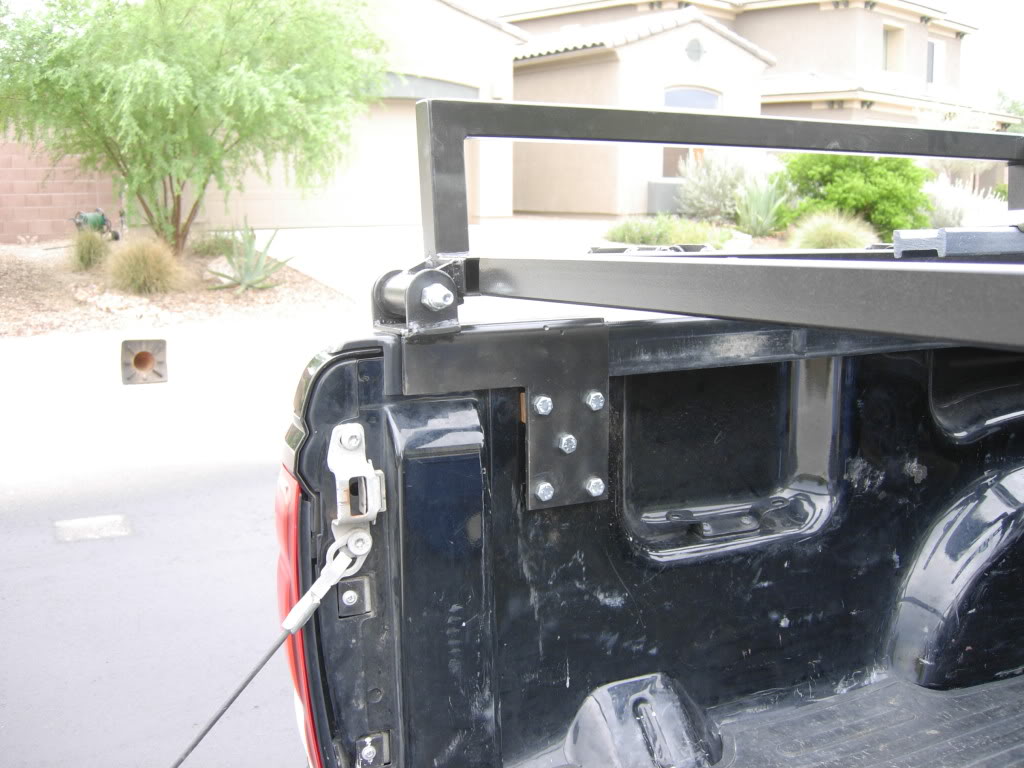
Mounting the rack was an issue since there are no structural elements under the bed cap. To overcome this, I designed brackets that bolted to the inside of the bed.
Examples of the mounting brackets.

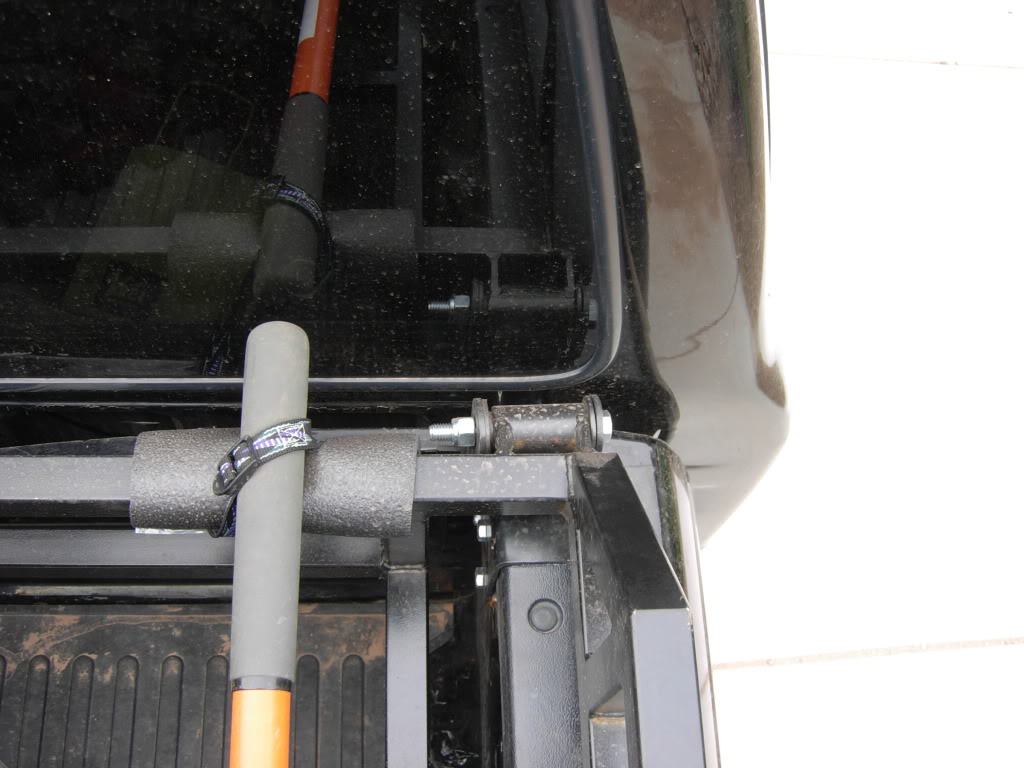
The rack was mounted to the brackets using 3"X1"OD poly bushings. I decided to use these to allow a bit of flex, to limit the possible noise, and to allow the rack to lift and or be removed easily.
Examples of bushing mounts.
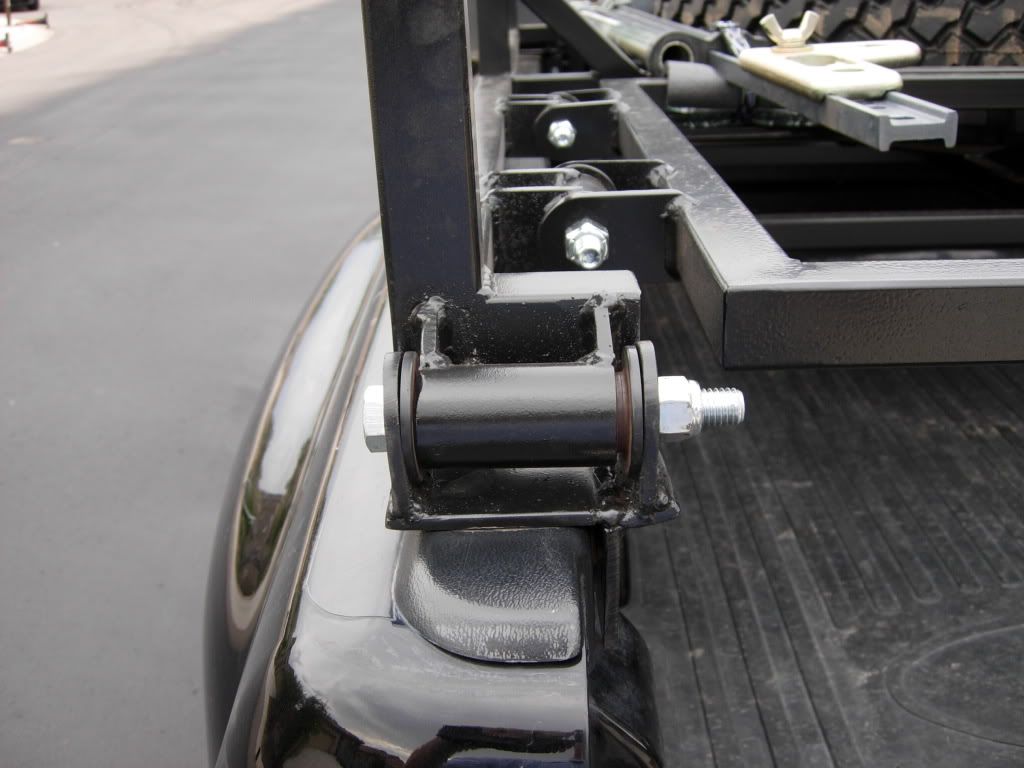
I designed the rear portion of the rack to lift to either side or be removed completely. I used the same style of busings for this mount as I did for the overall rack.
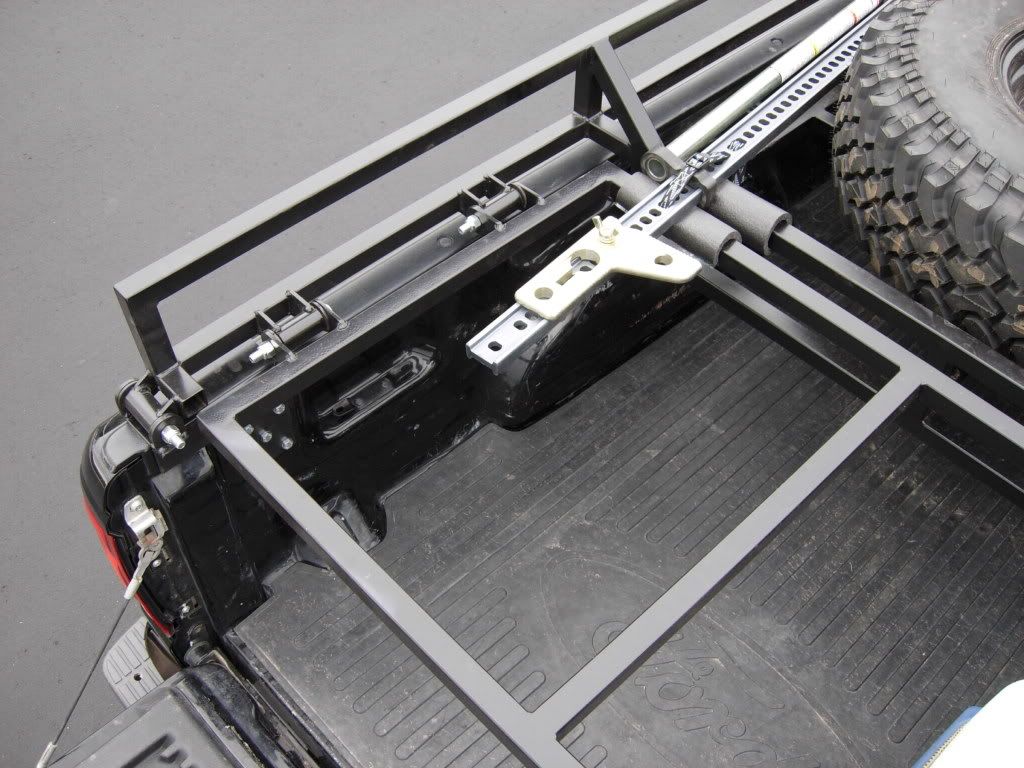
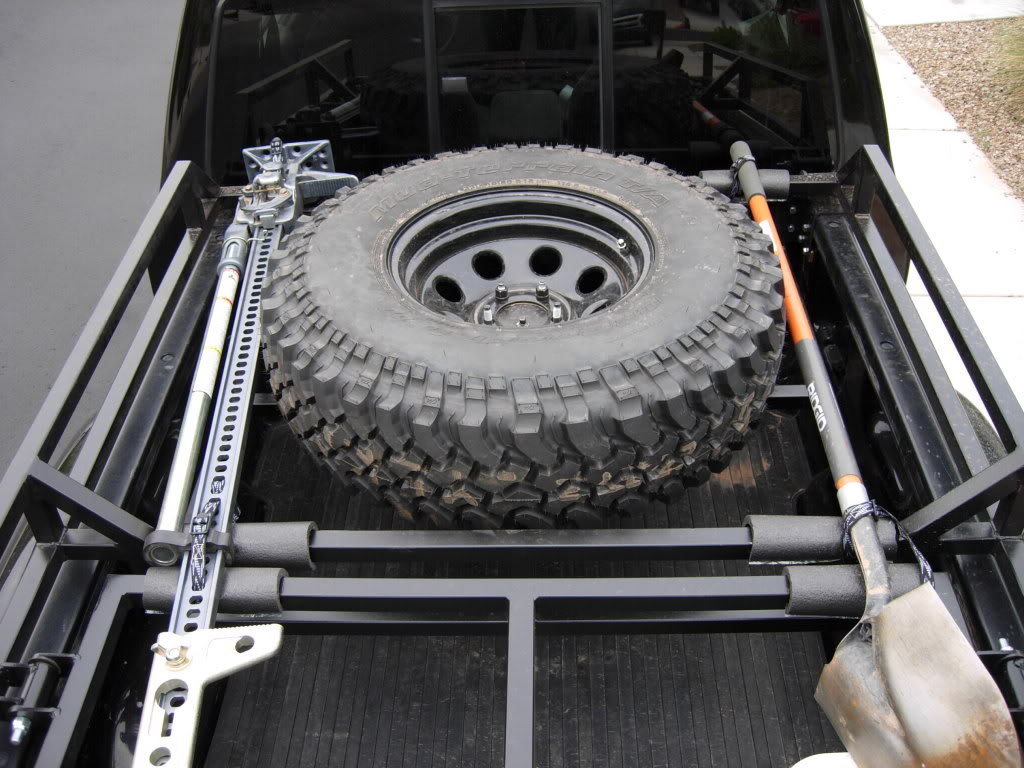
The bottom of this tire basket and the rear portion of the rack will eventually be skinned with a removable mesh so that additional storage can be provided on top of these areas.
I added side rails so that I could mount a HiLift jack and shovel/ax combo on either side. The mounts will also house a pair of 2"X6" KC backup lights.
So far, I am happy with the design and it has performed as intended. As previously mentioned, I intend to skin the flat areas below the tire and the removable rear panel; add utility/light mount points to the side rails; and add lift struts so that the rack can be raised in a similar fashion to a tonneau cover.
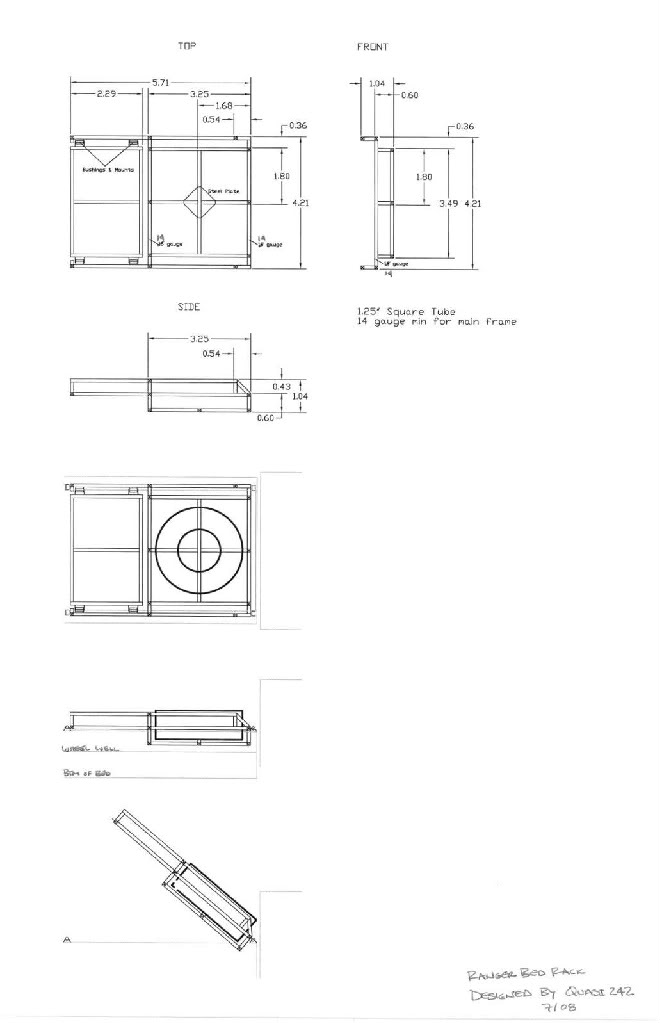
Lastly, I am including an image of my original design drawing. The dimensions are in decimal feet. Please feel free to use it as a starting point for your own design. Please let me know what you think.
To start out, here are a couple of shots of the rack in action.
As for the design, after lifting the truck and adding 33's the rear tire no longer fit under the bed. Leaving the tire laying in the bottom of the bed was not an option since I routinely use my truck for camping and other trips that require the use of my bed for gear. I contemplated hitch gate and rear bumper vertical mount designs before finally settling on a top mount option.
I abandoned the hitch gate (TireGate) option after realizing that the step side did not offer enough width to allow the gate to swing when mounted prerunner style. I abandoned the hitch mount option after reading an article on www.ExpeditionsWest.com where the author had to reinforce the frame of his Taco to support the cantilevered weight of the bumper mounted tire. After choosing a top mount design, I quickly realized that a top mounted tire would render my rear view mirror and rear window useless. To address this issue I decided to recess the tire basket 6" into the truck bed. This left the top of the tire roughly 1/2 way up the rear window. At this height I still have visibility out of the mirror and rear window.
These two pictures show the relationship of the mounted tire to the rear window.
This picture shows the bed clearance under the tire basket.
Mounting the rack was an issue since there are no structural elements under the bed cap. To overcome this, I designed brackets that bolted to the inside of the bed.
Examples of the mounting brackets.
The rack was mounted to the brackets using 3"X1"OD poly bushings. I decided to use these to allow a bit of flex, to limit the possible noise, and to allow the rack to lift and or be removed easily.
Examples of bushing mounts.
I designed the rear portion of the rack to lift to either side or be removed completely. I used the same style of busings for this mount as I did for the overall rack.
The bottom of this tire basket and the rear portion of the rack will eventually be skinned with a removable mesh so that additional storage can be provided on top of these areas.
I added side rails so that I could mount a HiLift jack and shovel/ax combo on either side. The mounts will also house a pair of 2"X6" KC backup lights.
So far, I am happy with the design and it has performed as intended. As previously mentioned, I intend to skin the flat areas below the tire and the removable rear panel; add utility/light mount points to the side rails; and add lift struts so that the rack can be raised in a similar fashion to a tonneau cover.
Lastly, I am including an image of my original design drawing. The dimensions are in decimal feet. Please feel free to use it as a starting point for your own design. Please let me know what you think.

Thread Starter
|
Member
Joined: Jun 2008
Posts: 155
Likes: 0
From: Tucson, AZ
Unfortunately, I have not added the hydraulic struts to it yet. That combined with the fact that I need to replace the bolts with pins makes it difficult to lift at this time. That is one of the next steps. I will post more pictures when complete.

Member
Joined: Apr 2008
Posts: 842
Likes: 0
From: mobile,Alabama
kinda makes me want to just buy something almost like a ladder rack so i can order and basket to mount on top of it so i can throw a tire and crap up their... mainly a crap load of lights lol their was a guy on james duff site that i got the idea form but i cant find the picture of his truck anymore!


Thread Starter
|
Member
Joined: Jun 2008
Posts: 155
Likes: 0
From: Tucson, AZ
We will see how it holds up but the four brackets are quite stout. They are made out of 3/16" plate and each have multiple bolts attached to the bed. The mounts on the front of the bed actually have bolt into both the side and the front of the bed. Basically, it does not move. As for the tire size, I agree that is why i sized it to fit a 35X12.50 tire. It will be a tight fit but it should work. That is one of the reasons why my 33X10.50 tire does not rest on the bottom of the basket. I am sure that there will be bugs to work out. First generation fabrication generally does. I fully expect that anyone that decides to make one of these in the future will find ways to improve upon my design. Thanks to everyone for the props.

Wow, thats awesome. I tried to desgin something like that last year when i first got my truck but gave up on it and after seeing yours it makes me wish i would not have, i would have it on my truck...simple but serves its purpose


