
How To: Change U-Joints

Thread Starter
|
Member

Joined: Mar 2005
Posts: 4,376
Likes: 1
From: Dearborn Michigan
How To: Change U-Joints
How to: Change U-joints on the drive shaft.
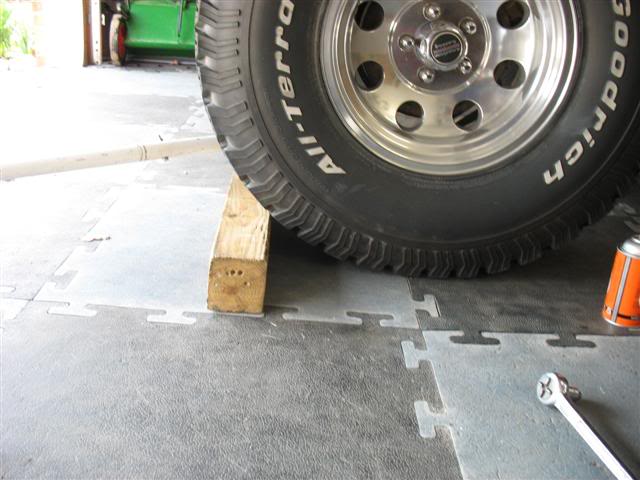
First off, make sure you have about 1 foot space in front and back of the truck for rolling purposes so you can roll the truck to access all bolts on the drive shaft.
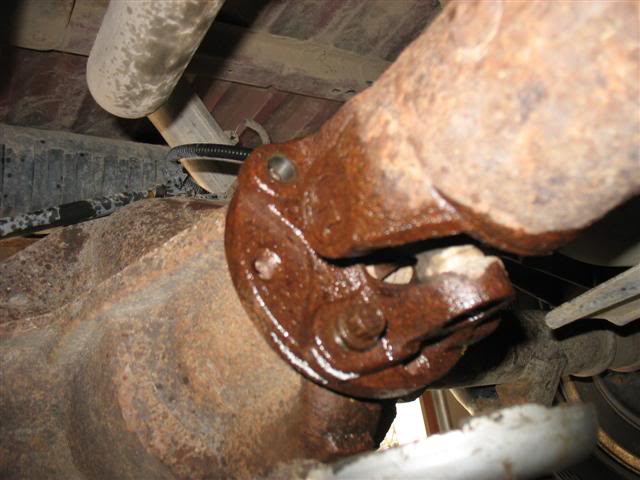
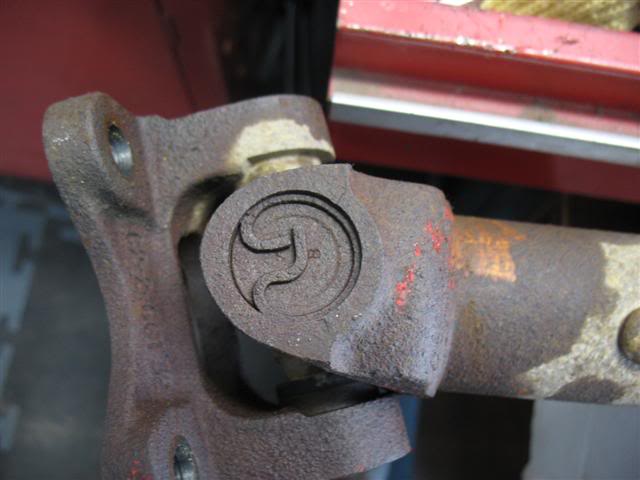
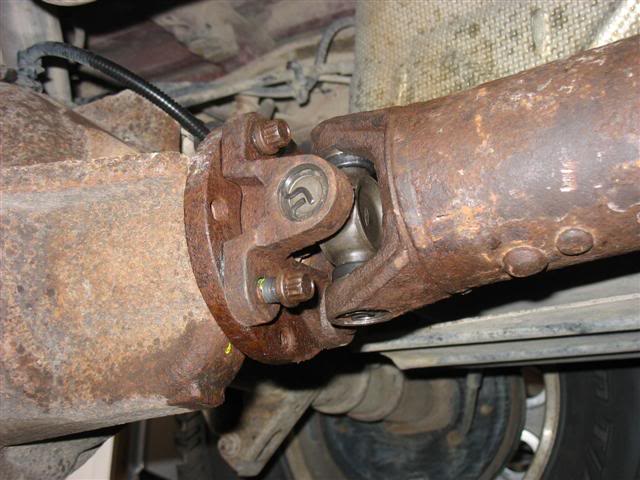
Step 1: Spray penetrating oil on all bolts and clips and mark a line from the drive shaft yoke to where it connects to the diff so you put it back on the exact way you took it off (so it stays balanced)
Step 2: Place chuck behind wheel so it doesn’t move
Step 3: Loosen the rear bolts on the drive shaft, and remove 3 of the 4 bolts
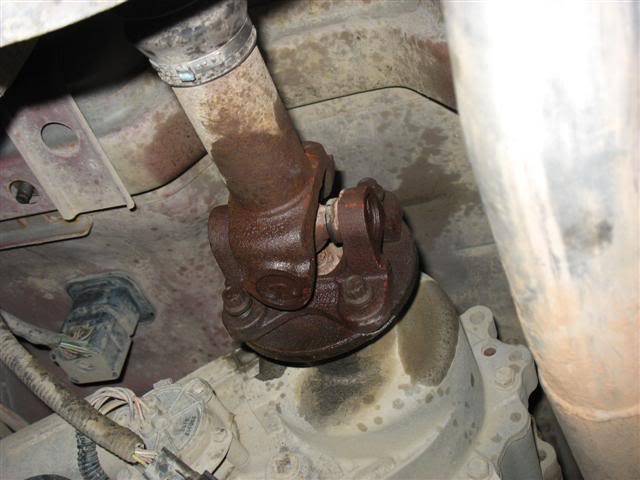
Step 4: Remove all 4 bolts from the front of the driveshaft
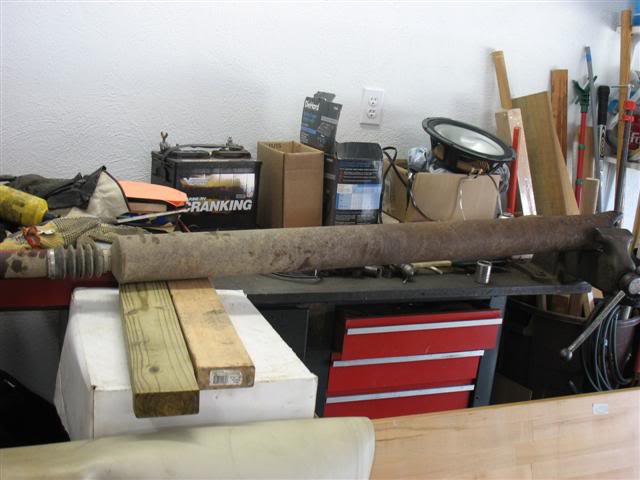
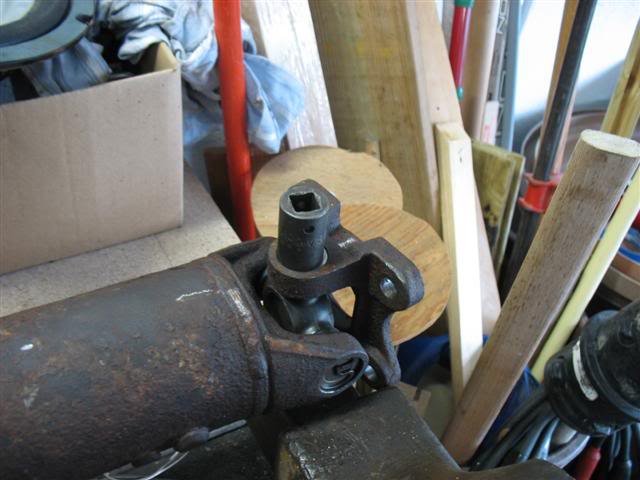
Step 5: Remove last bolt from rear, and take drive shaft out. Place it on work area. Flat ground or table is best.
Step 6: Remove clips from the u-joint. Needle noise pliers work best for this part. Clip is most likely going to break, but using a small flat head screwdriver, you should be able to pop it out of the grove.
If you get a part stuck in the grove, I find it best to fill the hole with penetrating oil and let it sit for a few minutes.
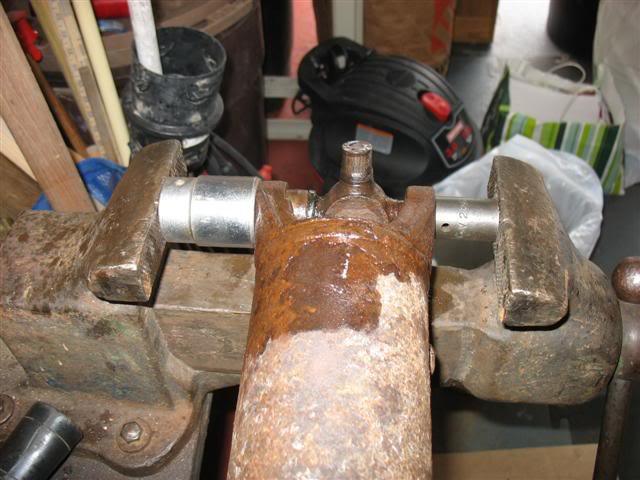
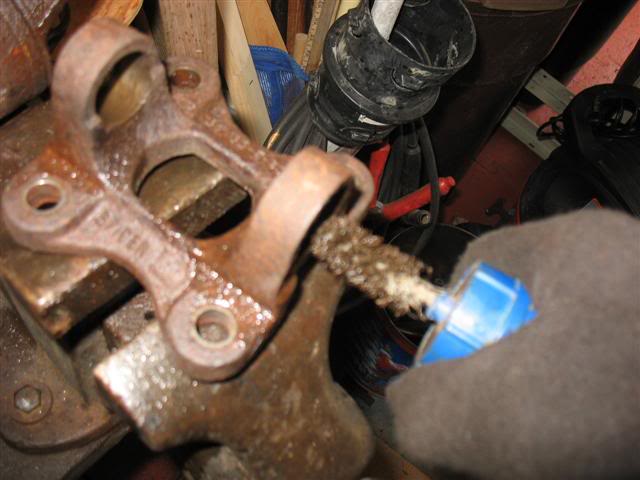
Step 7: Once clips are removed, its time to press out the u-joint caps. I found it best to place a small socket in the hole on one side and a larger socket on the other side. The larger socket must be large enough so the u-joint will fit in it, other wise it will hold it in place. I set this up in a vise, and slowly cranked on the vise until it poped out. Penetrating oil helps with this part as well.
Another method would be to set up the same way, but not in a vise. You would hit the smaller socket with a hammer pushing the u-joint out.
Step 8: Once you push out the one cap, you have to switch the larger socket and smaller socket and press the u-joint back through to the other side to remove the other cap like so.
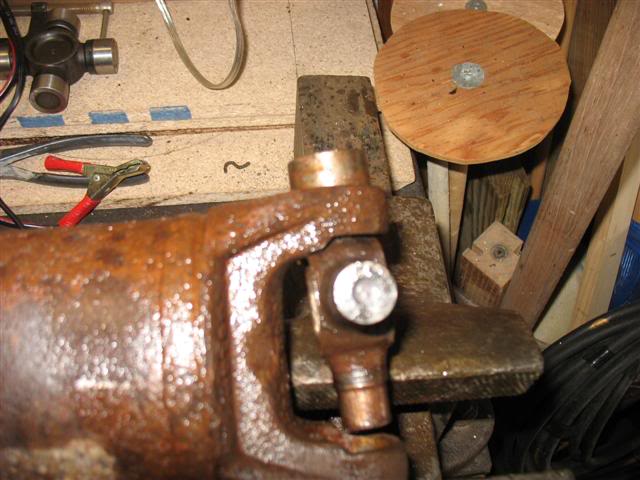
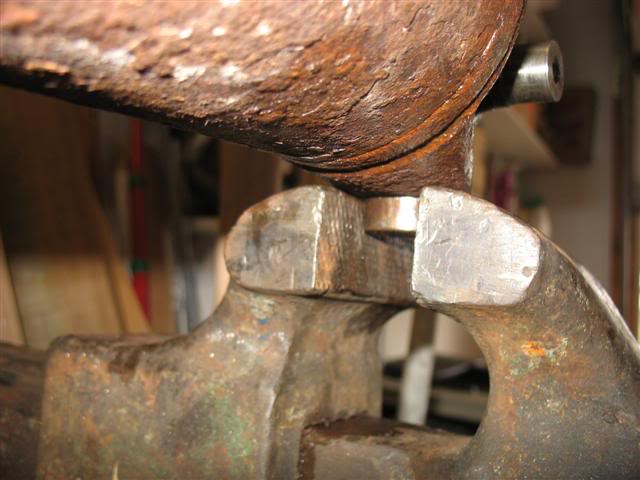
Removing this cap can be tricky. One way to do it is to place the cap in a vise and try to pull up on the shaft, or hit the shaft with a hammer. Be careful not to bend the shaft while doing this. Penetrating oil is your friend.
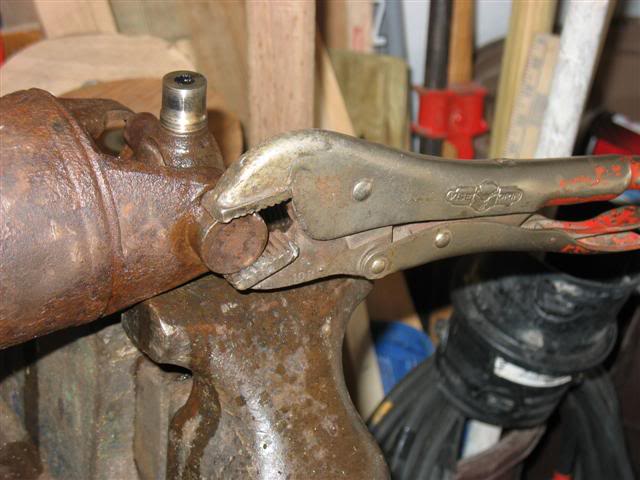
Another possibility is to get a pair of locking pliers, clamp it around the cap, and try to work it off by twisting it.
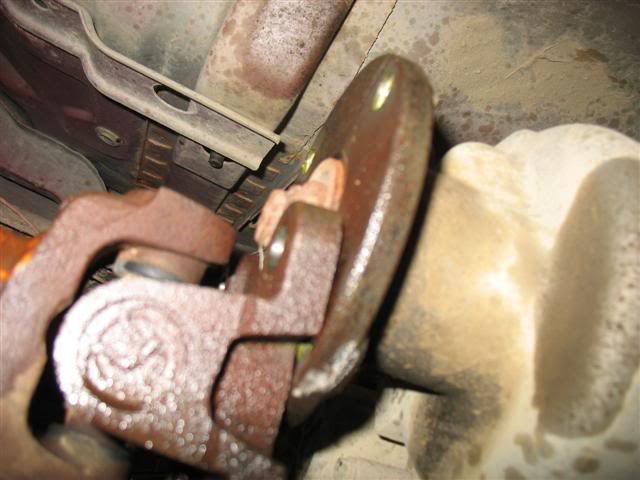
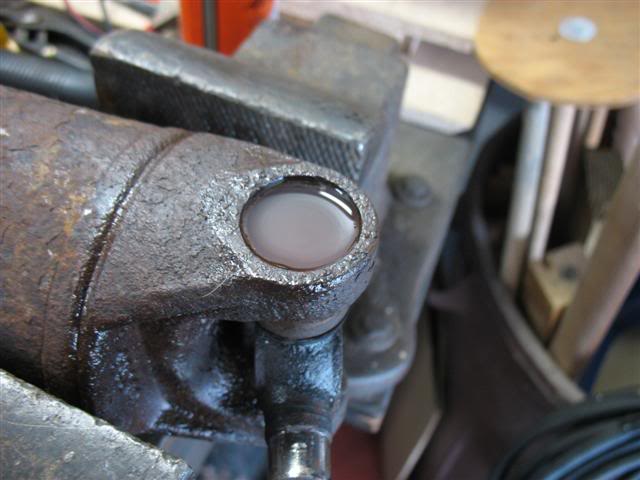
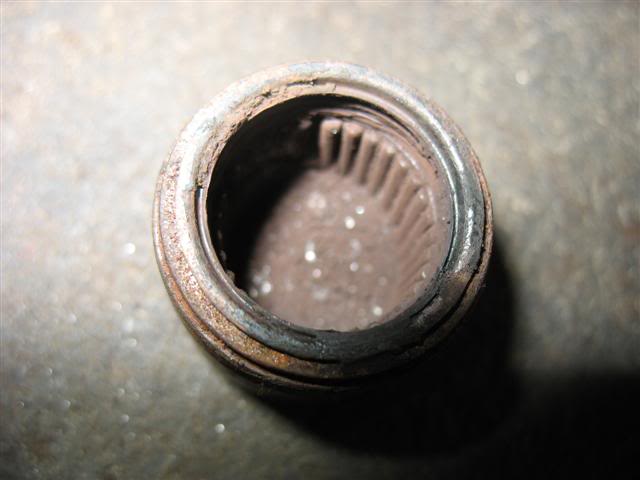
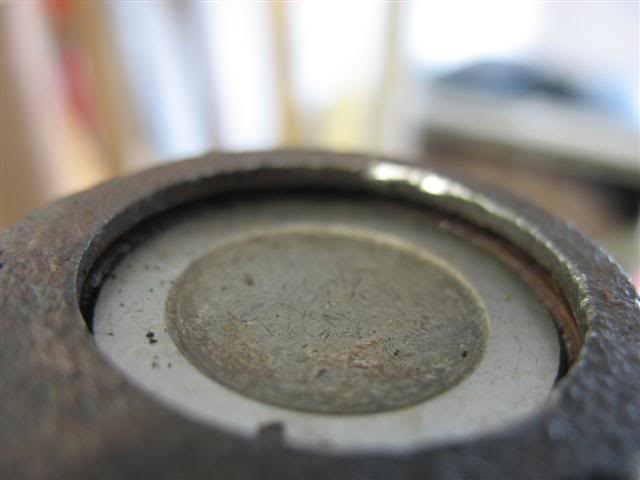
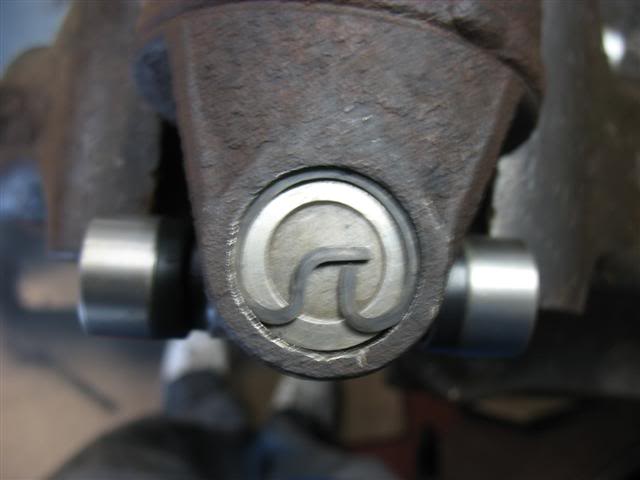
Although it may be hard to see, this is what a bad cap looks like. All the pins which are supposed to roll freely are froze up, and there is no lube on the cap at all.
Step 9: Follow this process for the other set of caps to
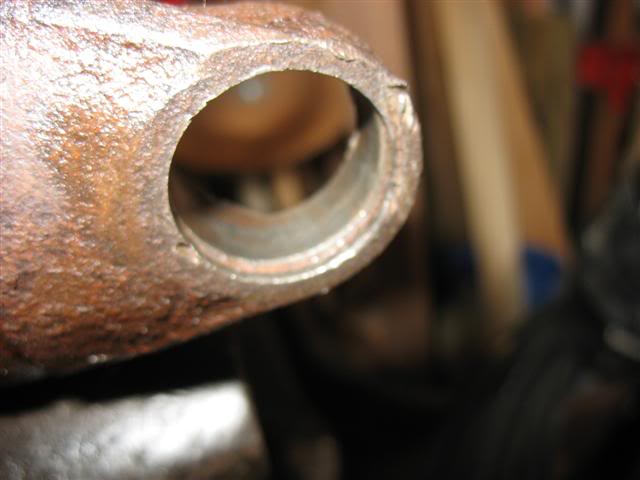
Step 10: Once everything is removed, clean all the surfaces and groves where the caps sit.
Wire brush used to clean the inside.
Make sure to clean in the grove as well
Step 11: Ready to place the new u-joint in place
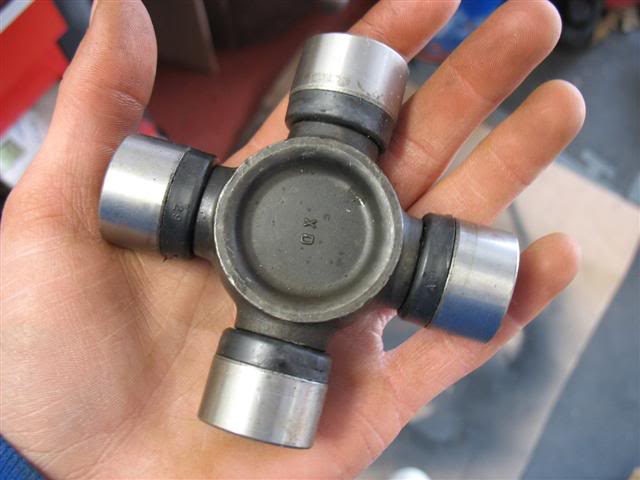
Step 12: Remove both caps from the new u-joint, place the caps in the hole from the outside in, and place u-joint in the holes. They are ready to be pressed into place. I used a vise and slowly pressed them in.
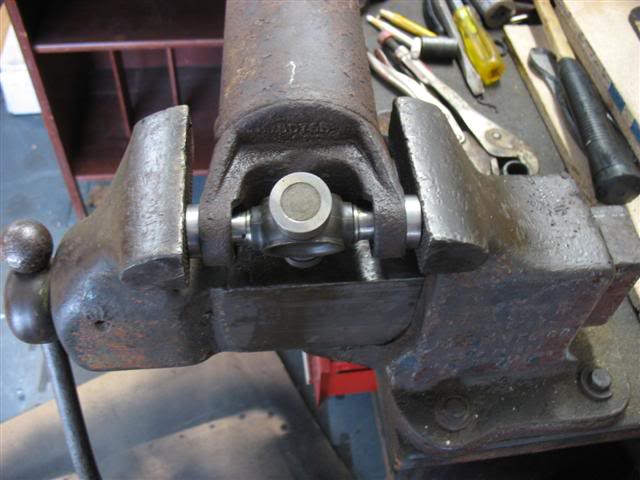
The caps still need to be pressed in further if you use a vise instead of a hammer. Place small socket over cap and tap it till you clear the grove.
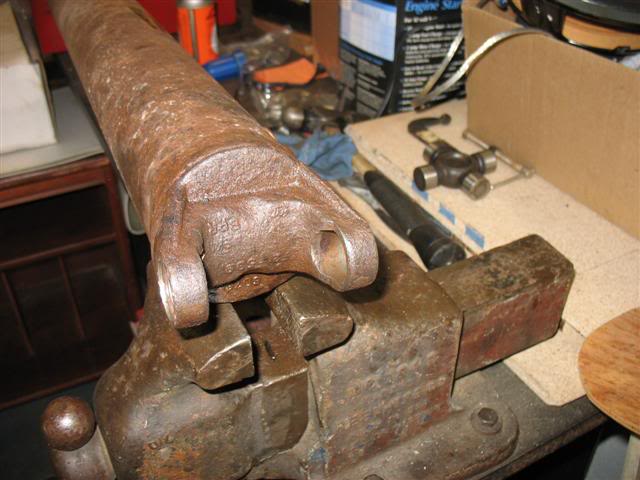
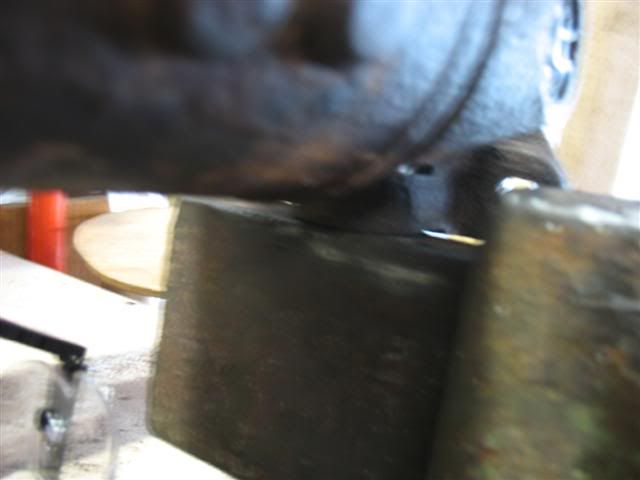
Be careful not to bend the drive shaft when hitting the cap. Make sure the drive shaft is not supporting the weight, you want the flange to support it as you hit with hammer (sorry it is blurry).
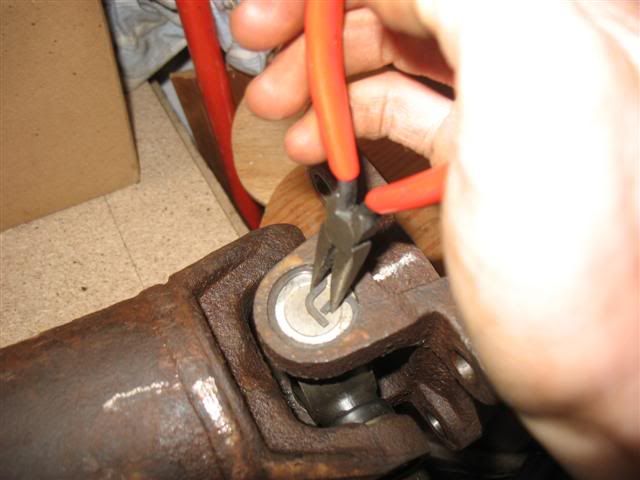
Step 13: Set clips in grove. Use a needle nose pair of pliers to compress the clip, and release in grove. Make sure the clip is all the way set into the grove, you may have to hit the cap in a little more if it does not set in place, but be careful not to push it to far in, otherwise you will push the other cap outward
Step 14: Put the drive shaft back into place under the truck. Start all screws, and then tighten to 70- 95 lb/ft
First off, make sure you have about 1 foot space in front and back of the truck for rolling purposes so you can roll the truck to access all bolts on the drive shaft.
Step 1: Spray penetrating oil on all bolts and clips and mark a line from the drive shaft yoke to where it connects to the diff so you put it back on the exact way you took it off (so it stays balanced)
Step 2: Place chuck behind wheel so it doesn’t move
Step 3: Loosen the rear bolts on the drive shaft, and remove 3 of the 4 bolts
Step 4: Remove all 4 bolts from the front of the driveshaft
Step 5: Remove last bolt from rear, and take drive shaft out. Place it on work area. Flat ground or table is best.
Step 6: Remove clips from the u-joint. Needle noise pliers work best for this part. Clip is most likely going to break, but using a small flat head screwdriver, you should be able to pop it out of the grove.
If you get a part stuck in the grove, I find it best to fill the hole with penetrating oil and let it sit for a few minutes.
Step 7: Once clips are removed, its time to press out the u-joint caps. I found it best to place a small socket in the hole on one side and a larger socket on the other side. The larger socket must be large enough so the u-joint will fit in it, other wise it will hold it in place. I set this up in a vise, and slowly cranked on the vise until it poped out. Penetrating oil helps with this part as well.
Another method would be to set up the same way, but not in a vise. You would hit the smaller socket with a hammer pushing the u-joint out.
Step 8: Once you push out the one cap, you have to switch the larger socket and smaller socket and press the u-joint back through to the other side to remove the other cap like so.
Removing this cap can be tricky. One way to do it is to place the cap in a vise and try to pull up on the shaft, or hit the shaft with a hammer. Be careful not to bend the shaft while doing this. Penetrating oil is your friend.
Another possibility is to get a pair of locking pliers, clamp it around the cap, and try to work it off by twisting it.
Although it may be hard to see, this is what a bad cap looks like. All the pins which are supposed to roll freely are froze up, and there is no lube on the cap at all.
Step 9: Follow this process for the other set of caps to
Step 10: Once everything is removed, clean all the surfaces and groves where the caps sit.
Wire brush used to clean the inside.
Make sure to clean in the grove as well
Step 11: Ready to place the new u-joint in place
Step 12: Remove both caps from the new u-joint, place the caps in the hole from the outside in, and place u-joint in the holes. They are ready to be pressed into place. I used a vise and slowly pressed them in.
The caps still need to be pressed in further if you use a vise instead of a hammer. Place small socket over cap and tap it till you clear the grove.
Be careful not to bend the drive shaft when hitting the cap. Make sure the drive shaft is not supporting the weight, you want the flange to support it as you hit with hammer (sorry it is blurry).
Step 13: Set clips in grove. Use a needle nose pair of pliers to compress the clip, and release in grove. Make sure the clip is all the way set into the grove, you may have to hit the cap in a little more if it does not set in place, but be careful not to push it to far in, otherwise you will push the other cap outward
Step 14: Put the drive shaft back into place under the truck. Start all screws, and then tighten to 70- 95 lb/ft
Last edited by 98liftedranger; Dec 2, 2011 at 11:43 AM.
Member
Joined: May 2005
Posts: 2,782
Likes: 1
From: Columbus Ohio
^ 12 point 14mm i beleive
im in the process of doing mine right now, i just hit my thumb with the hammer and im pissed.....
I f'ed the new joint up by not putting it back in right...so i have to go buy another one...
Nice how to by the way.
Rocky
im in the process of doing mine right now, i just hit my thumb with the hammer and im pissed.....
I f'ed the new joint up by not putting it back in right...so i have to go buy another one...
Nice how to by the way.
Rocky
RF Veteran
Joined: Jun 2004
Posts: 10,623
Likes: 6
From: Kennett Square, PA

The best way to do that is with a 12-point 12 mm open end wrench. Those are a funny 12.5 mm head, but a 12 mm 12 point socket or open end fits that well. That's how I got mine off when I swapped in my 31 spline axle.
Nice how-to and very well illustrated other than the omission on the bolt removal and tools required! I will be using it myself soon, thanks!!!
Nice how-to and very well illustrated other than the omission on the bolt removal and tools required! I will be using it myself soon, thanks!!!
Member
Joined: Sep 2011
Posts: 724
Likes: 7
From: NOVA
Really dumb question, but what size ujoints are needed?
I'm looking on Rock auto and they have a WIDE range for the ranger. I can't seem to source anything for a 2001 2.3L XLT? Everything appears to be for a 4x4 and not a 2x4?
Great thread, this will come in handy in the next couple weeks.
-Nigel
I'm looking on Rock auto and they have a WIDE range for the ranger. I can't seem to source anything for a 2001 2.3L XLT? Everything appears to be for a 4x4 and not a 2x4?
Great thread, this will come in handy in the next couple weeks.
-Nigel


Member
Joined: Sep 2011
Posts: 724
Likes: 7
From: NOVA
10 year thread isn't that bad, it's still relevant..lol This is the only forum that doesn't seem to want people to use the search feature and then post on that topic, they'd rather you make a new topic, so then there are 20+ of the same topics being asked on the same thing.
Oh well, back to searching.
-Nigel

I find it fairly amusing. There's nothing wrong with bumping an old thread, but it's kinda pointless to ask a previous poster a specific question when they haven't been online in years. At least most of your questions aren't ignorant.
Member
Joined: Apr 2016
Posts: 115
Likes: 1
From: Albuquerque new mexico

Old thread I know, it's a good write up tho. Although there is mention of "rolling the truck" to get to the bolts. Uh, I always put the trans in neutral & spin the shaft with my hand. That's much safer & smarter IMO.


Thread
Thread Starter
Forum
Replies
Last Post
93rangerXLT4x4
General Ford Ranger Discussion
3
Jun 1, 2024 11:23 AM
FireRanger
General Technical & Electrical
1
Sep 12, 2004 09:58 AM


