
How-To: Reseal Ranger Rear Window '98-12

How-To: Reseal Ranger Rear Window '98-12
Well, i had the issue of my rear window leaking when it rained hard. I learned from a local body shop what to do to reseal the rear window and thought I would share. I know that this is how the rear windows on 98 up are but not sure for 93 to 97.
Materials needed,
1 roll of rear window seal
10mm wrench or socket
rag and alcohal
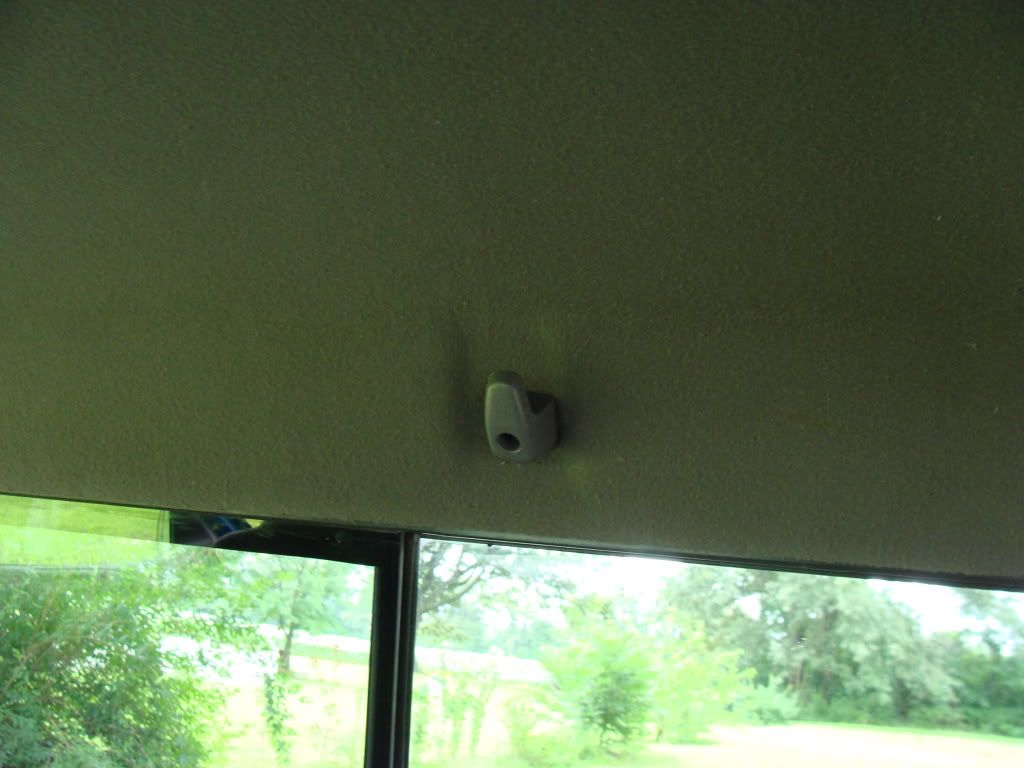
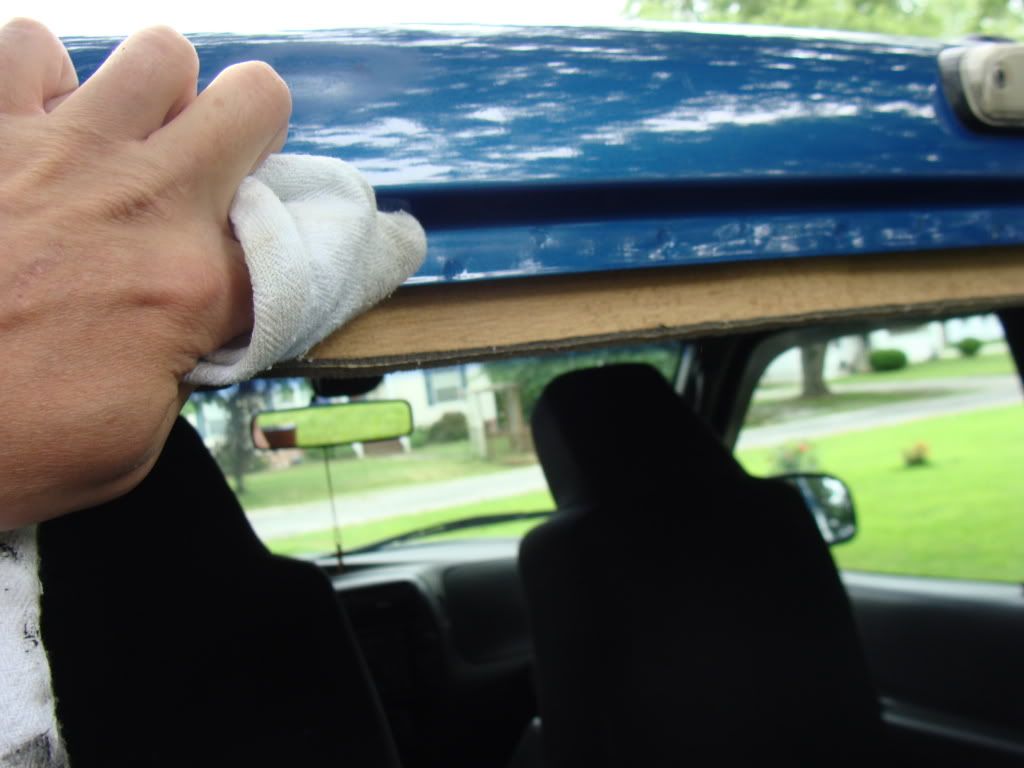
First off, I removed the jack cover and popped the retaining plugs from the side panels so I could pull the panels out far enough to get to the 8 bolts (3 along the top, 3 along the bottom and 1 in the center of each end) that hold the rear window in place. You also need to remove the coat hanger from the rear as well so you can get behind the headliner to get to the top bolts.
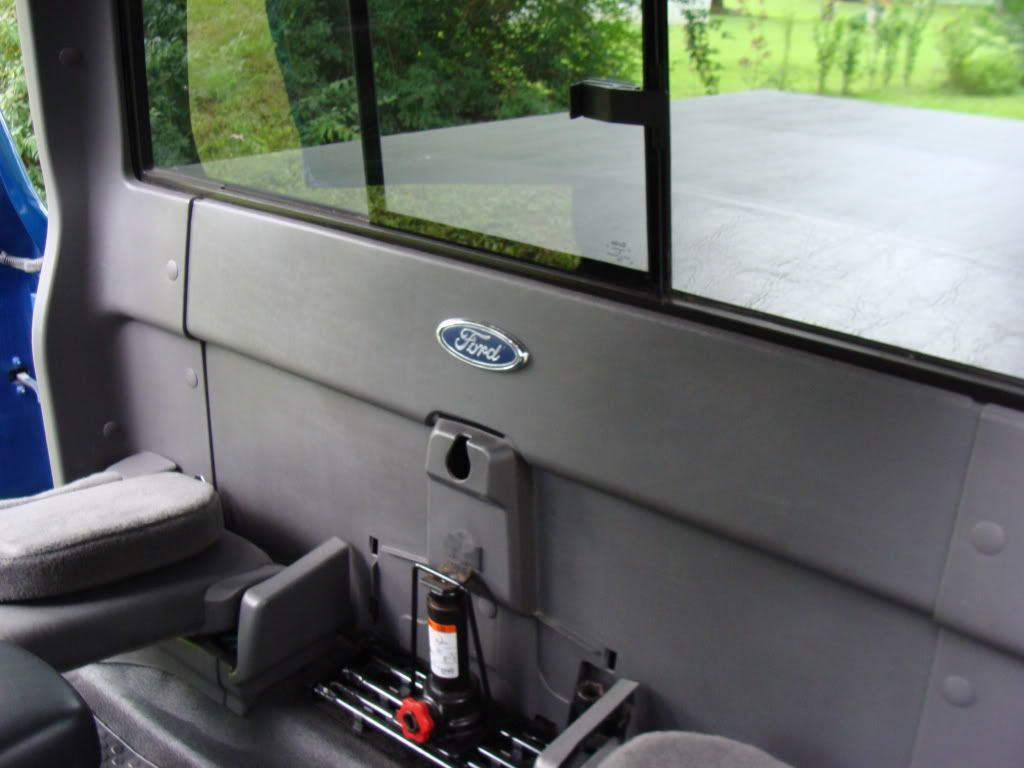
The nuts that hold the rear windowin are 10mm.
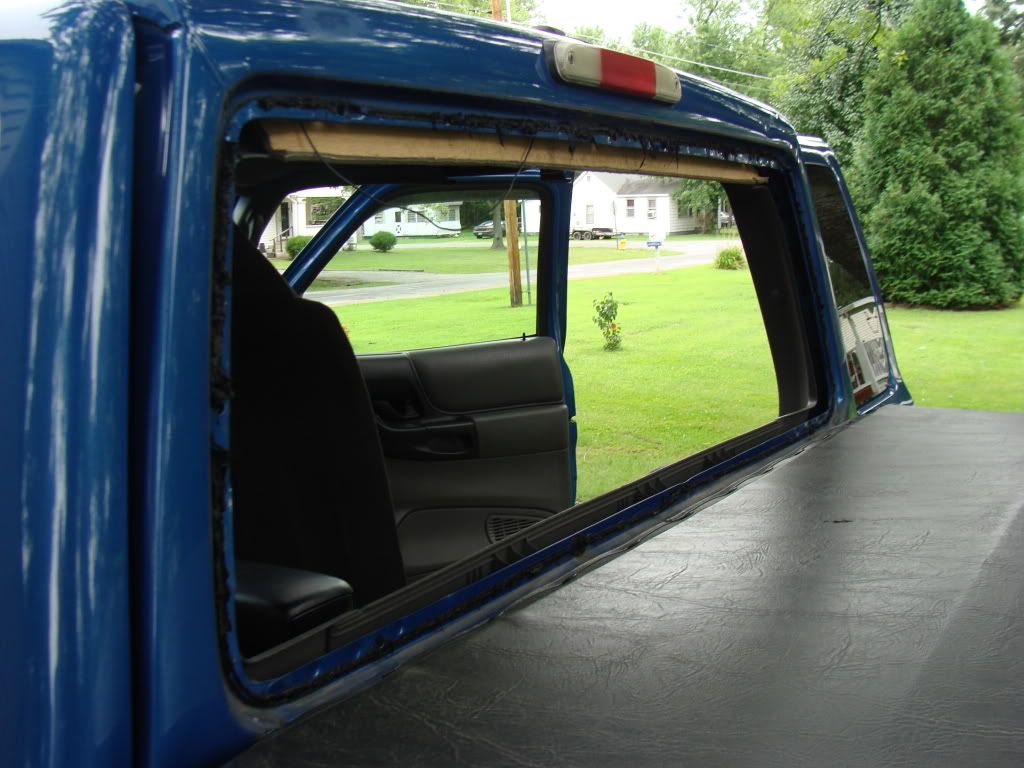
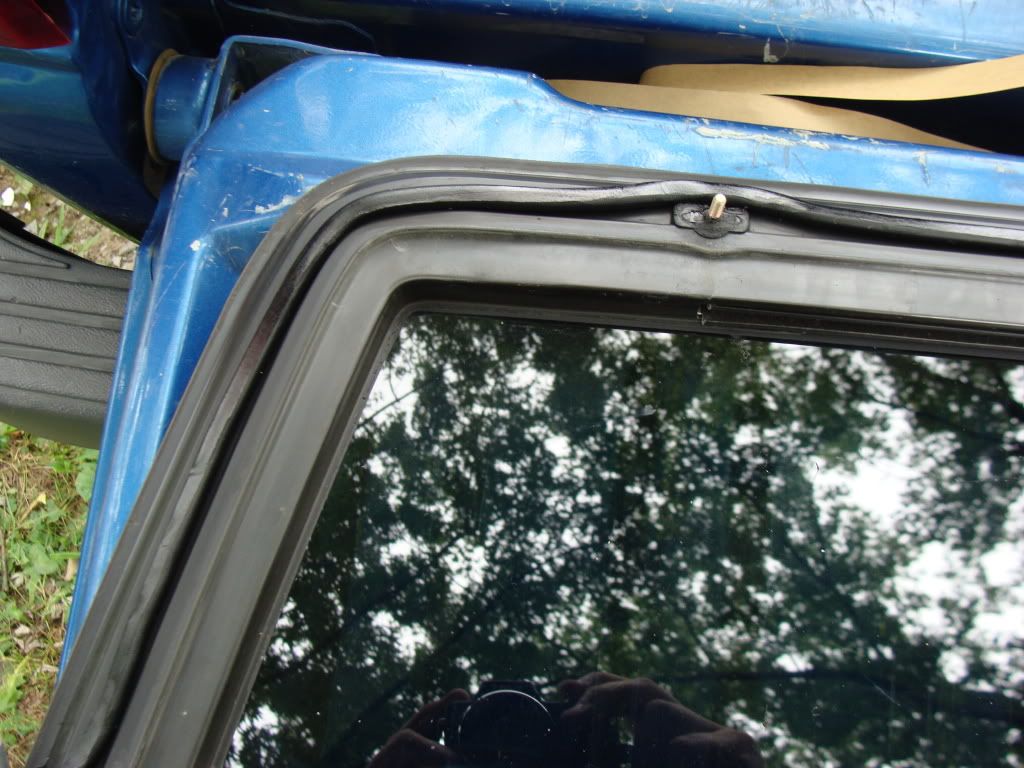
Once all the nuts are removed you can just push on the corners and around the edges to push the rear window out.
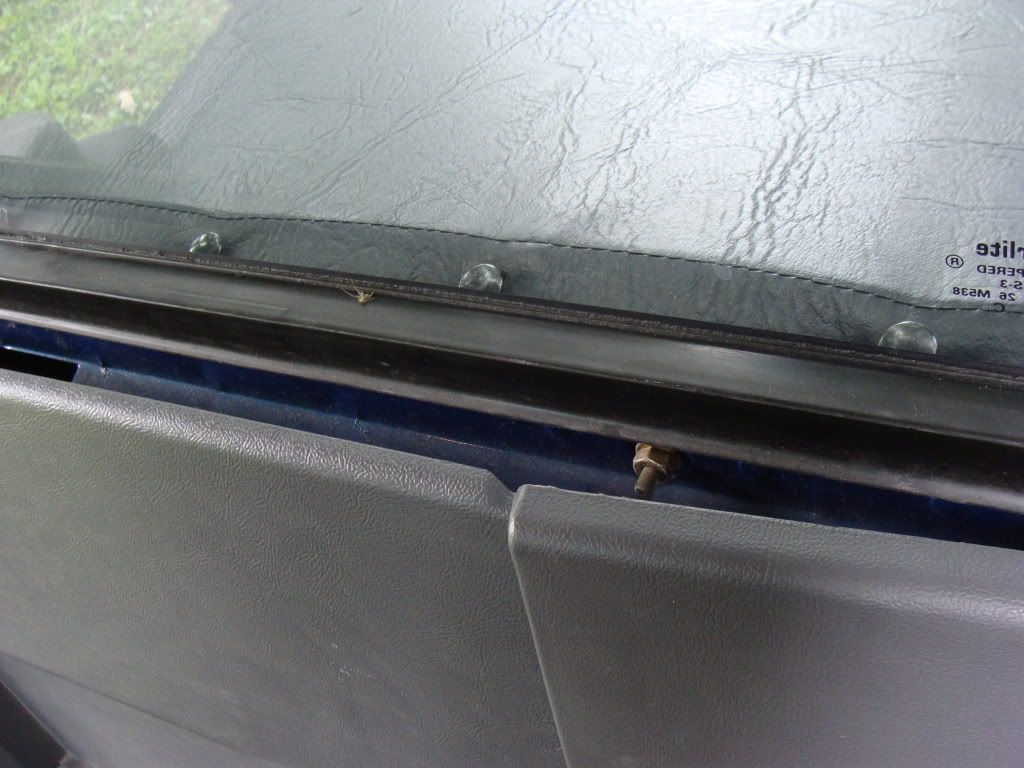
The old seal peeled off really easy.
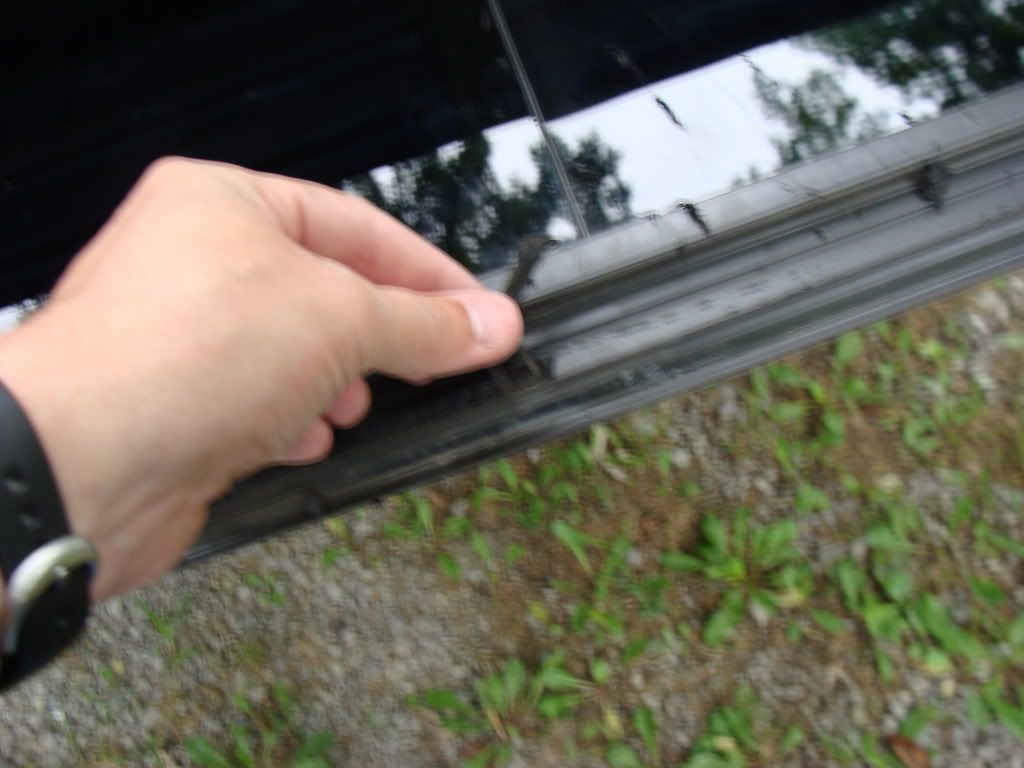
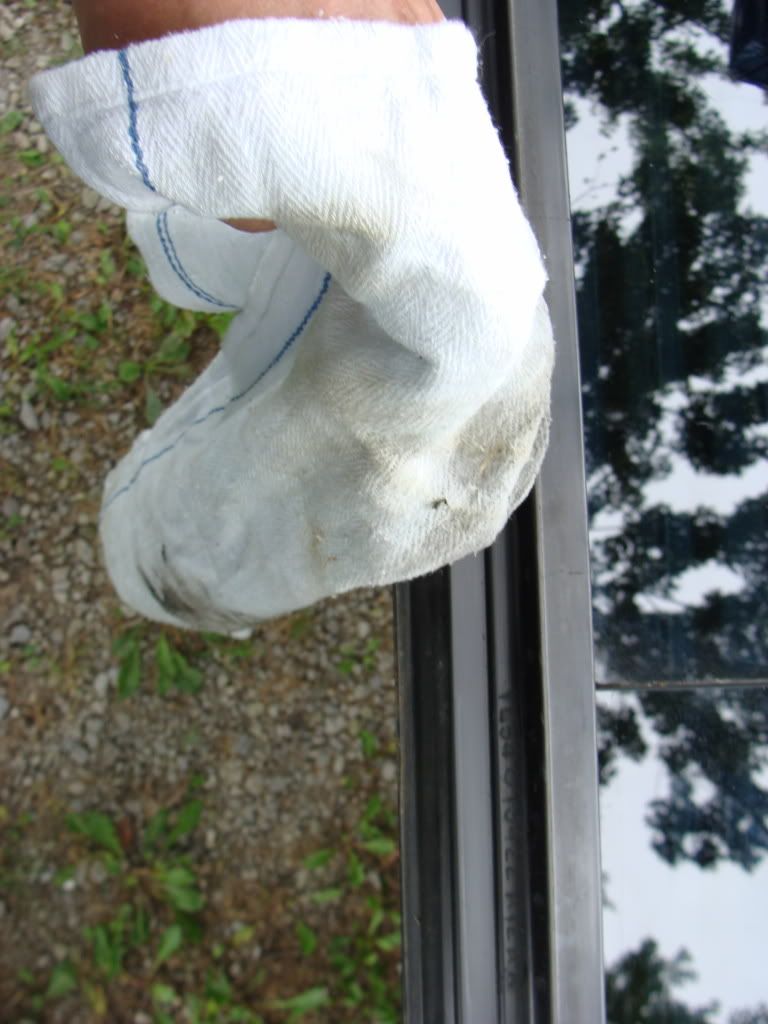
Make sure to clean the seal area on both the window and the truck with alcohal and that you get all of the old seal removed.
Once all of the old seal has been removed and the seal surface has been cleaned, its time to put the new seal on. It comes in a roll like shown and can be purchased from any body shop or glass installer.

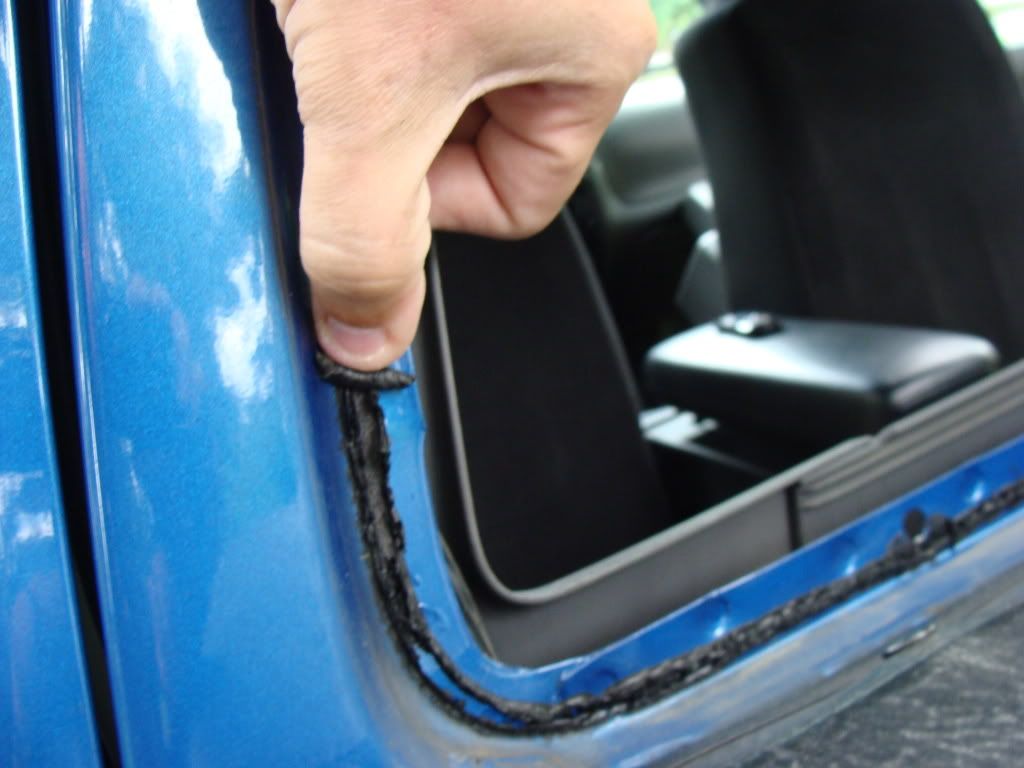
To start installing the seal, start in the center of the bottom of the window as shown putting the new seal down where the old was.
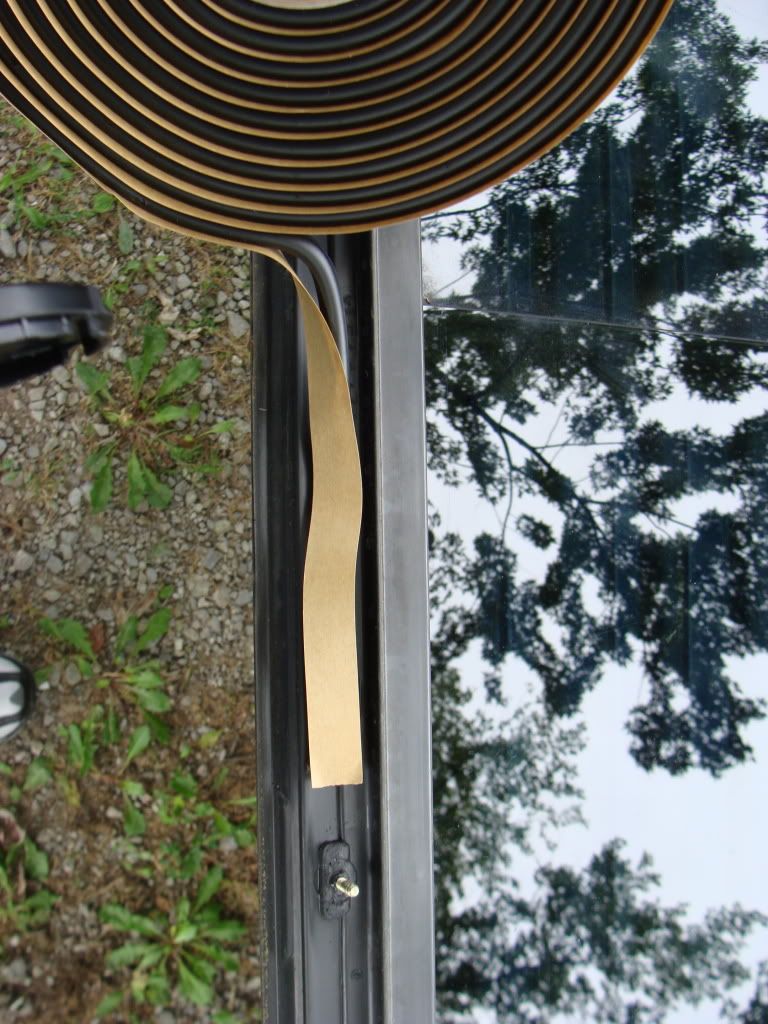
Move along the seal surface area making sure to go to the outside of the bolts like shown until you get back to the starting point where you should overlap both ends about an inch or so for sealing them together.
You are now ready to set the window back into place and reassemble. Dont over tighten the nuts. I snugged them all down and then gave them all about 3 more turns each. Then reassemble your interior and your done. Took me about 45 minutes from start to finish.
Materials needed,
1 roll of rear window seal
10mm wrench or socket
rag and alcohal
First off, I removed the jack cover and popped the retaining plugs from the side panels so I could pull the panels out far enough to get to the 8 bolts (3 along the top, 3 along the bottom and 1 in the center of each end) that hold the rear window in place. You also need to remove the coat hanger from the rear as well so you can get behind the headliner to get to the top bolts.
The nuts that hold the rear windowin are 10mm.
Once all the nuts are removed you can just push on the corners and around the edges to push the rear window out.
The old seal peeled off really easy.
Make sure to clean the seal area on both the window and the truck with alcohal and that you get all of the old seal removed.
Once all of the old seal has been removed and the seal surface has been cleaned, its time to put the new seal on. It comes in a roll like shown and can be purchased from any body shop or glass installer.
To start installing the seal, start in the center of the bottom of the window as shown putting the new seal down where the old was.
Move along the seal surface area making sure to go to the outside of the bolts like shown until you get back to the starting point where you should overlap both ends about an inch or so for sealing them together.
You are now ready to set the window back into place and reassemble. Dont over tighten the nuts. I snugged them all down and then gave them all about 3 more turns each. Then reassemble your interior and your done. Took me about 45 minutes from start to finish.
Last edited by Fordzilla80; Sep 21, 2018 at 06:42 PM. Reason: Fixed Photos

Member

Joined: Jan 2012
Posts: 2
Likes: 0
From: Louisville, KY
Was there anything else relevant that I should know before doing this? I'm thinking of doing it tomorrow. Also, the 3 nuts on the topside, do you have to take the headliner down a little to get to them? And finally, have you had any leaking issues since doing this back in 09?

WHAT SIZE TAPE DID YOU USE? It comes in 1/4" , 5/16", 3/8" and probably several other thicknesses too. I got the 3/8" tape (because that's all they had at the place I went to) and my friend insists that 3/8 too thick for this truck and the window will not mount up correctly.
Last edited by gts007; Mar 17, 2012 at 01:12 PM.


Member
Joined: Mar 2012
Posts: 4
Likes: 0
From: Indiantown, fl
Great write up, my supplier called it "Butal" and only carried the 3/8". The window does not sit as flush but has held great over the last 3 S FL rainy days. Some say the "roof moldings" on the single cabs cause the corner leaks, however the seal "cut the corners" so there was no seal between the moulding and metal. I threw some extra silicon just for safe measures, and so far so good
Last edited by sheltra87; Apr 23, 2012 at 09:06 AM.
Member
Joined: Nov 2011
Posts: 13
Likes: 0
From: North Olmsted, Ohio
I went to a stealership the other day to get there opinion on this subject and they said i will need a new weather strip/gasket for the window. I see you were able to reuse the old one. I have a solid window and will be installing a slider. As long as the weather strip appears to be in good condition, should I be ok to reuse it?
I will admit I'm a noob when it comes to this stuff.
I will admit I'm a noob when it comes to this stuff.
Member
Joined: May 2011
Posts: 39
Likes: 1
From: Iowa
03Ranger4x4,
I think the weatherstripping you are referring to is really just a plastic/rubber trim piece around the edge of the window that is attached to the window piece. The weather stripping that the dealer is talking about is likely the sealant ribbon described above, which cannot be reused as it gets ruined when you take the window off. In my case the sealant ribbon was all rotten and cracked anyways which is why my window was leaking in the first place.
I think the weatherstripping you are referring to is really just a plastic/rubber trim piece around the edge of the window that is attached to the window piece. The weather stripping that the dealer is talking about is likely the sealant ribbon described above, which cannot be reused as it gets ruined when you take the window off. In my case the sealant ribbon was all rotten and cracked anyways which is why my window was leaking in the first place.


Member
Joined: Sep 2010
Posts: 4
Likes: 0
From: Connersville, IN
Leaking at headliner on passenger side
During the last hard rain I noticed a steady drip from under the headliner. Would resealing the rear window solve this problem? The exterior stripping looks dry rotted from the sun.
Member
Joined: Sep 2008
Posts: 834
Likes: 0
From: Greenville south carolina
Now when you bolt the bolts, back in place, did you bolt the top middle ones in first? Or did you start from the middle? Cause when I did mine, I started in the middle and it bowed in at the top. And I had to redo it.
If so, I'd check into re-sealing your third brake light first.
I usually did the top first.
Member
Joined: Sep 2010
Posts: 4
Likes: 0
From: Connersville, IN
[QUOTE=StxDangerRanger;2031968]Where was the drip at? in the middle?
If so, I'd check into re-sealing your third brake light first.
------------
The water is coming in at the headline over the passenger side right rear section of window, I figure it is running to that side. A friend mentioned 'just silicone it'. I was curious exactly where do I need to apply it to get a good seal?
[quote=Jacobt1978;2031994]
What year ranger? and Reg cab or extended
Where was the drip at? in the middle?
If so, I'd check into re-sealing your third brake light first.
------------
The water is coming in at the headline over the passenger side right rear section of window, I figure it is running to that side. A friend mentioned 'just silicone it'. I was curious exactly where do I need to apply it to get a good seal?
Member
Joined: Jun 2006
Posts: 384
Likes: 0
From: Hibbing MN
Sounds like a common issue. Just discovered my ranger interior is now soaked. We got some really hard rain today and I was cleaning my interior when I noticed the rear speaker grills and my tool box I have in rhe back with water in it... ugh!

Member
Joined: Feb 2013
Posts: 7
Likes: 1
From: the dalles, or
Thanks for the how-to -- much appreciated!
I just did this to my 1994, and posted pictures/etc here:
Ford Ranger - Useful-Info
I included pictures of the water stain i was seeing as well as where all of the push-pops were that I had to remove to do the work.
take care
I just did this to my 1994, and posted pictures/etc here:
Ford Ranger - Useful-Info
I included pictures of the water stain i was seeing as well as where all of the push-pops were that I had to remove to do the work.
take care


Member
Joined: Feb 2015
Posts: 4
Likes: 0
From: Keizer, OR
I did this over the weekend. I used 1/4" 3M Window Weld. The first time I tightened everything up, it leaked like a sieve. I pulled it partially off and it looked like it was just gaps in the top, so I built up the top with some more butyl tape and put it all back together. No leaks now. I would recommend using 5/16" or 3/8". You could probably go as big as 5/8" because you can push hard on the window and squish the seal down, there is plenty of room for it to move.

Member
Joined: Oct 2014
Posts: 2
Likes: 0
From: Lynnwood, WA
my project went well. quite a contortion to get to the nuts. Threw my back out which extended the project. My issue occurred when I was putting the dome light back in place. I was screwing in the three screws. The lights came on since the doors were open. Then, all of a sudden, the light went out. I can't figure out why. Does not seem that a fuse is blown. I'm going to put the screws in with out the light itself and test if there is current. Any ideas what could have happened? Thanks, Larry


