
How-To: Sub Enclosure Dimensions for Jump seat Cavity


Joined: Jun 2004
Posts: 24,936
Likes: 11
From: usa
How-To: Sub Enclosure Dimensions for Jump seat Cavity
***Disclaimer :
Neither we nor Ranger-Forums.com accept any responsibility for actions taken during or resulting from attempting this modification. Bear in mind that you perform this modification solely at your own risk. ***
Modification: Sub Enclosure Dimensions for Jump seat Cavity
How-To author: RentonRanger
Original thread: https://www.ranger-forums.com/f59/ho...-cavity-53366/
Let the modding Begin!!
_________________________
I've had several inquiries about how I built my sub box so that it would fit into the jumpseat location.
First off, let me give credit where credit is due. Special thanks to Maurice (lifted97ranger) and Logan (My91Ranger). Both of these guys had already built similar boxes and posted pics, I just asked them a few questions and went from there.
Tools needed are just basic shop tools such as:
Circular saw
Screw gun
Brad nailer (if you have one, not absolutely necessary)
Liquid Nail
Ratchet set
3/4" MDF
Assembly of the box is pretty straightforward. Just make sure your cuts are true and that you use a good, long bead of liquid nail in all the joints. This will ensure you have a nice, tight seal all the way around.
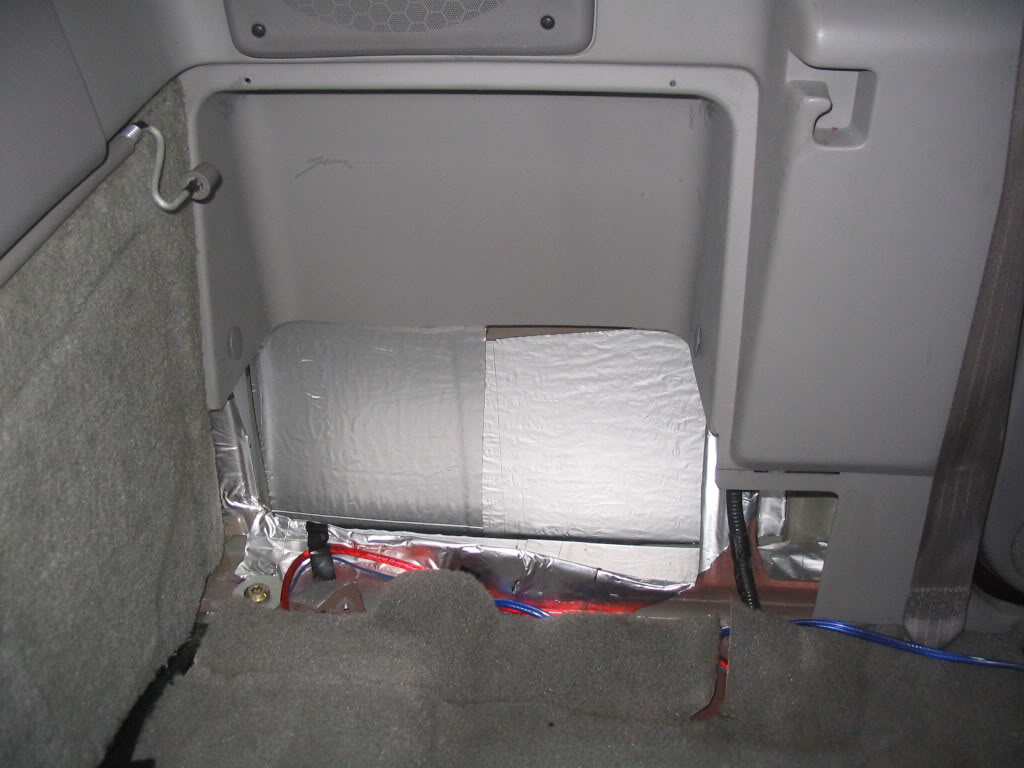
Remove the jumpseat. This just takes the removal of a few bolts and it's out.
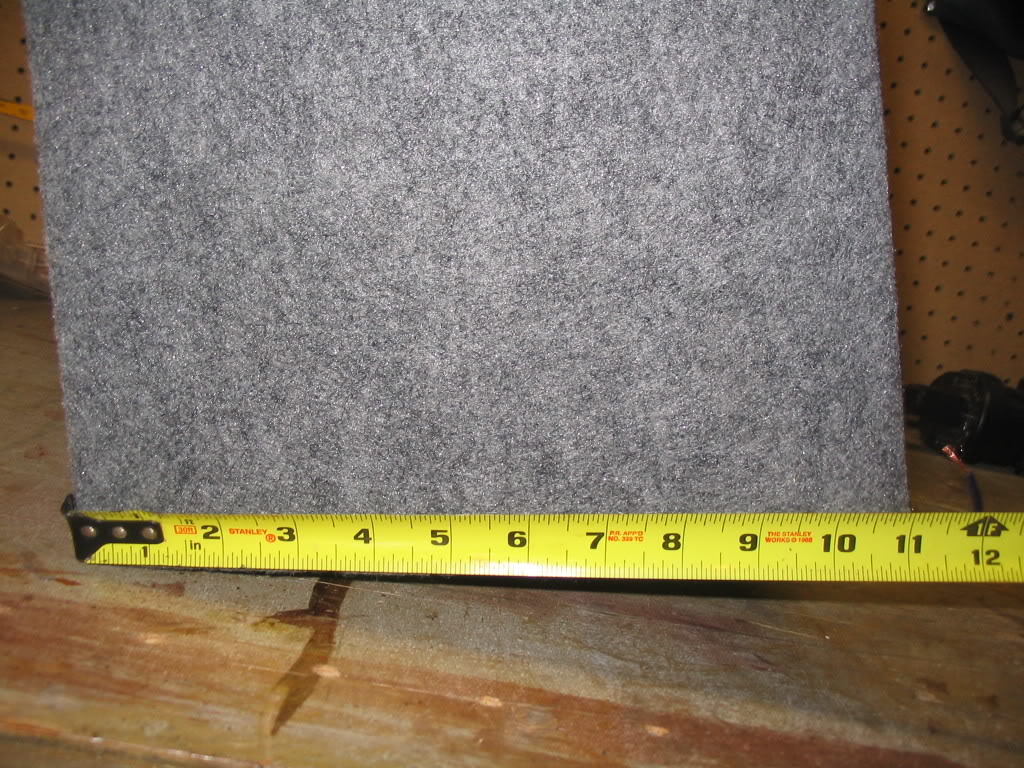
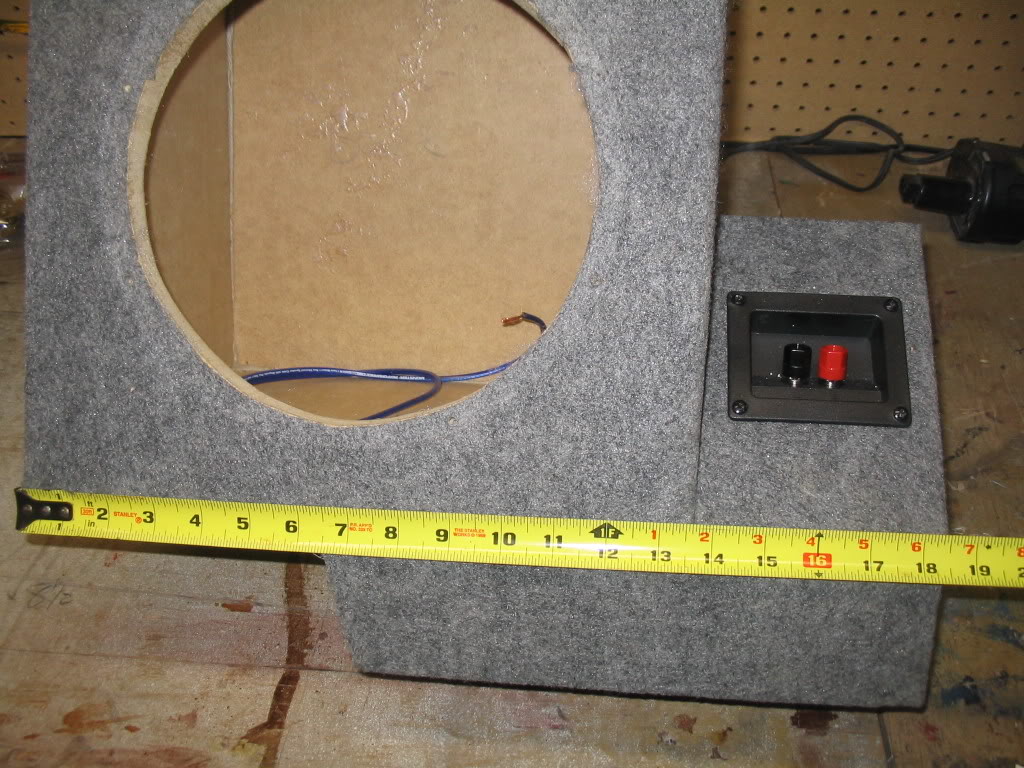
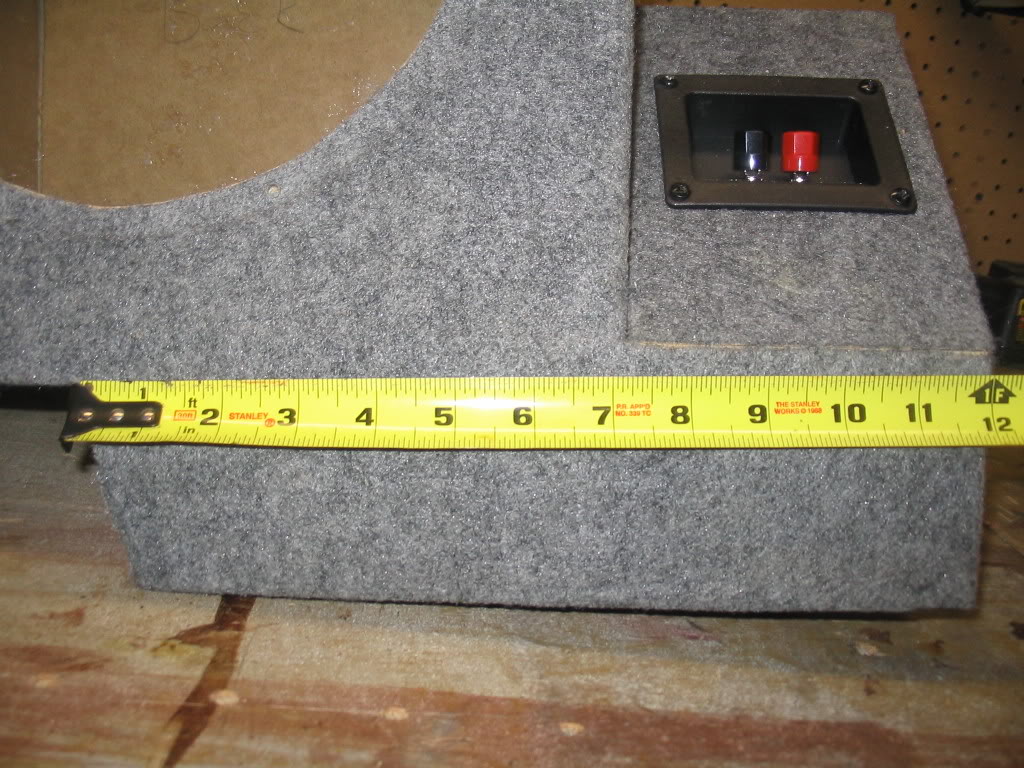
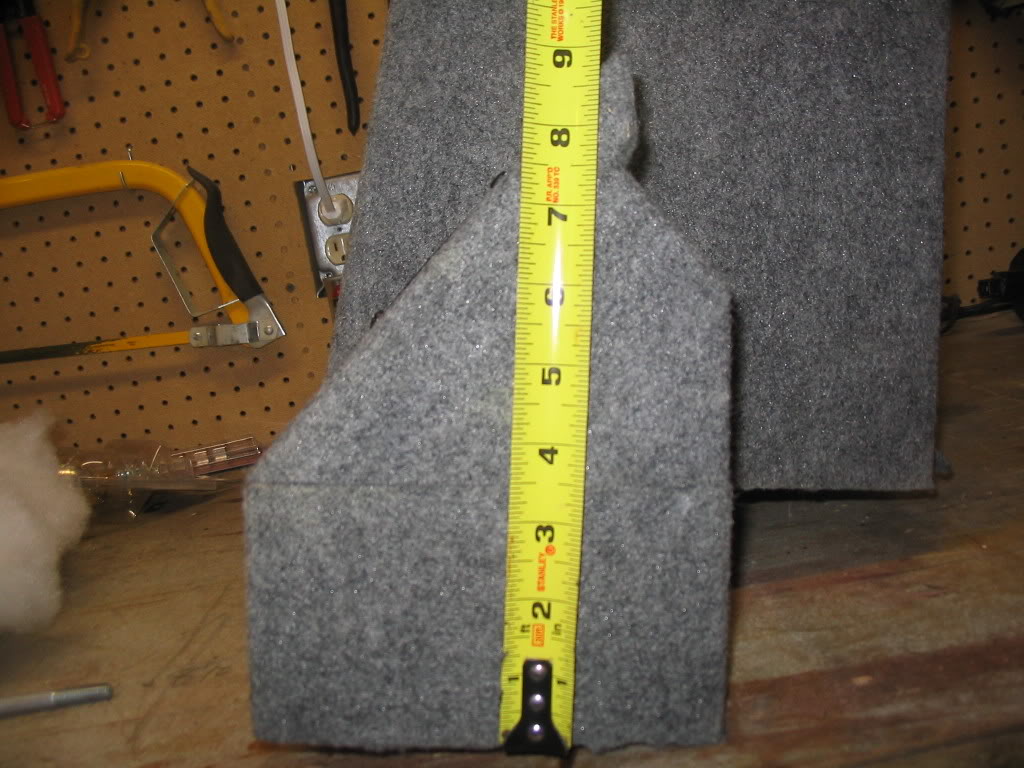
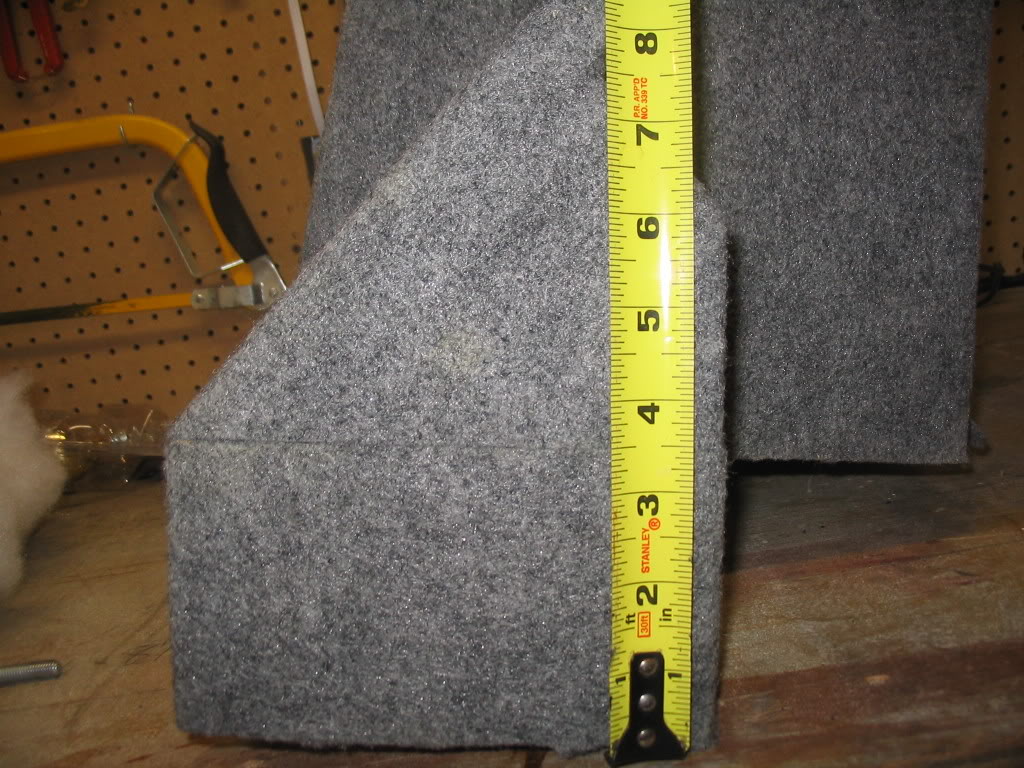
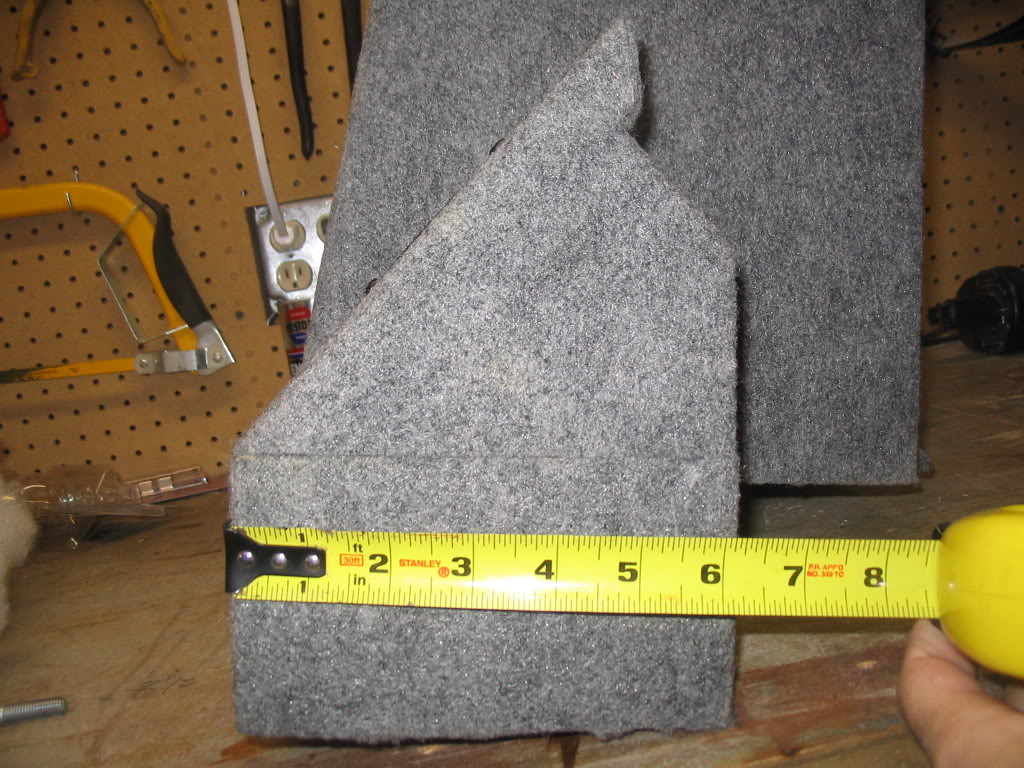
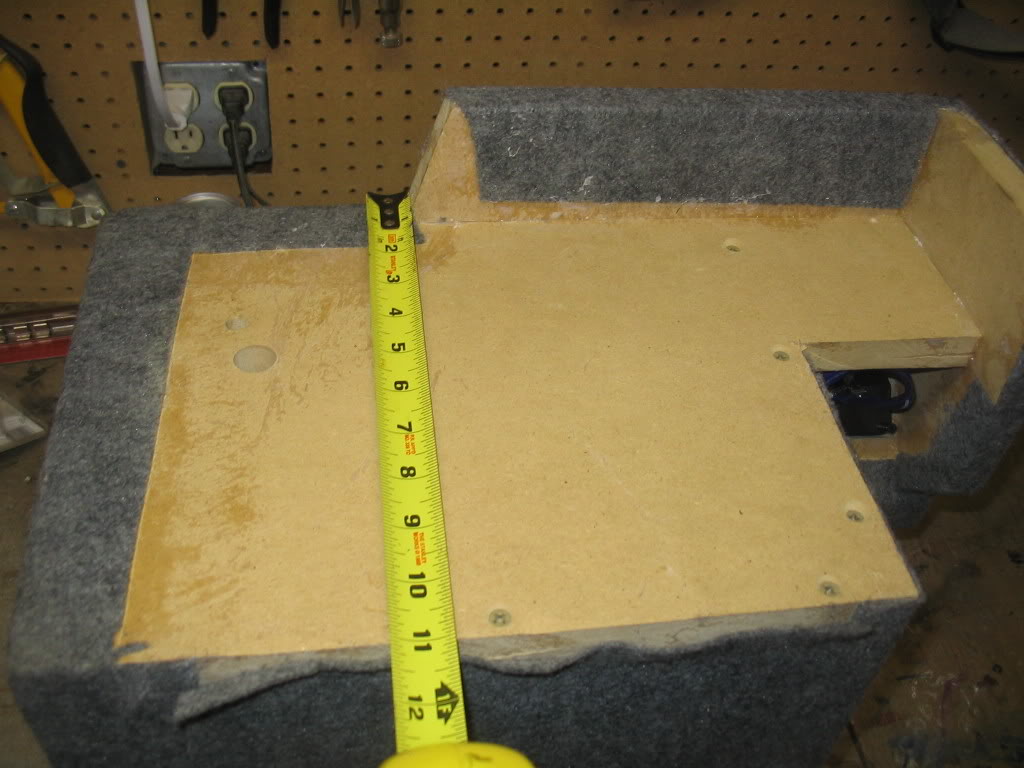
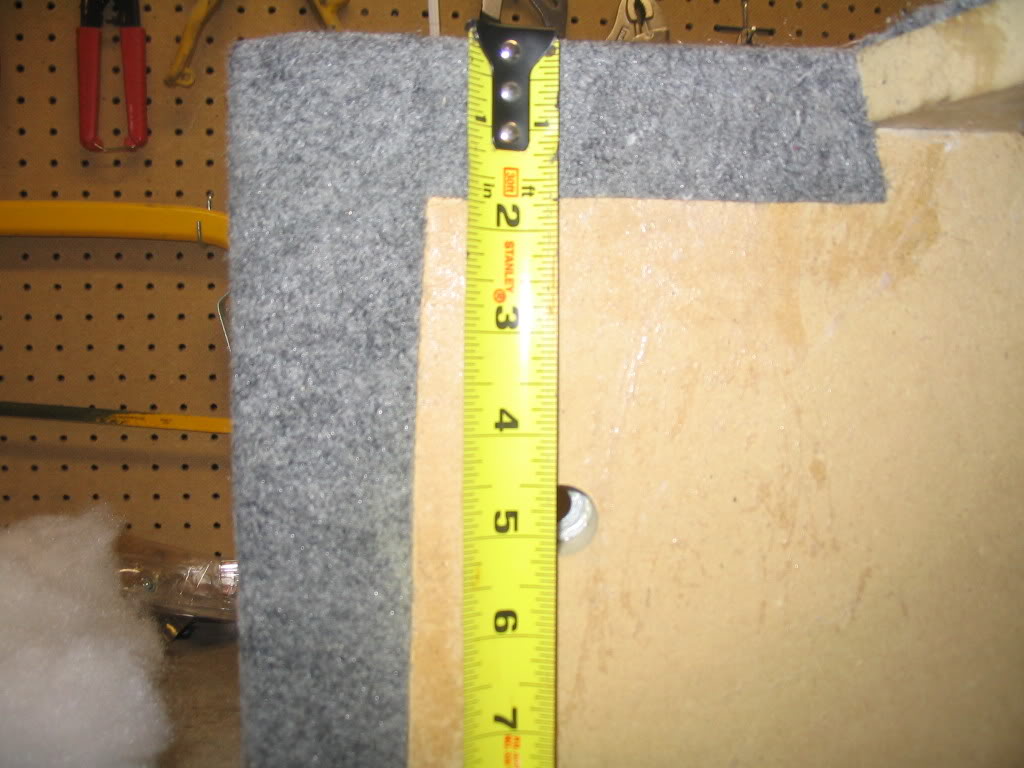
The following pics are of the finished box after final assembly. I didn't think to take pics as I was building it, so I removed it and took several shots and included a tape measure so you can get a better idea of the dimensions.
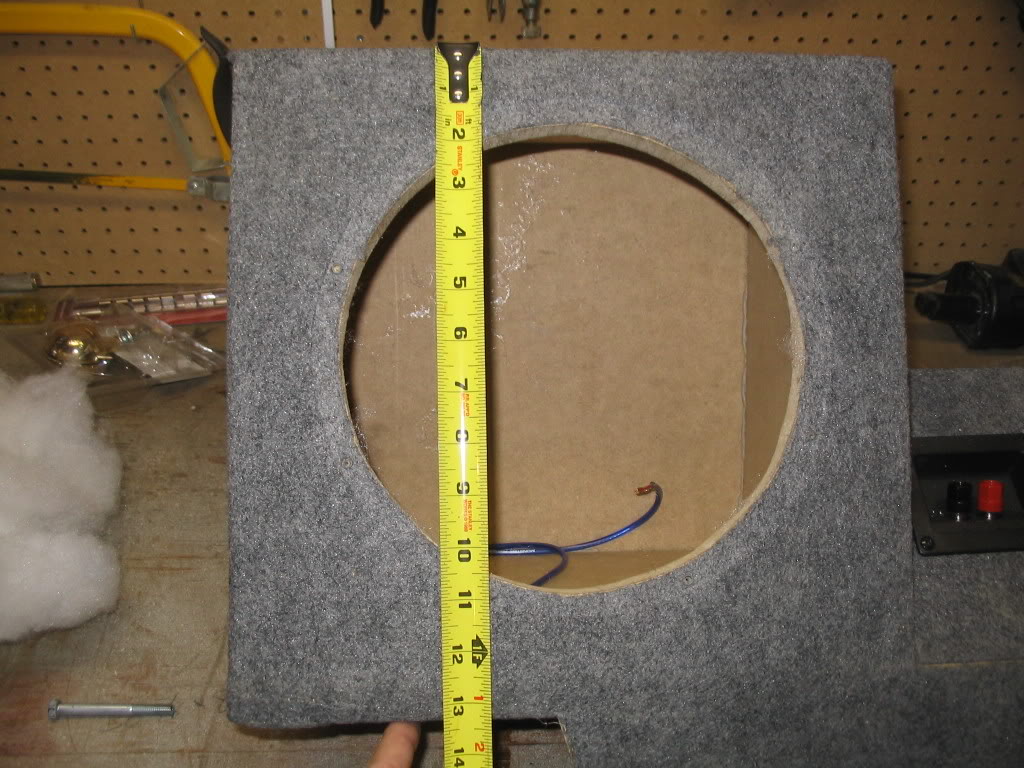
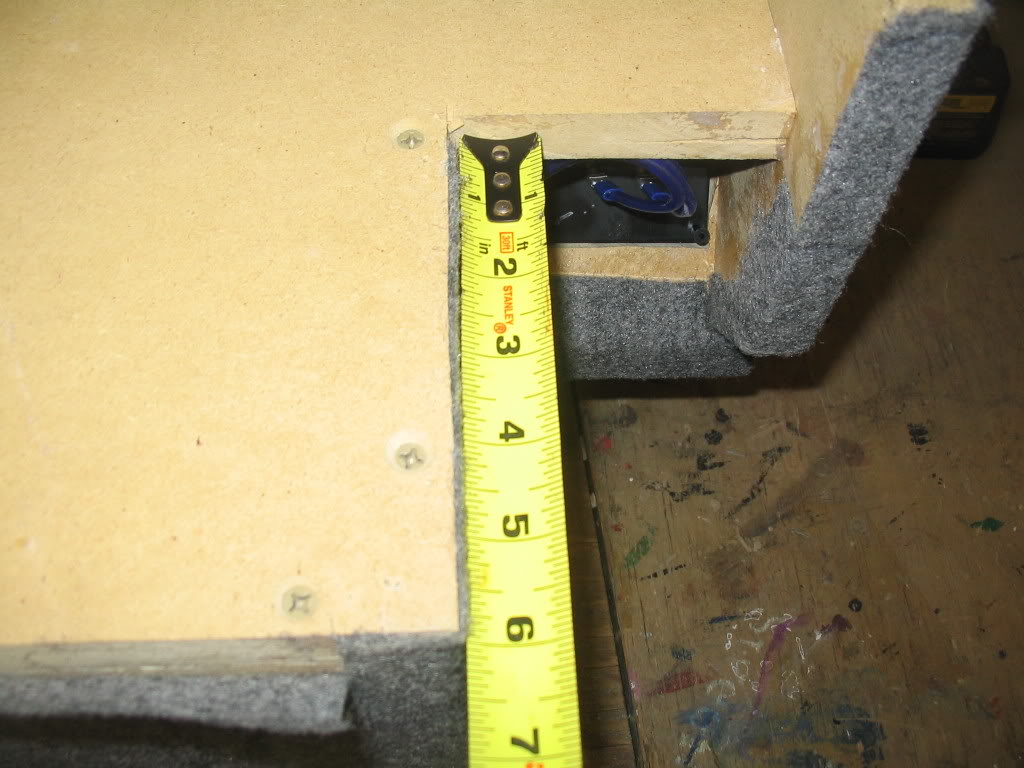
TOP DEPTH

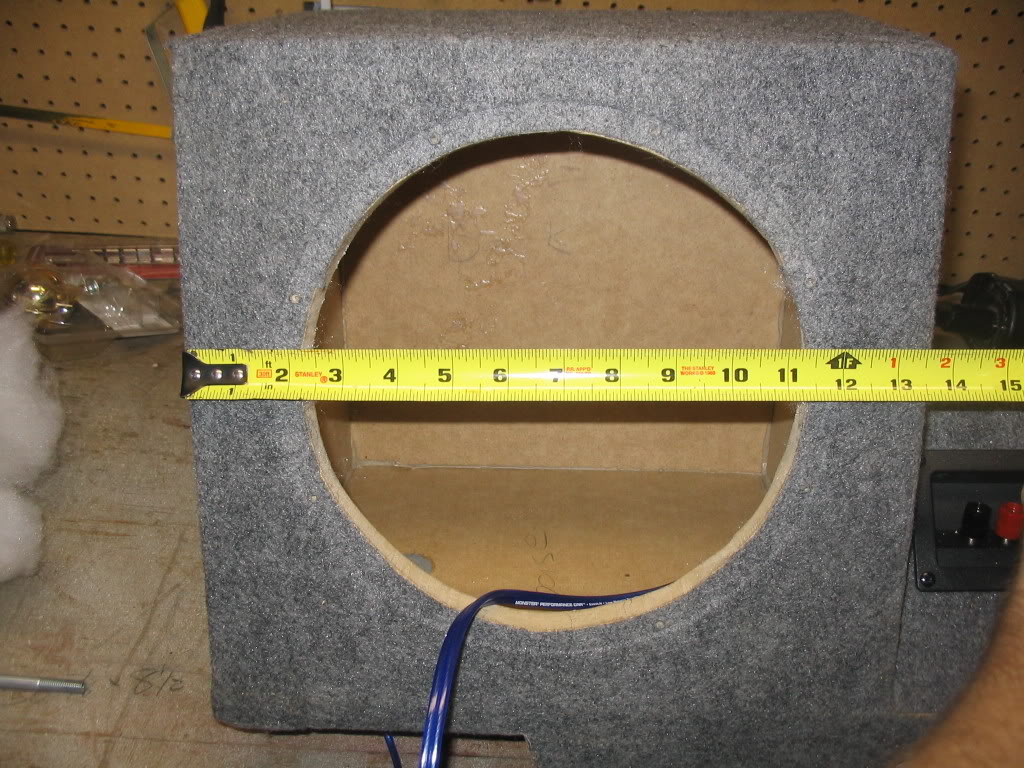
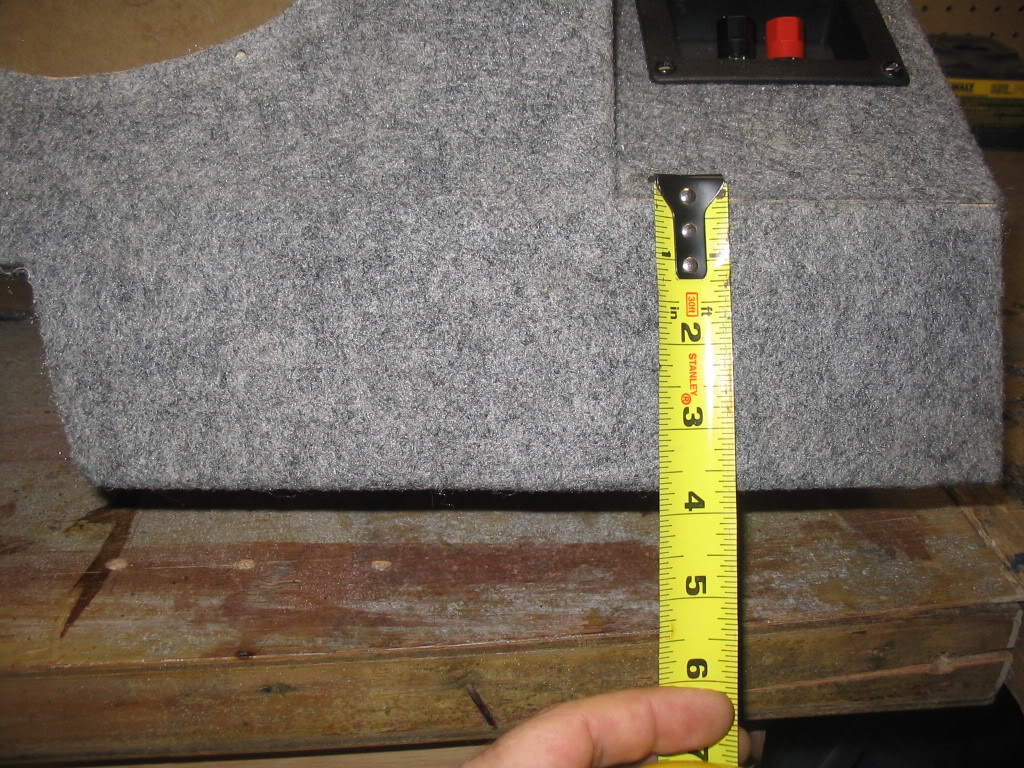
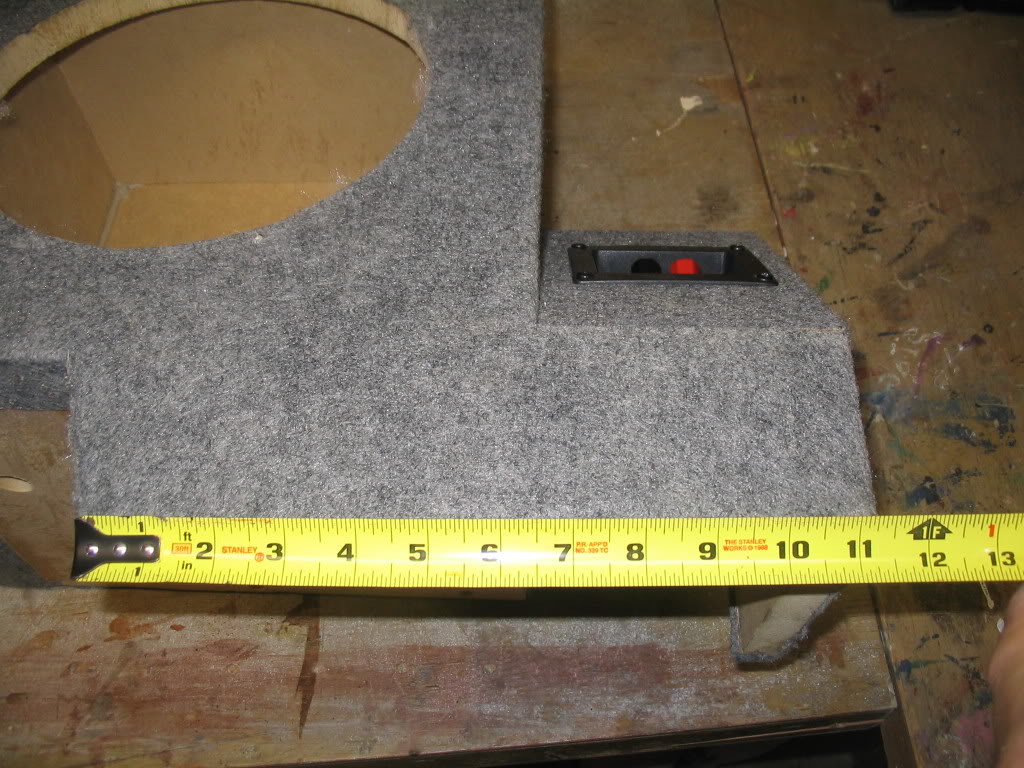
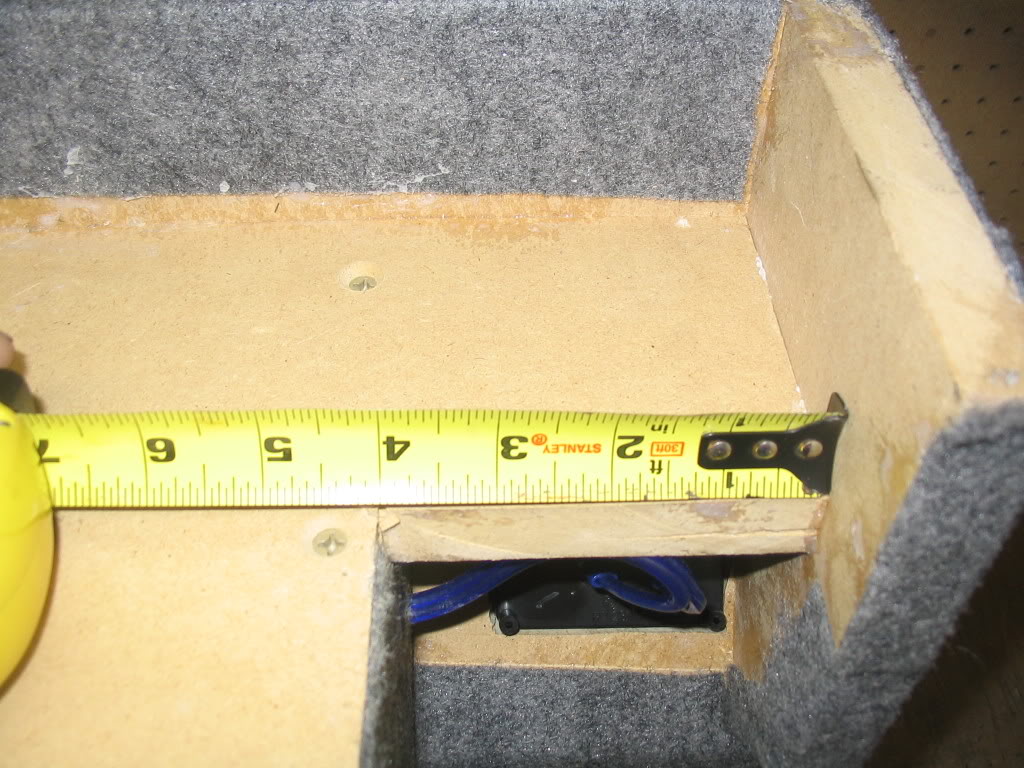
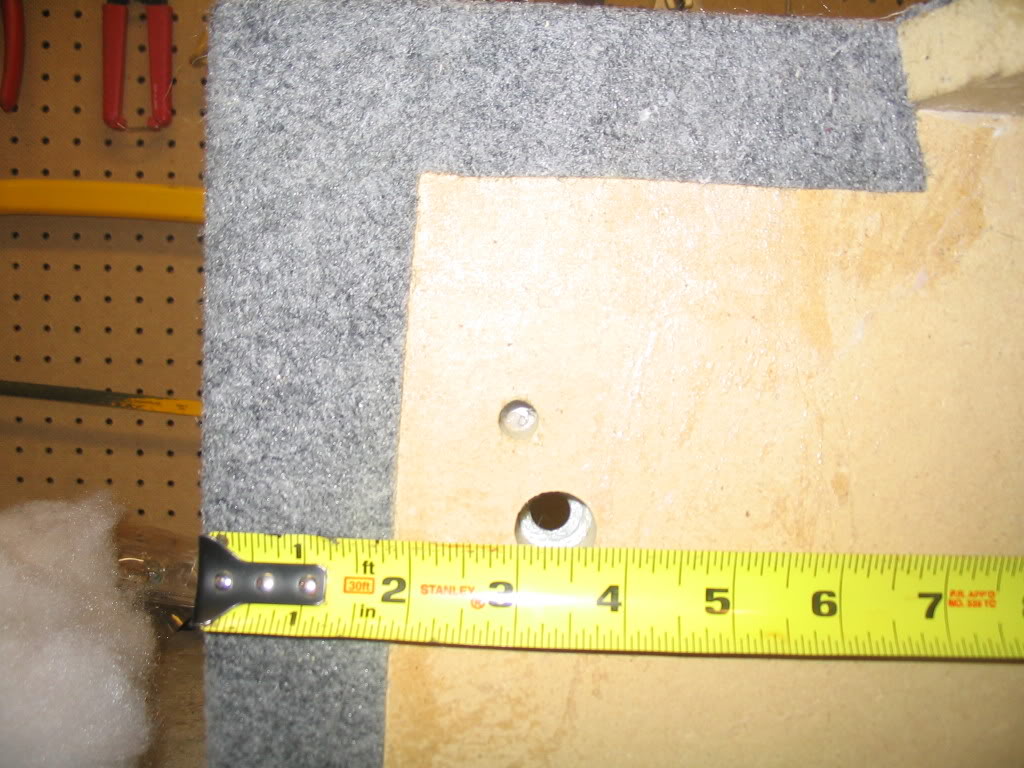
BOTTOM DEPTH
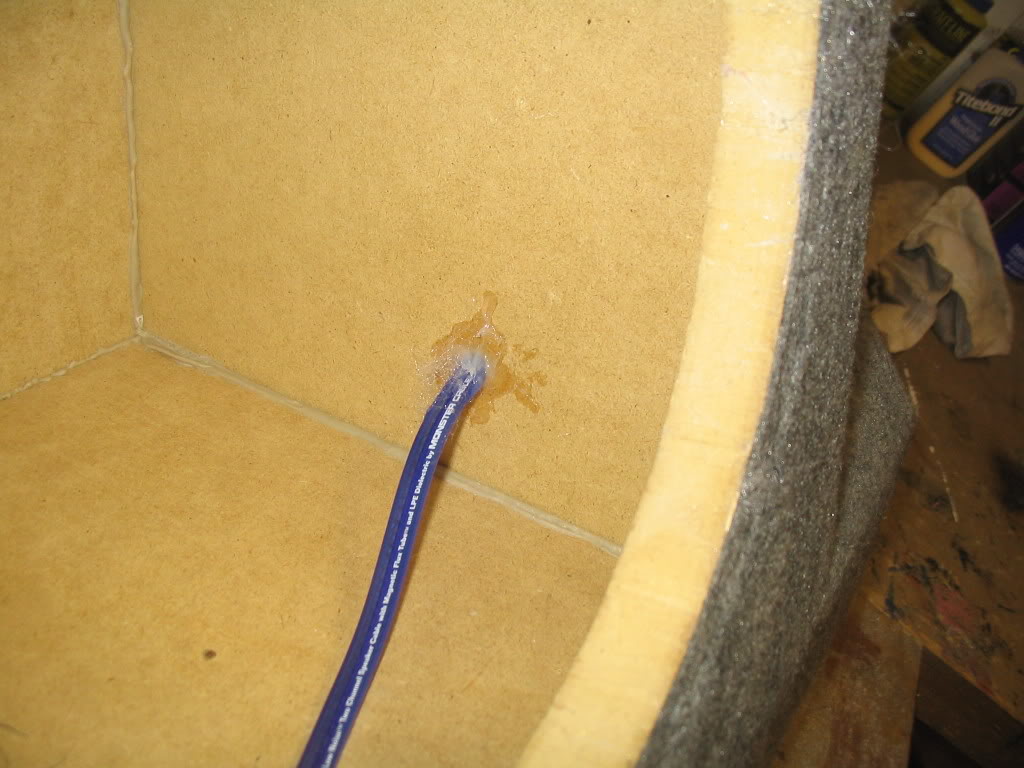
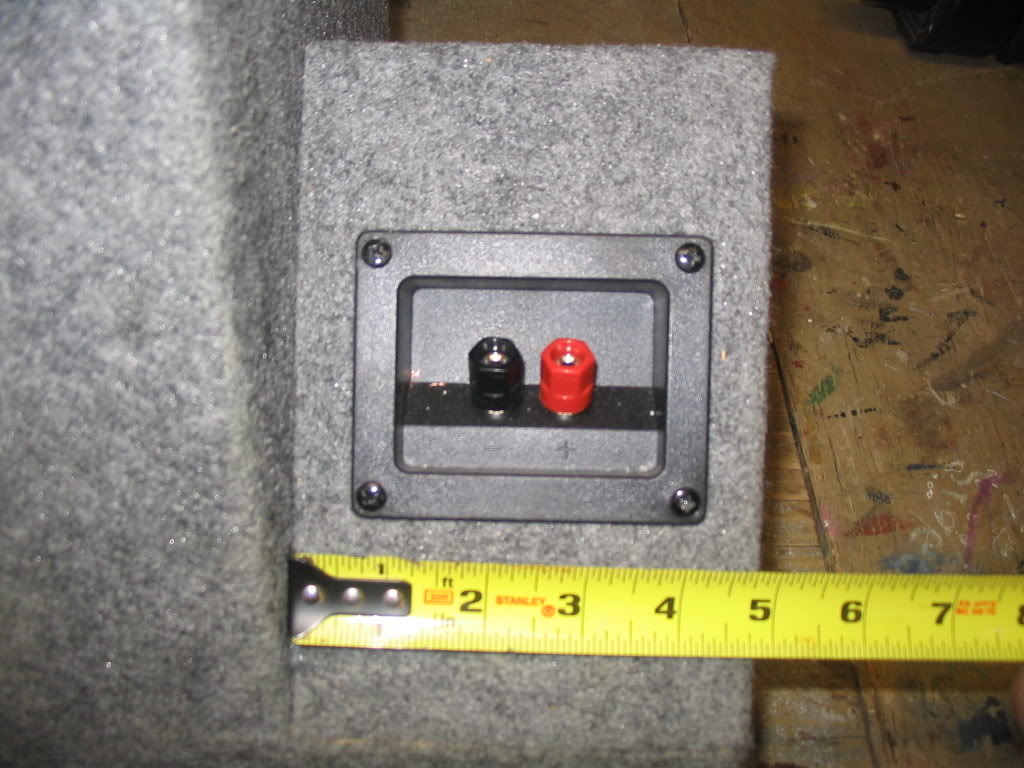
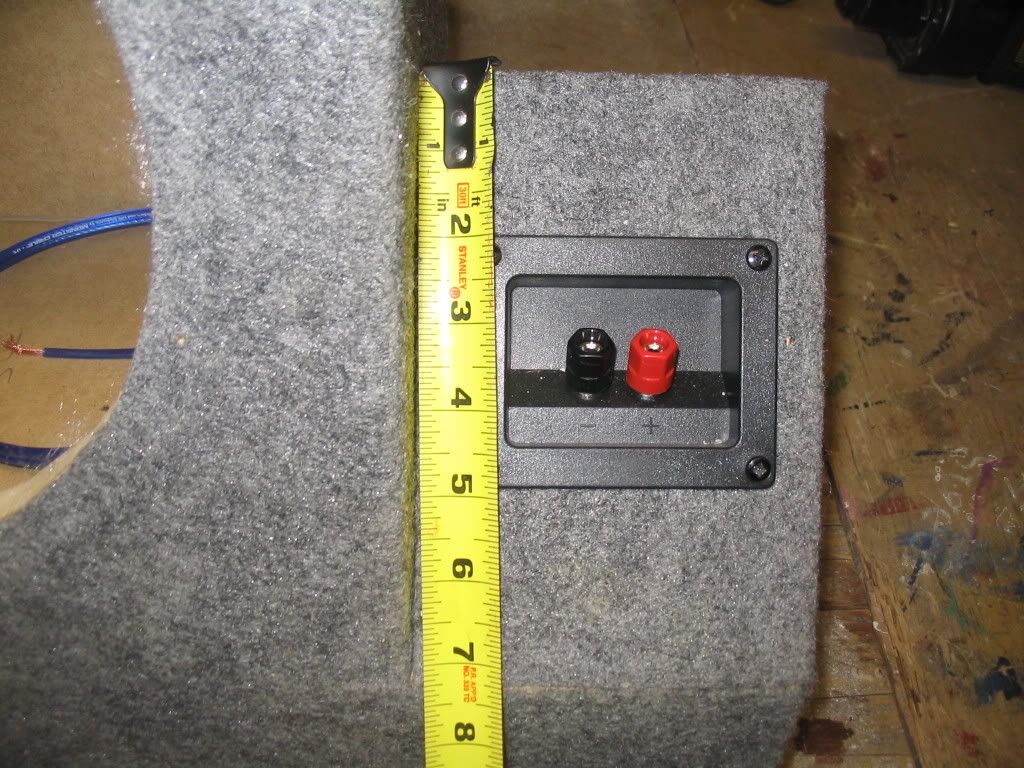
Be sure to use some silicone to seal the hole where you run your speaker wire so the seal of the box isn't compromised.
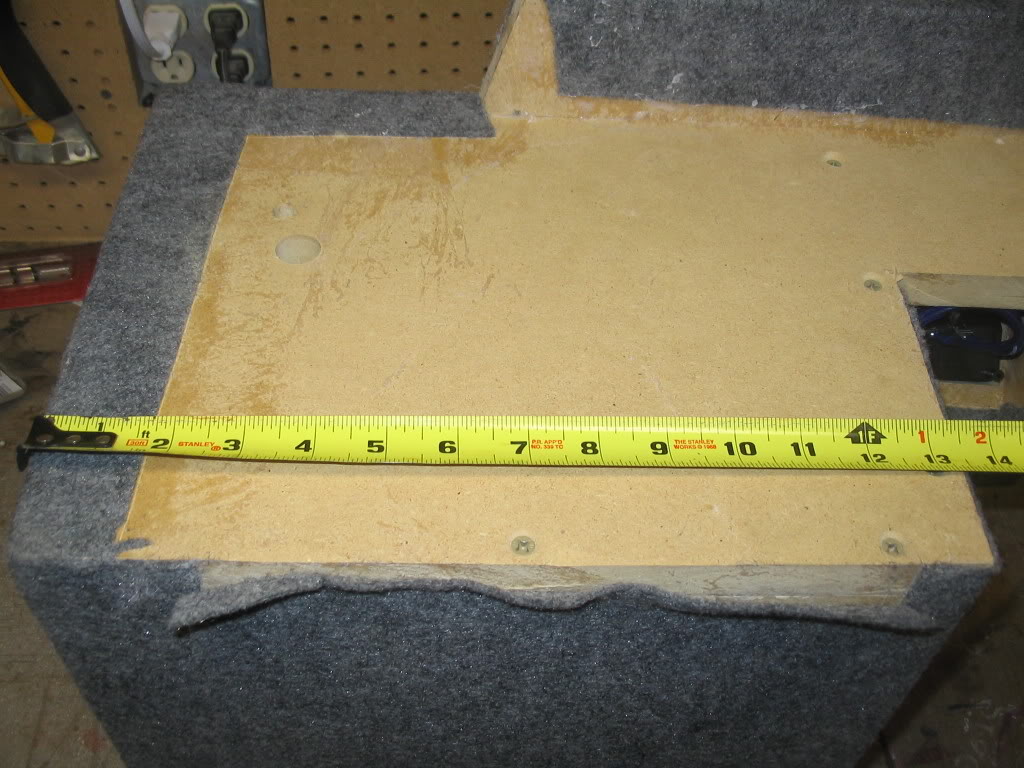

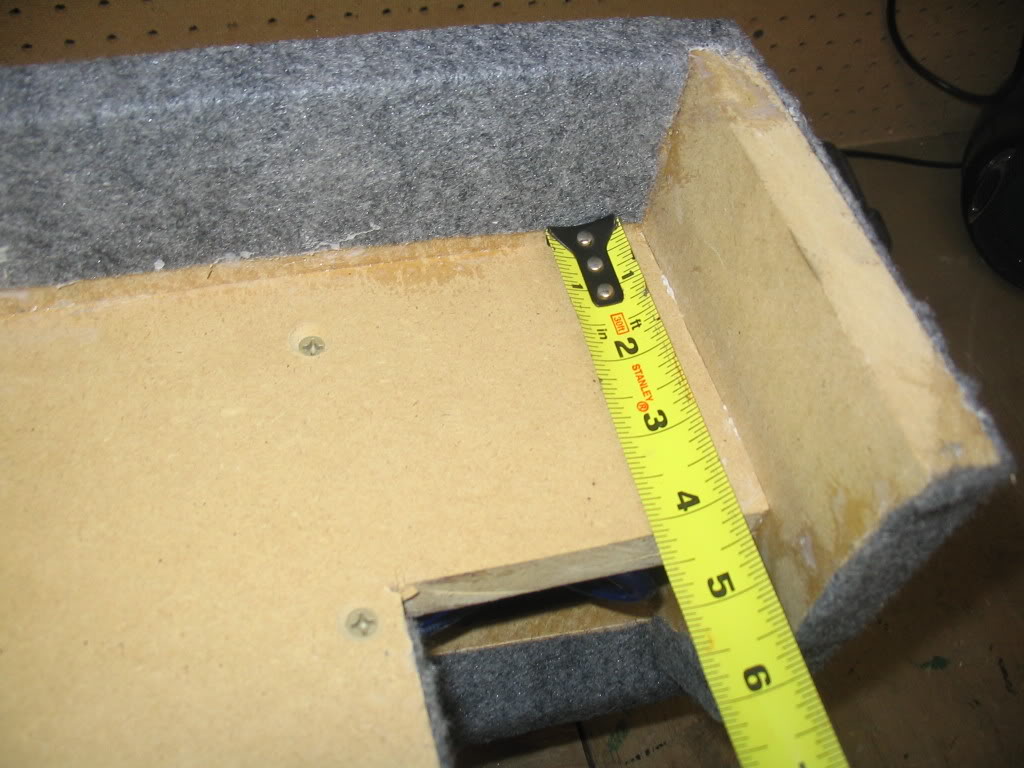
The following are shots of the hole that I drilled in the bottom of the box so that it could be bolted to the floor of the cab. Dont mind the small hole and the poker chip covering it, that was my first (missed) attempt. Measurements are taken from the front, left corner of the box.

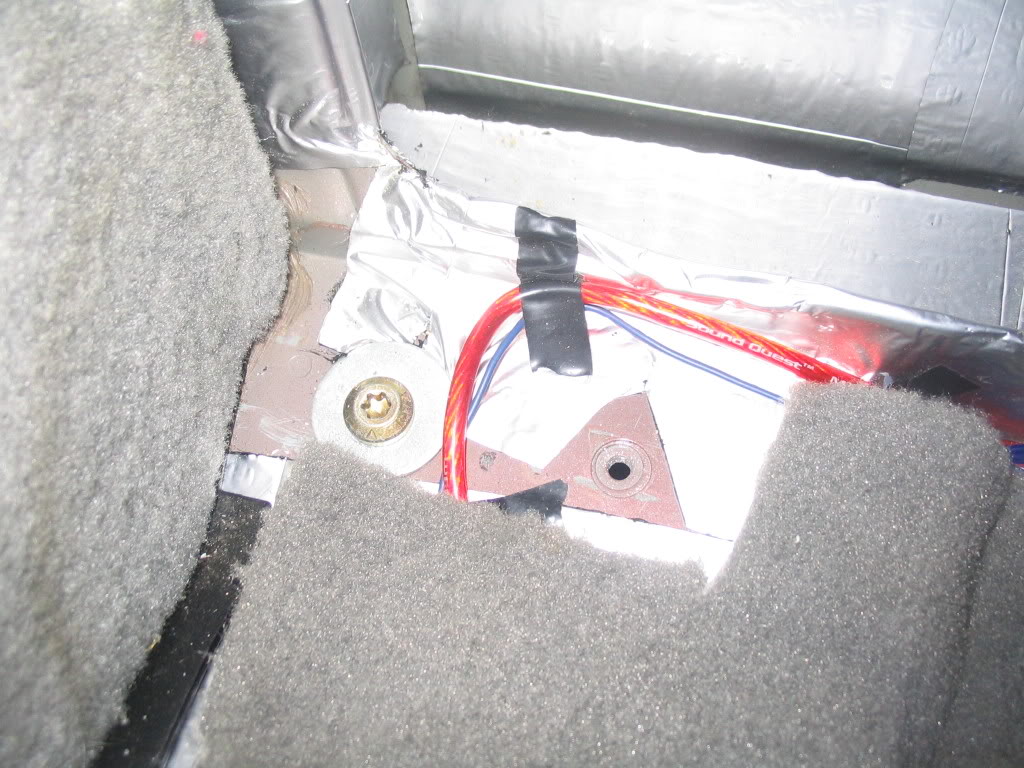
This is the bolt hole you will use to secure the box to the cab floor (The one with the red triangle around it).
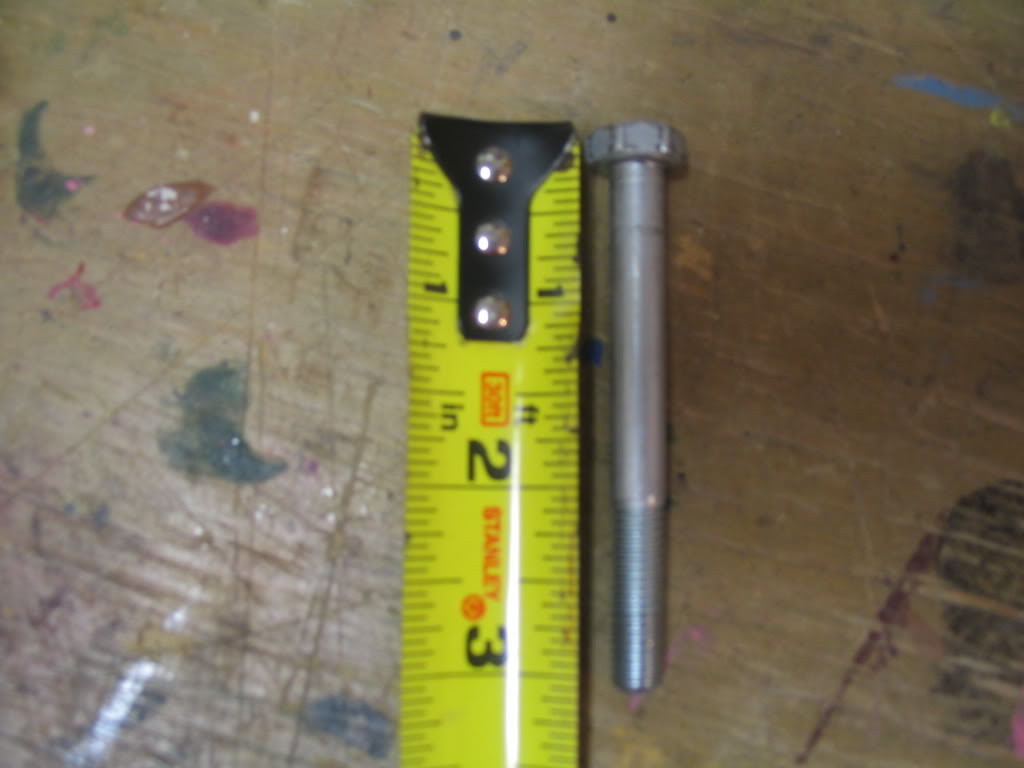
You will need to get a longer bolt in order to make up for the additional space between the bottom of the box and the bolt hole. I just took the original jumpseat bolt to the local hardware store and matched up the threads.
Here is the finished box before installing. I put some polyfill in it to help out with the sound. There will be plenty of room to get a ratchet in the speaker hole in order to bolt the box in.
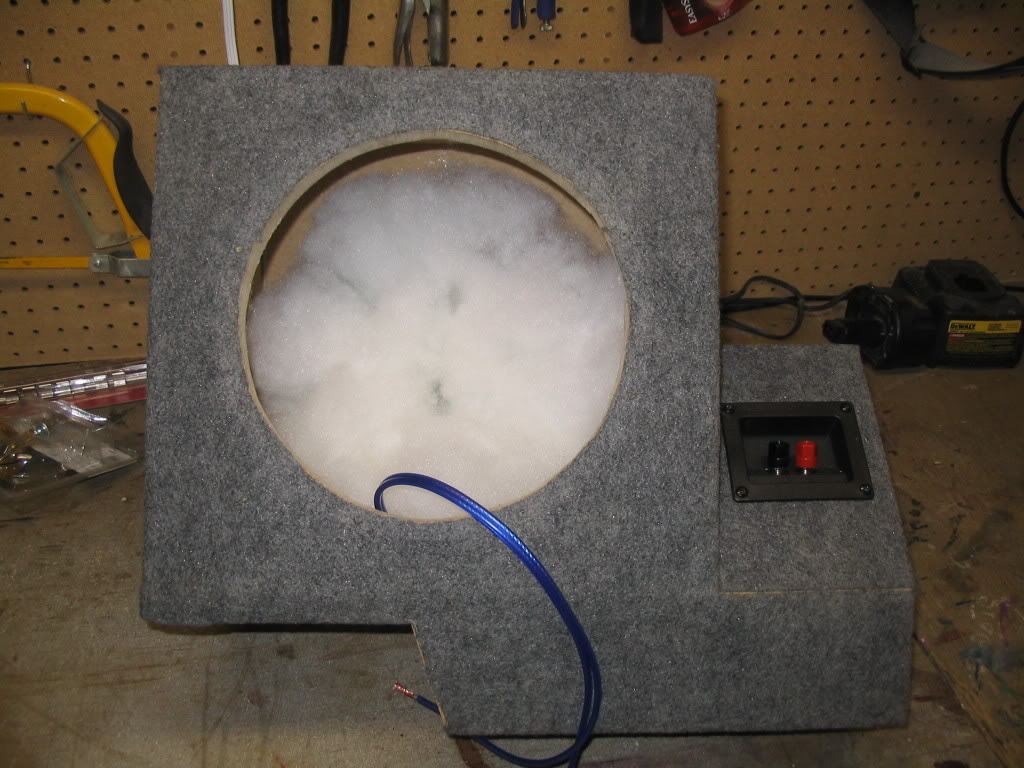
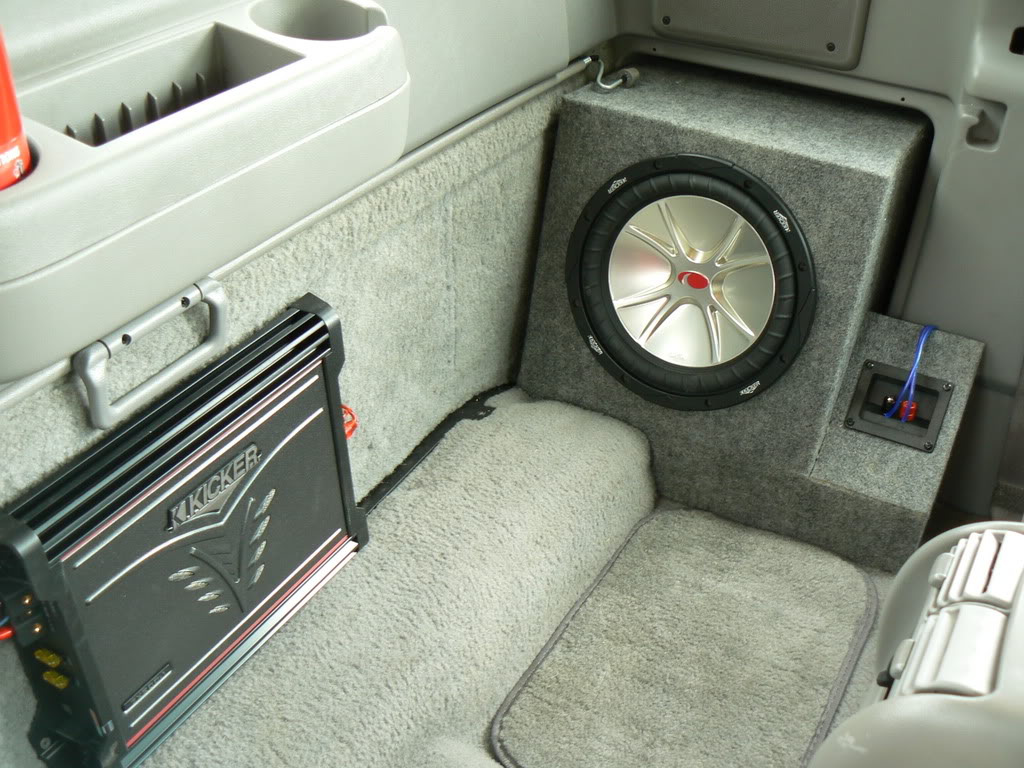
After you've installed the box and bolted it to the floor, just screw in your sub of choice (mine is a 10" Kicker), wire it up and you're done!

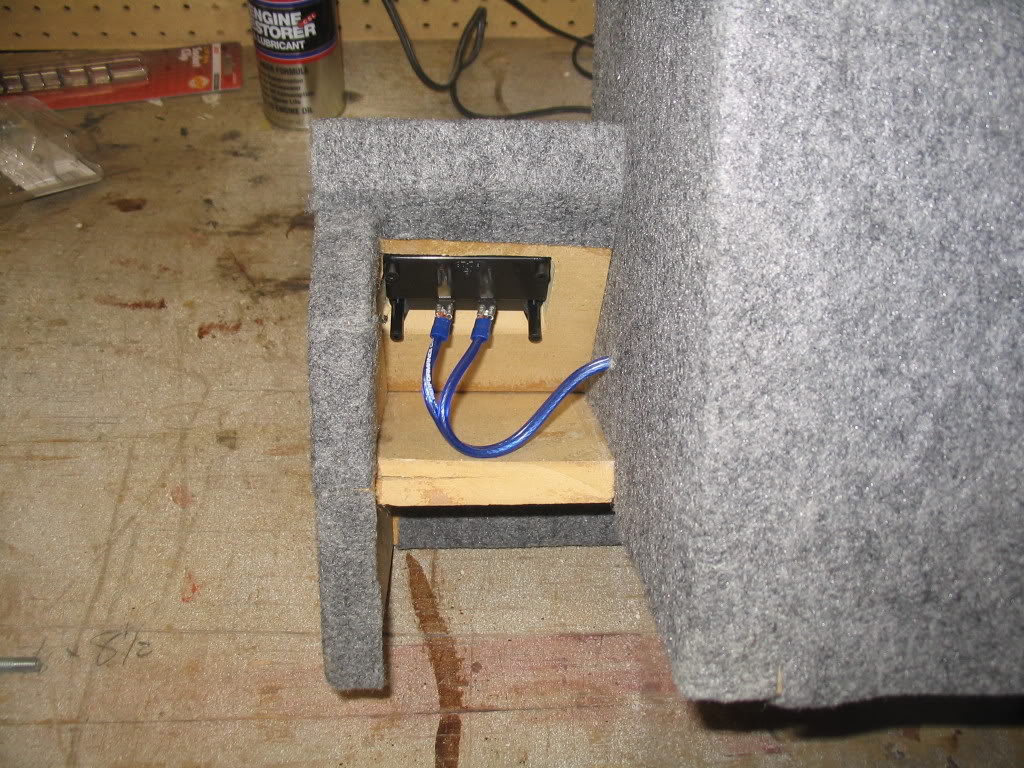
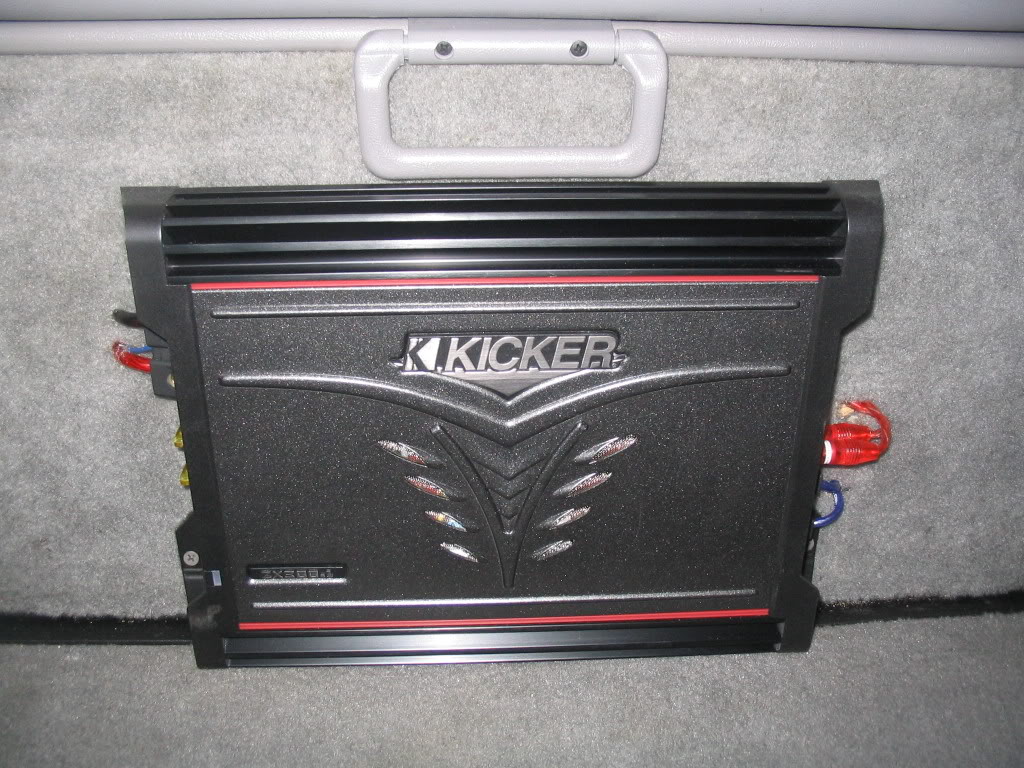
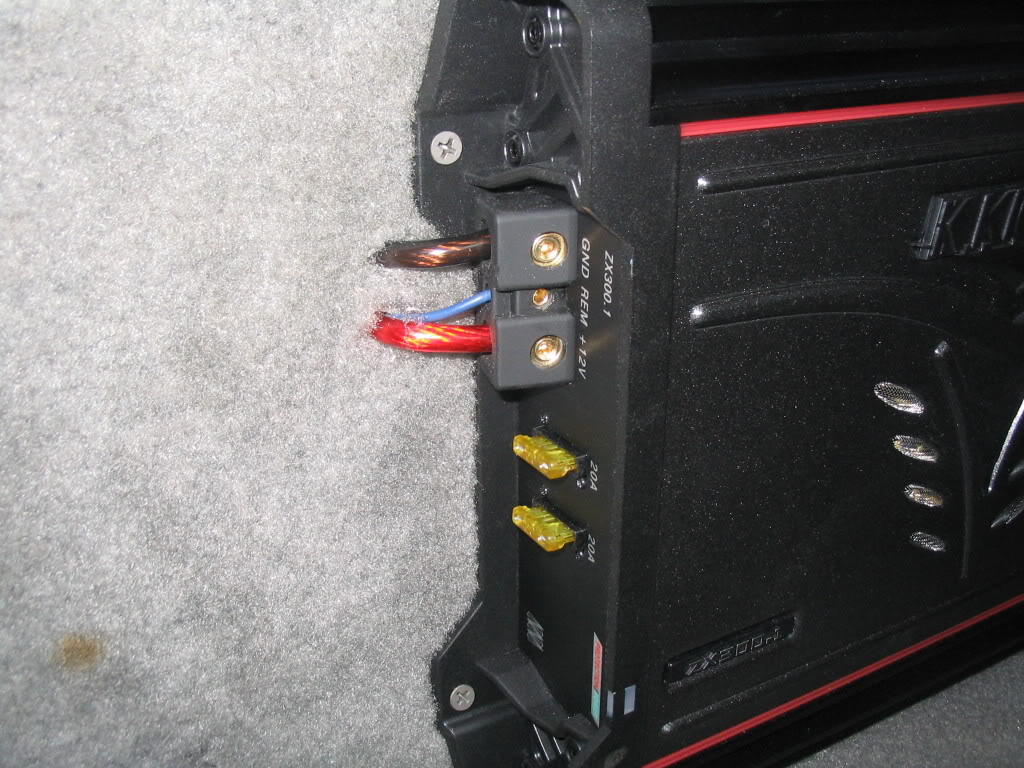
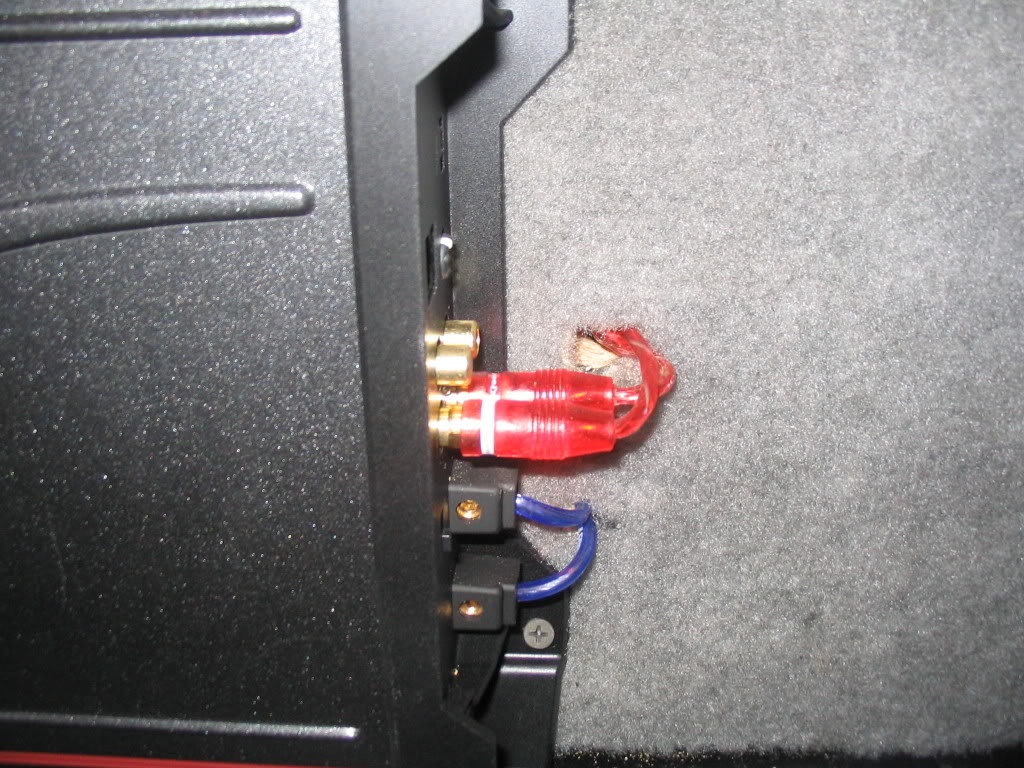
For a little added bonus, I also took some shots of where I mounted my amp. All I did was pull the rear panel and cut out some of the foam padding. I then took a piece of 3/4" plywood and screwed that in place of the padding I just removed. Screw the amp into the panel and plywood, drill a few holes to run your wiring and re-install the panel.
Hope this helps everyone out. Any questions, please just ask!
Happy building!
John
Neither we nor Ranger-Forums.com accept any responsibility for actions taken during or resulting from attempting this modification. Bear in mind that you perform this modification solely at your own risk. ***
Modification: Sub Enclosure Dimensions for Jump seat Cavity
How-To author: RentonRanger
Original thread: https://www.ranger-forums.com/f59/ho...-cavity-53366/
Let the modding Begin!!
_________________________
I've had several inquiries about how I built my sub box so that it would fit into the jumpseat location.
First off, let me give credit where credit is due. Special thanks to Maurice (lifted97ranger) and Logan (My91Ranger). Both of these guys had already built similar boxes and posted pics, I just asked them a few questions and went from there.
Tools needed are just basic shop tools such as:
Circular saw
Screw gun
Brad nailer (if you have one, not absolutely necessary)
Liquid Nail
Ratchet set
3/4" MDF
Assembly of the box is pretty straightforward. Just make sure your cuts are true and that you use a good, long bead of liquid nail in all the joints. This will ensure you have a nice, tight seal all the way around.
Remove the jumpseat. This just takes the removal of a few bolts and it's out.
The following pics are of the finished box after final assembly. I didn't think to take pics as I was building it, so I removed it and took several shots and included a tape measure so you can get a better idea of the dimensions.
TOP DEPTH
BOTTOM DEPTH
Be sure to use some silicone to seal the hole where you run your speaker wire so the seal of the box isn't compromised.
The following are shots of the hole that I drilled in the bottom of the box so that it could be bolted to the floor of the cab. Dont mind the small hole and the poker chip covering it, that was my first (missed) attempt. Measurements are taken from the front, left corner of the box.
This is the bolt hole you will use to secure the box to the cab floor (The one with the red triangle around it).
You will need to get a longer bolt in order to make up for the additional space between the bottom of the box and the bolt hole. I just took the original jumpseat bolt to the local hardware store and matched up the threads.
Here is the finished box before installing. I put some polyfill in it to help out with the sound. There will be plenty of room to get a ratchet in the speaker hole in order to bolt the box in.
After you've installed the box and bolted it to the floor, just screw in your sub of choice (mine is a 10" Kicker), wire it up and you're done!
For a little added bonus, I also took some shots of where I mounted my amp. All I did was pull the rear panel and cut out some of the foam padding. I then took a piece of 3/4" plywood and screwed that in place of the padding I just removed. Screw the amp into the panel and plywood, drill a few holes to run your wiring and re-install the panel.
Hope this helps everyone out. Any questions, please just ask!
Happy building!
John
Member

Joined: Apr 2013
Posts: 44
Likes: 0
From: north carolina
this is exactly what im looking to do but would there be a way for my 06 where the seat fold into the door flush (i dont know if thats how your truck is) to have the speaker set flush with the door like the seat did.
i like speakers but i want them to look clean and professionally done and this job looks great
i like speakers but i want them to look clean and professionally done and this job looks great


Member
Joined: May 2014
Posts: 19
Likes: 0
From: Ladoga, Indiana
This is excellent. I've had this Idea with mine since I got it. I bet if you used a shallow mount sub and edited the dimensions you could get a flush to close to flush fit. This looks and probably sounds amazing.

Thread
Thread Starter
Forum
Replies
Last Post
2004xlmiller
Interior Semi-Tech
10
Dec 14, 2011 05:43 PM


