
How To: Install an electric rear view mirror


Joined: Sep 2009
Posts: 3,139
Likes: 1
From: Calgary AB, Canada
How To: Install an electric rear view mirror
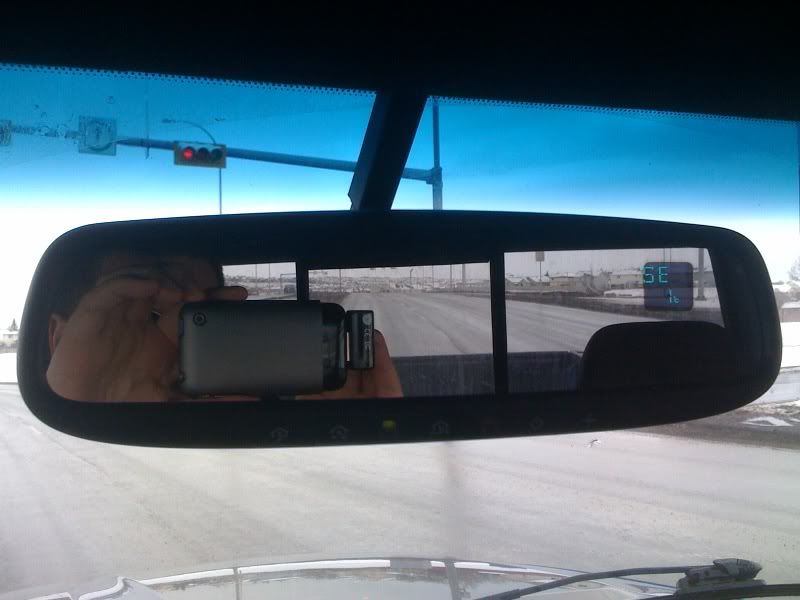
so i installed my Gentex GENK51A auto dimming mirror with temp, compass, and garage door opener, figured i would toss up a quick how to,

it was really simple, first thing i did was remove my old mirror, this was not as easy as i first thought, but it wasn't too bad... take a small screwdriver, and pry towards you, then pull up, it looks like the whole thing is going to break off, but it doesn't... anyways...
i then started pulling down the headliner, just one side... i first removed the trim on the drivers a-pillar, there are 2 7/16th's bolts, one on each side of the oh-**** bar on the a-piller, you remove it then pull gently, it mostly comes out, towards the center console...
the next thing i did was remove the sun visor, there are 3 philips screws on the pivot side, and 1 on the clip side. behind the clip there is a plastic clip holding the headliner up, i didn't want to damage my headliner by pulling on it, and didn't have the proper tool to remove it, so i left this up...
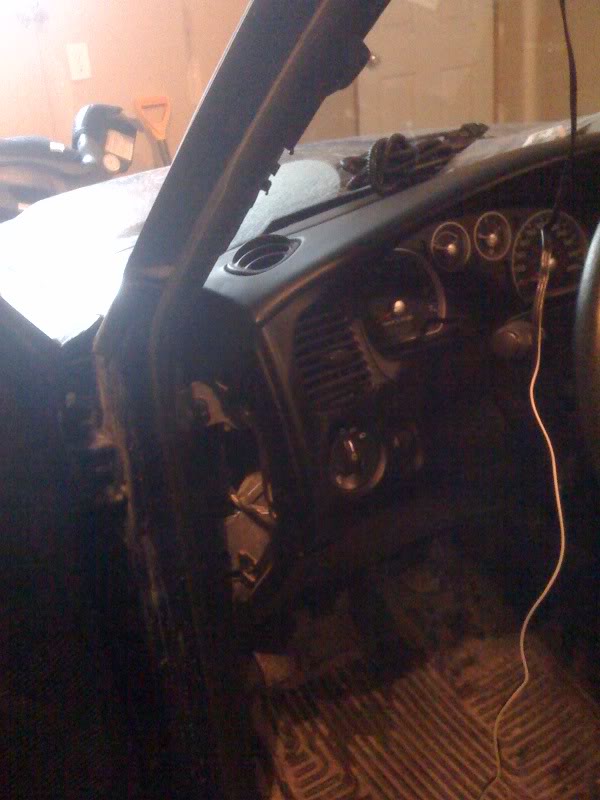
from here you can run your wires back, i ran them from the mirror, down the a-pillar through the access pannel on the left (on dash, against door) seen here
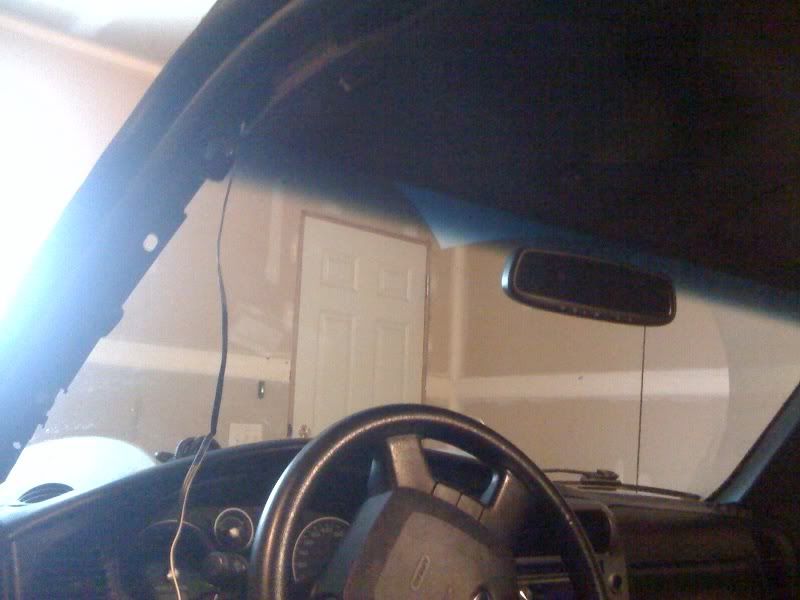
from there i ran them under the steering wheel, i removed the kick pannel, and the steel plate underneath it, the kick plate is held in by 4 torque bits, i used a t-15, however i think that was the wrong one, my t-20 was too big though. the steel kick plate is held in by 5 bolts, i don't remember the size though
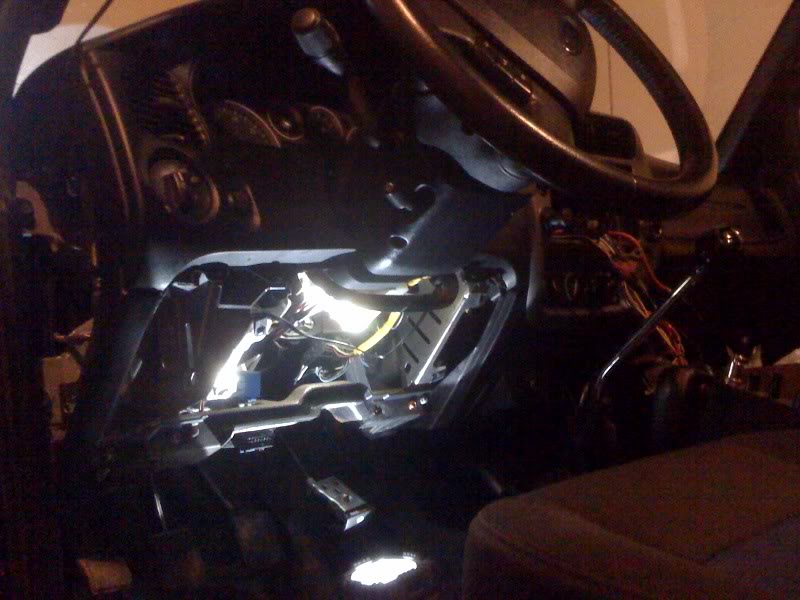
i ran the 3 wires for the actual mirror portion, there is a constant power, an ignition power and a ground, the ground i put to one of the bolts on the steel kick plate, it comes with a ring connector on it already, and the other 2 wires i hooked to my stereo HU, as all my wires in there are already labelled...
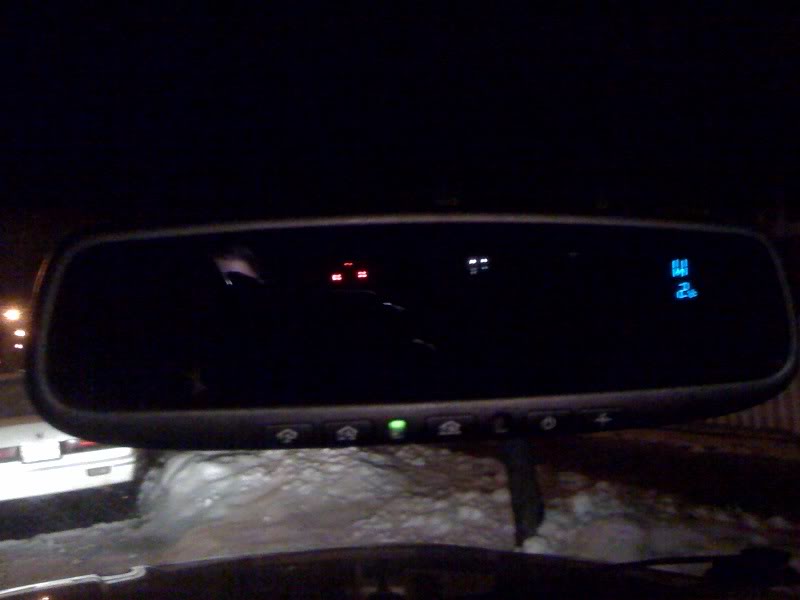
from there i ran the temp sensor, i started at the front and ran backwards, i hooked the sensor up directly to my bumper (comes with a clip on it) ran the wire back through the headlight area, behind my battery, under the brake booster, and through the rubber boot around the steering. this then ran back up the a-pillar and across the headliner. one thing i will suggest for all of the wires, is that you run the wires on the aft side of the swivel end of the sun visor, that way it pulls the wires away from the windsheild, that way they never pop out and become unsightly. here are a few pics of it installed

WARNING!
that kick area, i do not know if it will put you at risk for airbag deployment, remove all parts mentioned above at your own risk, i take no responsibility for any such events, nor do i have any knowledge AT ALL! about airbags or airbag safety
i really mean that, i don't know **** about them!
it was really simple, first thing i did was remove my old mirror, this was not as easy as i first thought, but it wasn't too bad... take a small screwdriver, and pry towards you, then pull up, it looks like the whole thing is going to break off, but it doesn't... anyways...
i then started pulling down the headliner, just one side... i first removed the trim on the drivers a-pillar, there are 2 7/16th's bolts, one on each side of the oh-**** bar on the a-piller, you remove it then pull gently, it mostly comes out, towards the center console...
the next thing i did was remove the sun visor, there are 3 philips screws on the pivot side, and 1 on the clip side. behind the clip there is a plastic clip holding the headliner up, i didn't want to damage my headliner by pulling on it, and didn't have the proper tool to remove it, so i left this up...
from here you can run your wires back, i ran them from the mirror, down the a-pillar through the access pannel on the left (on dash, against door) seen here
from there i ran them under the steering wheel, i removed the kick pannel, and the steel plate underneath it, the kick plate is held in by 4 torque bits, i used a t-15, however i think that was the wrong one, my t-20 was too big though. the steel kick plate is held in by 5 bolts, i don't remember the size though
i ran the 3 wires for the actual mirror portion, there is a constant power, an ignition power and a ground, the ground i put to one of the bolts on the steel kick plate, it comes with a ring connector on it already, and the other 2 wires i hooked to my stereo HU, as all my wires in there are already labelled...
from there i ran the temp sensor, i started at the front and ran backwards, i hooked the sensor up directly to my bumper (comes with a clip on it) ran the wire back through the headlight area, behind my battery, under the brake booster, and through the rubber boot around the steering. this then ran back up the a-pillar and across the headliner. one thing i will suggest for all of the wires, is that you run the wires on the aft side of the swivel end of the sun visor, that way it pulls the wires away from the windsheild, that way they never pop out and become unsightly. here are a few pics of it installed
WARNING!
that kick area, i do not know if it will put you at risk for airbag deployment, remove all parts mentioned above at your own risk, i take no responsibility for any such events, nor do i have any knowledge AT ALL! about airbags or airbag safety
i really mean that, i don't know **** about them!
Last edited by --weezl--; Feb 17, 2010 at 10:00 PM.

Joined: Sep 2009
Posts: 3,139
Likes: 1
From: Calgary AB, Canada
well fine than! GAWD! lol, thanks shane
to everyone else, i will add here (and edit to add to the first post)
that kick area, i do not know if it will put you at risk for airbag deployment, remove all parts mentioned above at your own risk, i take no responsibility for any such events, nor do i have any knowledge AT ALL! about airbags or airbag safety
i really mean that, i don't know **** about them!
Joined: Sep 2009
Posts: 3,139
Likes: 1
From: Calgary AB, Canada
no big reason, i didn't feel like messing with running the wires behind the glove box, to the HU, or trying to figure out which fuses were constant power/ignition, in the passenger foot area
$260 shipped from www.brandnewusa.com it's the cheapest place i could find online for it, i checked amazon, anythingauto, ebay, gentex.com, ford.com and a few others i think
$260 shipped from www.brandnewusa.com it's the cheapest place i could find online for it, i checked amazon, anythingauto, ebay, gentex.com, ford.com and a few others i think

Thread
Thread Starter
Forum
Replies
Last Post
RangerNDog
Snapshots
9
Jul 23, 2009 11:06 PM
edgerider2002
OLD - Interior, Exterior, Electrical, & Misc.
13
Jun 27, 2009 10:08 PM


