My 91 Exploder - Budget Build
#1
 05-05-2010


Join Date: Oct 2005
Location: Mount Holly, NC
Posts: 42
Likes: 0
Received 0 Likes
on
0 Posts
My 91 Exploder - Budget Build
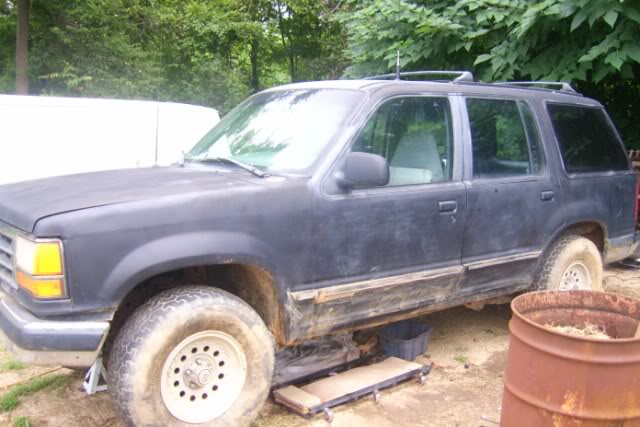
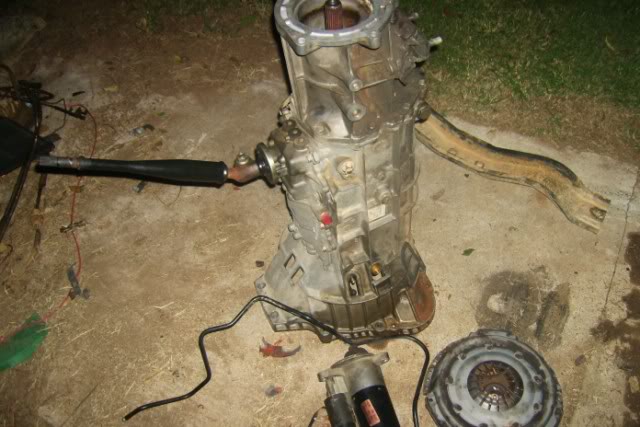
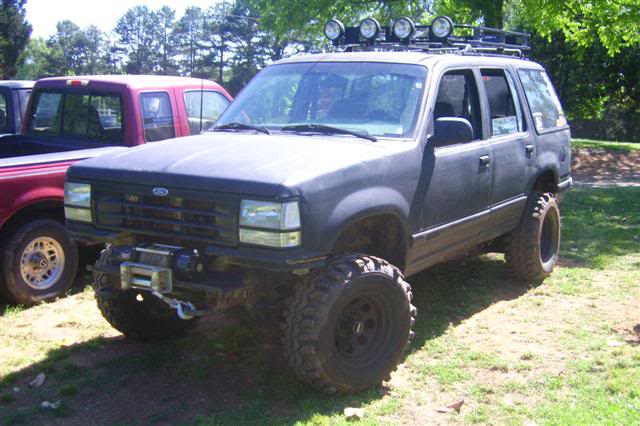
Had my sploder a few months now. Got it back in October or so. I gave $400 for it. Trans was shot. Came a long ways since then and still have a long ways to go.
Figured some people might want to take a look at it.
Here are some pics and more info up to now.
When I first got it.
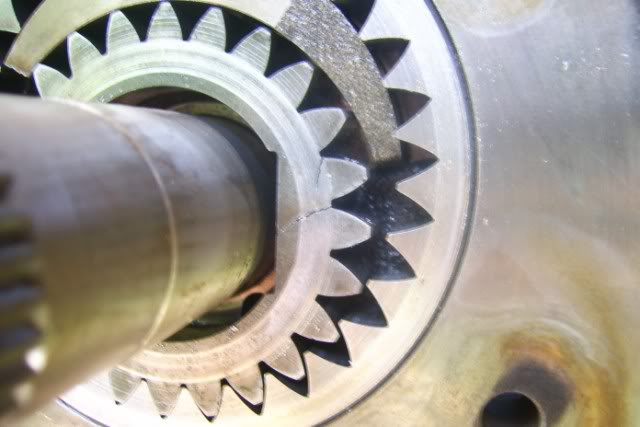
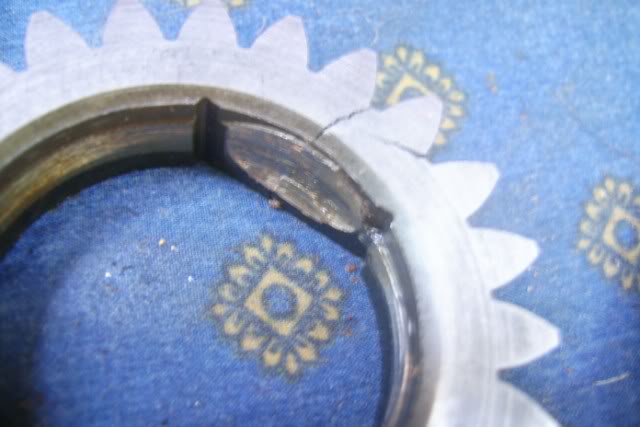
Pump was shot in the trans
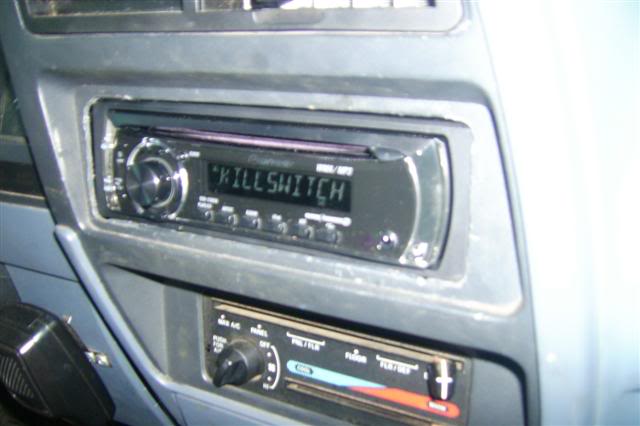
5 Speed swap and cb radio, cd player installed
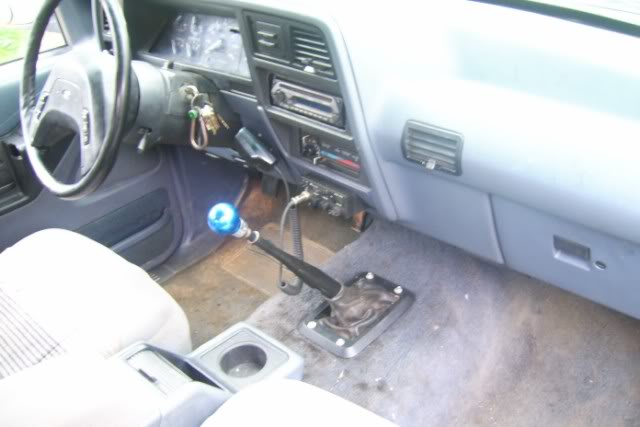
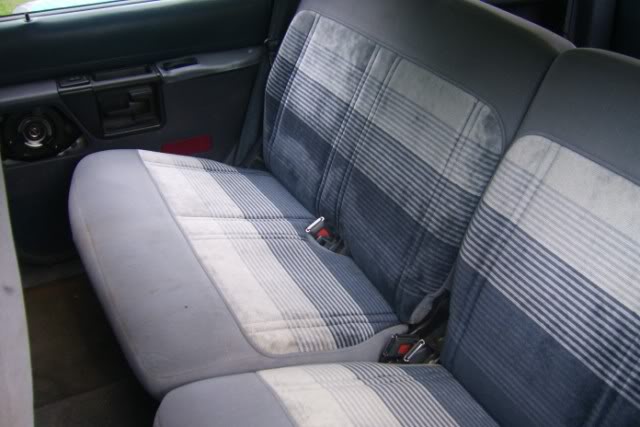
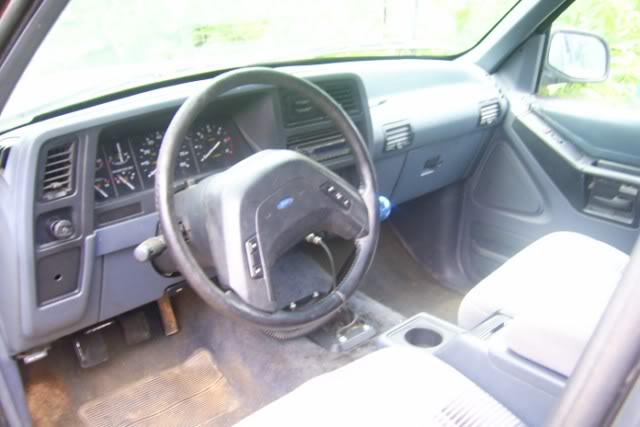
Shots of interior
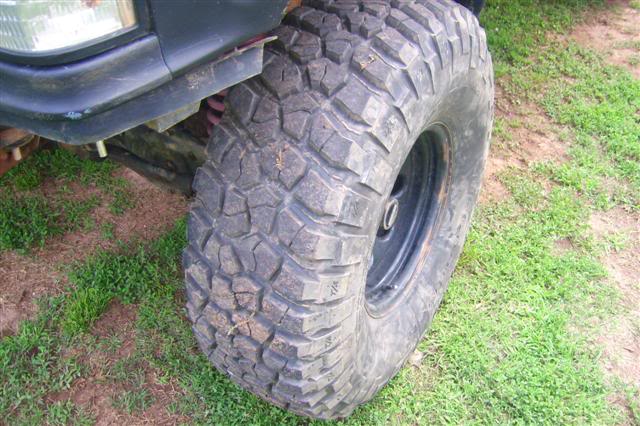
Borrowed a old set of wheels and tires from my buddy
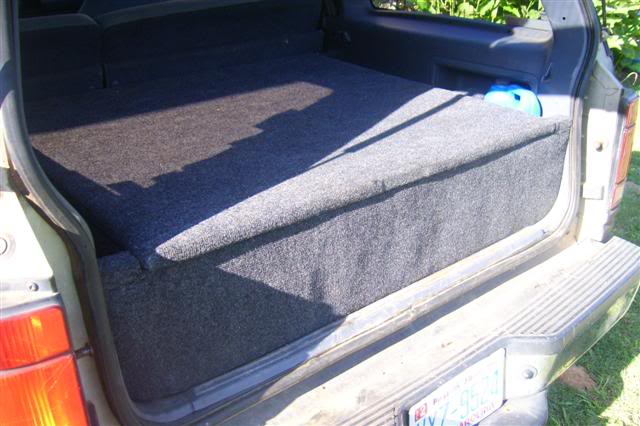
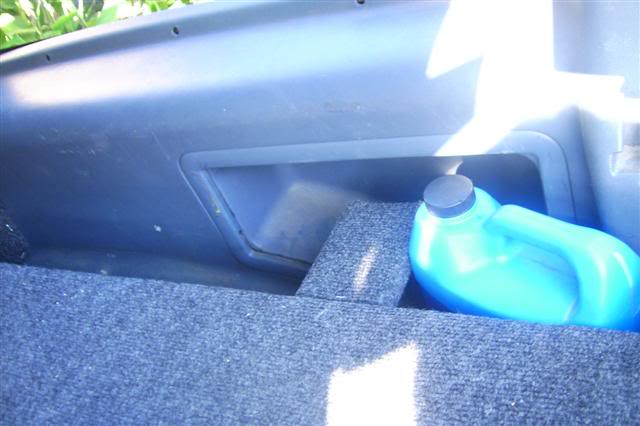
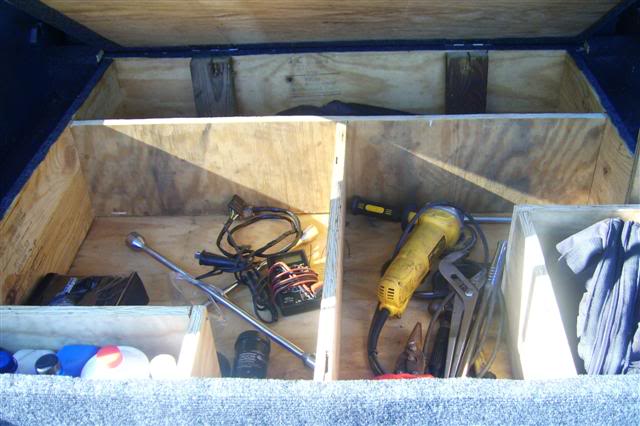
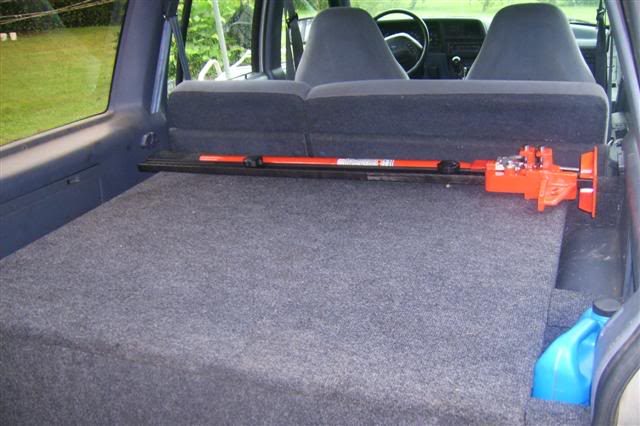
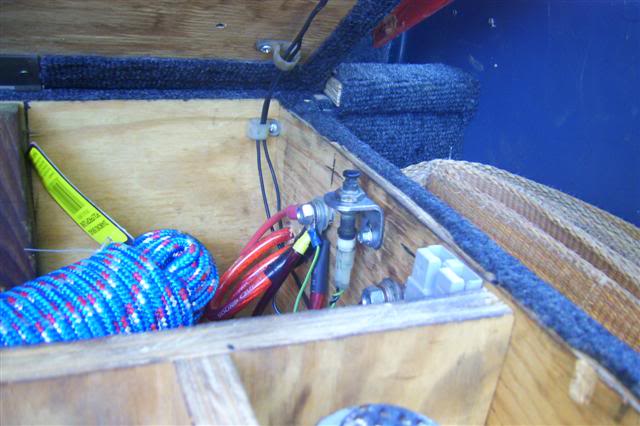
Built a storage box deal for the back
Farm jack mounted
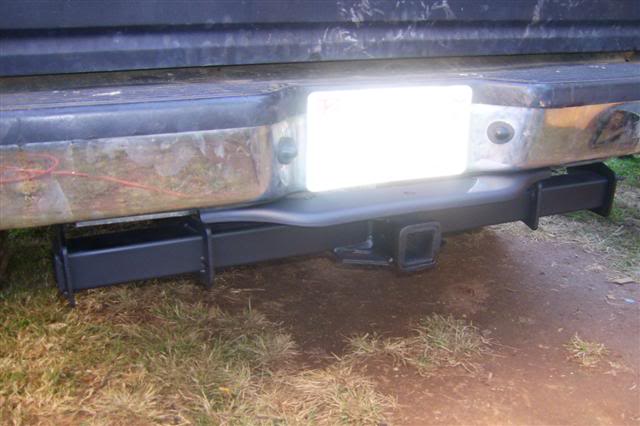
Trailer hitch receiver
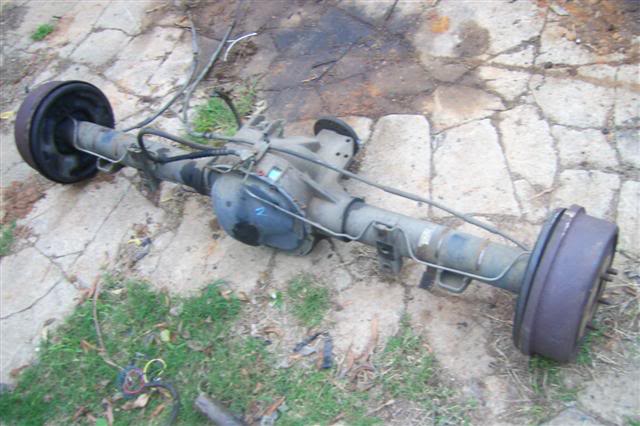
3.73 LS rear and did a lincoln locker in the front
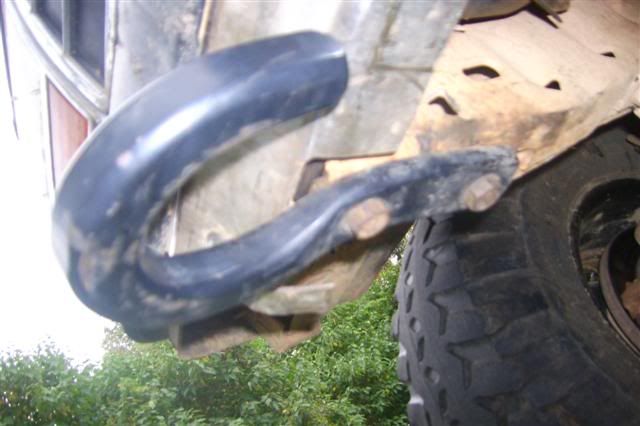
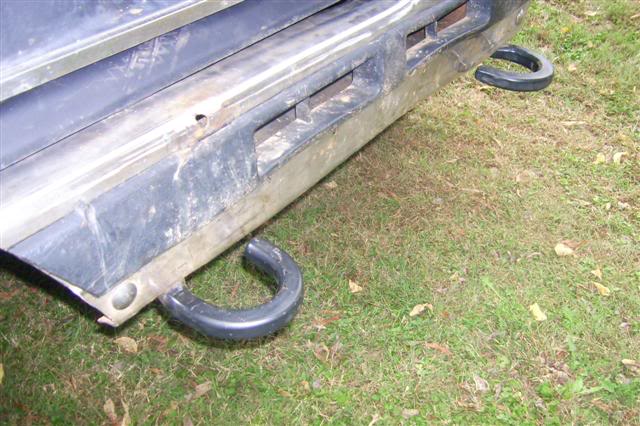
Tow Hooks and cut up the already mangled bumper
F-150 coil spacers and made some shackles
Fresh spray bomb job
4.6 MAF and new filter
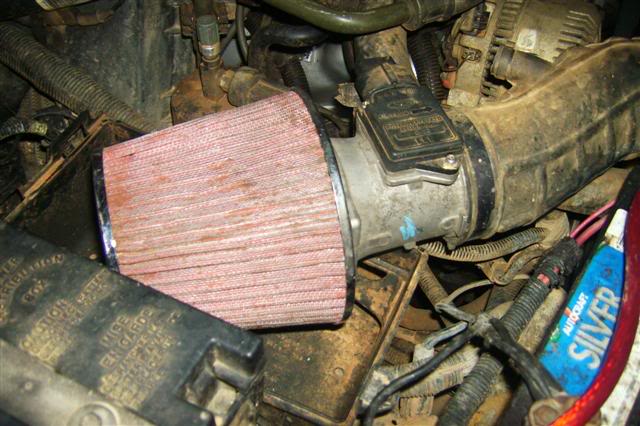
OHC

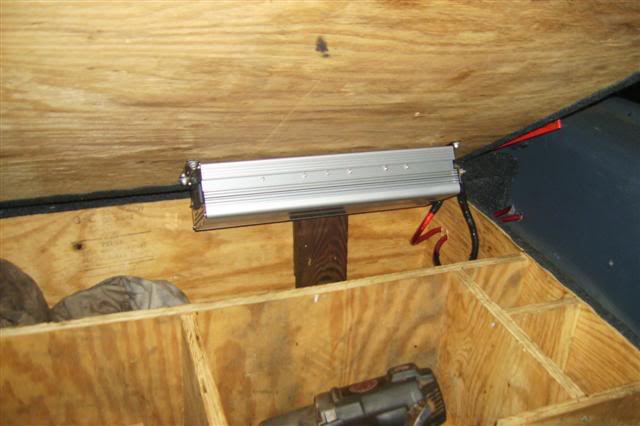
Power inverter
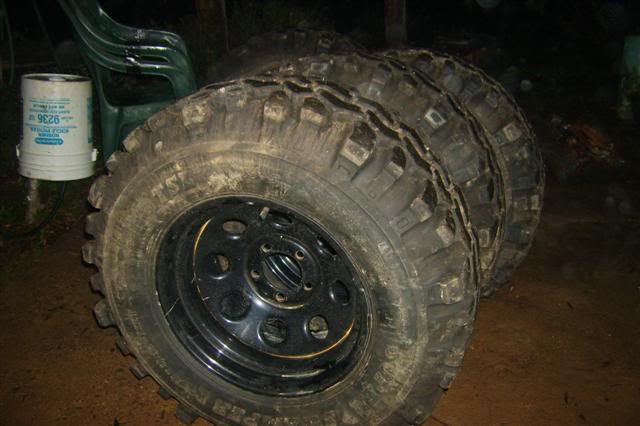
Bought some 31-11.50 LTB's and Soft 8's
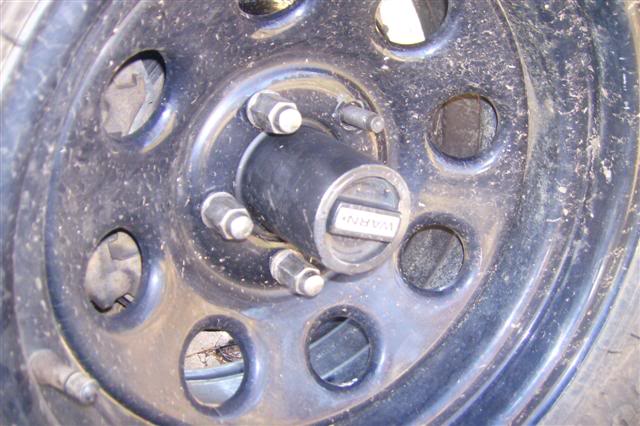
Jeep manual hubs
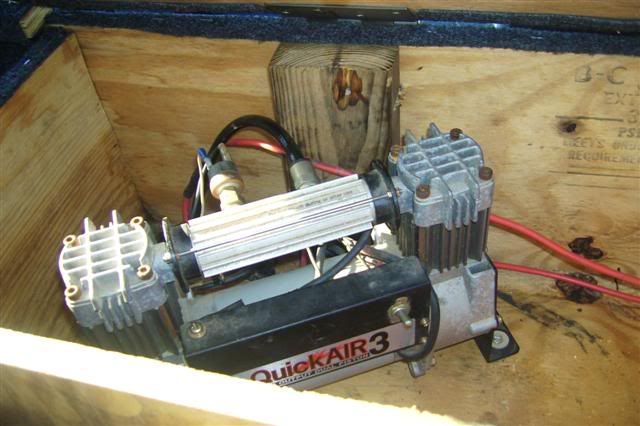
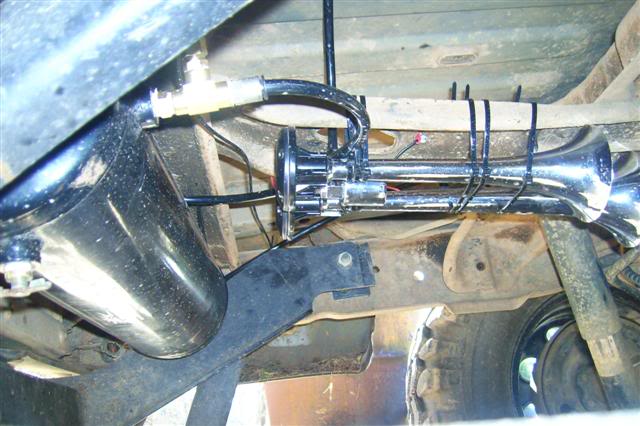
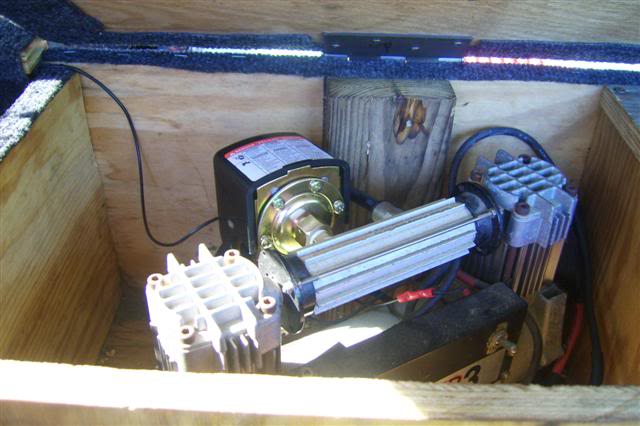
Air compressor, horn, tank.

Manual t-case
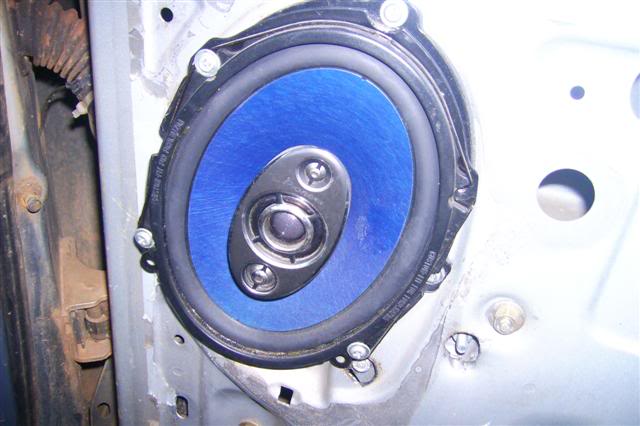
New CD player to control my ipod and found some speakers at the junkyard
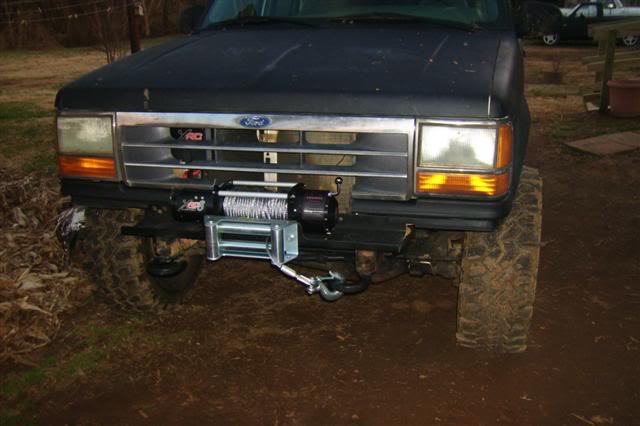
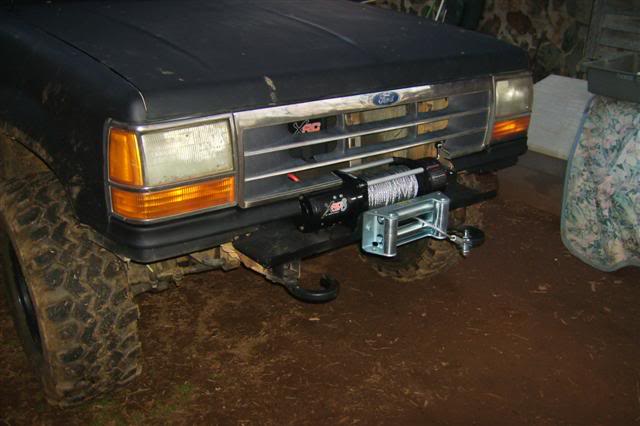
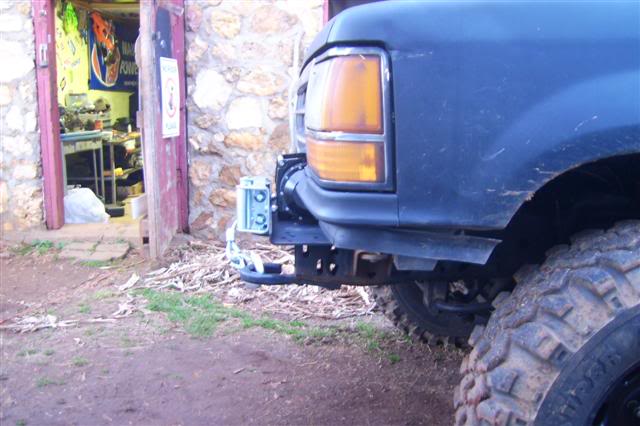
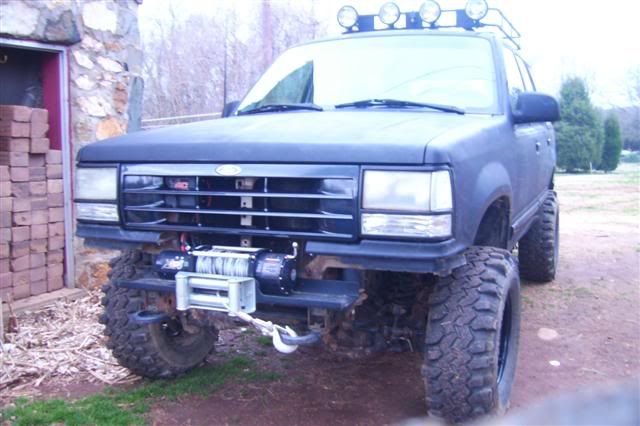
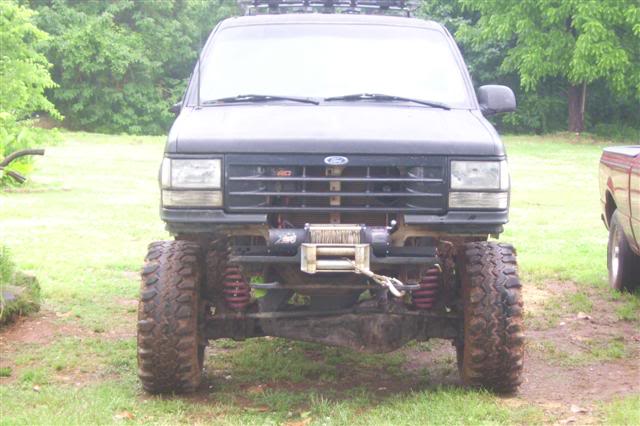
Picked up a winch at 4 Wheel Parts.
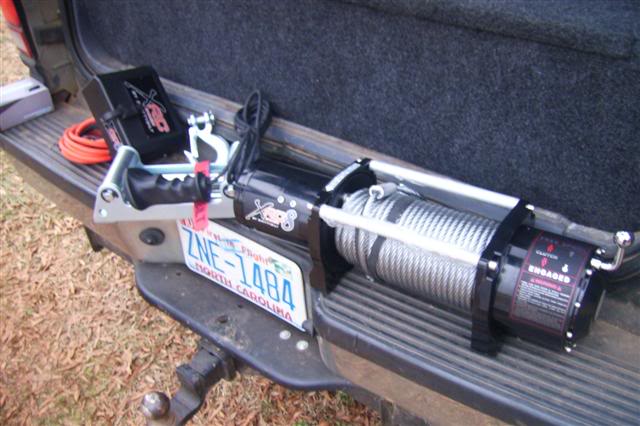
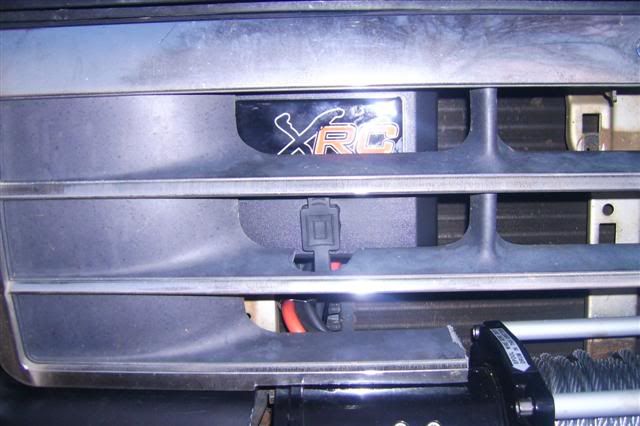
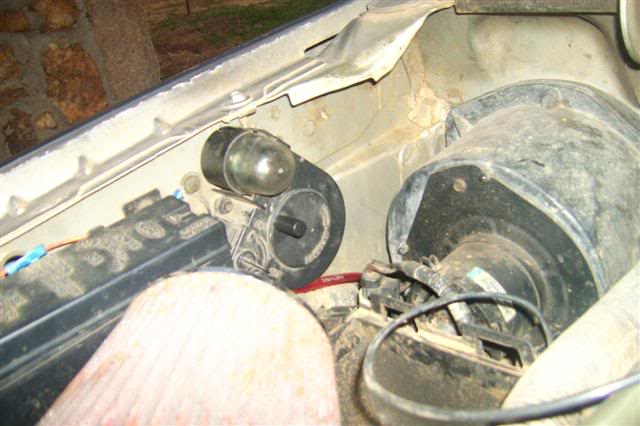
Got the winch mounted. Used a universal winch plate for now. When I go to make a Bumper for it I will probably just go off of it. I mounted the control box behind the grill.
Control box.
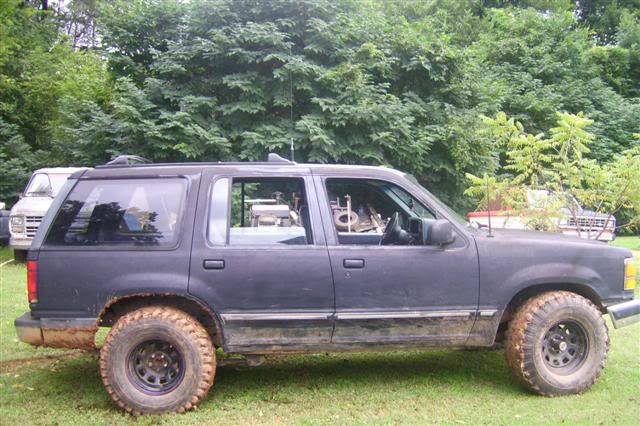
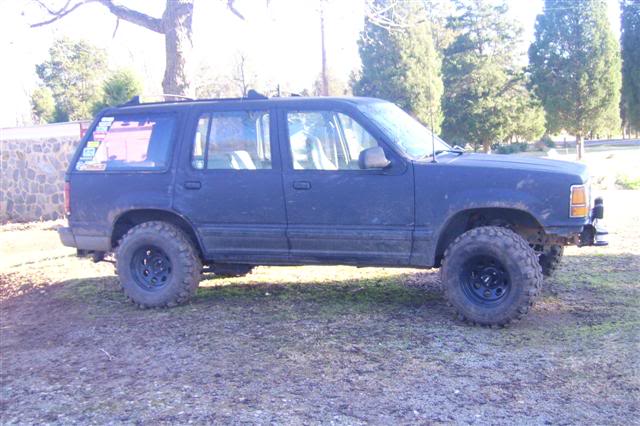
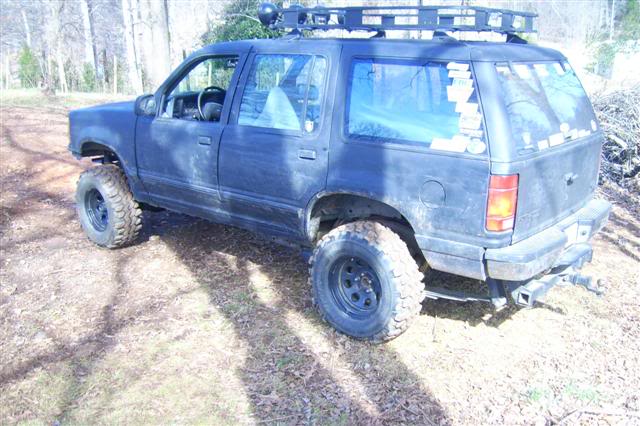
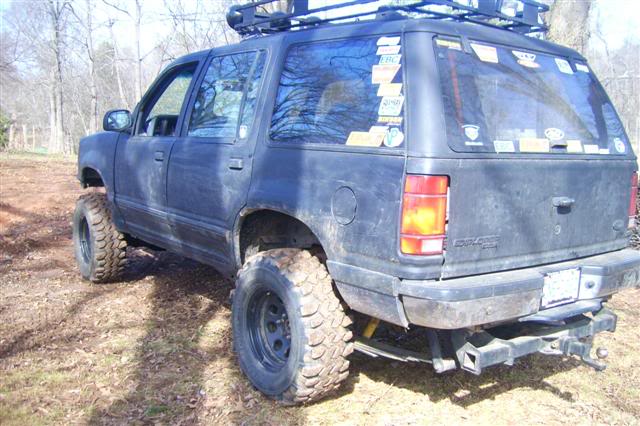
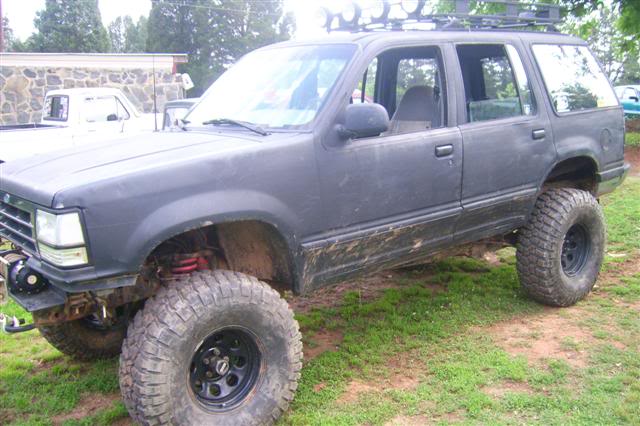
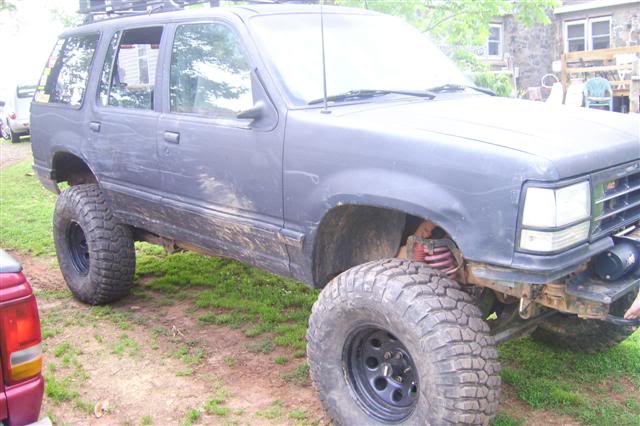
Side profile shot.
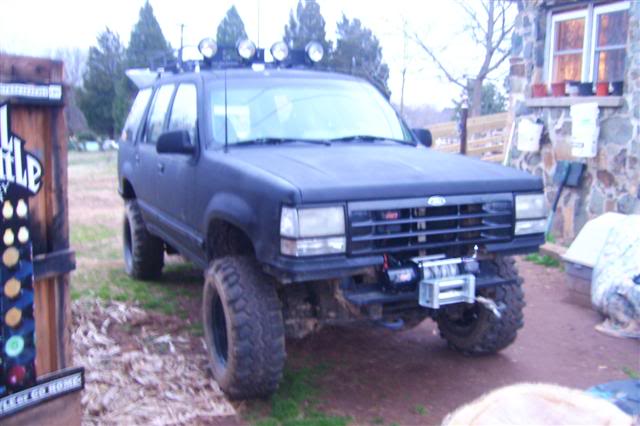
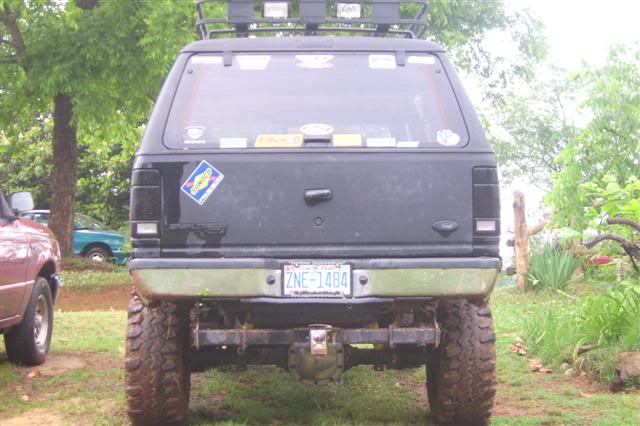
Also got one of the Chevy service lights. The one with the wind up cord that will reach all the way around the back.
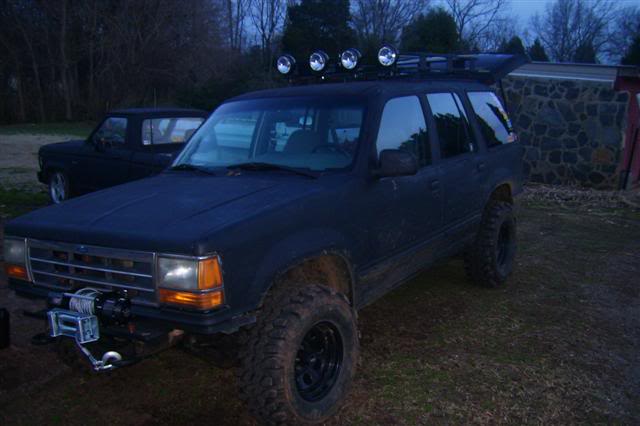
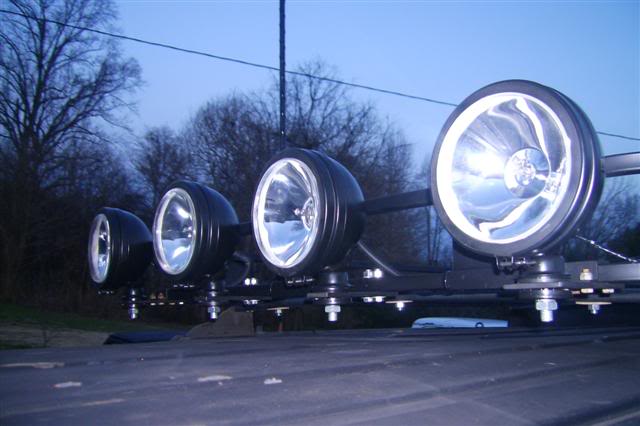
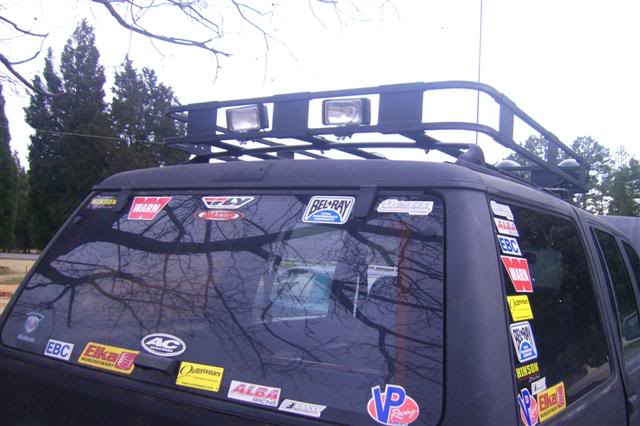
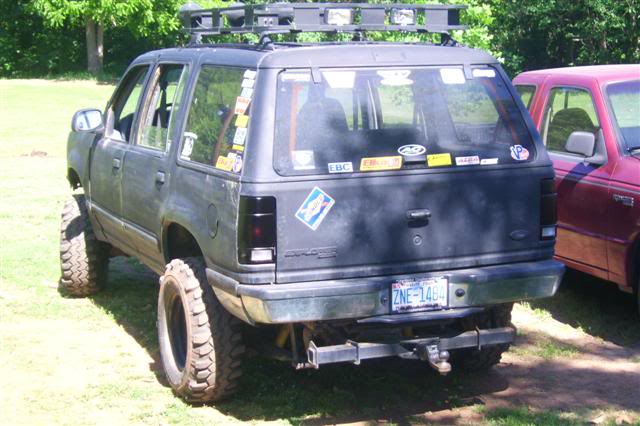
Got a Surco rack, some new lights put on, and a new Firestik CB antenna. Now I just need some new coax cable to hook the antenna up. Also have 2 more smaller square lights to go on the back of the rack for reverse lights.
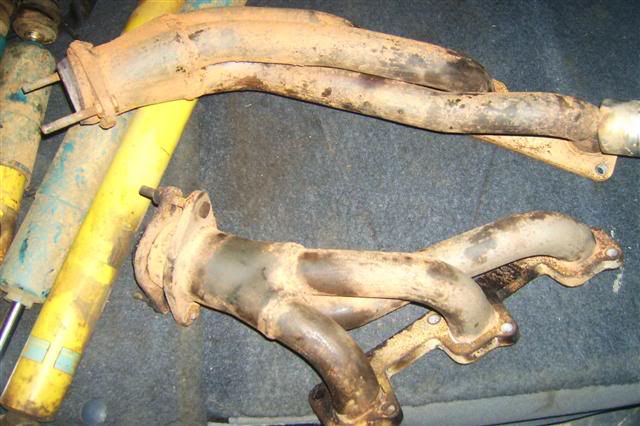
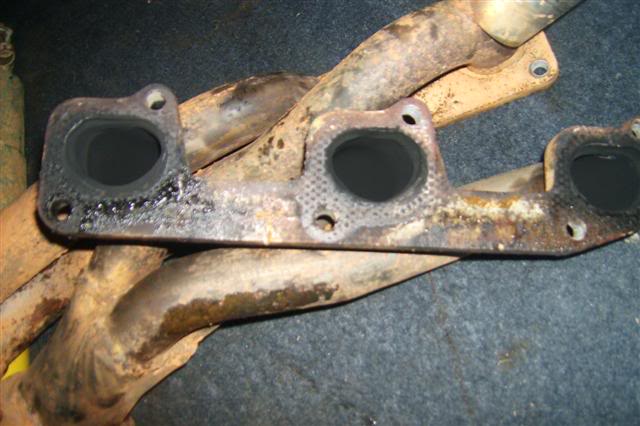
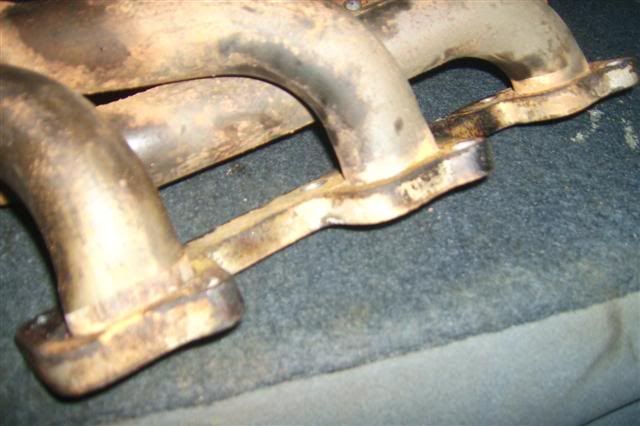
Scored a set of headers from the junkyard. Got them for $16 and some change. I believe they are Borla. The Explorer had a Borla Exhaust sticker and thats what they look like to me looking at pics on the net but Im not 100% sure.
Also picked up a set of Bilstein shocks. Not sure how good of shape they are in or how many miles for for $5 each I said why not.

Got the reverse lights mounted on the rack and did some wiring and little stuff like that.
Switches. One is fore the 4 lights on top, one is for the reverse lights, one for the air compressor, and one to turn on the switch for the winch switch. The light switches are SPDT so I have them wired up with a on all the time position, off, and automatic on. The reverse will come on when it in reverse and the 4 lights on top will come on with the high beams. Dont mind the extra holes they were already there. Ill grab a new piece from the junkyard next time and re drill it.
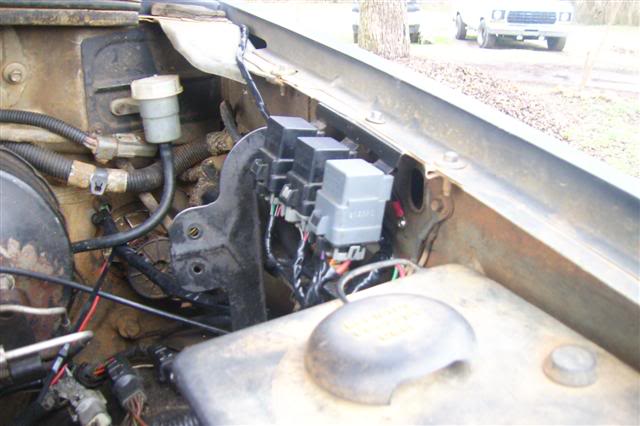
Relays
Reverse lights on rack.
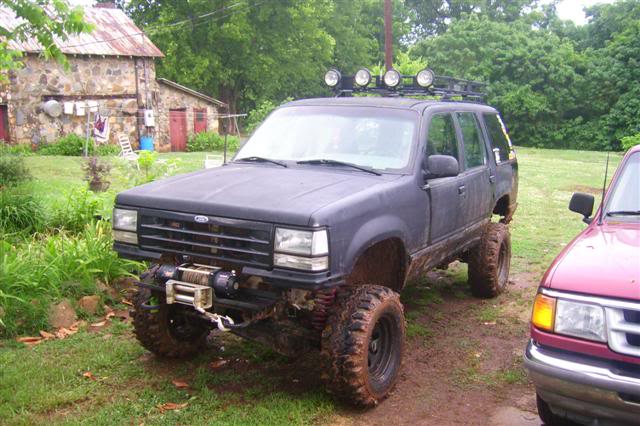
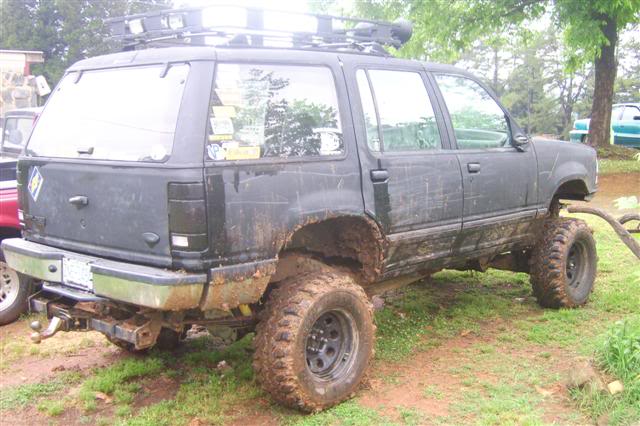
Body lift time.
Body lift on.
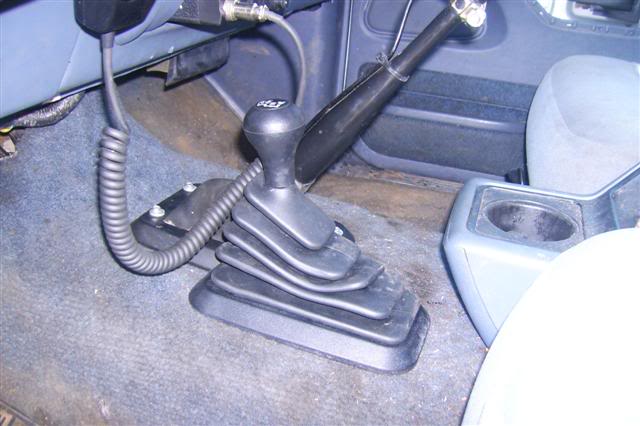
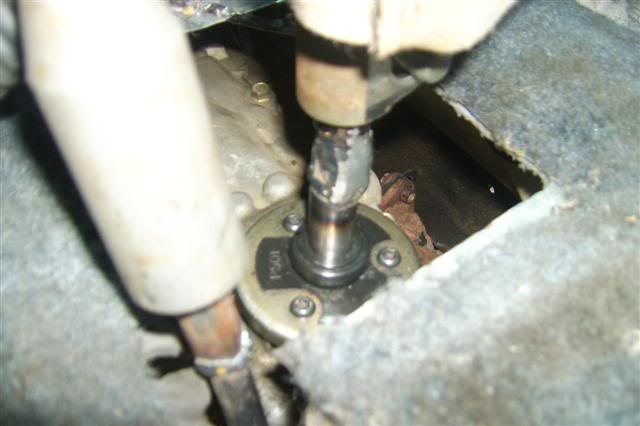
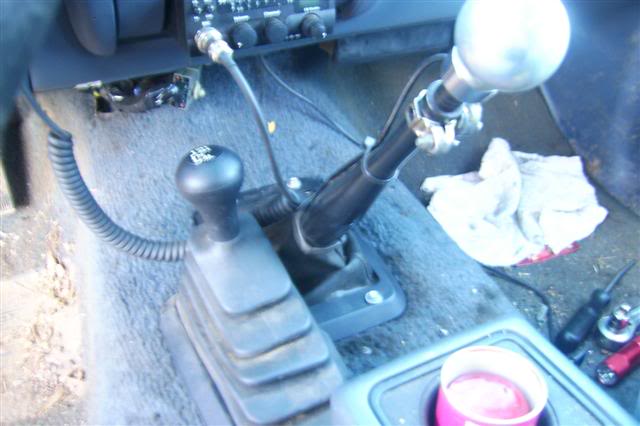
Got the shifters extended.
Didnt want to pay the $40 for the shifter extension and I had a few spare shifter pivot ball deals that go into the tranny so I cut the inches off one of the and welded to the top of the stock one. I had to grind the big ball off of it though. It may not be pretty but you cant see it and it works great and was free.
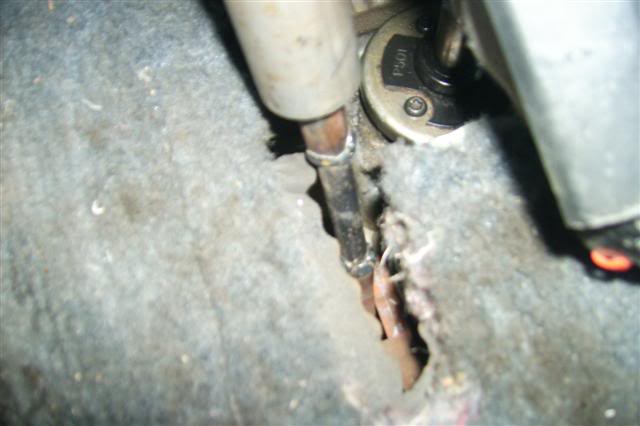
For the t-case shifter I just cut it in half and welded in a 3 inch piece between it.
Tranny shifter
T-case shifter
Now the shifters are back in the stock locations. Cant tell a difference from the inside.
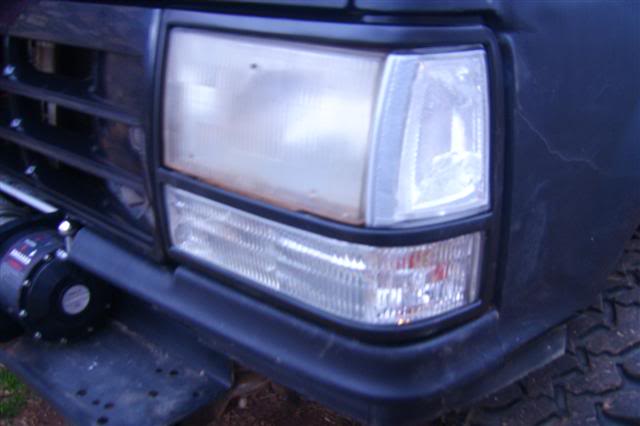
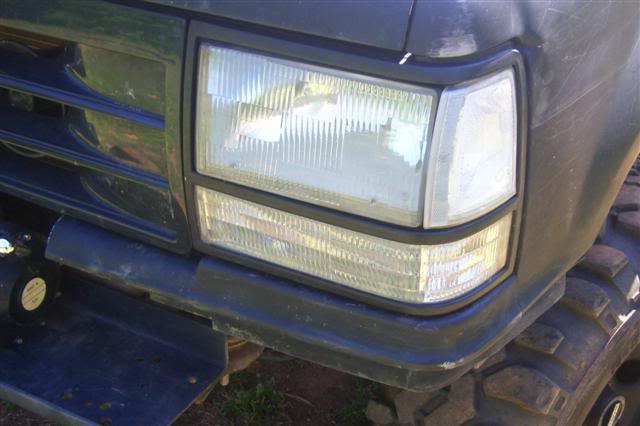
Got a the new black grill, headlight surrounds, and some new clear front lights put on just a little bit ago. Now I need some new headlights. Probably going to niteshade a set of rears since I cant find a set of clears anywhere.
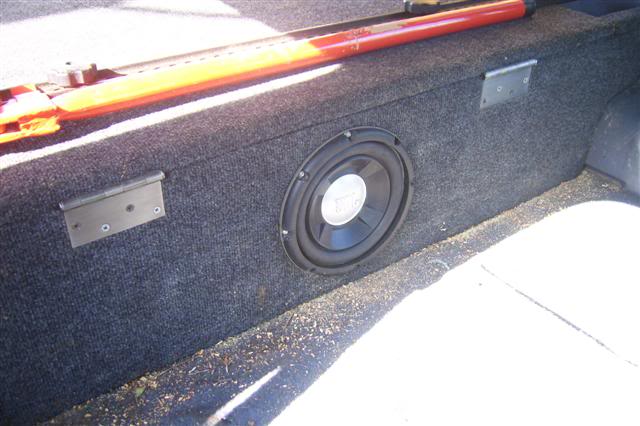
Got a little more bass now. Got a little 8" JBL sub and bought a little cheap 250watt rms amp. I wasnt looking for anything super loud just looking for a little more bass. I listen to a lot of metal/double bass stuff and it work and sounds great for what I wanted.
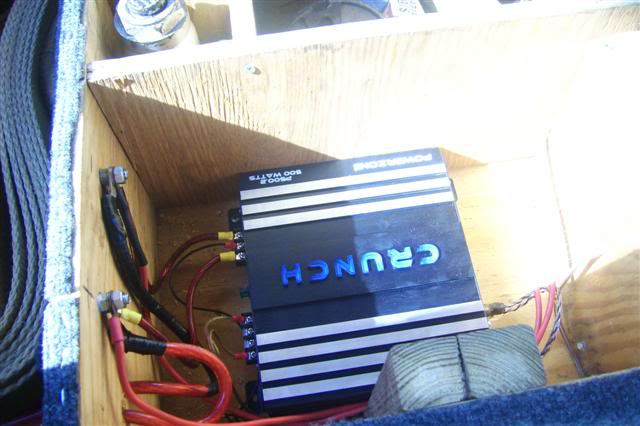
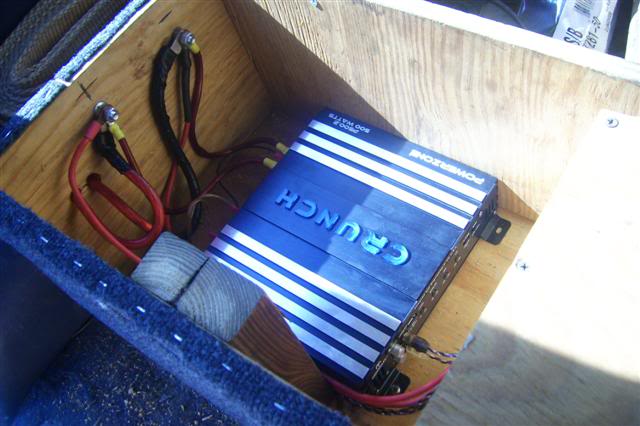
Got it all put in and wired up today. Its all mounted inside the box I built in the back.
Sub mounted in box
Sealed off a box inside the box for the sub
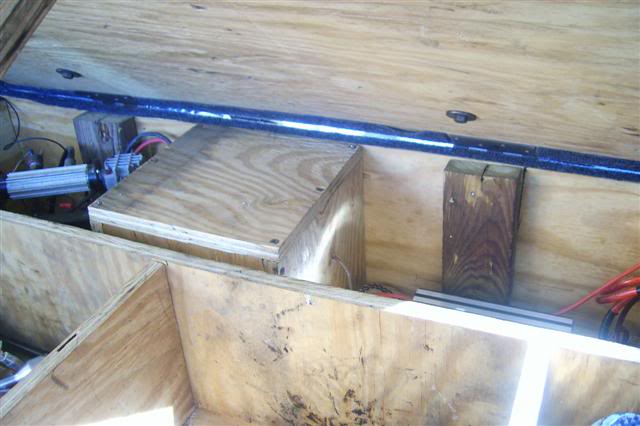
Amp wired up and everything
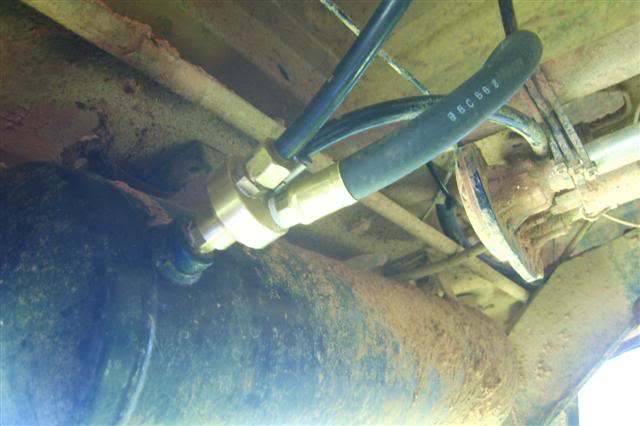
I was on my way to work the other week and the clutch line got a little to close to the exhaust manifold and burnt it in half so there goes the clutch. No more releasing it. lol It wasnt the right line to begin with just one my buddy had laying around at the transmission shop he works at.
So I took the day off and put it in low ranger so I would start in gear easier and made it back to the house and did a little afro engineering to the line to get me by until I find the right line. Use compression fitting to go from the plastic line and another fitting from it too brake line and pieced it back together. Ran it that way for a few weeks and it worked fine. No leaking or anything.
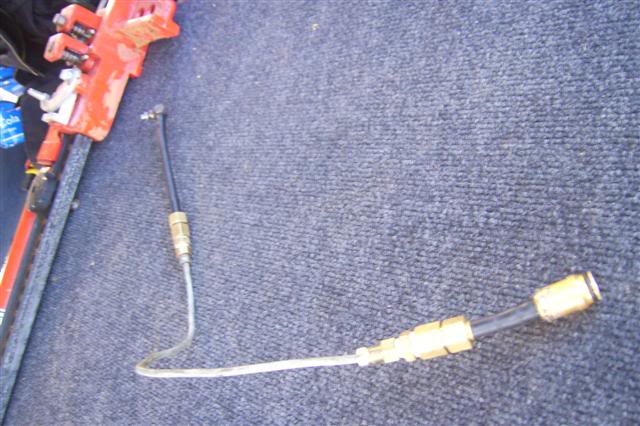
Then yesterday I was at the same shop and was messing around and we ran across a braided line with the same exact ends on it so figured I would give it a try and wouldnt you know, the perfect length. Got it changed it and it works great.
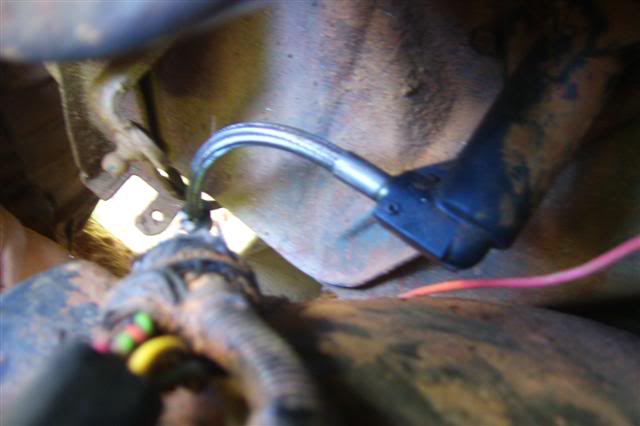
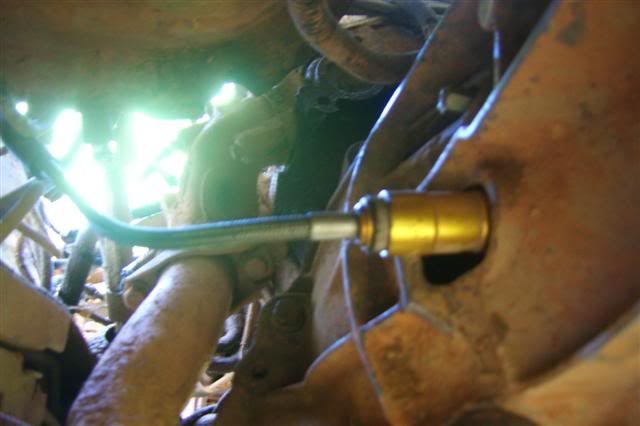
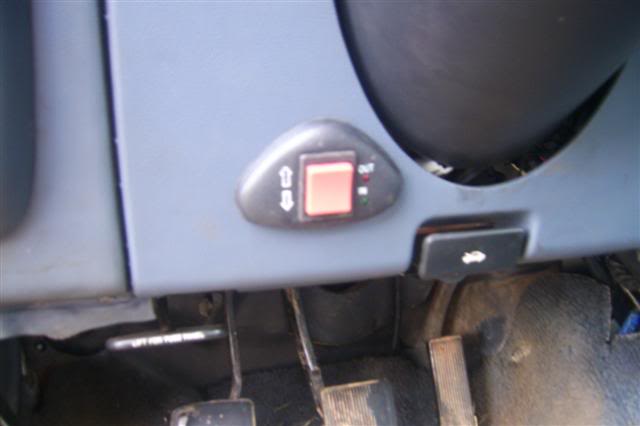
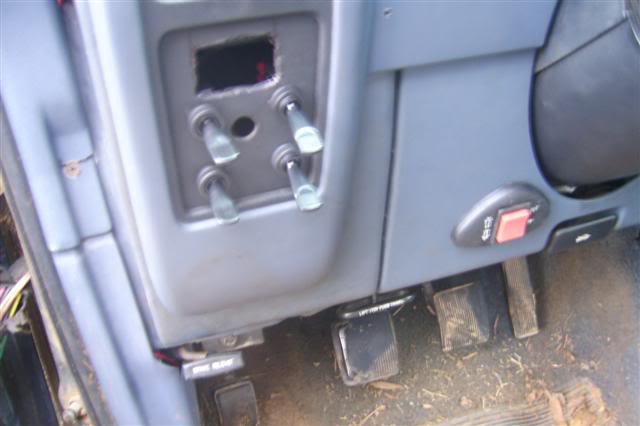
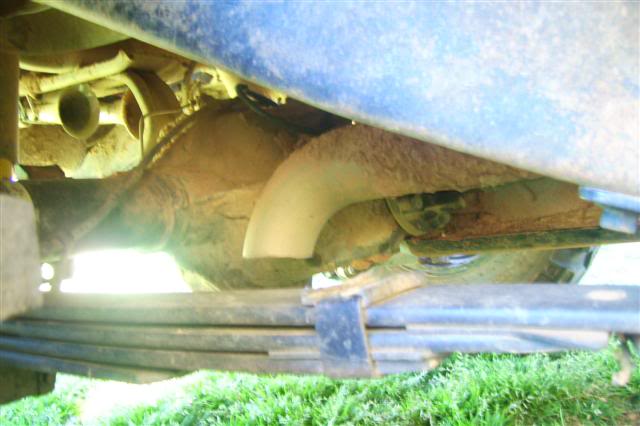
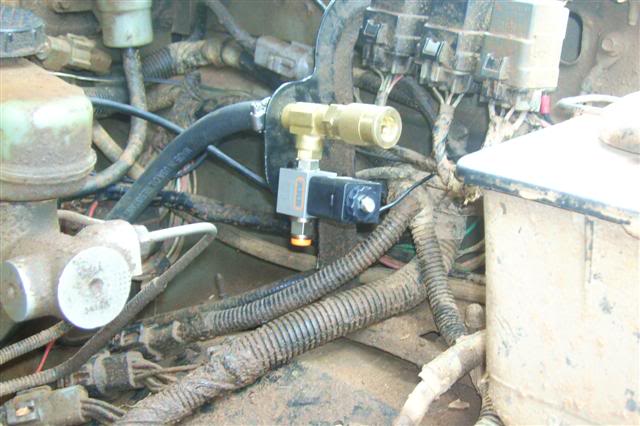
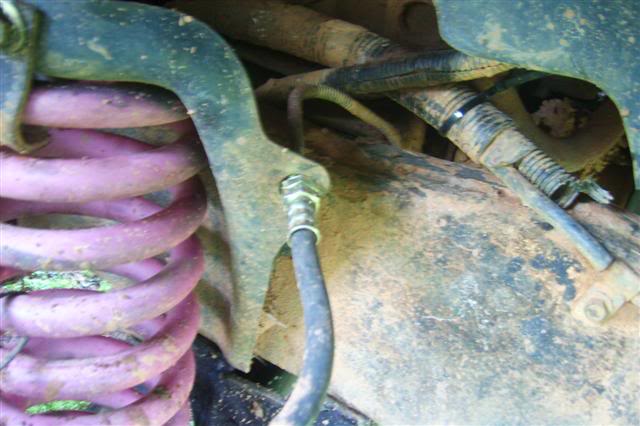
Ran some air hose for my OBS from the tank in the back to under the hood to get ready for the front air locker. Put a tee and a quick disconnect under the hood. The ARB solenoid is going to the other side of the tee I have plugged now.
3 way splitter at the tank
Also picked up a adjustable pressure switch and Home Depot to up the pressure a little for the air locker.
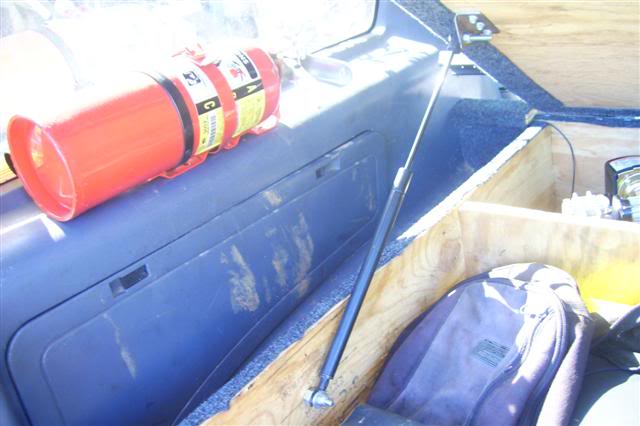
Put some much needed air shock/struts on the lid of the box I built for the back. Got the angles and everything right the first try. They work perfect. There the same ones that on the rear window in the hatch. Also got a fir extinguisher mounted.
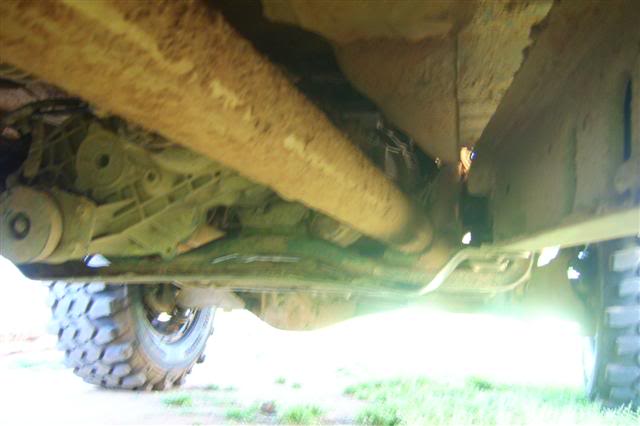
Also was bored and got a few pics of the exhaust I did on it. Dont think I have put any up of it. Its 2.5" pipe dumped at the axle, Flowmaster 2 chamber, with no cat. Its got a nice coating of mud now. I like to think of it as custom ceramic coating. lol
Dump
Muffler
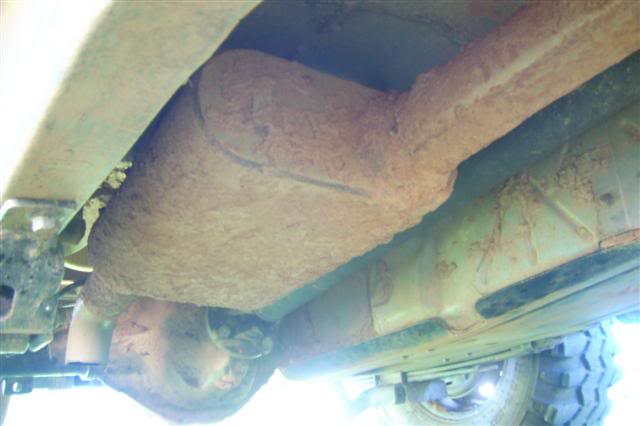
Straight piece of 2.5" pipe to the y pipe.
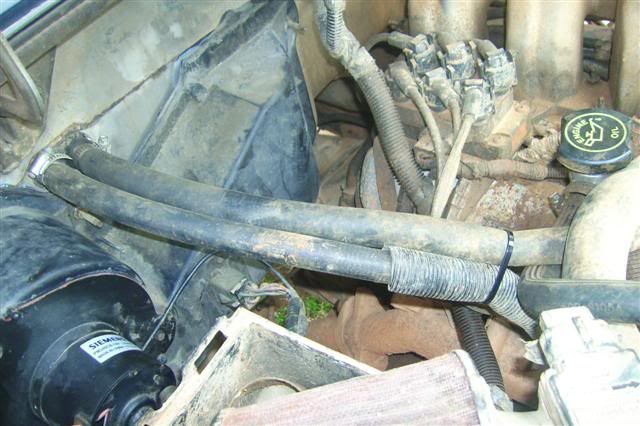
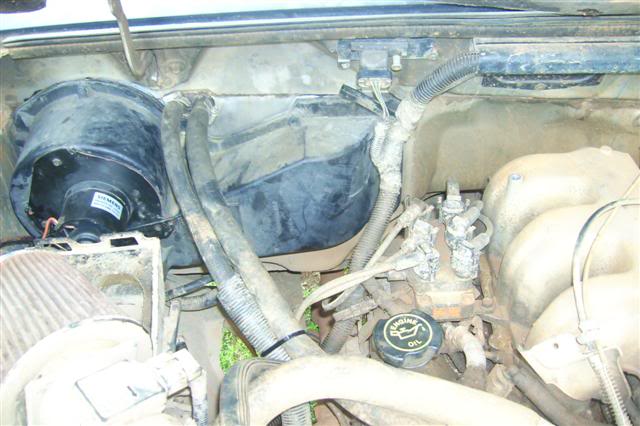
Goodbye A/C.

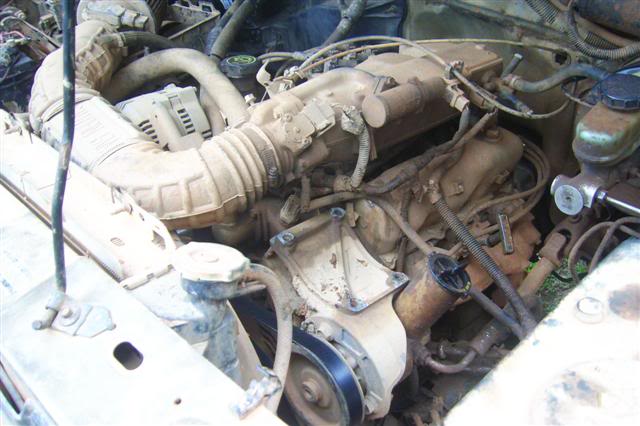
Tons of room under the hood now. Dont mind how dirty it is. Need to be washed under the hood. lol
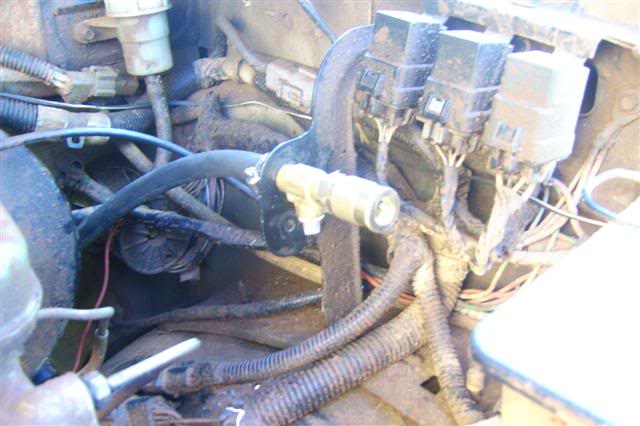
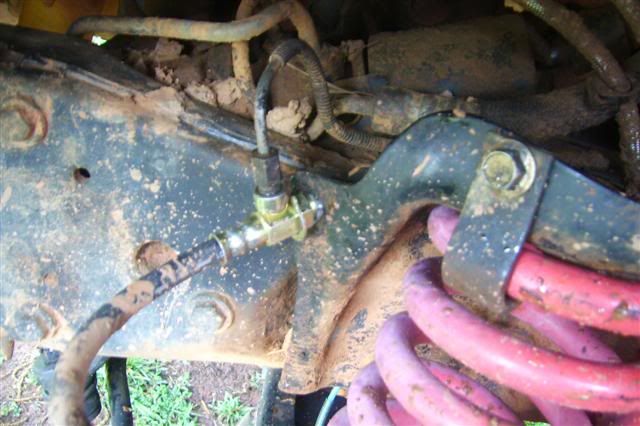
Got all the fittings I needed to get the ARB solenoid in place and got it wired up ready for the front locker.
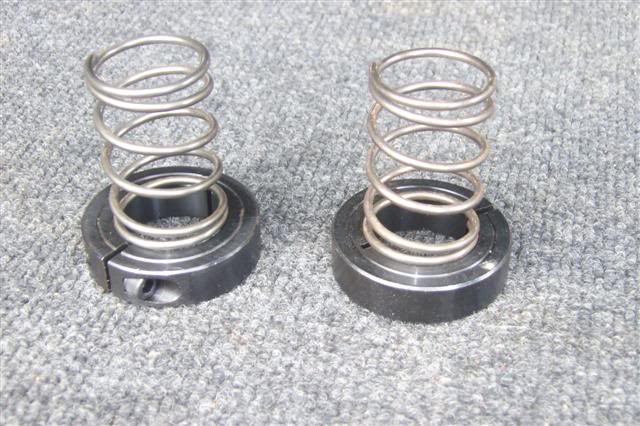
C-clip eliminator kits.
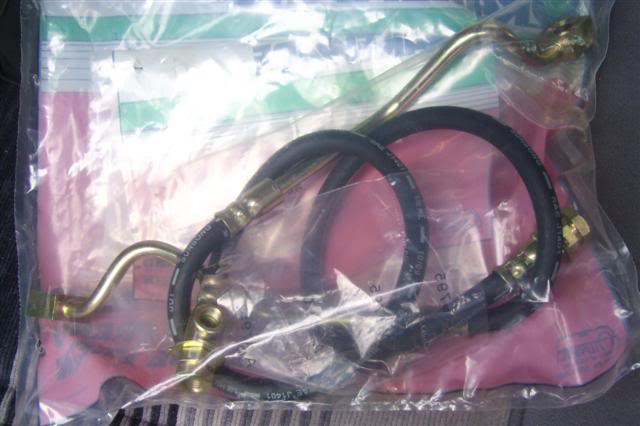
F-250 brake lines.
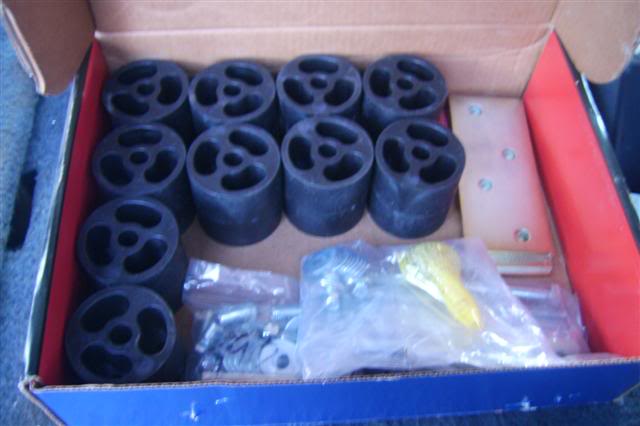
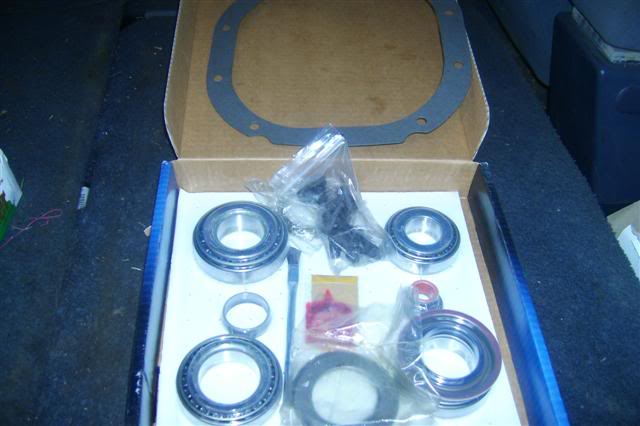
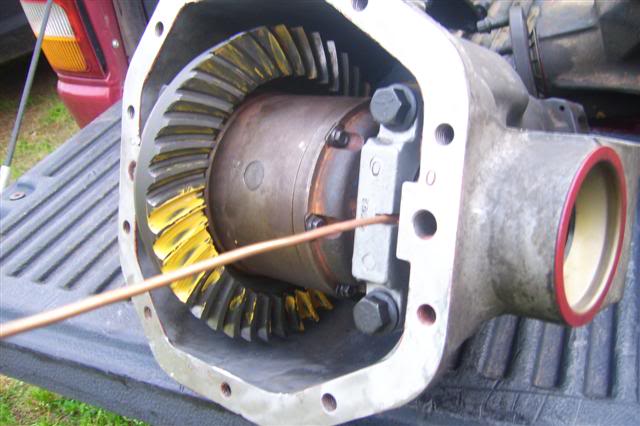
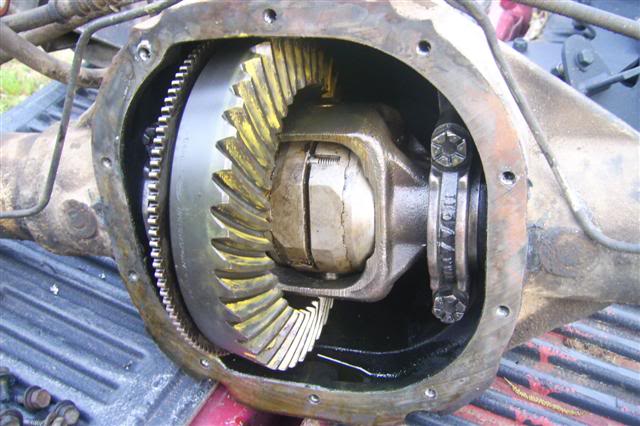
So that brings us up to today. Parts I have waiting to isntall are a 6" Skyjacker lift i scored it all for less then $50 at the junkyard. 4.56's front and rear. ARB air locker front and Aussie rear.


8.8 4.56
D35 4.56
Got the Aussie locker in the mail today.
8.8 Install kit
Figured some people might want to take a look at it.
Here are some pics and more info up to now.
When I first got it.
Pump was shot in the trans
5 Speed swap and cb radio, cd player installed
Shots of interior
Borrowed a old set of wheels and tires from my buddy
Built a storage box deal for the back
Farm jack mounted
Trailer hitch receiver
3.73 LS rear and did a lincoln locker in the front
Tow Hooks and cut up the already mangled bumper
F-150 coil spacers and made some shackles
Fresh spray bomb job
4.6 MAF and new filter
OHC
Power inverter
Bought some 31-11.50 LTB's and Soft 8's
Jeep manual hubs
Air compressor, horn, tank.
Manual t-case
New CD player to control my ipod and found some speakers at the junkyard
Picked up a winch at 4 Wheel Parts.
Got the winch mounted. Used a universal winch plate for now. When I go to make a Bumper for it I will probably just go off of it. I mounted the control box behind the grill.
Control box.
Side profile shot.
Also got one of the Chevy service lights. The one with the wind up cord that will reach all the way around the back.
Got a Surco rack, some new lights put on, and a new Firestik CB antenna. Now I just need some new coax cable to hook the antenna up. Also have 2 more smaller square lights to go on the back of the rack for reverse lights.
Scored a set of headers from the junkyard. Got them for $16 and some change. I believe they are Borla. The Explorer had a Borla Exhaust sticker and thats what they look like to me looking at pics on the net but Im not 100% sure.
Also picked up a set of Bilstein shocks. Not sure how good of shape they are in or how many miles for for $5 each I said why not.
Got the reverse lights mounted on the rack and did some wiring and little stuff like that.
Switches. One is fore the 4 lights on top, one is for the reverse lights, one for the air compressor, and one to turn on the switch for the winch switch. The light switches are SPDT so I have them wired up with a on all the time position, off, and automatic on. The reverse will come on when it in reverse and the 4 lights on top will come on with the high beams. Dont mind the extra holes they were already there. Ill grab a new piece from the junkyard next time and re drill it.
Relays
Reverse lights on rack.
Body lift time.
Body lift on.
Got the shifters extended.
Didnt want to pay the $40 for the shifter extension and I had a few spare shifter pivot ball deals that go into the tranny so I cut the inches off one of the and welded to the top of the stock one. I had to grind the big ball off of it though. It may not be pretty but you cant see it and it works great and was free.
For the t-case shifter I just cut it in half and welded in a 3 inch piece between it.
Tranny shifter
T-case shifter
Now the shifters are back in the stock locations. Cant tell a difference from the inside.
Got a the new black grill, headlight surrounds, and some new clear front lights put on just a little bit ago. Now I need some new headlights. Probably going to niteshade a set of rears since I cant find a set of clears anywhere.
Got a little more bass now. Got a little 8" JBL sub and bought a little cheap 250watt rms amp. I wasnt looking for anything super loud just looking for a little more bass. I listen to a lot of metal/double bass stuff and it work and sounds great for what I wanted.
Got it all put in and wired up today. Its all mounted inside the box I built in the back.
Sub mounted in box
Sealed off a box inside the box for the sub
Amp wired up and everything
I was on my way to work the other week and the clutch line got a little to close to the exhaust manifold and burnt it in half so there goes the clutch. No more releasing it. lol It wasnt the right line to begin with just one my buddy had laying around at the transmission shop he works at.
So I took the day off and put it in low ranger so I would start in gear easier and made it back to the house and did a little afro engineering to the line to get me by until I find the right line. Use compression fitting to go from the plastic line and another fitting from it too brake line and pieced it back together. Ran it that way for a few weeks and it worked fine. No leaking or anything.
Then yesterday I was at the same shop and was messing around and we ran across a braided line with the same exact ends on it so figured I would give it a try and wouldnt you know, the perfect length. Got it changed it and it works great.
Ran some air hose for my OBS from the tank in the back to under the hood to get ready for the front air locker. Put a tee and a quick disconnect under the hood. The ARB solenoid is going to the other side of the tee I have plugged now.
3 way splitter at the tank
Also picked up a adjustable pressure switch and Home Depot to up the pressure a little for the air locker.
Put some much needed air shock/struts on the lid of the box I built for the back. Got the angles and everything right the first try. They work perfect. There the same ones that on the rear window in the hatch. Also got a fir extinguisher mounted.
Also was bored and got a few pics of the exhaust I did on it. Dont think I have put any up of it. Its 2.5" pipe dumped at the axle, Flowmaster 2 chamber, with no cat. Its got a nice coating of mud now. I like to think of it as custom ceramic coating. lol
Dump
Muffler
Straight piece of 2.5" pipe to the y pipe.
Goodbye A/C.
Tons of room under the hood now. Dont mind how dirty it is. Need to be washed under the hood. lol
Got all the fittings I needed to get the ARB solenoid in place and got it wired up ready for the front locker.
C-clip eliminator kits.
F-250 brake lines.
So that brings us up to today. Parts I have waiting to isntall are a 6" Skyjacker lift i scored it all for less then $50 at the junkyard. 4.56's front and rear. ARB air locker front and Aussie rear.
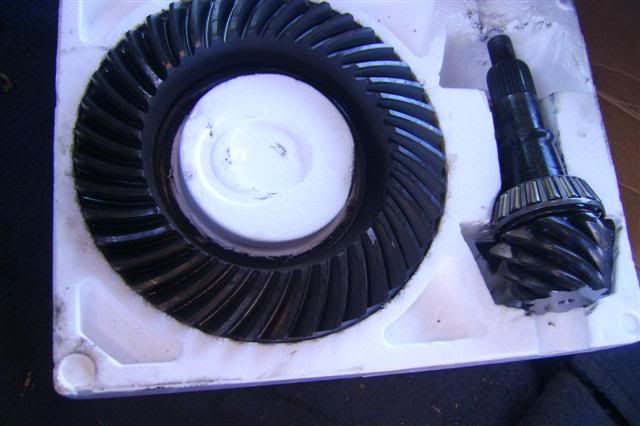
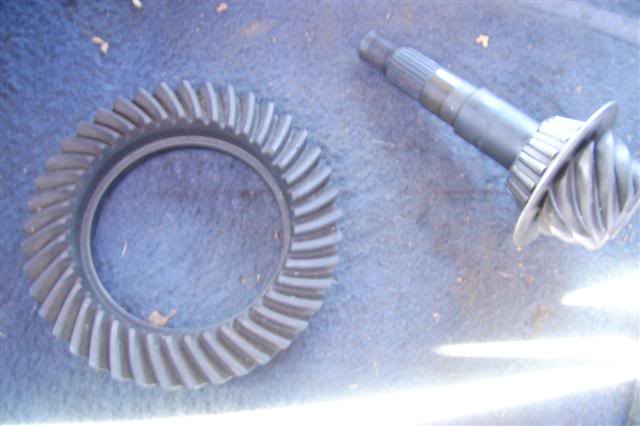
8.8 4.56
D35 4.56
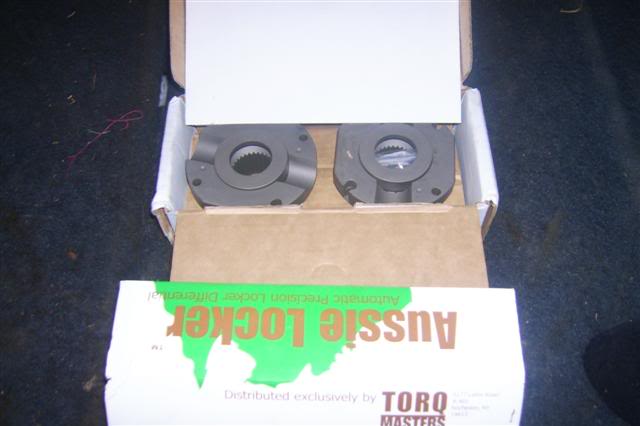
Got the Aussie locker in the mail today.
8.8 Install kit
#2
05-05-2010
Join Date: Oct 2005
Location: Mount Holly, NC
Posts: 42
Likes: 0
Received 0 Likes
on
0 Posts
Got the 8.8 put together and setup with the 4.56 and Aussie locker a week or so ago and started on the front.
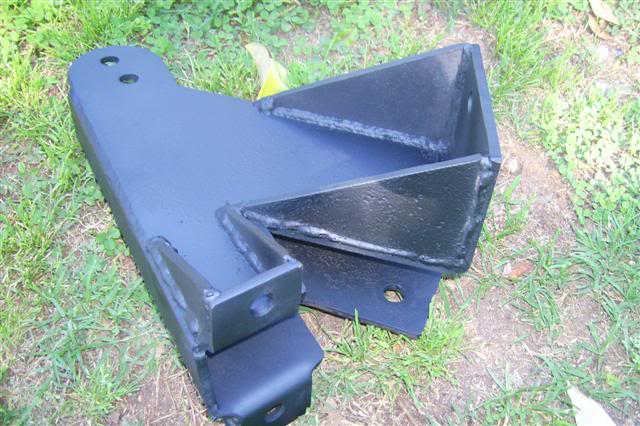
Made some guessets for the front lift brackets. Going to try to get the front diff finished up one days this week and plan on swapping the front and rear diff, and putting on the lift and taking off the body lift within the next 3 weeks or so. So stay tuned for more pics.
Also have a set of DDM 55w 4500K HIDS on the way. Will be my first set ever so If I like them i may change over all the light on the rack to HID also.
#3
05-05-2010
Join Date: Jul 2009
Location: El Paso, Tx
Posts: 1,206
Likes: 0
Received 0 Likes
on
0 Posts


#6
05-05-2010
Join Date: Oct 2009
Location: lexington,sc
Posts: 780
Likes: 0
Received 0 Likes
on
0 Posts
#7
05-05-2010
Join Date: Oct 2005
Location: Mount Holly, NC
Posts: 42
Likes: 0
Received 0 Likes
on
0 Posts
Thanks for the comments everybody.
Got all the junkyard parts from Pull-A-Part in Charlotte. They dont have any newer stuff. Mostly all 90's stuff.
Got all the junkyard parts from Pull-A-Part in Charlotte. They dont have any newer stuff. Mostly all 90's stuff.


#13
05-09-2010
Join Date: Oct 2005
Location: Mount Holly, NC
Posts: 42
Likes: 0
Received 0 Likes
on
0 Posts
Found a set of nice clear headlights at the junkyard. Funny thing is the whole front end was destroyed on it in a crash except the headlights. Just on of the back backing pieces was broke all up so I just replaced it with one of mine. Worked fine.
Put a light in my box and put a door switch on it.

Nite shaded the tails. Not sure if I like it or not though.
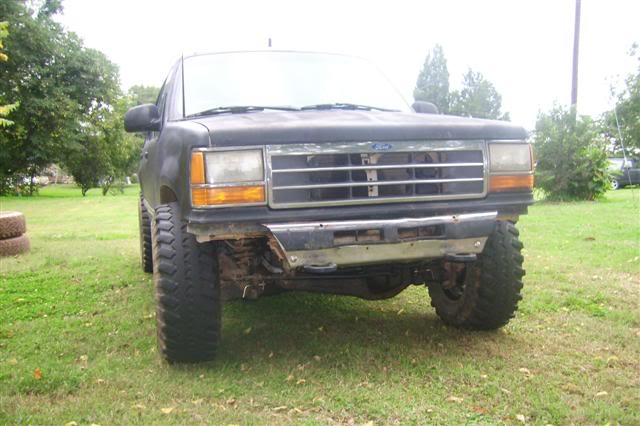
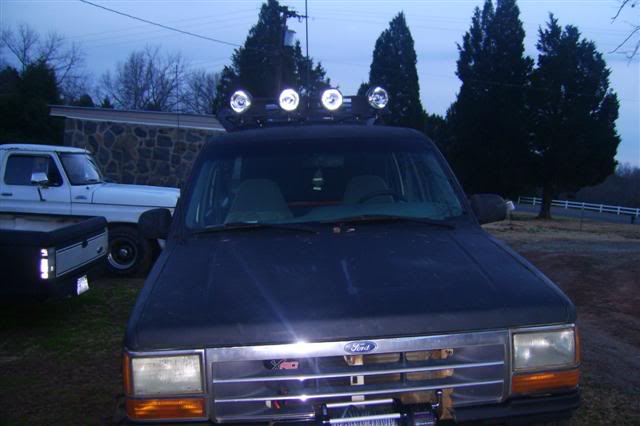
Overall shot of the front now.
Getting everything ready for the lift install and diff swap. Ran into a problem putting the front air locker in could get the backlash right and found out it calls for a different bearing on one side so I got the right bearing for it this weekend so I should get it together this coming week. Made some guessets for the drop bracket.
I shouldnt break it now. But we shall see.
Put a light in my box and put a door switch on it.
Nite shaded the tails. Not sure if I like it or not though.
Overall shot of the front now.
Getting everything ready for the lift install and diff swap. Ran into a problem putting the front air locker in could get the backlash right and found out it calls for a different bearing on one side so I got the right bearing for it this weekend so I should get it together this coming week. Made some guessets for the drop bracket.
I shouldnt break it now. But we shall see.
#14
05-13-2010
Join Date: Oct 2005
Location: Mount Holly, NC
Posts: 42
Likes: 0
Received 0 Likes
on
0 Posts
#18
05-15-2010
Join Date: Jan 2008
Location: Ontario, Canada
Posts: 1,694
Likes: 0
Received 0 Likes
on
0 Posts
#19
05-16-2010
Join Date: Oct 2005
Location: Mount Holly, NC
Posts: 42
Likes: 0
Received 0 Likes
on
0 Posts
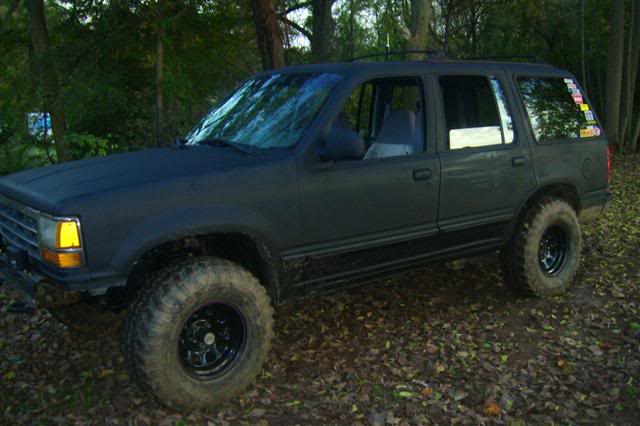
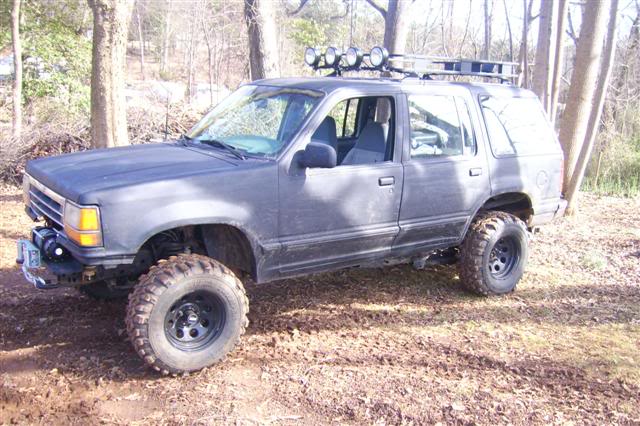
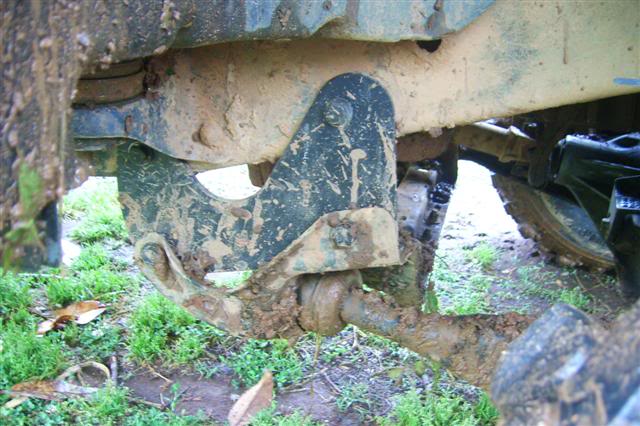
Finished getting the lift and diffs swapped out yesterday. Havent got the body lift taken off yet so it looks kind of goofy with 31's. There is actually a little negative camber so I will probably put the coil spacers back on the front and pull the body lift and see how it sits then.
Driver side f-250 brake line
Passenger side f-250 brake line
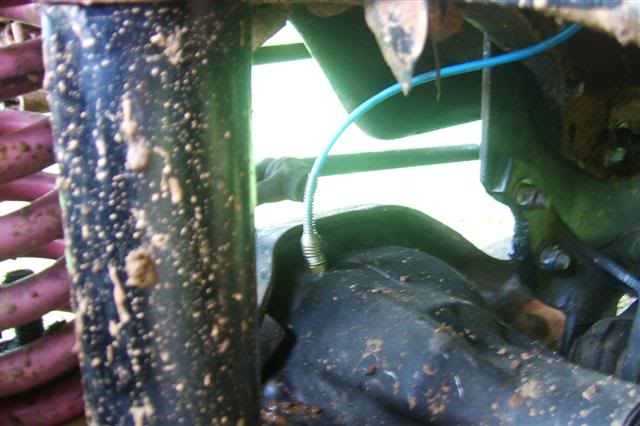
Air line going to front diff
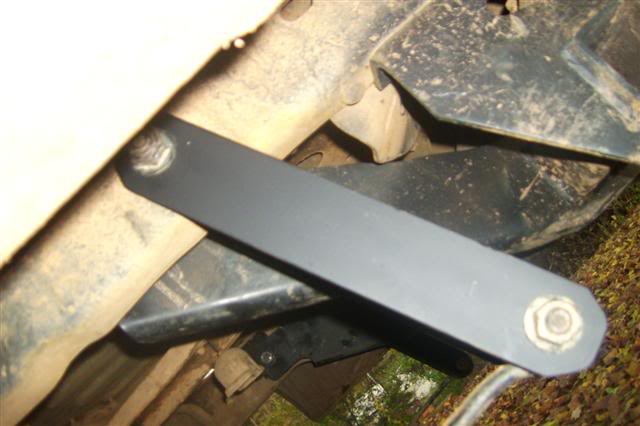
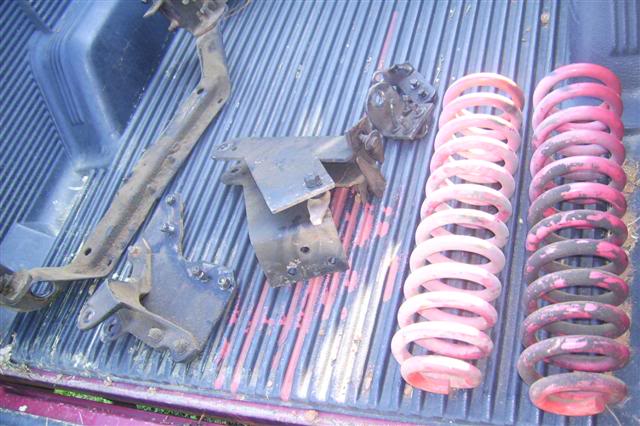
Radius arm drop bracets temporarily
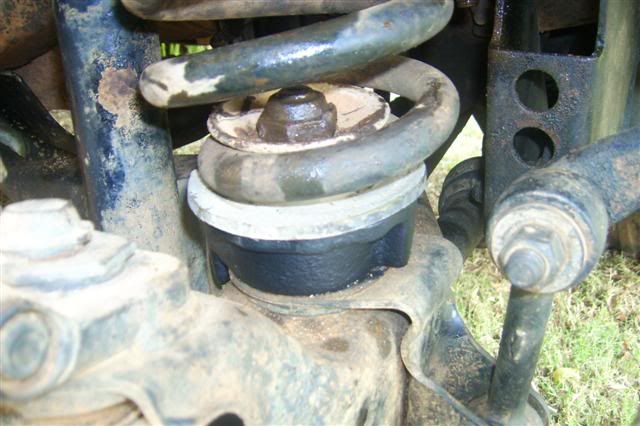
Shocks and springs

Rear end setup
1991 Explorer :: lifton8.jpg picture by Foxracin - Photobucket
Also got my HIDS yesterday and just got them put on earlier today. They seem pretty bright just have to wait until it gets dark to see. The seem like a good quality set but I dont really know this is my first set ever.
Ballasts
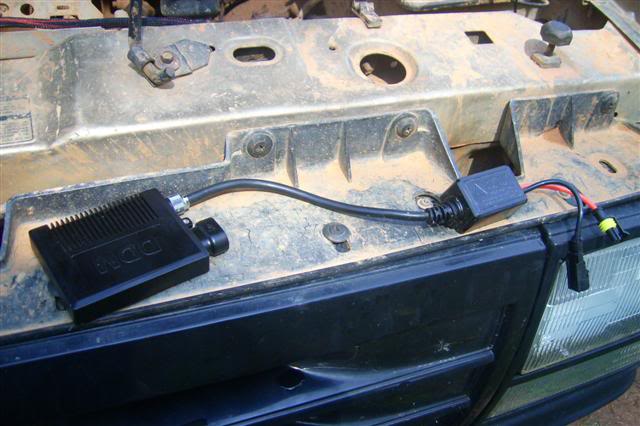
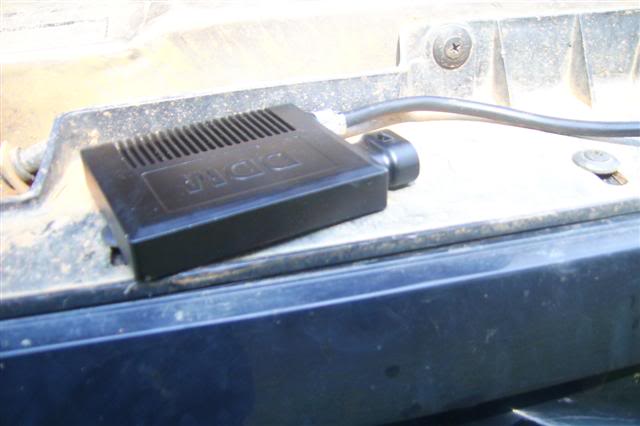
Wiring harness and controller for high/low
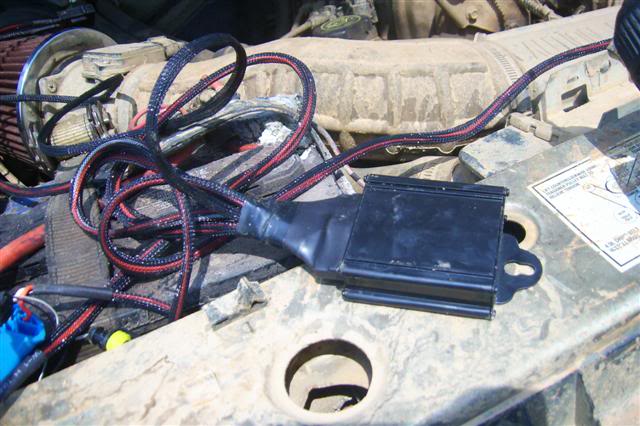
Lights on kind of hard to get a pics of in day light
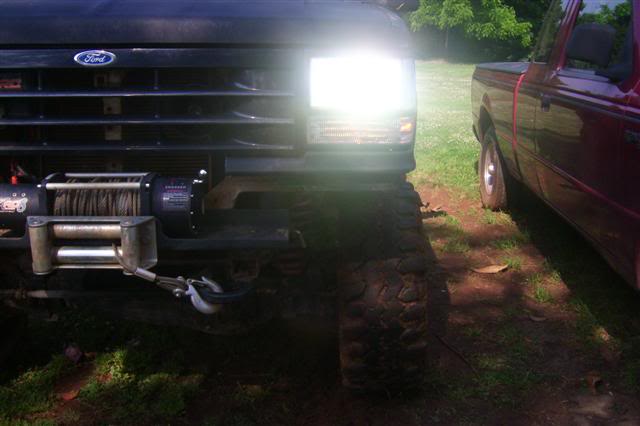
Ill get some picture of them tonight when it gets dark.
Got the money saved up to get a set of 33's. Got to find somebody that has the 33x12.50x15 BFG km2's though. Everybody seems to be out of stock of them.
Driver side f-250 brake line
Passenger side f-250 brake line
Air line going to front diff
Radius arm drop bracets temporarily
Shocks and springs
Rear end setup
1991 Explorer :: lifton8.jpg picture by Foxracin - Photobucket
Also got my HIDS yesterday and just got them put on earlier today. They seem pretty bright just have to wait until it gets dark to see. The seem like a good quality set but I dont really know this is my first set ever.
Ballasts
Wiring harness and controller for high/low
Lights on kind of hard to get a pics of in day light
Ill get some picture of them tonight when it gets dark.
Got the money saved up to get a set of 33's. Got to find somebody that has the 33x12.50x15 BFG km2's though. Everybody seems to be out of stock of them.

#22
05-22-2010
Join Date: Feb 2007
Location: Temperance Mi
Posts: 677
Likes: 0
Received 0 Likes
on
0 Posts
#23
05-22-2010
Join Date: Oct 2005
Location: Mount Holly, NC
Posts: 42
Likes: 0
Received 0 Likes
on
0 Posts
#25
05-23-2010
Join Date: Feb 2006
Location: Yuma, AZ
Posts: 813
Likes: 0
Received 0 Likes
on
0 Posts


