
Project Dragula: B3000 Rat rod


Member

Joined: Nov 2008
Posts: 89
Likes: 1
From: Newark, DE
I'm not sure but I think Photobooth on iMacs flips the image sometime from left to right. I've noticed it before in other photos on the net. (Ex. Someone who I know plays guitar right handed but looks like they're playing left handed, or a piercing someone had that has always been on one side of their body suddenly on the other side, etc)
Thread Starter
|
Member
Joined: Nov 2006
Posts: 713
Likes: 2
From: DFW Area, Tx
I didn't change the steering wheel this mac for whatever reason just flips the pictures like a mirror.. Stupid macs.
Soooooo.... Look what followed me home today!
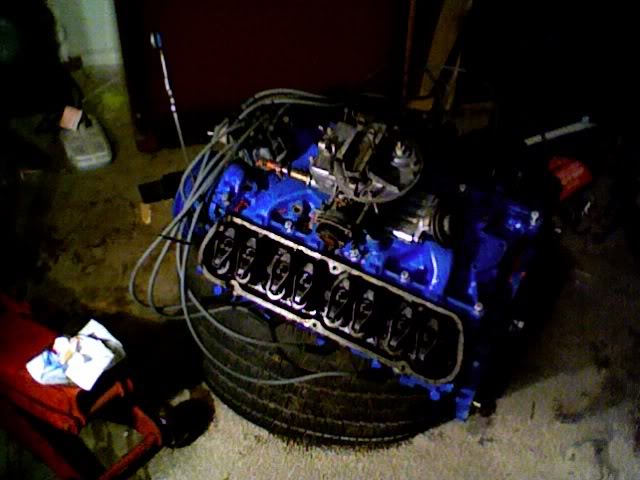
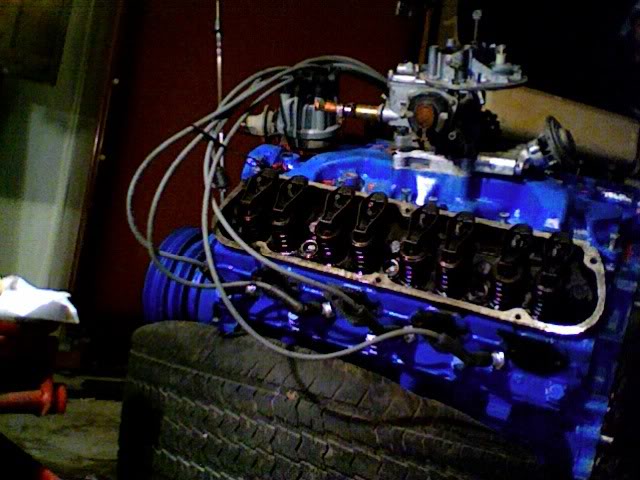
For $150 I picked up a '77 302 complete with everything less starter/flywheel, water pump, and alternator. It's in fantastic shape. Even came with a big box of parts like 2 sets of valve covers, fuel pump, mounts, ect. Hopefully within 2 or 3 months I'll be able to afford the 347 stroker rebuild kit and turn this thing into a monster! THANKS SCOTT!!!!!
Soooooo.... Look what followed me home today!
For $150 I picked up a '77 302 complete with everything less starter/flywheel, water pump, and alternator. It's in fantastic shape. Even came with a big box of parts like 2 sets of valve covers, fuel pump, mounts, ect. Hopefully within 2 or 3 months I'll be able to afford the 347 stroker rebuild kit and turn this thing into a monster! THANKS SCOTT!!!!!


Thread Starter
|
Member
Joined: Nov 2006
Posts: 713
Likes: 2
From: DFW Area, Tx
Oh dear oh dear, what have I done?!
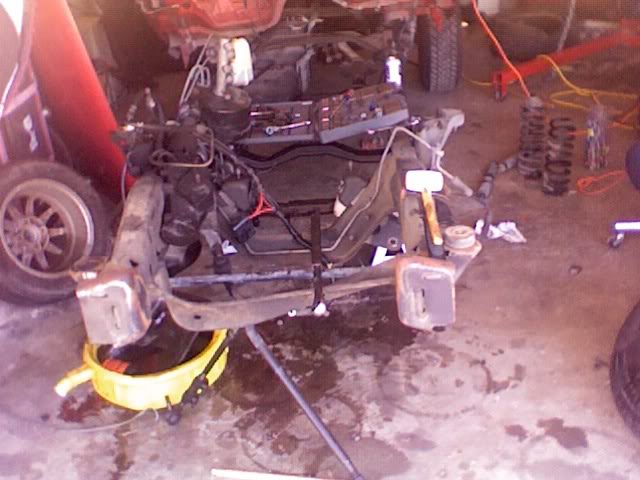
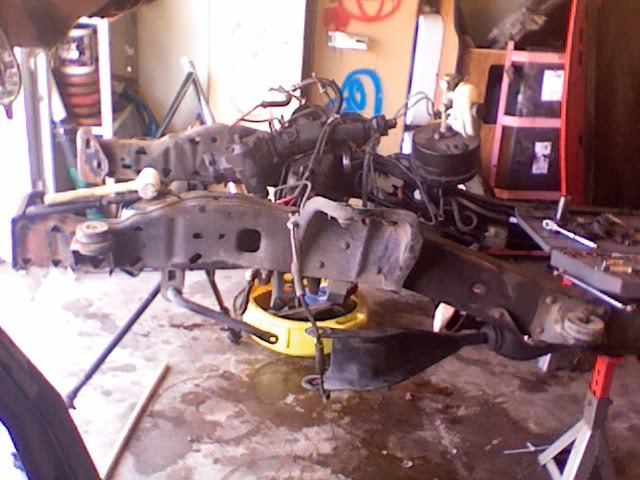
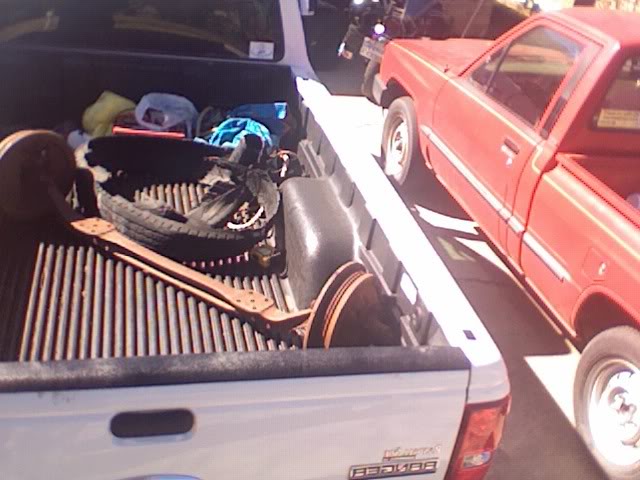
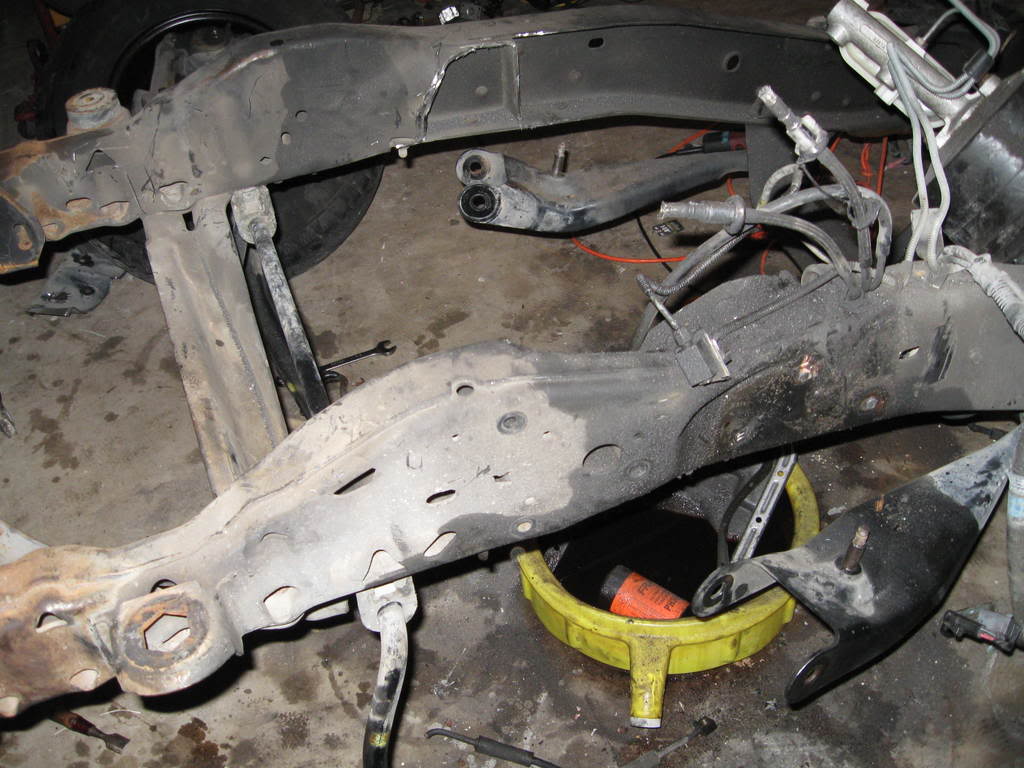
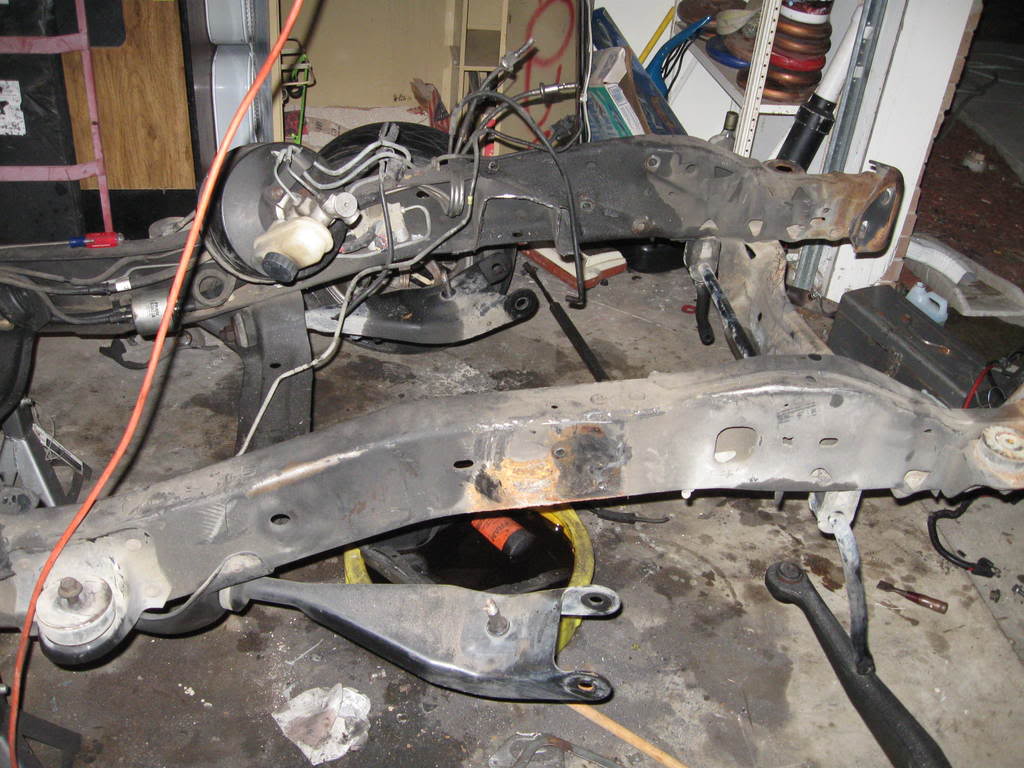
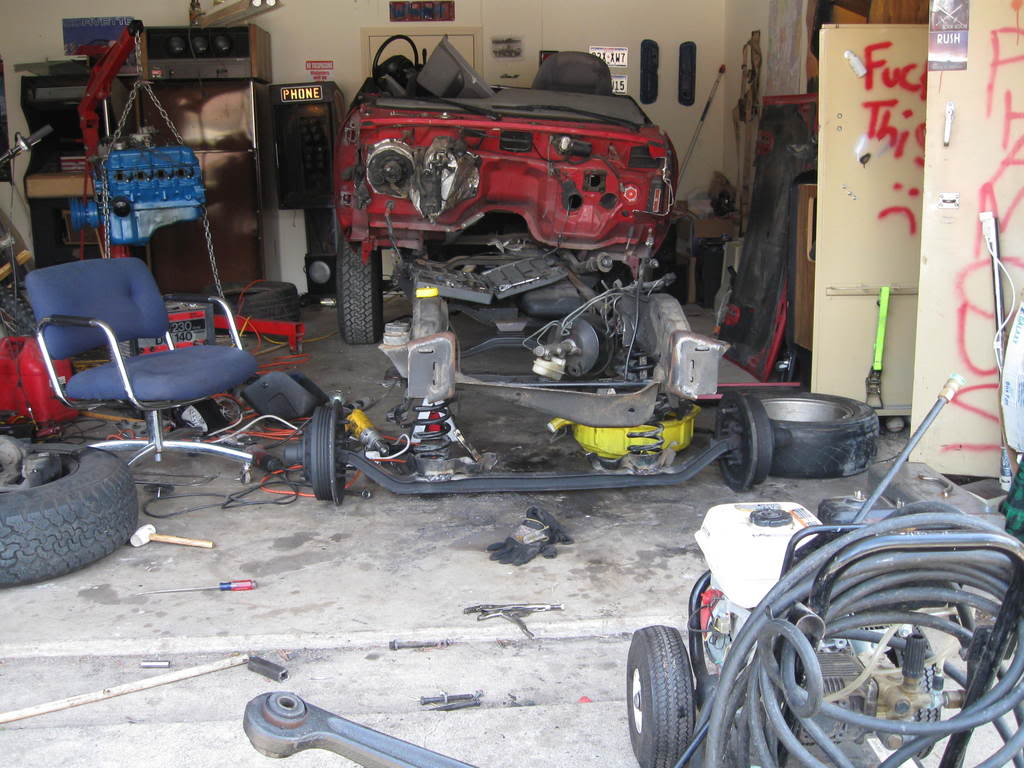
In order to put the 302 where I want it, and the radiator where I want it, the front suspension crossmember has to go, and that means the IFS has to go. I've got the front suspension totally taken totally taken off, and in a minute I'm going to start chopping off the crossmember.
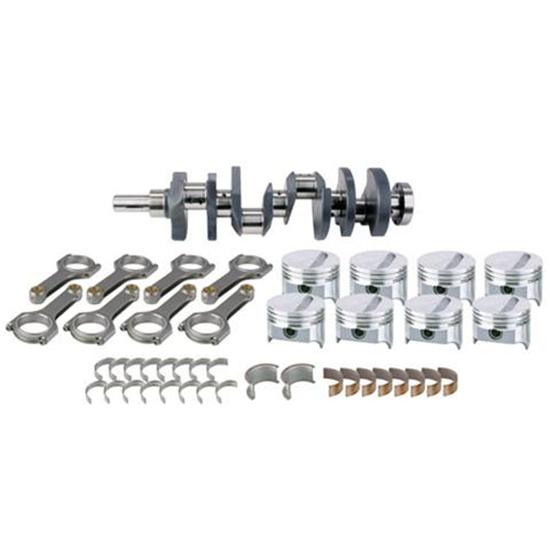
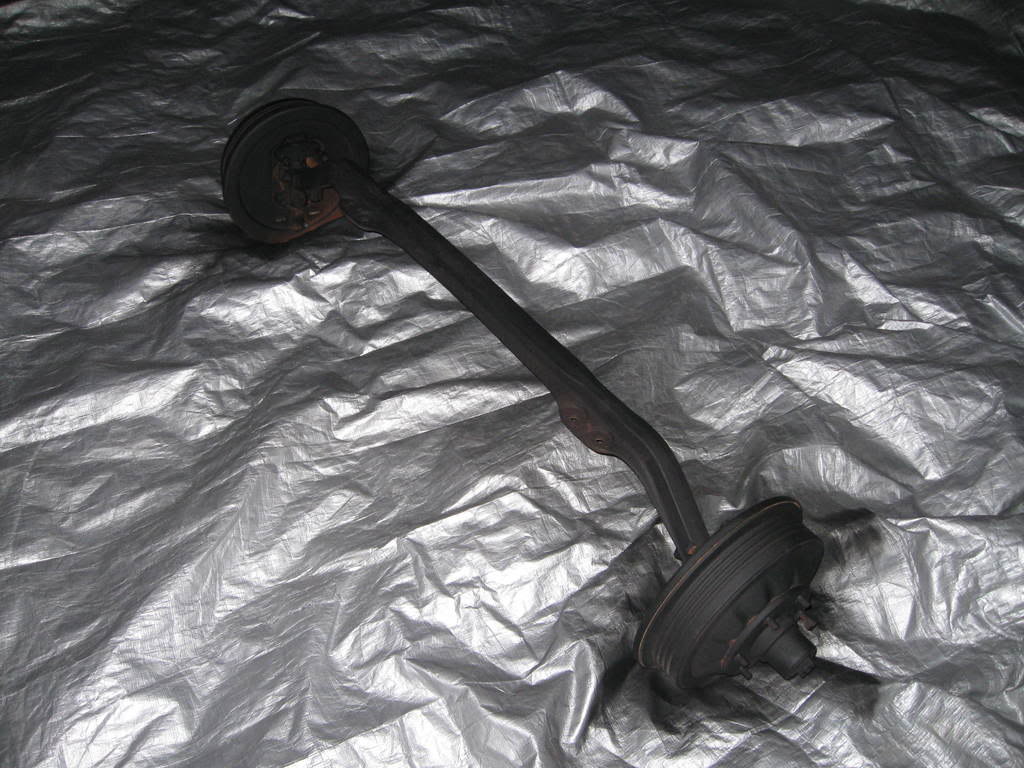
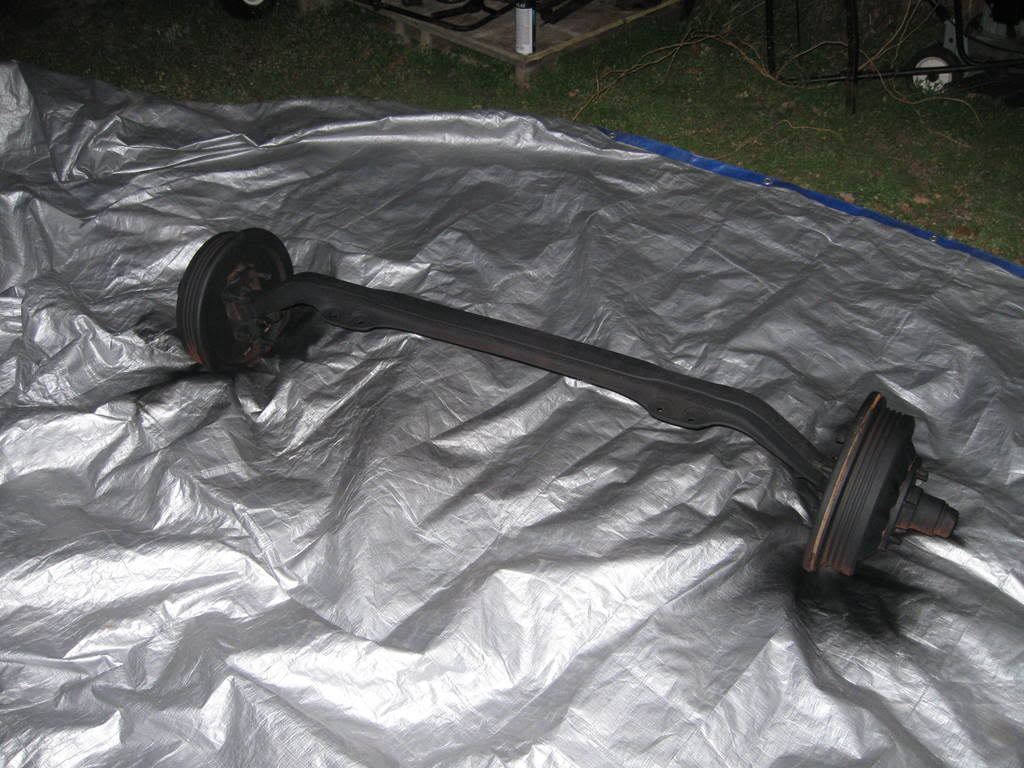
My friends are awesome. People keep coming over, seeing the rod, and seeing how close my dream is to reality, and just giving me parts. I told my roomie about the IFS dilemma, and he told me that he had a solid front axle sitting in his dad's back yard from a '57 Chevy coupe, that had been sitting there for about a year and if I could lift it I could have it... So I went and grabbed it, and it's damn near perfect. The wheels still spin free, the steering is light, and most of all, the measurements are almost dead on. Plus, it's slightly U shaped, so it will be very, very easy for me to have lower it and have longer springs than I would with the stocks IFS, giving it a better ride. Then, my buddy came over and saw the 302, noticed it still had the stock 2 bbl carb, and he is giving me an Edelbrock intake and Edelbrock 4bbl 800cfm carb for FREE. 800cfm is probably a little much for a stock ish 30, but sometime next month or the month after I'm going to bite the bullet and get a stroker kit and build it into a 347 stroker, and 800CFM will be perfect.
TADA!!! If that's not rat rod I don't know what is.
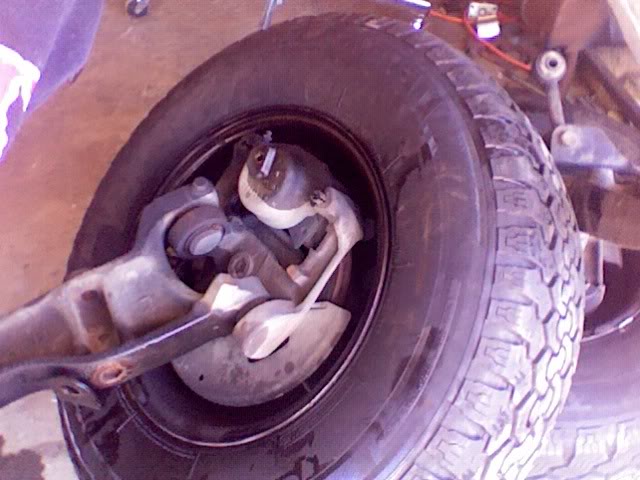
One thing I don't like is that the new axle is Chevy 6 lug, which means I'm going to have to buy new wheels for the front. However, at first glance it looks like I MIGHT be able to modify the axle to accept the Mazda hub, so I can keep the Ford 5 lug pattern and disc brakes. Either way, the front suspension is going to be a completely custom build, and I'm determinded that I can do it using only the parts I've pulled off the original suspension. I've got a game plan but it's too complex to try and describe, so you'll just have to wait and see when I'm done Either way, should be an interesting build.5
In order to put the 302 where I want it, and the radiator where I want it, the front suspension crossmember has to go, and that means the IFS has to go. I've got the front suspension totally taken totally taken off, and in a minute I'm going to start chopping off the crossmember.
My friends are awesome. People keep coming over, seeing the rod, and seeing how close my dream is to reality, and just giving me parts. I told my roomie about the IFS dilemma, and he told me that he had a solid front axle sitting in his dad's back yard from a '57 Chevy coupe, that had been sitting there for about a year and if I could lift it I could have it... So I went and grabbed it, and it's damn near perfect. The wheels still spin free, the steering is light, and most of all, the measurements are almost dead on. Plus, it's slightly U shaped, so it will be very, very easy for me to have lower it and have longer springs than I would with the stocks IFS, giving it a better ride. Then, my buddy came over and saw the 302, noticed it still had the stock 2 bbl carb, and he is giving me an Edelbrock intake and Edelbrock 4bbl 800cfm carb for FREE. 800cfm is probably a little much for a stock ish 30, but sometime next month or the month after I'm going to bite the bullet and get a stroker kit and build it into a 347 stroker, and 800CFM will be perfect.
TADA!!! If that's not rat rod I don't know what is.
One thing I don't like is that the new axle is Chevy 6 lug, which means I'm going to have to buy new wheels for the front. However, at first glance it looks like I MIGHT be able to modify the axle to accept the Mazda hub, so I can keep the Ford 5 lug pattern and disc brakes. Either way, the front suspension is going to be a completely custom build, and I'm determinded that I can do it using only the parts I've pulled off the original suspension. I've got a game plan but it's too complex to try and describe, so you'll just have to wait and see when I'm done
Either way, should be an interesting build.5
Thread Starter
|
Member
Joined: Nov 2006
Posts: 713
Likes: 2
From: DFW Area, Tx

Too busy to work right now :-p
However, I decided that I'm going to build my own old school grill rather than try and find a real grill. For one, most grills suitable for my needs are HIGHLY sought after, so they are very rare and cost upwards of $400, and there's still no guarentee that my existing radiator will fit. So, I drafted up a plan, got a quote from a local steel supplier, and it will only cost me $115 in sheet metal. Plus, this way, I can build it exactly the way I want it to look, and I can build it the exact size I want. And it's $300 cheaper, which is a transmission or another tattoo, depending on how much Sailor Jerry I've had that night.
Oh and for reference, the bolts are the bolts holding the radiator in. The sub structure, the grey bits, will be on the inner side of the grill and not seen.
Last edited by b3kbruiser; Mar 1, 2009 at 11:51 AM.
Thread Starter
|
Member
Joined: Nov 2006
Posts: 713
Likes: 2
From: DFW Area, Tx
Ok so for the front suspension... Basically I'm going to cut off and modify the upper spring retainers, weld them to the bottom of the frame rails, and then drill or use the pre-existing holes in the axle for the bottom retainer assembly, which thankfully bolts on. Then I will cut out the stock radius arms and make them into wishbones and bolt them on, and then I'll have to do some heavy duty custom fabbing and modifications to connect the tie rods onto the chevy hubs. Obviously all the welds will be gone over several times to make sure that they are strong enough... And also remember that the truck is much lighter without all the sheetmetal and a bed, so I have a little leeway. Should be amusing!
Just to make a point, let's tally up how much I've spent so far...
302 $150
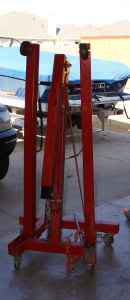
Engine lift $100
Cutting wheels $20
Welding rods $10 (subtotal $280)
Sold engine / front end -$250
$30
Rock on :)
(edit) Also, the project is officially been named! The rat rod is named Dragula, after the Rob Zombie song.
(/edit)
Just to make a point, let's tally up how much I've spent so far...
302 $150
Engine lift $100
Cutting wheels $20
Welding rods $10 (subtotal $280)
Sold engine / front end -$250
$30
Rock on :)
(edit) Also, the project is officially been named! The rat rod is named Dragula, after the Rob Zombie song.
(/edit)
Last edited by b3kbruiser; Mar 1, 2009 at 11:54 AM.
Thread Starter
|
Member
Joined: Nov 2006
Posts: 713
Likes: 2
From: DFW Area, Tx
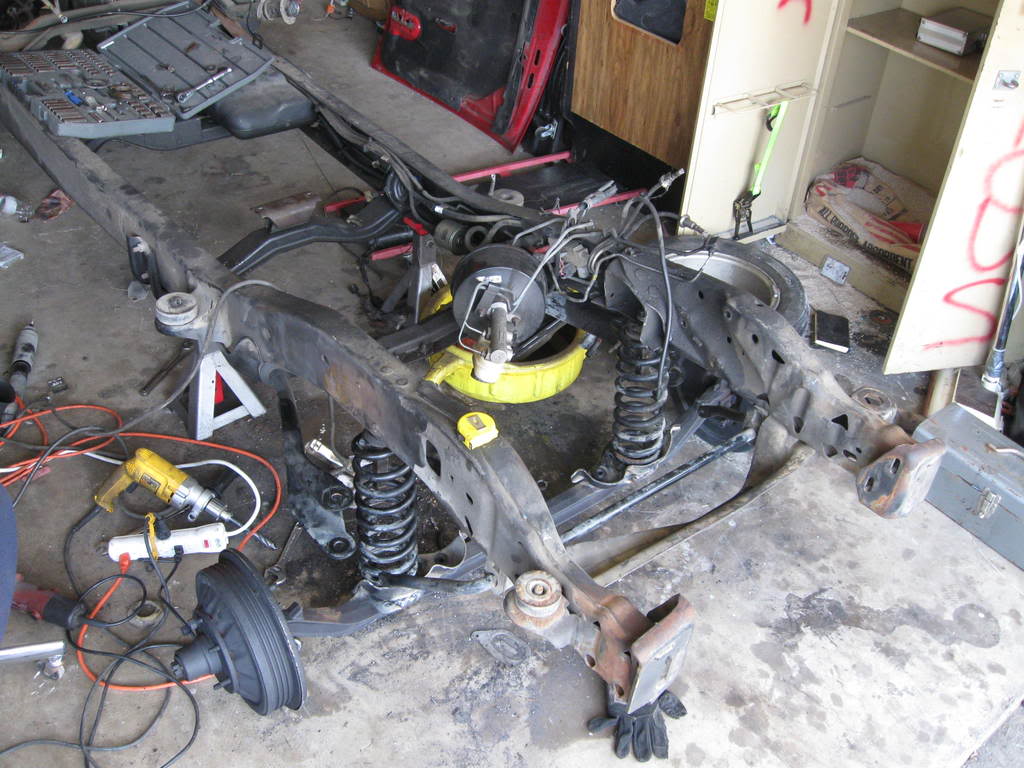
Here, while I pause for dinner and a smoke, let's have a quick live update.
Front Axle is out back getting a quick coat of anti-rust rattlecan
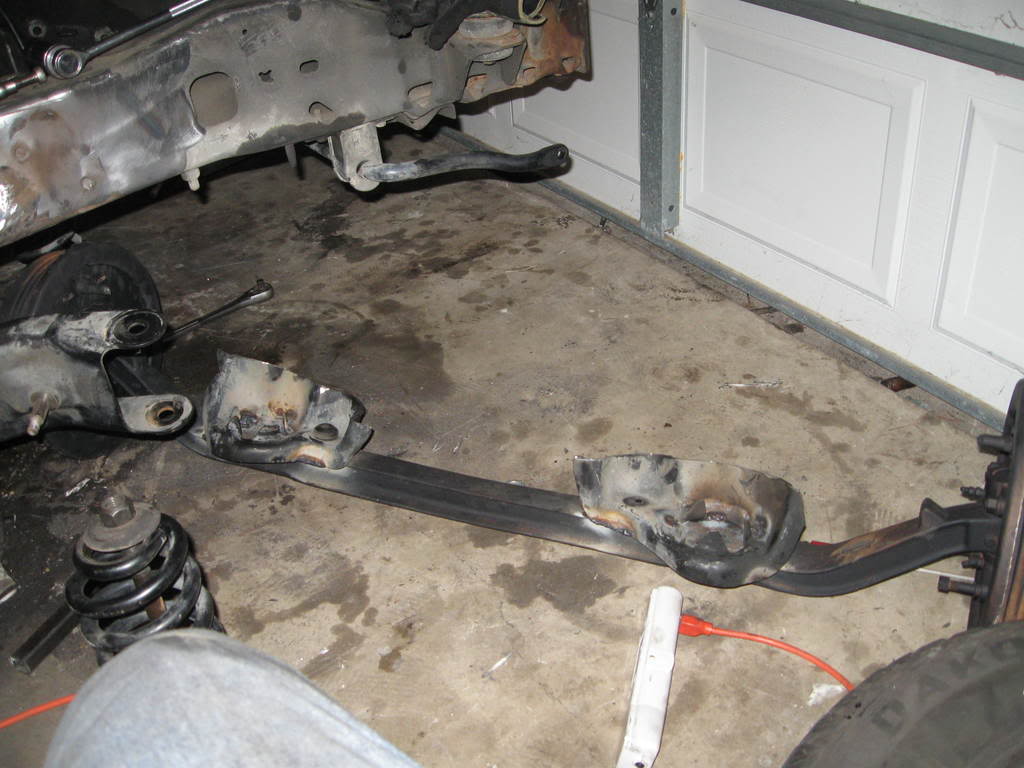
Remember where that big, stupid v6 engine crossmember was? SHAZAM!
I took off the steering box and tie rods to give myself some more space. As soon as the paint dries on the axle it's time to start working on the suspension!
Front Axle is out back getting a quick coat of anti-rust rattlecan
Remember where that big, stupid v6 engine crossmember was? SHAZAM!
I took off the steering box and tie rods to give myself some more space. As soon as the paint dries on the axle it's time to start working on the suspension!
Thread Starter
|
Member
Joined: Nov 2006
Posts: 713
Likes: 2
From: DFW Area, Tx
Well, i wanted to have the front end DONE today, but today turned out to be a huge string of hang ups and needy roommates...
Got the re-purposed brackets welded onto the axle. I was a little worried about the strength of the welds, but I welded the hell out of them and from every angle I could. If it's not good enough, I'll find out soon enough, but I'm confident in them.
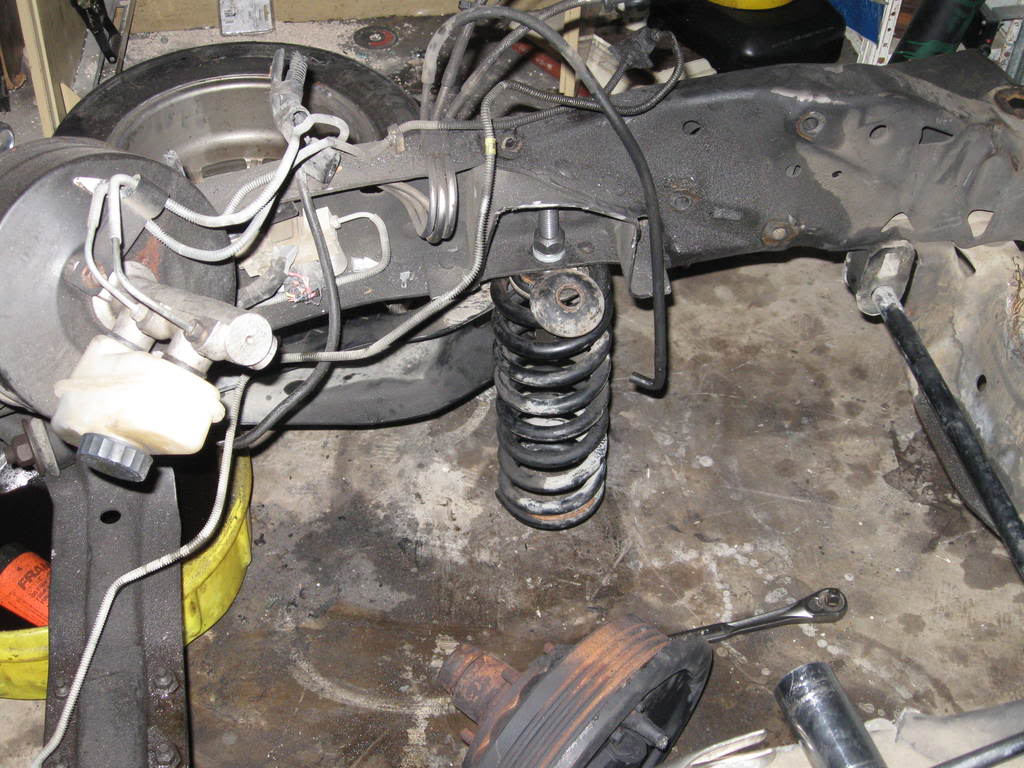
Got one spring mounted and finalized. I forgot to put that dish washer on top of the spring, so I stuck it there, snapped a pic, and put it on. I'm pretty pleased with the spring setup, It's on there nice and stiff. I had the frame resting on the spring and a jackstand and I was able to jump on it and kick it with no adverse effect, so, go me. With the radius arms providing lateral support it should be more then enough to withstand anything I throw at it. Obviously, the springs are going to get cut down, quite a bit. To add strength, I'm going to weld the springs into the brackets on the axle, so the setup should be semi - permanent. I can still take it off by unbolting the springs from the frame and unbolting the radius arms, it'll just be more of a pain than usual.
Got the re-purposed brackets welded onto the axle. I was a little worried about the strength of the welds, but I welded the hell out of them and from every angle I could. If it's not good enough, I'll find out soon enough, but I'm confident in them.
Got one spring mounted and finalized. I forgot to put that dish washer on top of the spring, so I stuck it there, snapped a pic, and put it on. I'm pretty pleased with the spring setup, It's on there nice and stiff. I had the frame resting on the spring and a jackstand and I was able to jump on it and kick it with no adverse effect, so, go me. With the radius arms providing lateral support it should be more then enough to withstand anything I throw at it. Obviously, the springs are going to get cut down, quite a bit. To add strength, I'm going to weld the springs into the brackets on the axle, so the setup should be semi - permanent. I can still take it off by unbolting the springs from the frame and unbolting the radius arms, it'll just be more of a pain than usual.


Thread Starter
|
Member
Joined: Nov 2006
Posts: 713
Likes: 2
From: DFW Area, Tx
Quick update before I head off to drive the bus again-
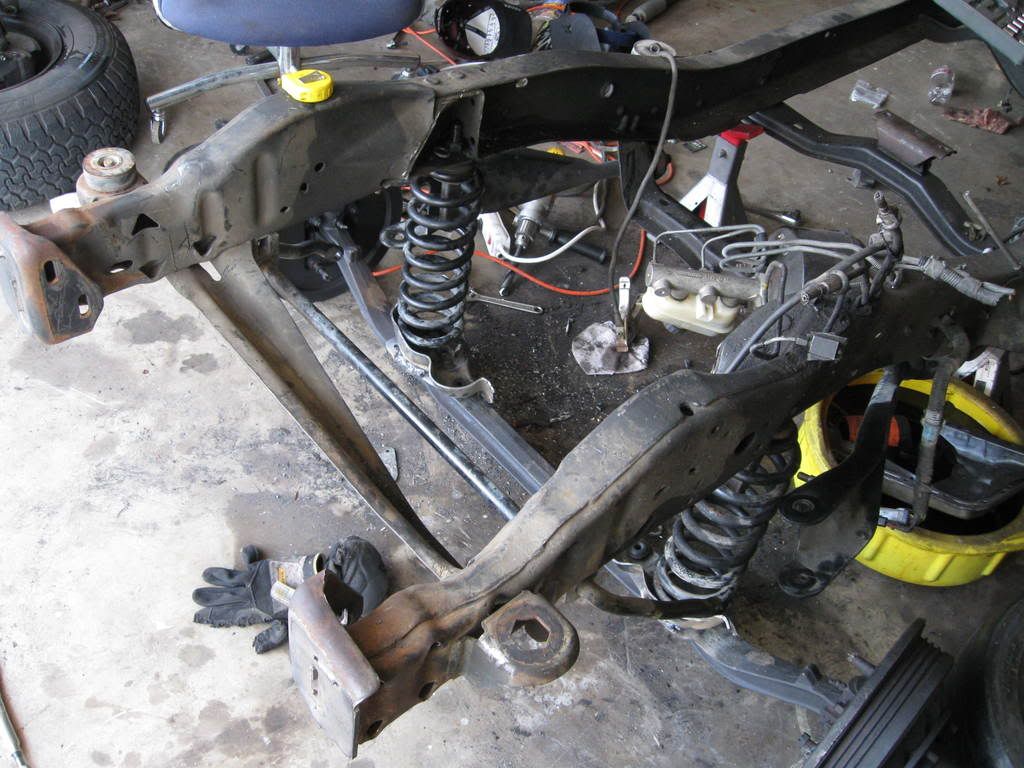
Don't mind the messy garage, we're college kids.
Got the front end mocked up. Mind that I haven't cut the springs yet, it's going to be much lower! If you look at the radius arms, the lower knuckle is at the level the axle will sit. To make it easy and strong, I'm just going to weld them right to the axle, if I need to take them off... Eh, rat rod. I can always unbolt from the frame and grind off. So, all I have left to do on the front end is cut the springs, weld the springs into the brackets, modify and weld on the radius arms, and fabricate brackets for, then re-attach the tie rods.


