
Can't see pictures

Thread Starter
|
Member

Joined: Feb 2008
Posts: 89
Likes: 0
From: Fla Tech
Can't see pictures
I just recently signed up for this forum and I was browsing though the How-To section and realized that I cannot see many pictures in thetutorials. Is there somethign wrong on my end or can other people not see them also?
Thread Starter
|
Member
Joined: Feb 2008
Posts: 89
Likes: 0
From: Fla Tech
well i can't see pictures in some other parts, that is just the one part i first noticed it in.

Joined: Jun 2004
Posts: 0
Likes: 1
What pics do you need? I put one in my bed, and can get some pics in the morning if you want.
My brother went to FIT, and I went down there a few times a year. Have you been to Bizarro's pizza over the 192 bridge at A1A, in Indiatlantic? Theres days that I miss that pizza.
My brother went to FIT, and I went down there a few times a year. Have you been to Bizarro's pizza over the 192 bridge at A1A, in Indiatlantic? Theres days that I miss that pizza.
Thread Starter
|
Member
Joined: Feb 2008
Posts: 89
Likes: 0
From: Fla Tech
That would be great. I just need the pictures of the bed cap, where to run the wires, and the power distribution box. I can either figure out the rest or wait for the rest of the pictures. It shouldnt be too hard with those main pictures.
thanks in advance.
thanks in advance.
Thread Starter
|
Member
Joined: Feb 2008
Posts: 89
Likes: 0
From: Fla Tech
haha, yes I went there the other day for the first time. Good cheap pizza right by the beach. It's awesome
Joined: Jun 2004
Posts: 0
Likes: 1
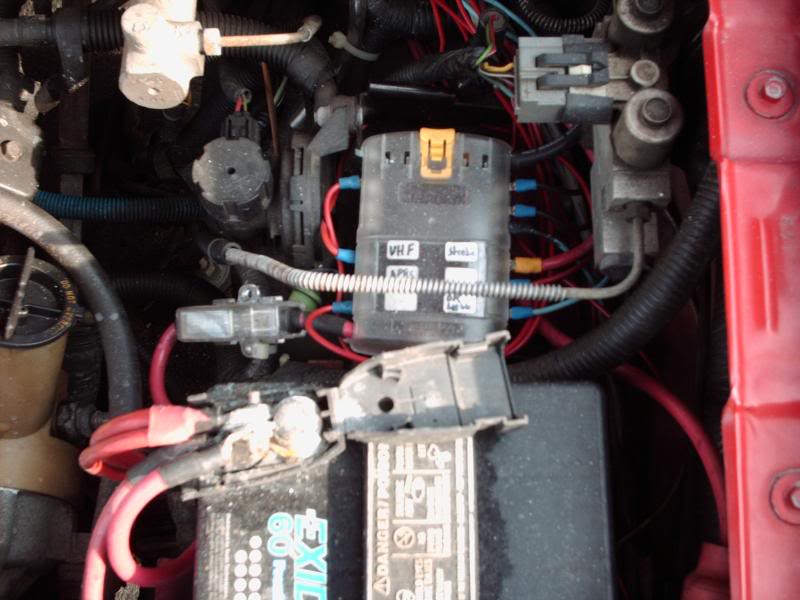
Ok, so to hook it up to the battery (or in my case, the fuse block I added, or If I remember correctly Christian hooked hid onto the stock fuse block):
Battery and Fuse Block I added:
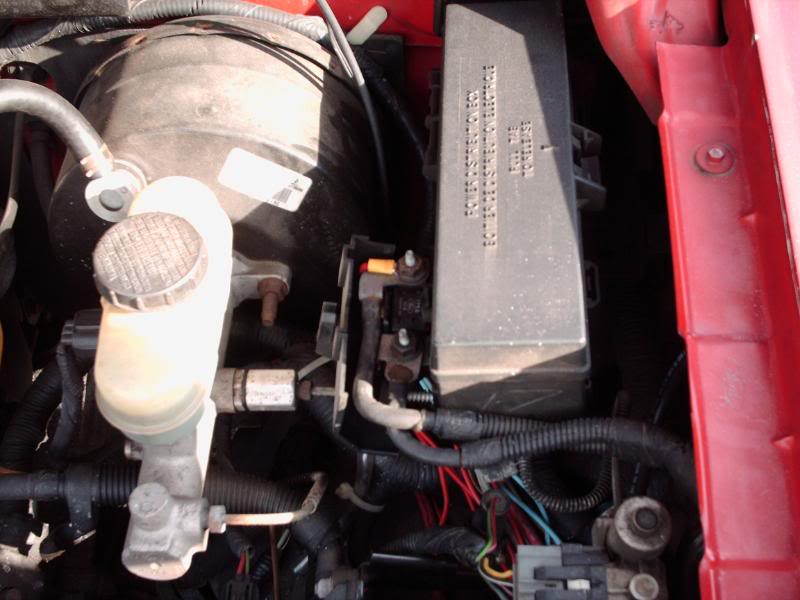
Stock Fuse block:
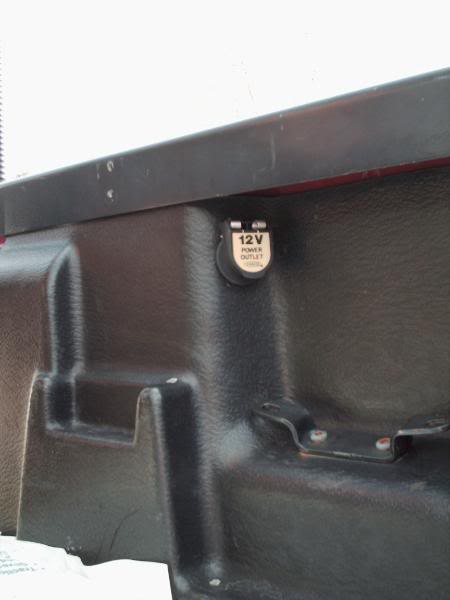
I have a step side bed, but am pretty sure there is a hole in the same location, on the fleet sides. The hole had to be made bigger (I think my receptacle needed a 1" hole) so I drilled it out with a hole saw. Also, if you have a bed liner, the hole isn't going to be pre-drilled in that, you have to do it yourself.
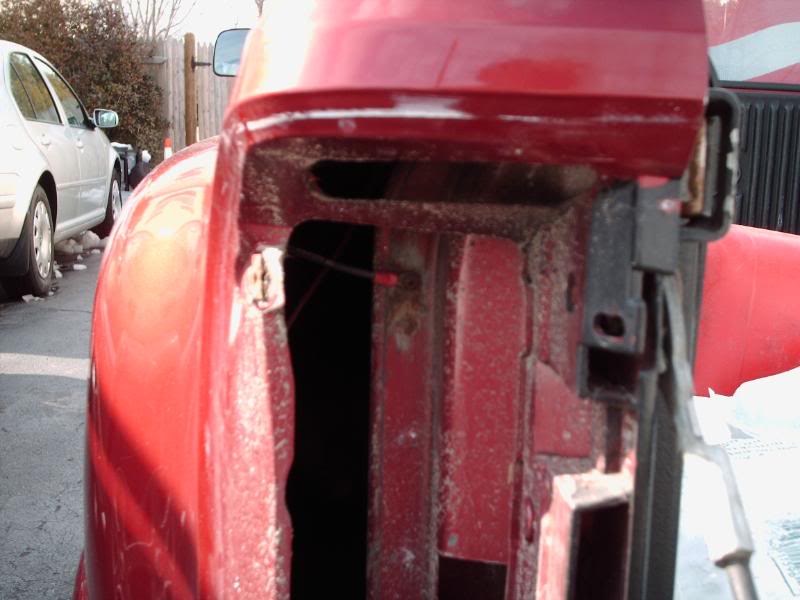
Where I put my ground (not the best, didn't cover it with any silicone or anything, but it still works) You can see the red end of the ring terminal I used, just scraped away some metal, drilled a hole, and screwed a screw in with th ring:
Battery and Fuse Block I added:
Stock Fuse block:
I have a step side bed, but am pretty sure there is a hole in the same location, on the fleet sides. The hole had to be made bigger (I think my receptacle needed a 1" hole) so I drilled it out with a hole saw. Also, if you have a bed liner, the hole isn't going to be pre-drilled in that, you have to do it yourself.
Where I put my ground (not the best, didn't cover it with any silicone or anything, but it still works) You can see the red end of the ring terminal I used, just scraped away some metal, drilled a hole, and screwed a screw in with th ring:
Member
Joined: Feb 2008
Posts: 1,121
Likes: 2
From: California

I finished installing my 12 volt outlet in the bed. It works great!. I used some snap-on clamps and wire ties to keep the power wire put and a 1 inch hole saw to hog out the hole.
I used that plastic corrugated wire tubing to protect the wire along the frame. I also used a liberal amount of electrician's tape in areas where I secured the wire (double wrapped with the plastic tubing) so it's protected the entire length. I finished the connections with silicone sealer on all terminals and a fuse (30 AMP) splice.
All in all I used:
1. About 17-18 feet of 12 gauge wire for the power (I bought 21 feet and ran one piece, cut off excess). Ground wire is less than a ft. I used an existing hole to bolt the ground terminal to, just scrape off any paint first.
2. About 18 feet of corrugated tubing .
3. A roll or so of electrician's tape.
4. Misc. wire ties and snap-ons, about 7-8
5. One inline fuse holder near battery.
6. 12 volt outlet from a Marine shop, misc. terminals.
7. 1" hole saw
Sorry, no pics, if I can get my camera operating I'll add some pics.
Thanks all,
Last edited by Rangerguy; Mar 14, 2008 at 09:20 PM. Reason: adding hole saw info

Thread
Thread Starter
Forum
Replies
Last Post
Jerry D
Interior Semi-Tech
27
Jan 27, 2008 08:54 PM


