
Just another flop body...lil clip


yes...*sigh* Previous owner's let the nice TEXAS HEAT take care of the paint...or lack there of .....
1990 Mustang coupe. Stock bottom end. Gt40 heads (upgraded springs from AlexParts.com) 1.6 rockers, E303 cam, gt40 lower, explorer gt40 upper. 65mm t/b, BBK fenderwell cold air intake, BBK 1 3/4 ceramic coated longtubes, offroad h-pipe, Borla Pro XS mufflers, 3.55 gears, SVO girdle, weld in subframe connectors, Wild Rides Torque box reinforcements, sn95 5-lug swap, 1999 17x8 polished cobra rims, Nitto NT555 tires.Stock T-5, pro 5.0 shifter, Steeda Tri-ax handle, Hurst pistol grip handle, SVE Mongoose clutch, billet firewall adjuster/quadrant. Otherwise stock all the way down to the Ford Tape Deck. Oh and it's a Canadian model too
Dang man, that's quite the list! I thought I heard a nice cam lope lol.
Ever tried that set up at the strip?? Sounds like it should be some pretty quick times with that setup.
Also, are you pleased with the Pro 5.0 short throw? I have been juggling with the idea to get one for a while. Or any short throw at that. The stock one feels so sloppy when running the gears quickly.
yes I have...pretty slow though....our local track you have to go THROUGH the water box. Now way to go around it. With the stock radials on I've gone 13.89...haven't tried with drag radials yet. But it's not really setup for the strip...I do road course/autocross.
The Pro 5.0 "power tower" is what I have, and I'm extremely pleased with it. Not really happy with the steeda tri-ax. Broken it off, but I do think that has to do with the pistol grip...allows to much leverage. So I'm going to a 03 cobra style shift ****. The stock one needs to go into the garbage can. Not only will you be faster shifting, but it helps extend the life of the trans, as long as the positive stops are setup properly.
Ah I gotcha. Makes sense with the frame connectors and shock tower mods, my bad lol.
Ok, I will look up some info on that shifter. I am trying to keep my Mustang as stock "looking" as possible. Some short throws I have read about still allow you the option to use the stock arm and ****. That's what I am interested in. My car is strictly a weekend/nice day driver, so I don't think much pressure will be applied in my case to the shifter.
Thanks for your input!
Torque box upgrade day/night!!
Just to those who are thinking about doing this....the lowers are a piece of cake. As long as you remember that you can lower and raise the diff in order to gain you clearance, for drilling your holes (for the uppers). The upper's are a pain in the ***...and I suggest taking breaks when you get to a point that creates a challenge...I was at the point of throwing tools.
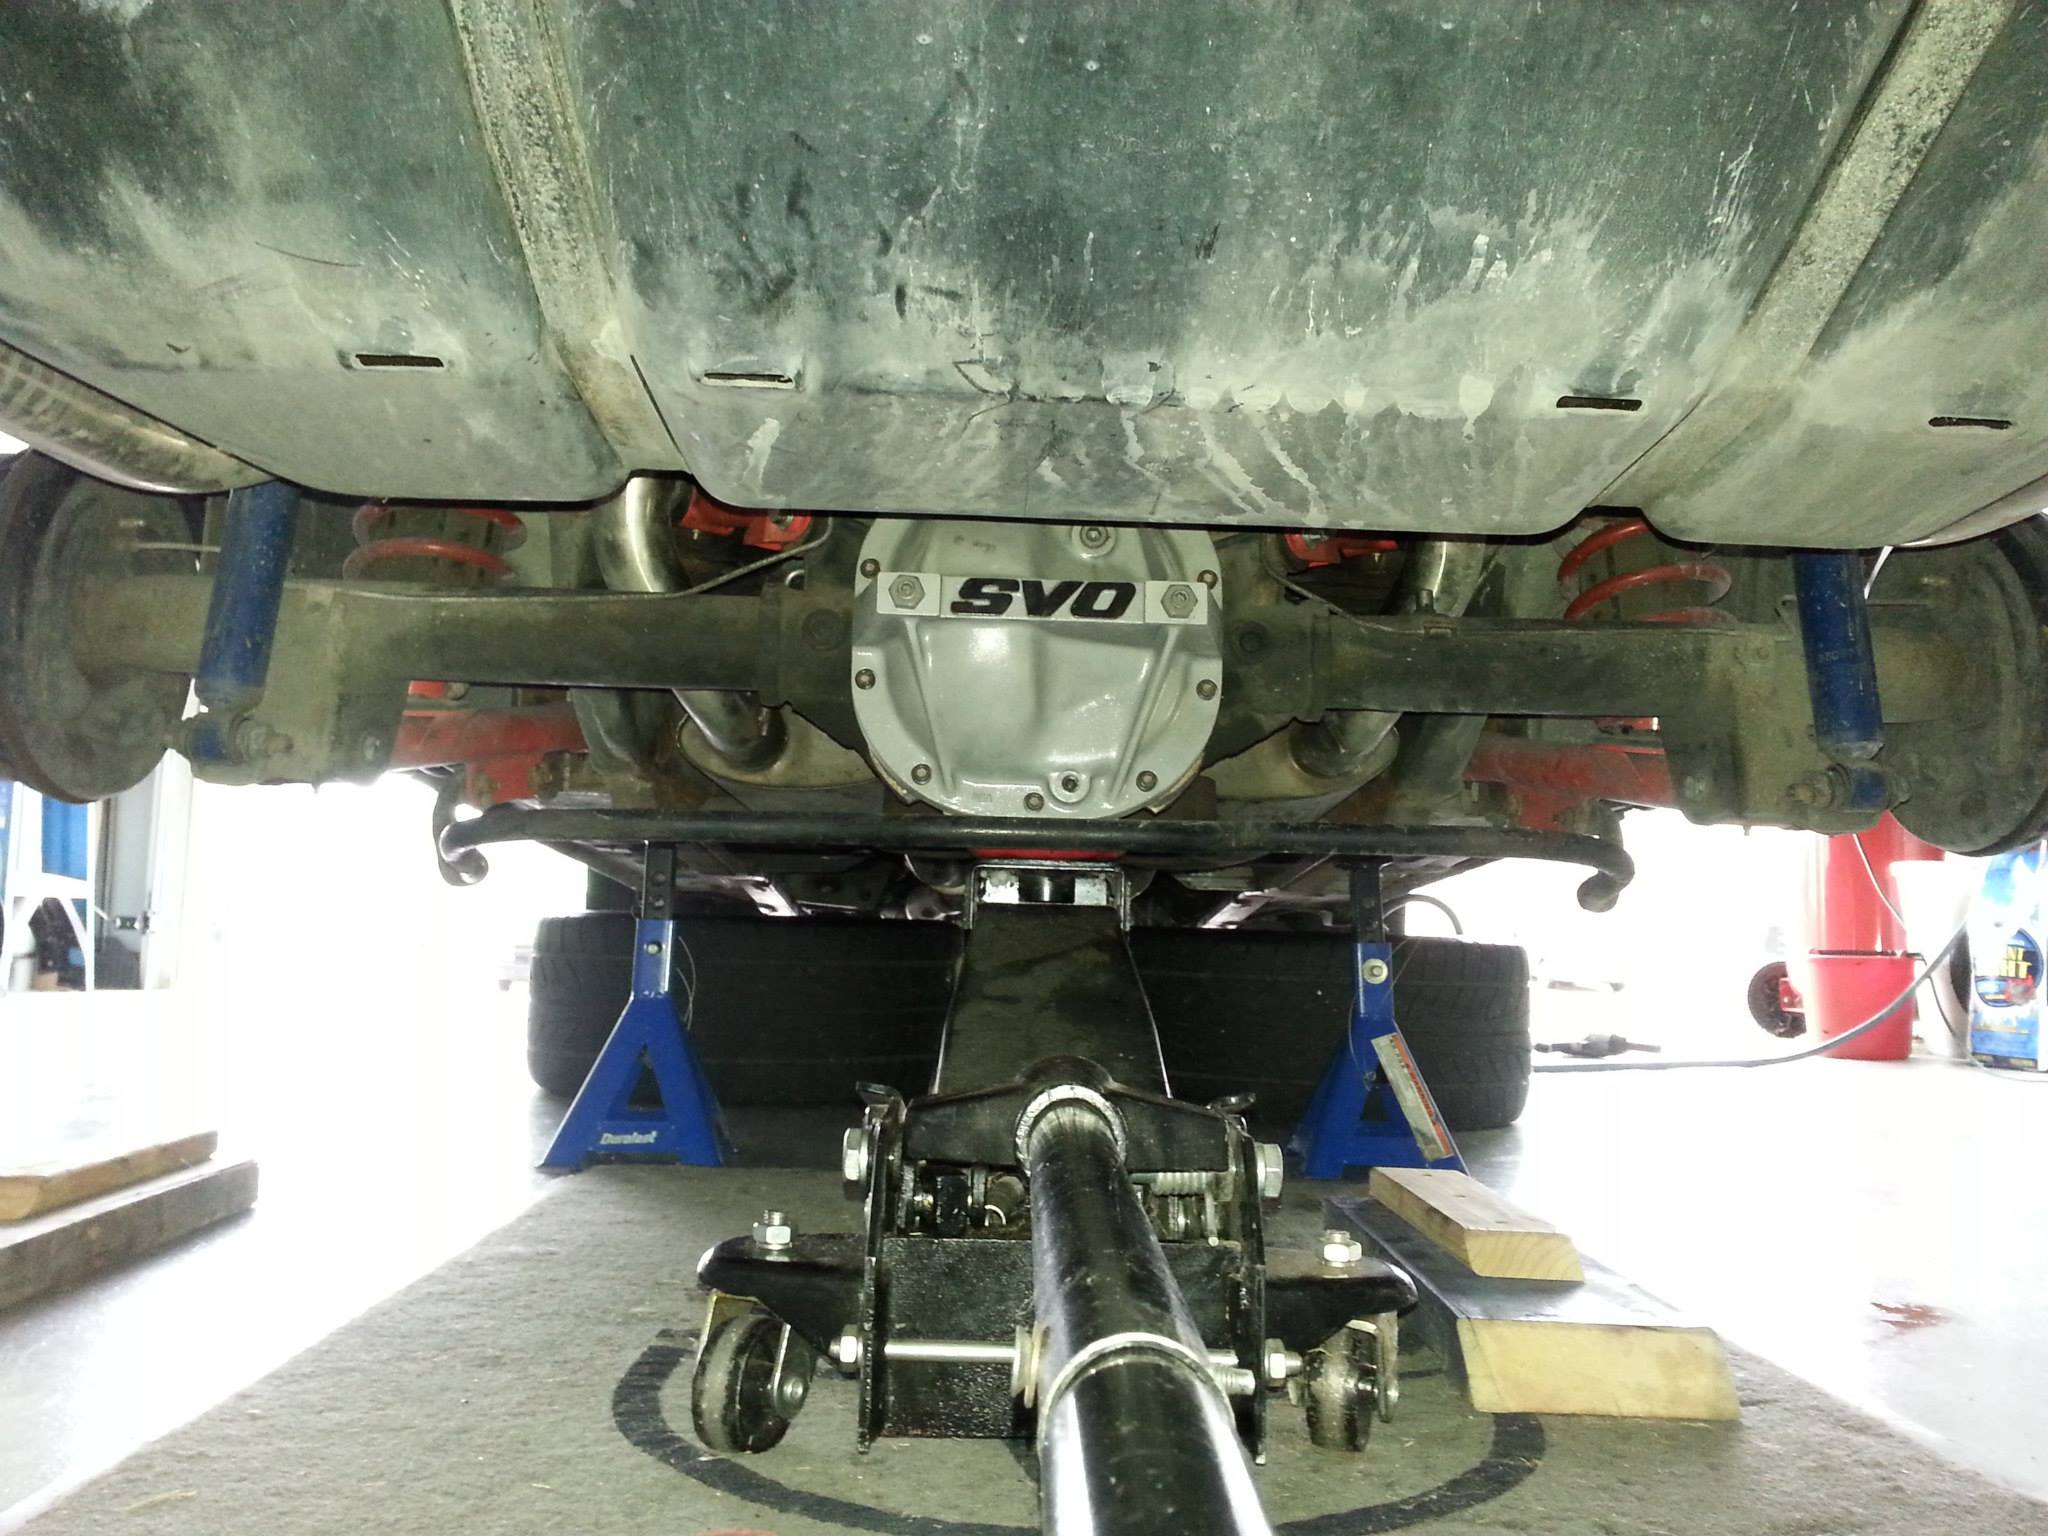
Zipped the tires off and got to it:

Torque box:

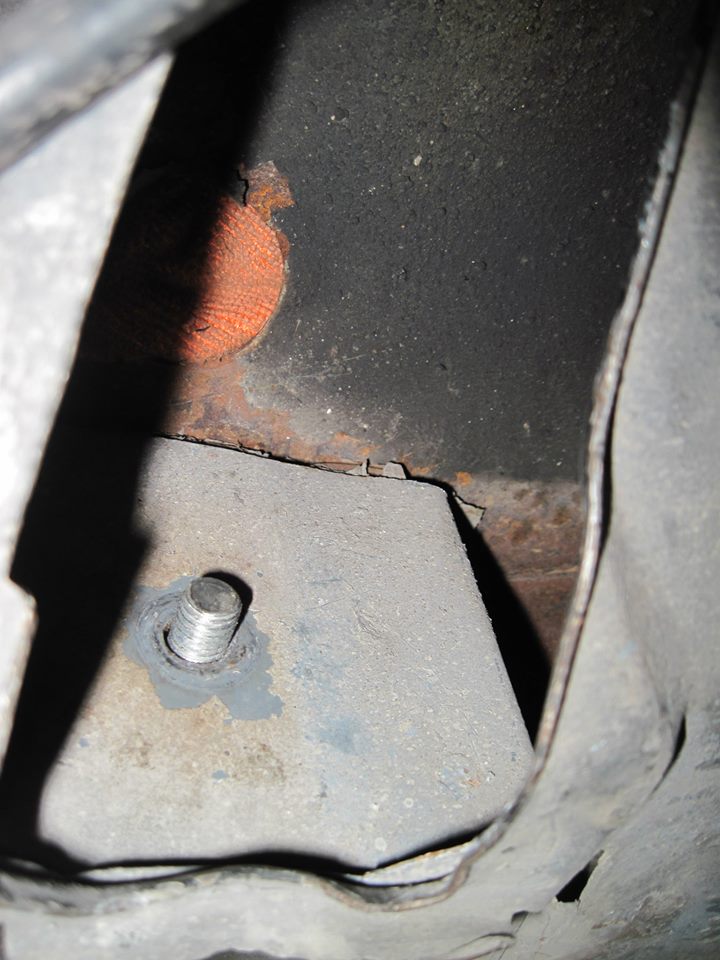
Removed lower control arm fwd mounting bolt (torque box reinforcement ties in with lower control arm)

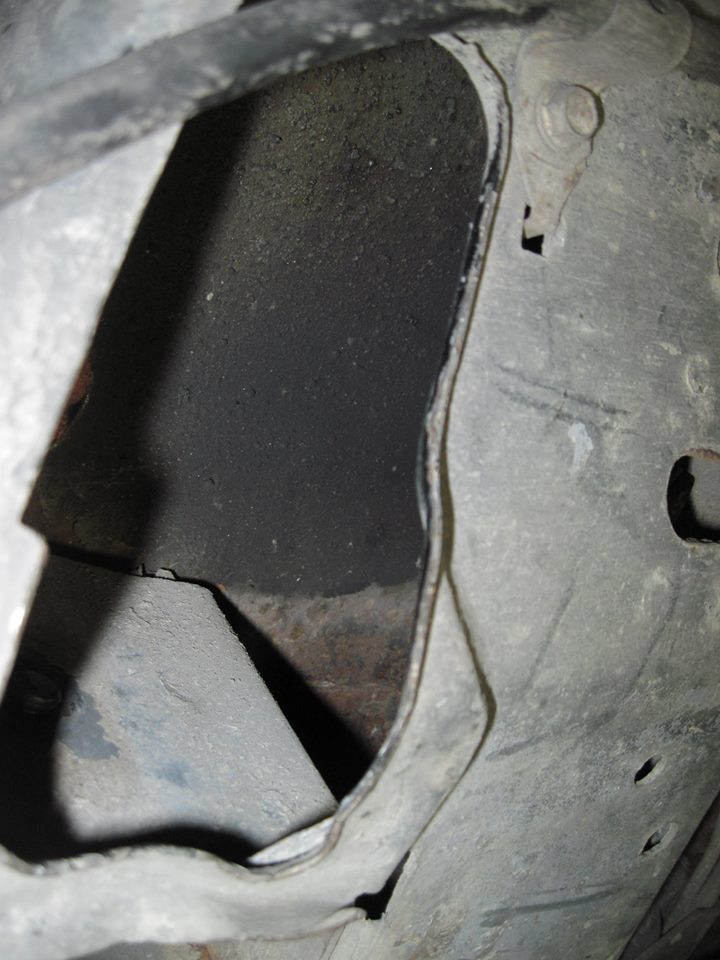
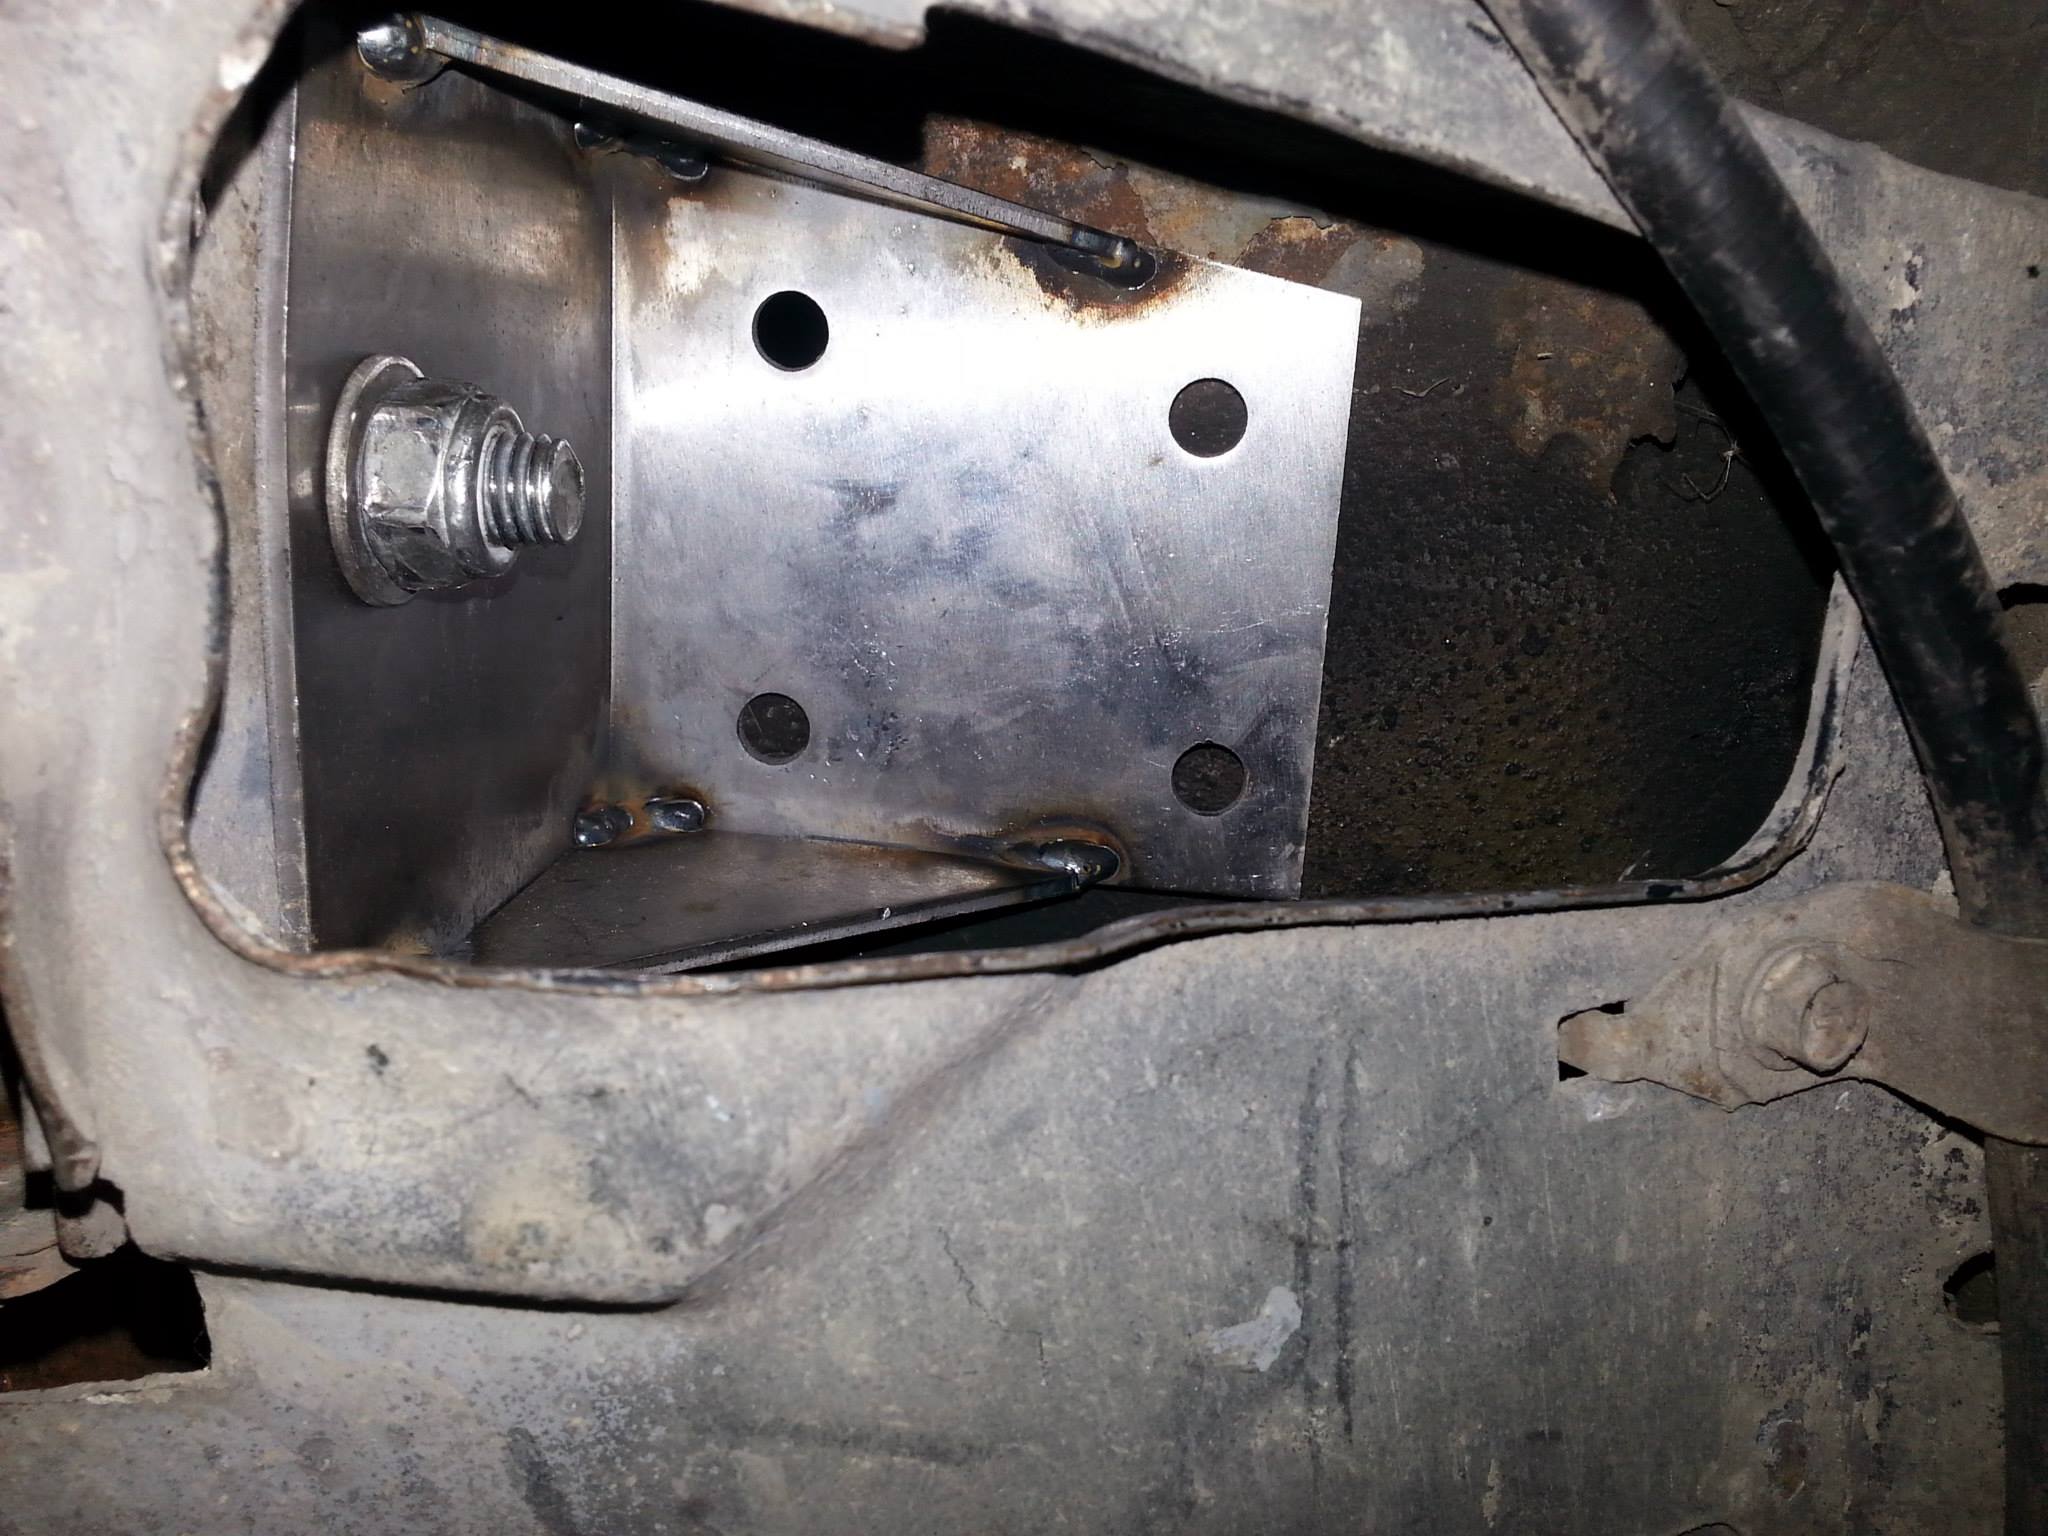
Feeding the torque box reinforcment box inside the box:


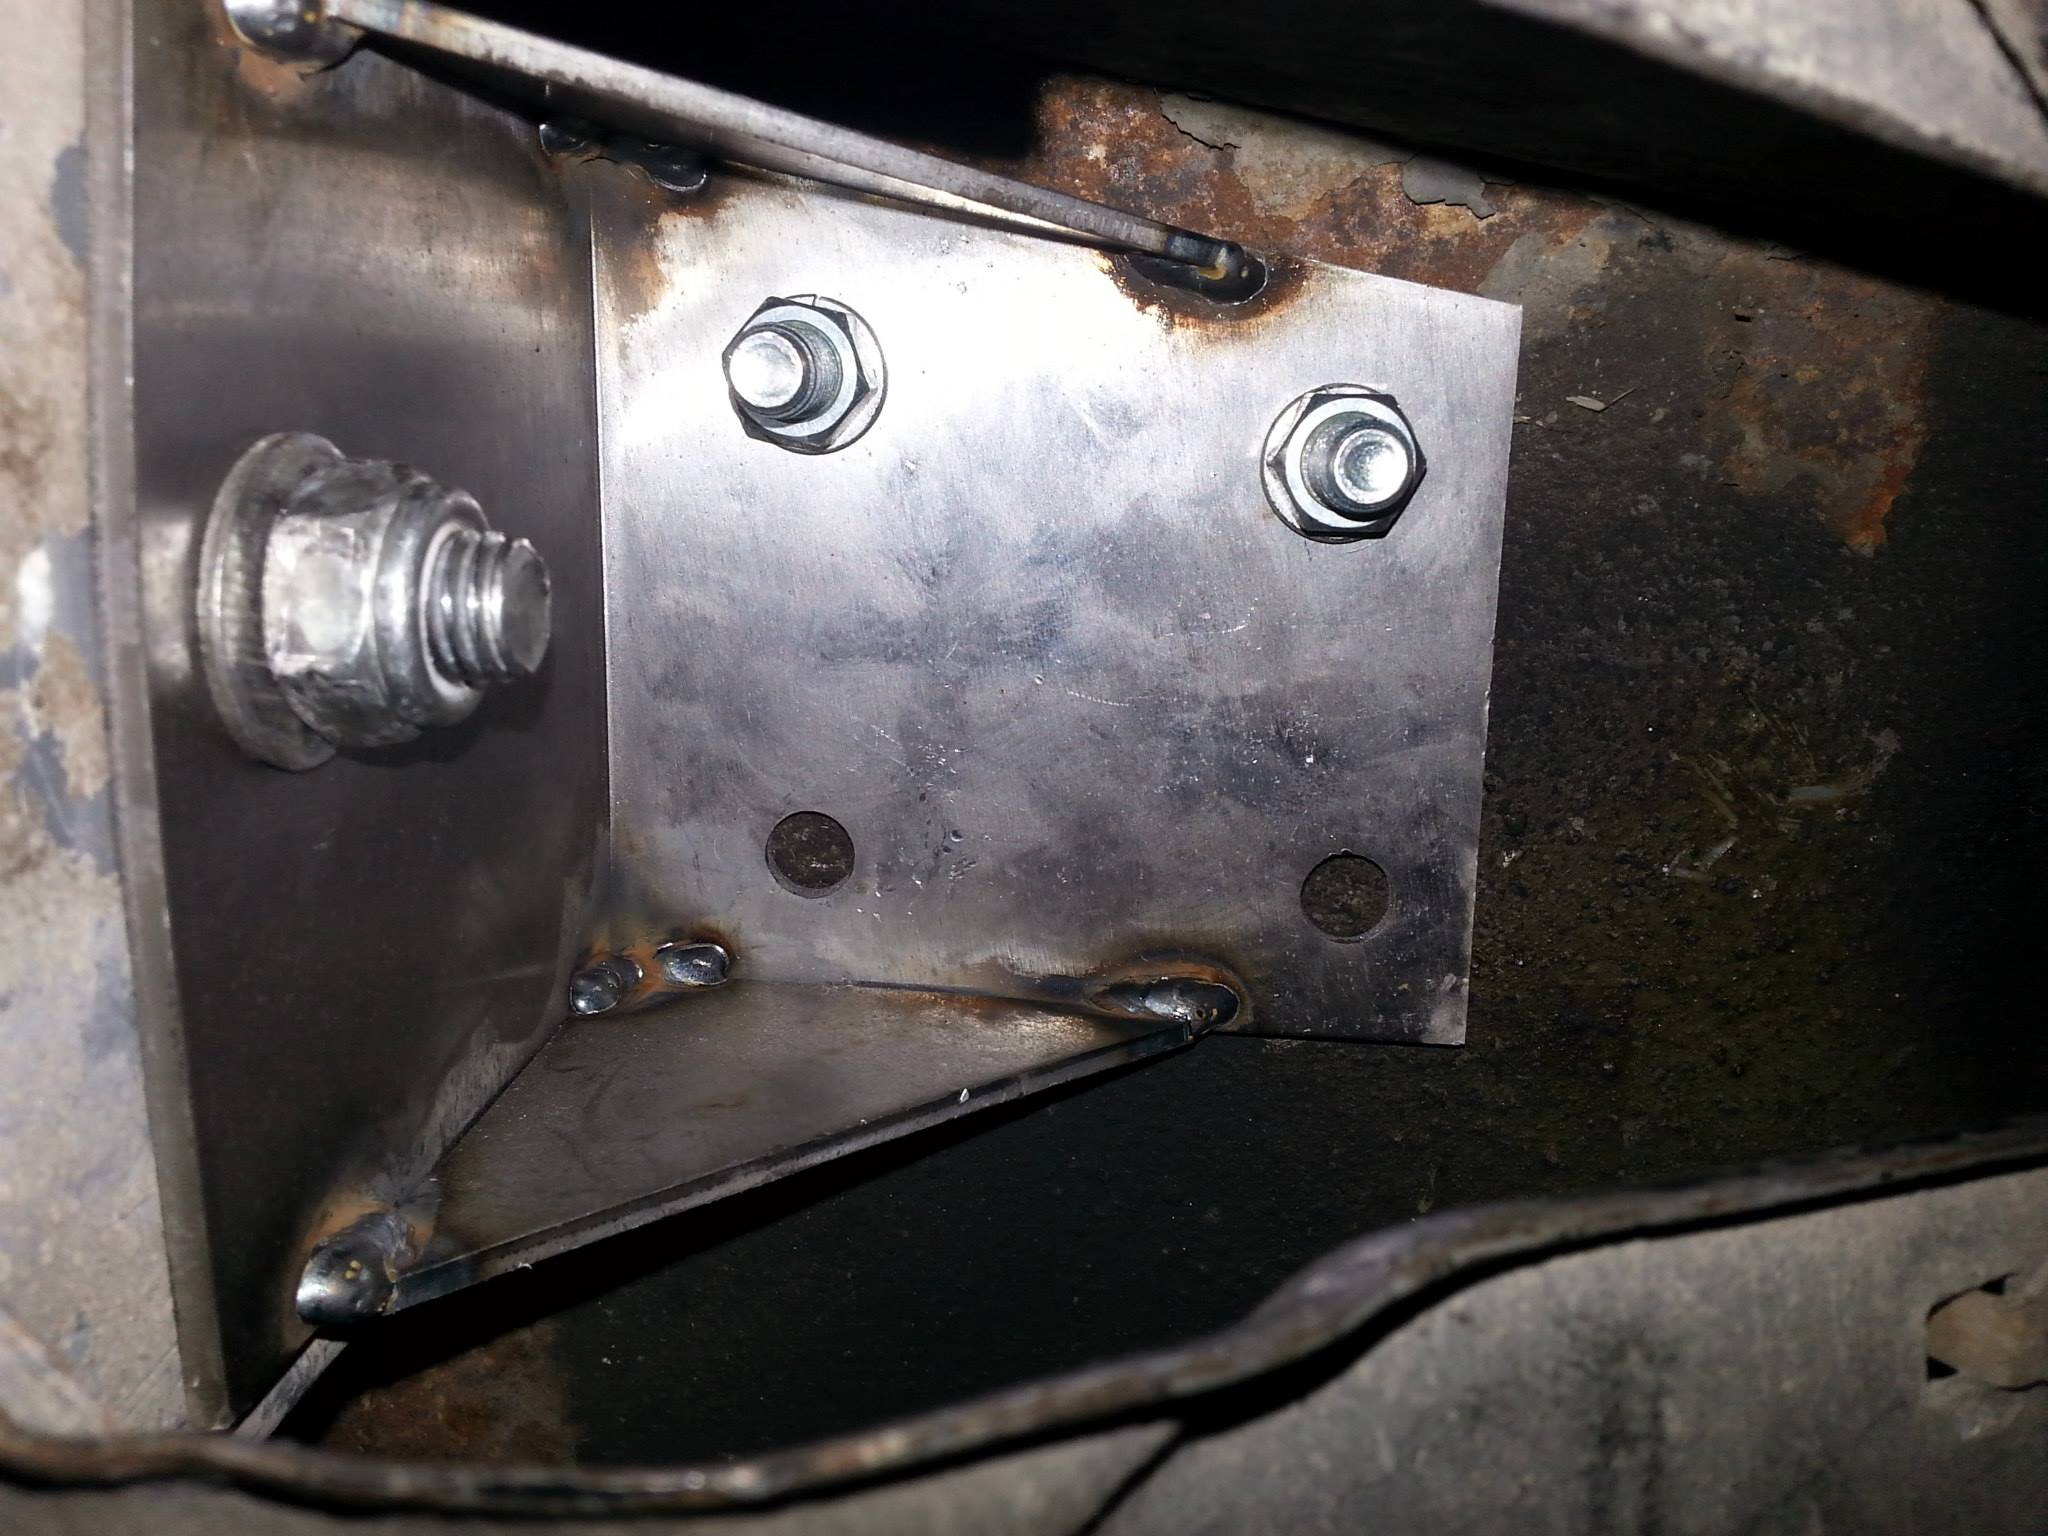
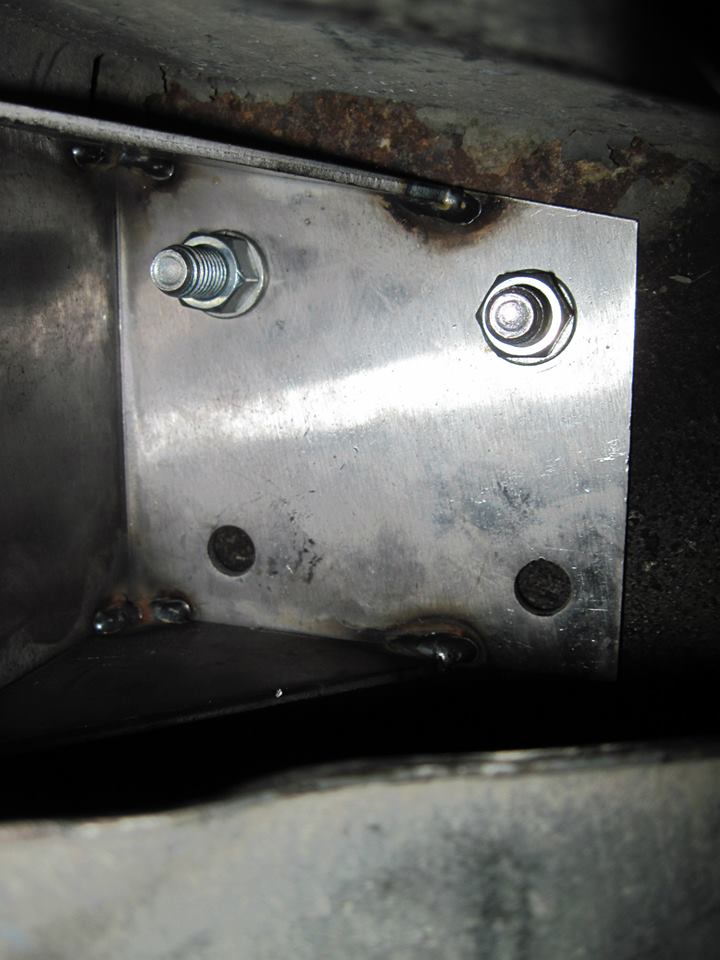
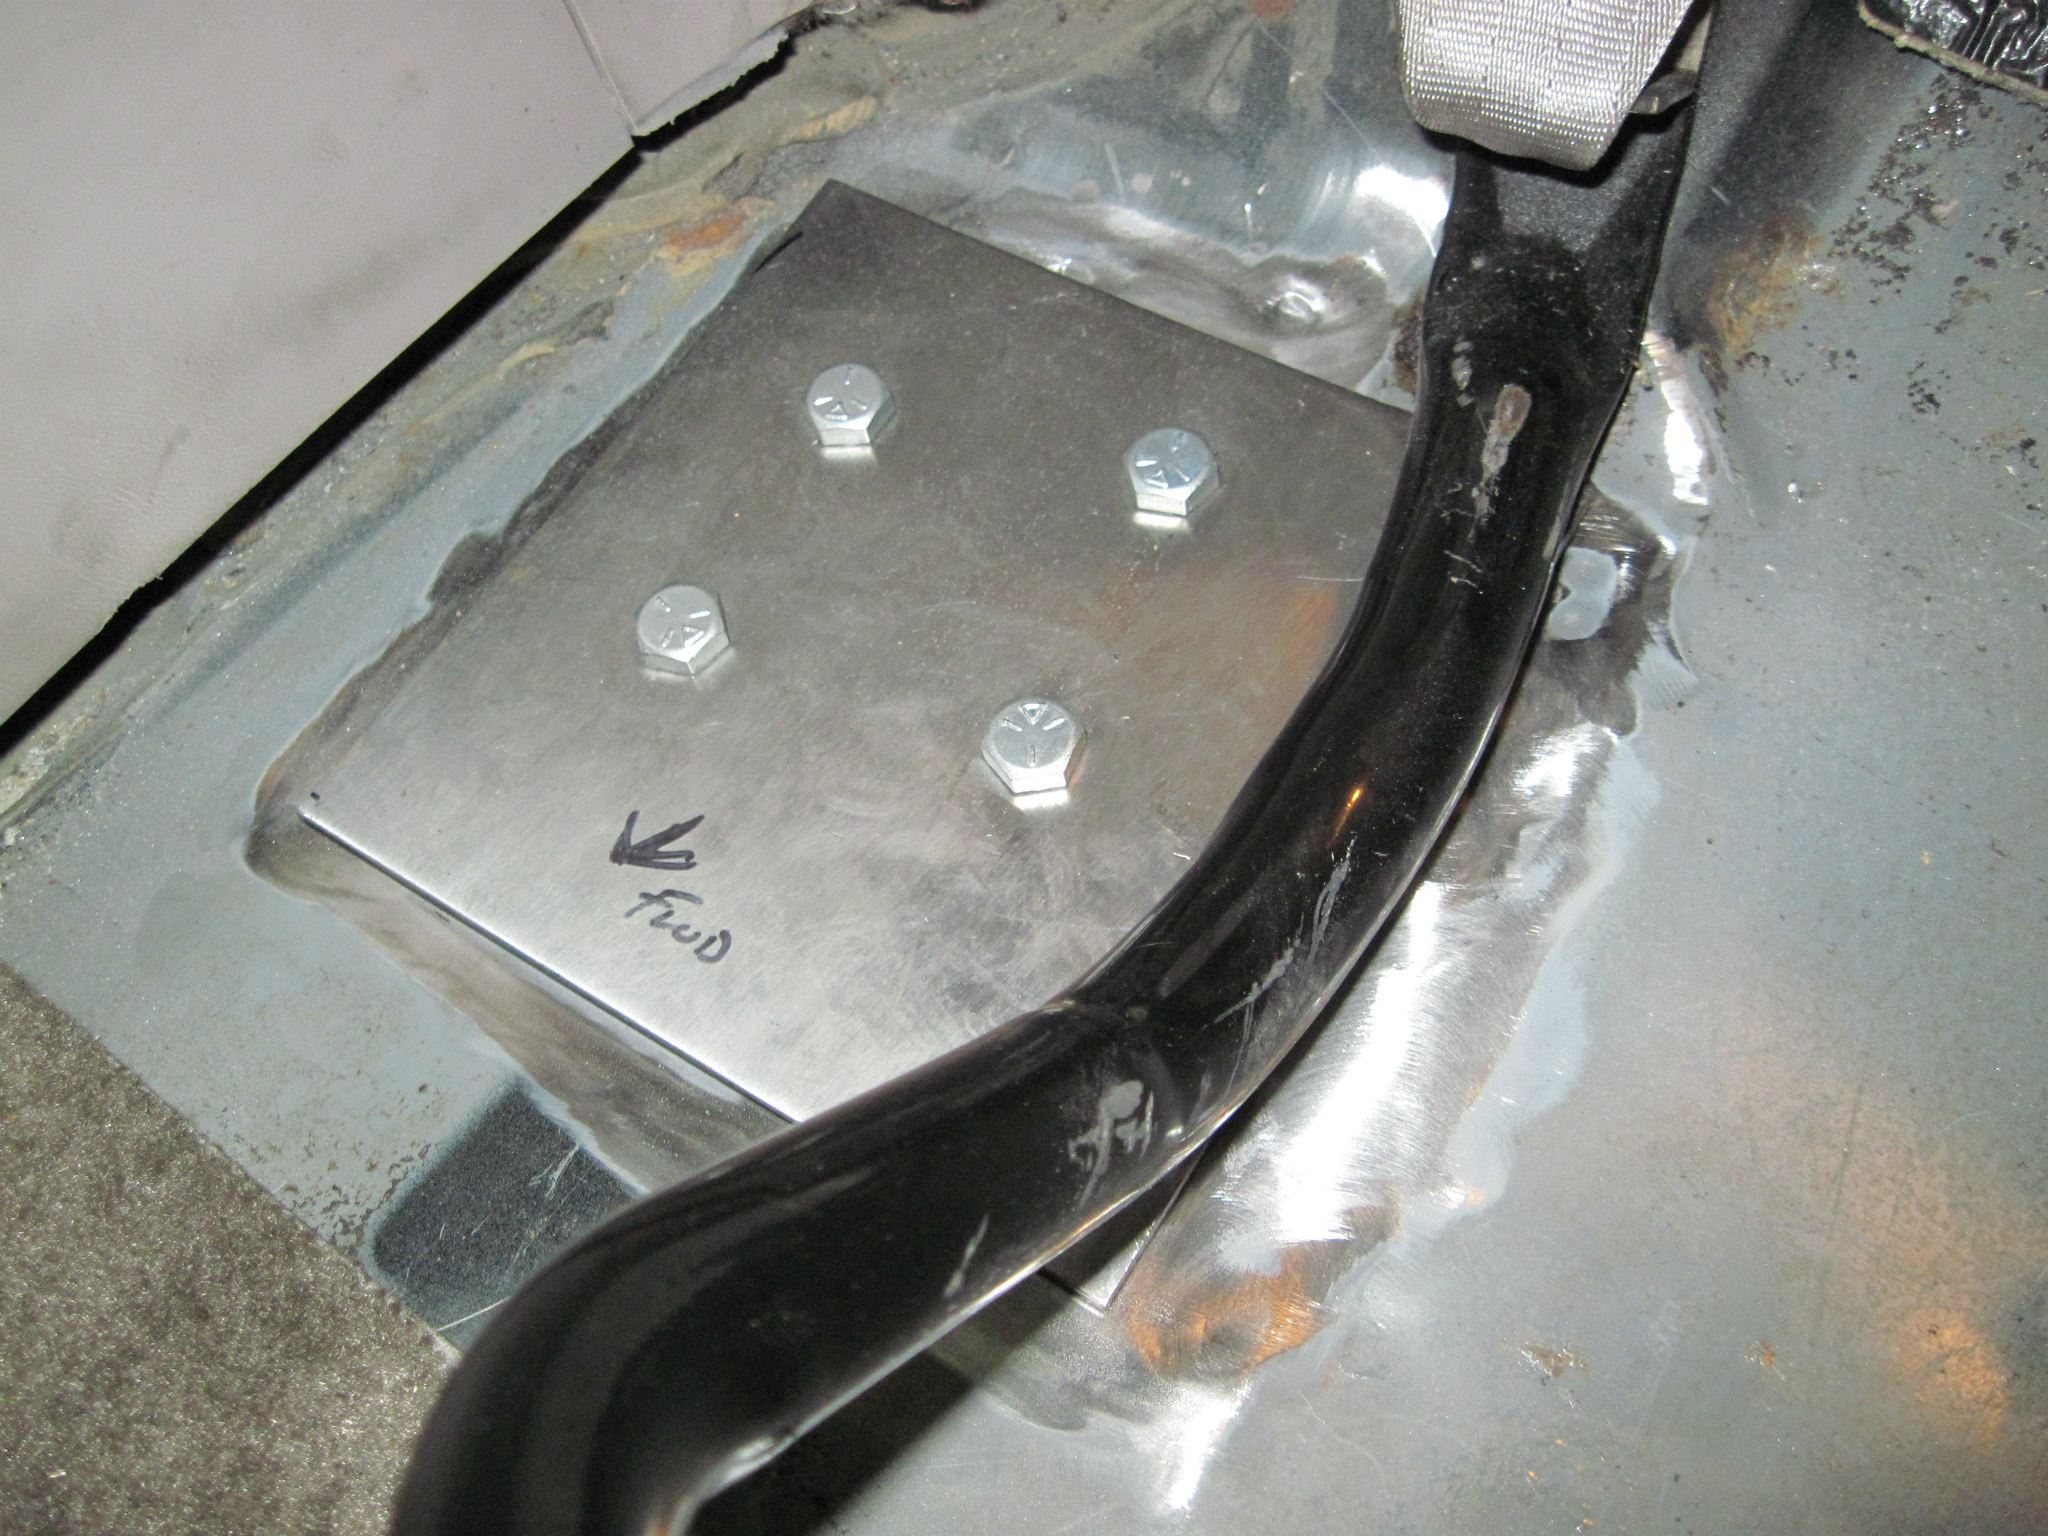
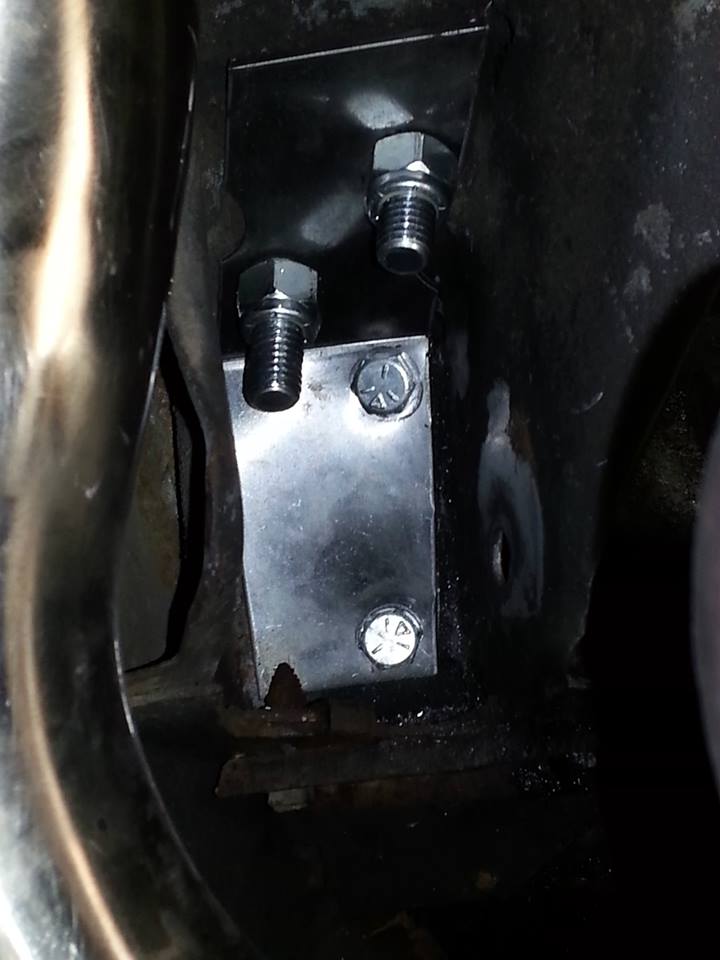
Plate is in place. This is looking up.Control arm hardware"Snugged" down. The four holes in the box , get drilled through the bottom of the seat pan (back seat) and a plate is installed inside the car. Basically sandwiching the floor pan.

Two of the 4 holes drilled and snugged up:
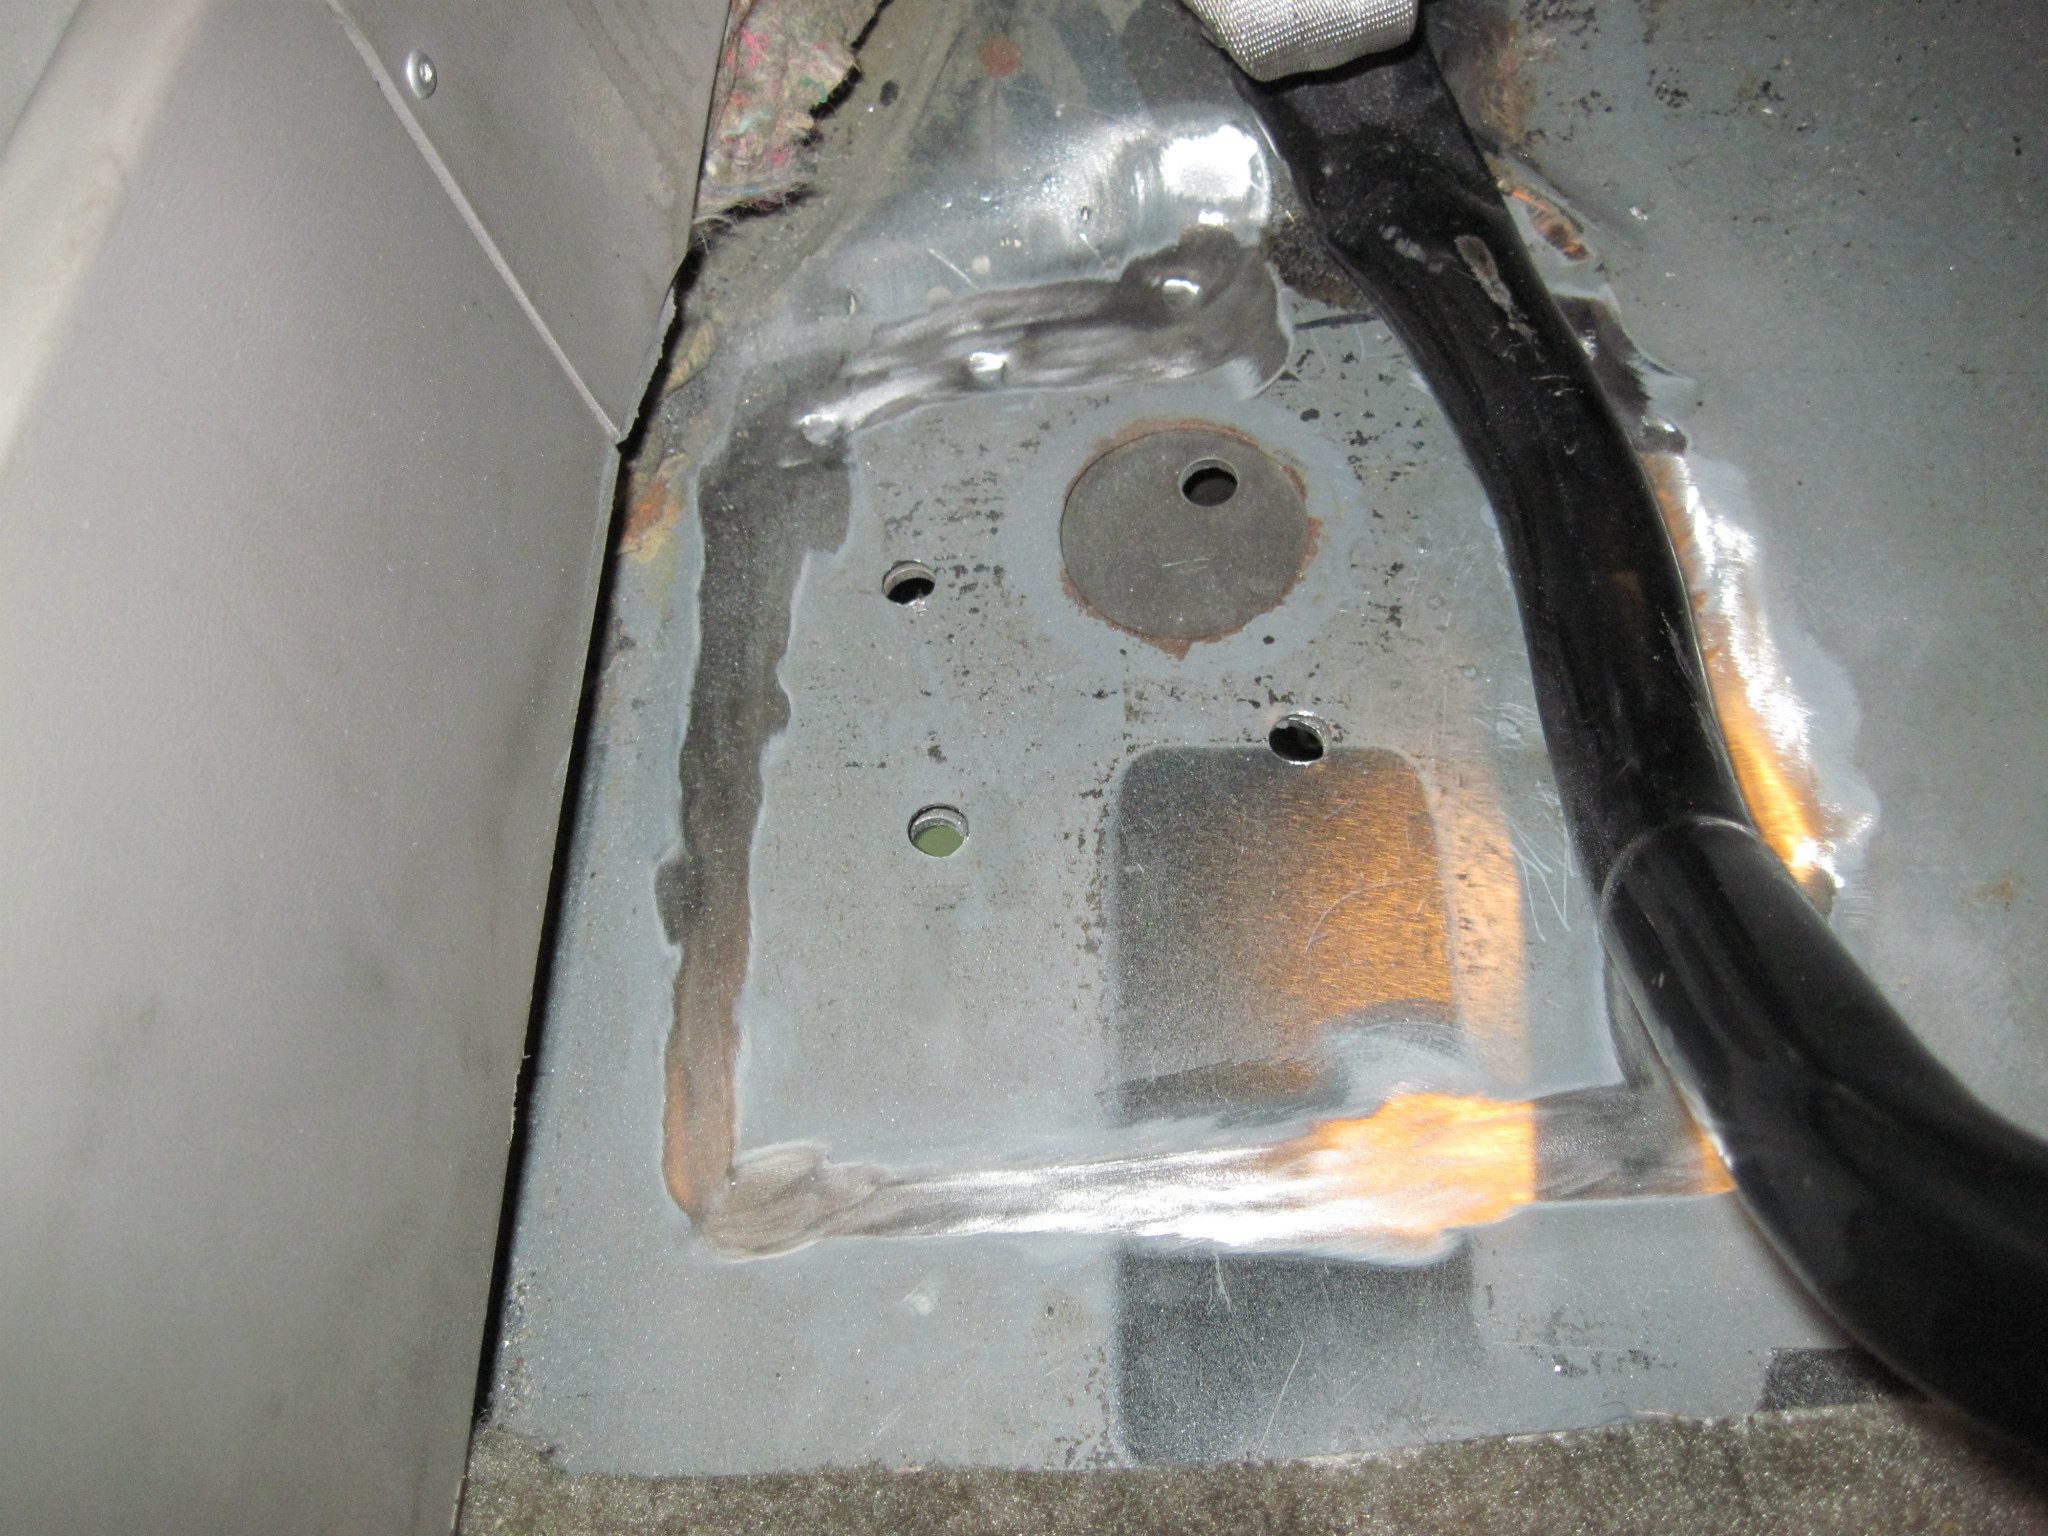
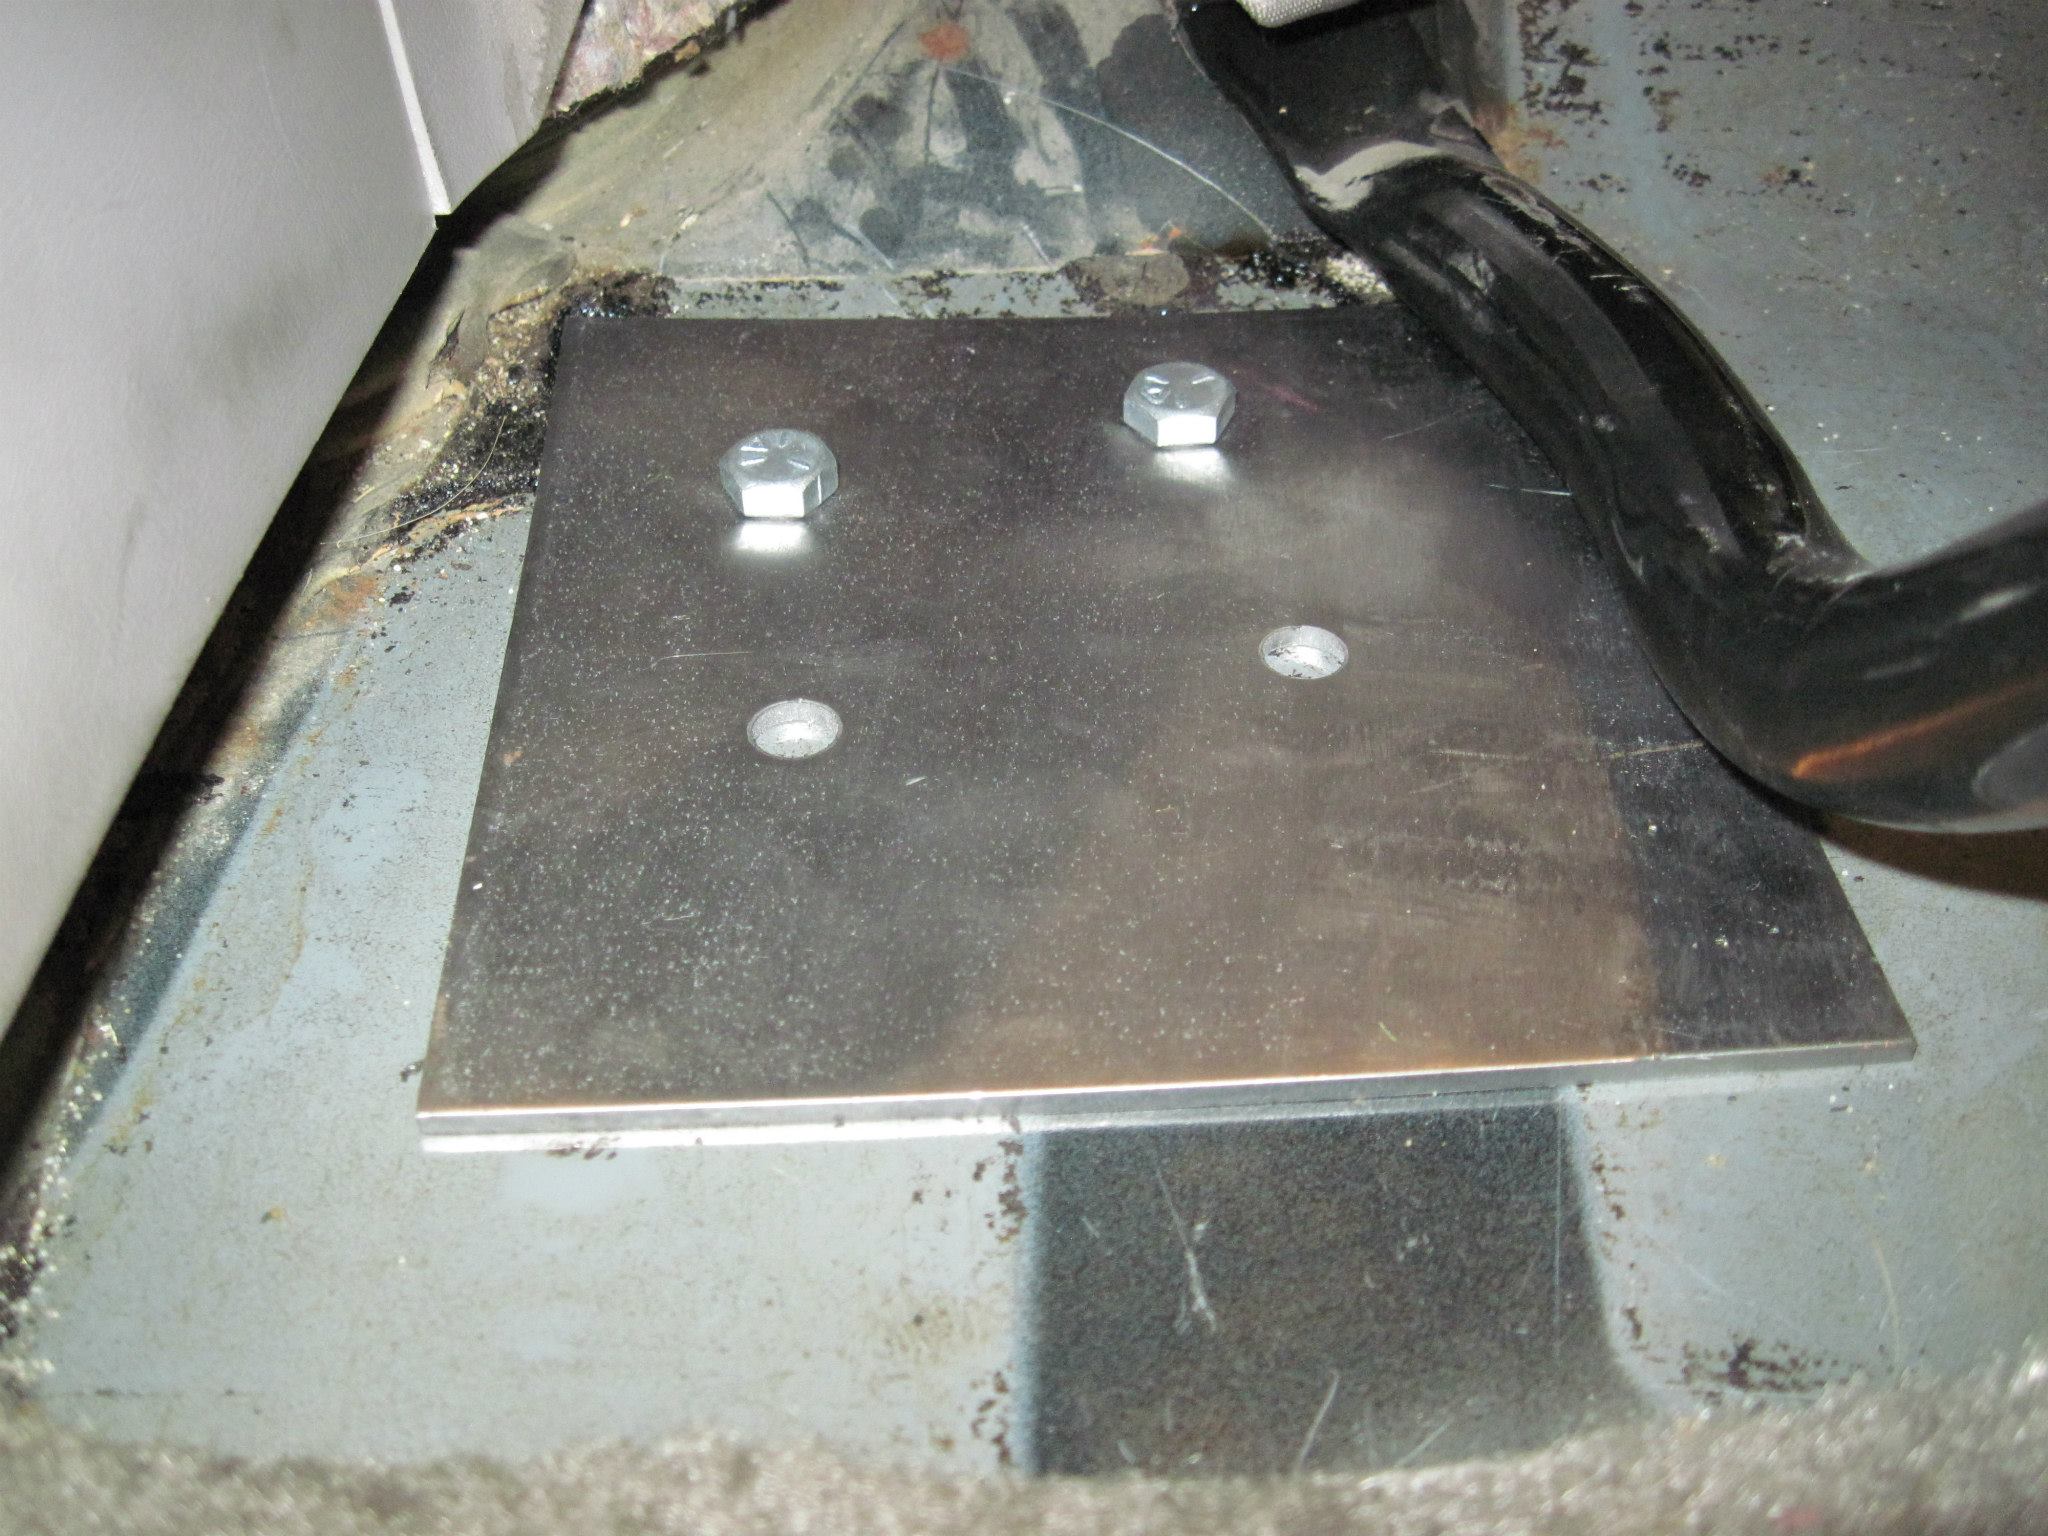
Top plate. They want you to drill the holes from the bottom, however the actual torque box framing is in the way, So I drilled the two that I had access to, and then back drilled the other's. The top plates are location specific, so you shouldn't have a problem, once you locate the two.

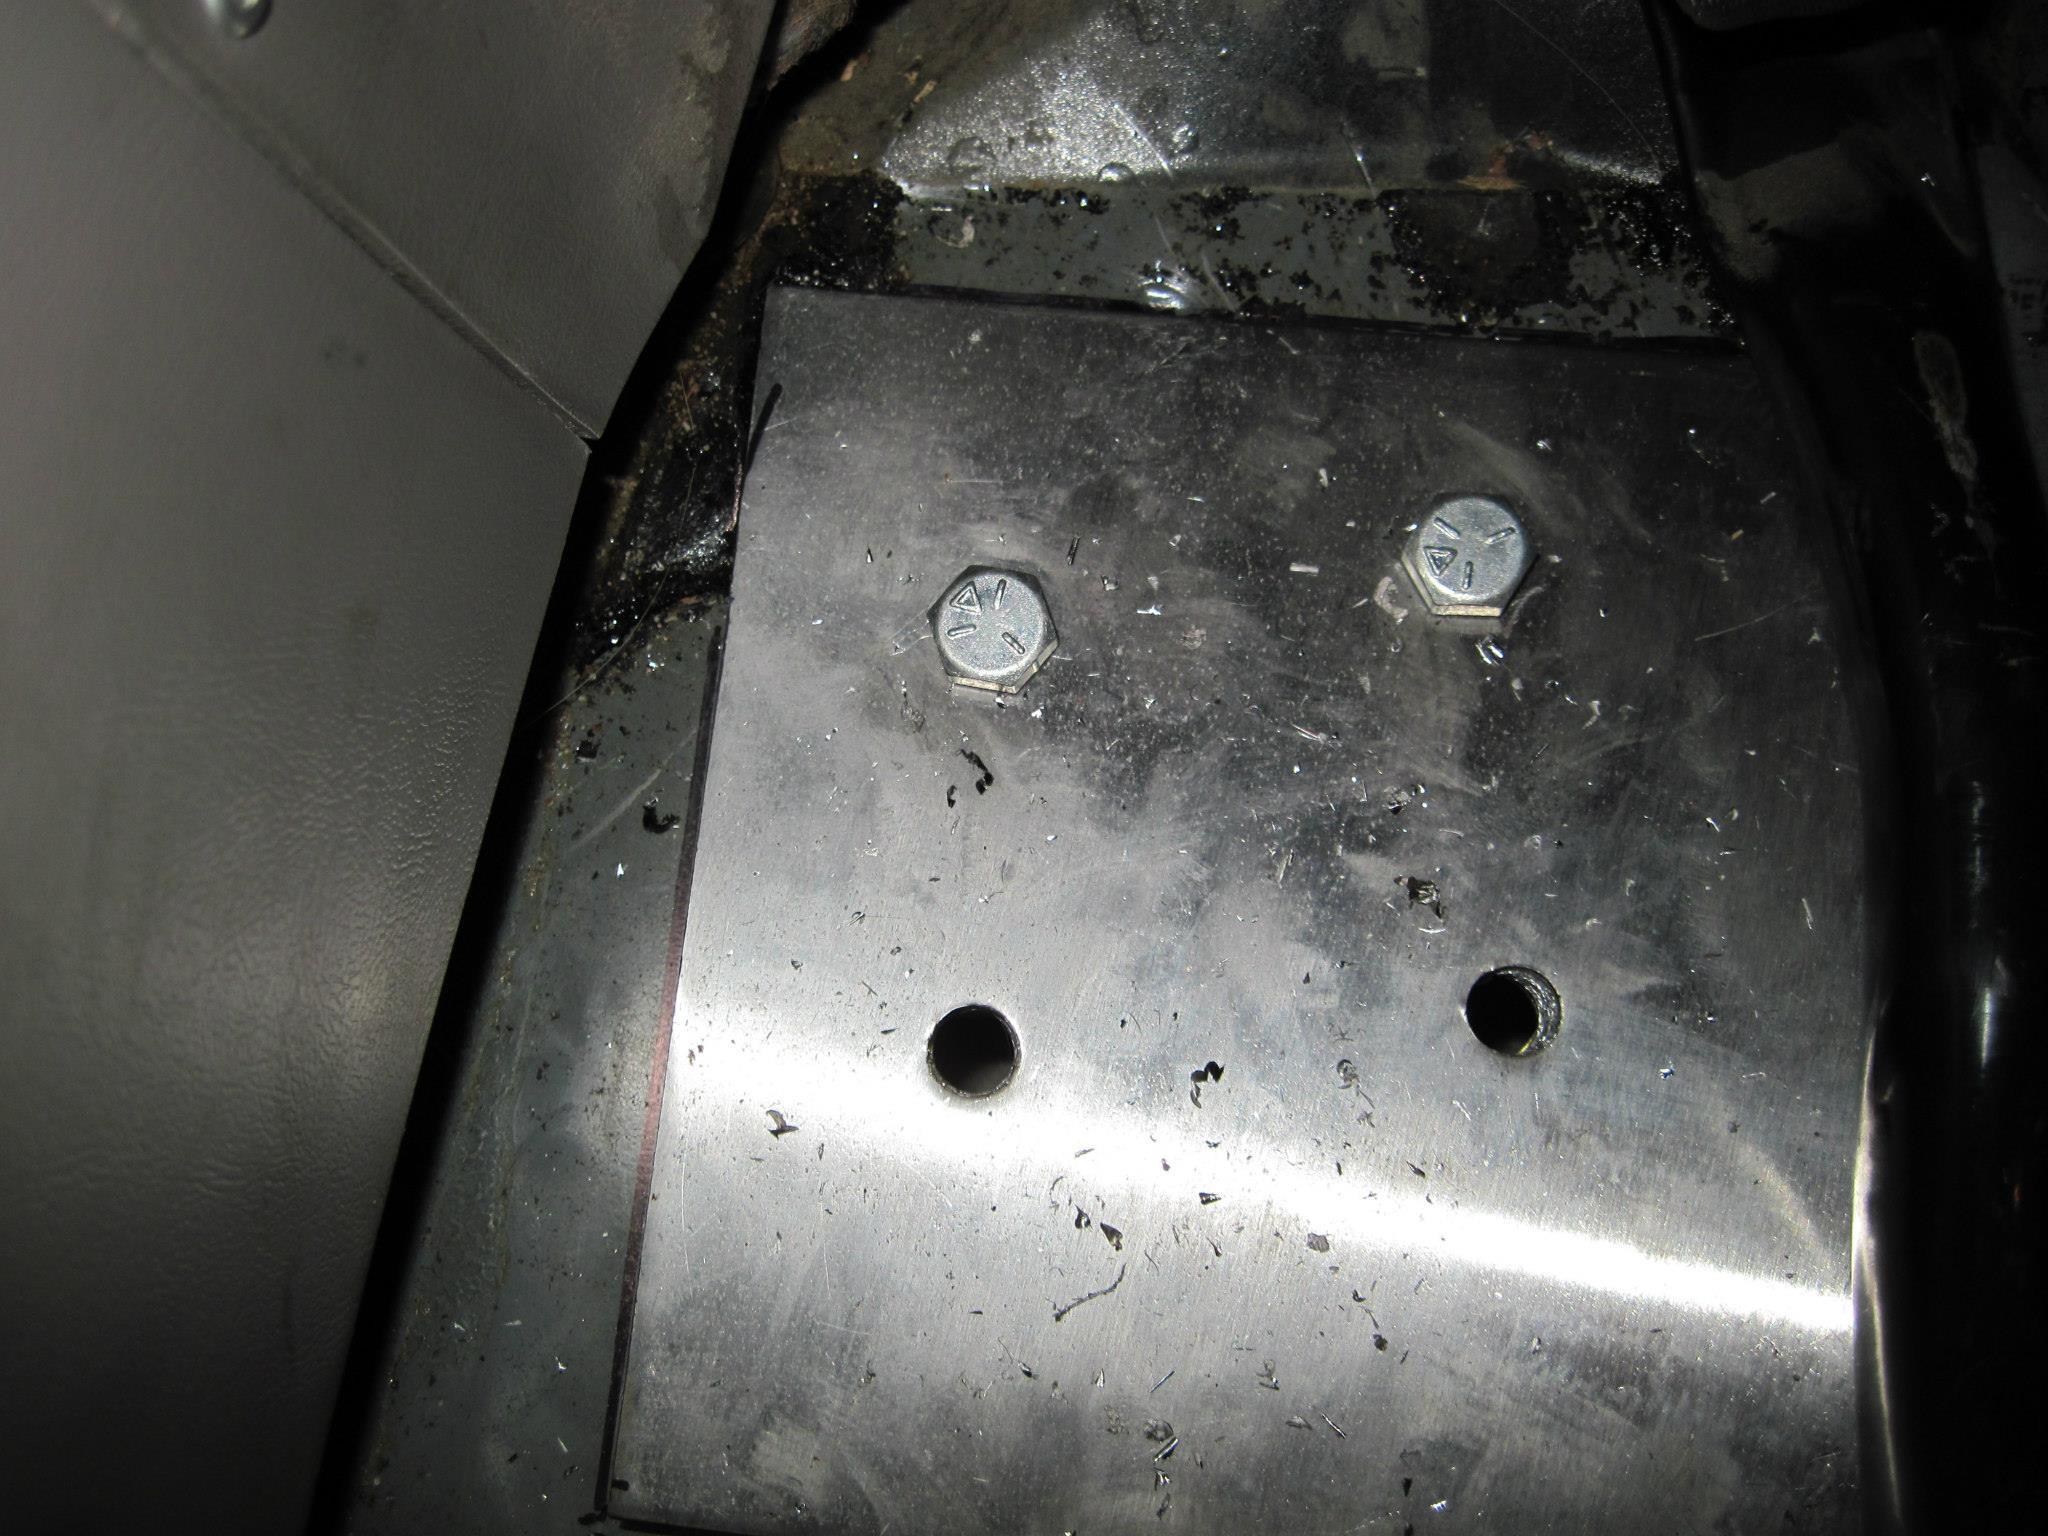
Bottom view:

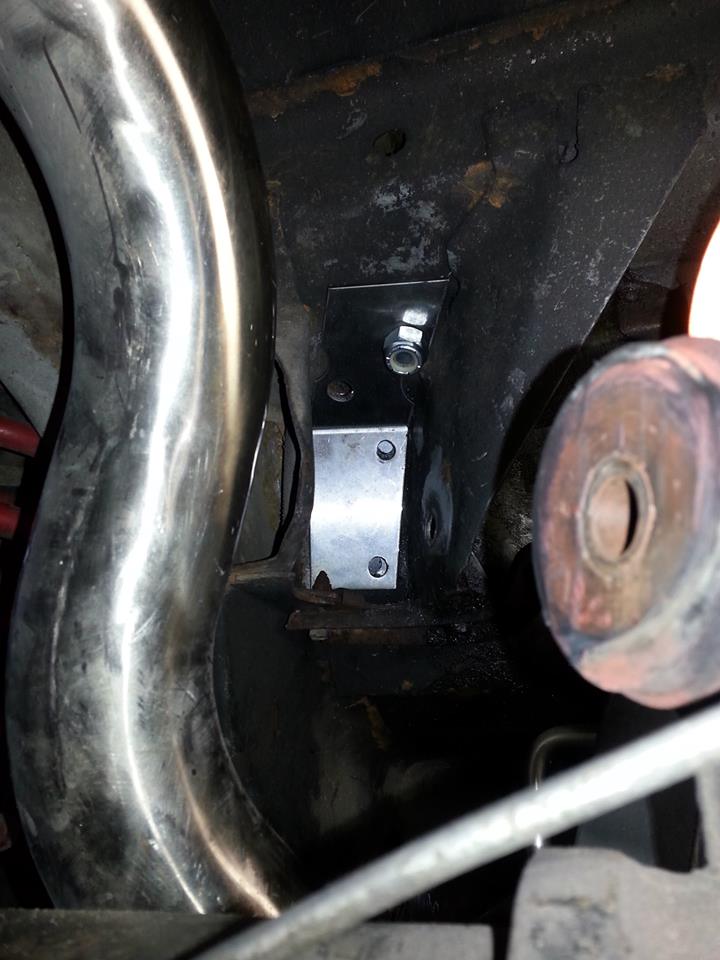
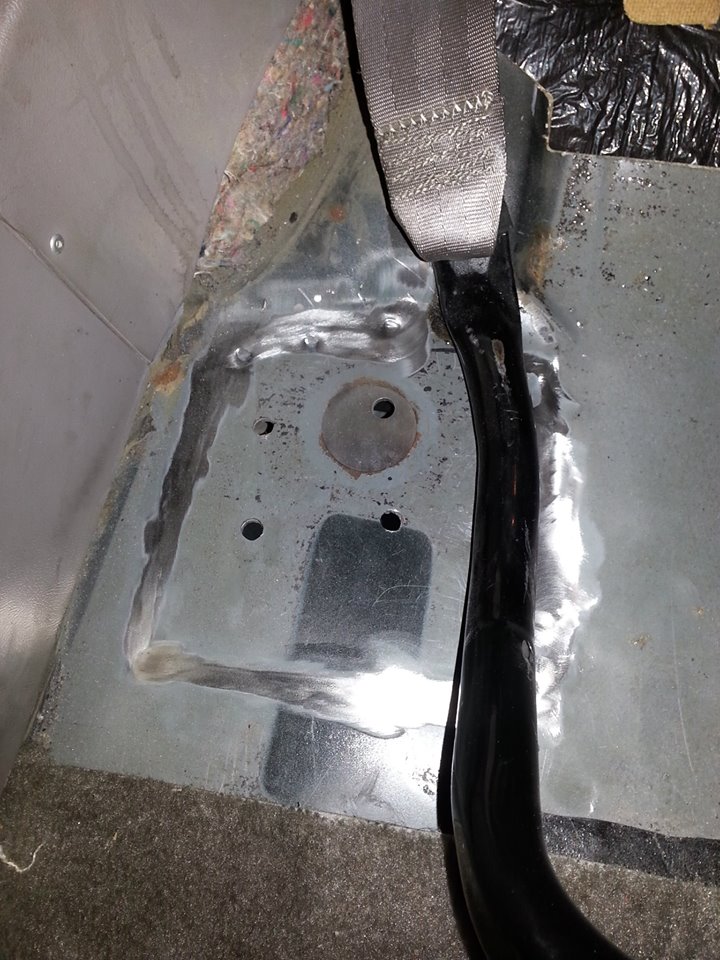
Wild rides recommends welding the top plate, so I wire wheel'd the surrounding perimeter of the plate in prep for the welding:


Installed:
Upper torque box....(pain in the ***)Upper control arms removed
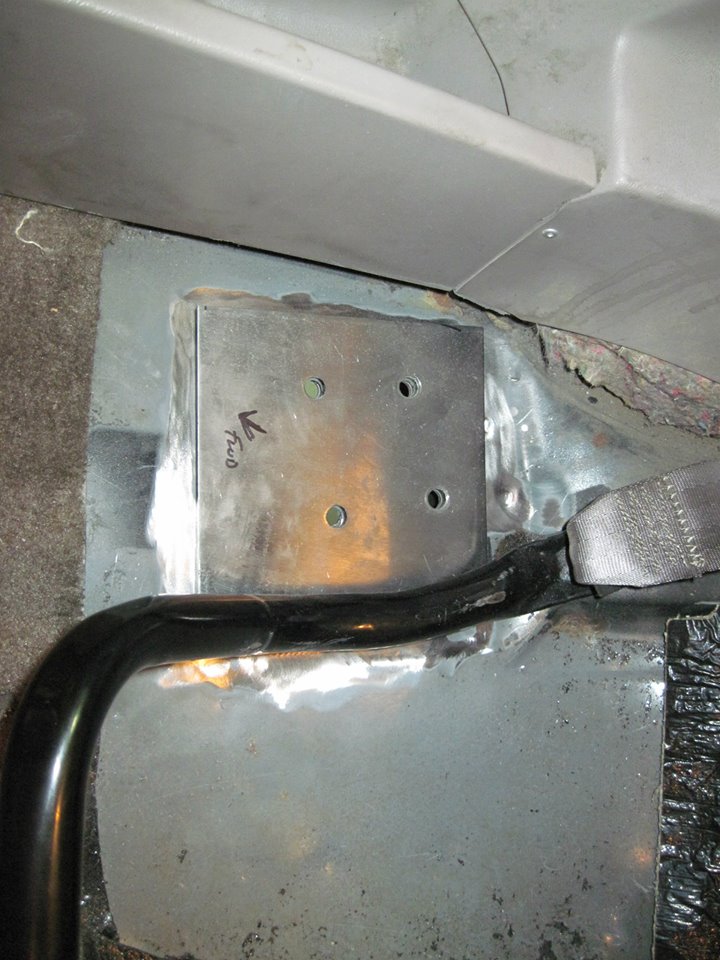
Interior plates:

Final install:

Few notes, make sure you have different size drills, in order to get in those hard to drill spots. I had both air, electric (battery) and corded drills, that accepted 1/2 drill bits. Make sure you get good decent drill bits. 3/8, 7/16 and 1/2. Have a lot of patience. Since driving the car, I've noticed it feels a lot "TIGHTER", it's not as squirrely when getting deep into the throttle. All in all, it was worth the cussing, screaming and of course...ice cold beer afterwards.
Just to those who are thinking about doing this....the lowers are a piece of cake. As long as you remember that you can lower and raise the diff in order to gain you clearance, for drilling your holes (for the uppers). The upper's are a pain in the ***...and I suggest taking breaks when you get to a point that creates a challenge...I was at the point of throwing tools.
Zipped the tires off and got to it:
Torque box:
Removed lower control arm fwd mounting bolt (torque box reinforcement ties in with lower control arm)
Feeding the torque box reinforcment box inside the box:
Plate is in place. This is looking up.Control arm hardware"Snugged" down. The four holes in the box , get drilled through the bottom of the seat pan (back seat) and a plate is installed inside the car. Basically sandwiching the floor pan.
Two of the 4 holes drilled and snugged up:
Top plate. They want you to drill the holes from the bottom, however the actual torque box framing is in the way, So I drilled the two that I had access to, and then back drilled the other's. The top plates are location specific, so you shouldn't have a problem, once you locate the two.
Bottom view:
Wild rides recommends welding the top plate, so I wire wheel'd the surrounding perimeter of the plate in prep for the welding:
Installed:
Upper torque box....(pain in the ***)Upper control arms removed
Interior plates:
Final install:
Few notes, make sure you have different size drills, in order to get in those hard to drill spots. I had both air, electric (battery) and corded drills, that accepted 1/2 drill bits. Make sure you get good decent drill bits. 3/8, 7/16 and 1/2. Have a lot of patience. Since driving the car, I've noticed it feels a lot "TIGHTER", it's not as squirrely when getting deep into the throttle. All in all, it was worth the cussing, screaming and of course...ice cold beer afterwards.
Torque box upgrade day/night!!
Just to those who are thinking about doing this....the lowers are a piece of cake. As long as you remember that you can lower and raise the diff in order to gain you clearance, for drilling your holes (for the uppers). The upper's are a pain in the ***...and I suggest taking breaks when you get to a point that creates a challenge...I was at the point of throwing tools.
Zipped the tires off and got to it:
Torque box:
Removed lower control arm fwd mounting bolt (torque box reinforcement ties in with lower control arm)
Feeding the torque box reinforcment box inside the box:
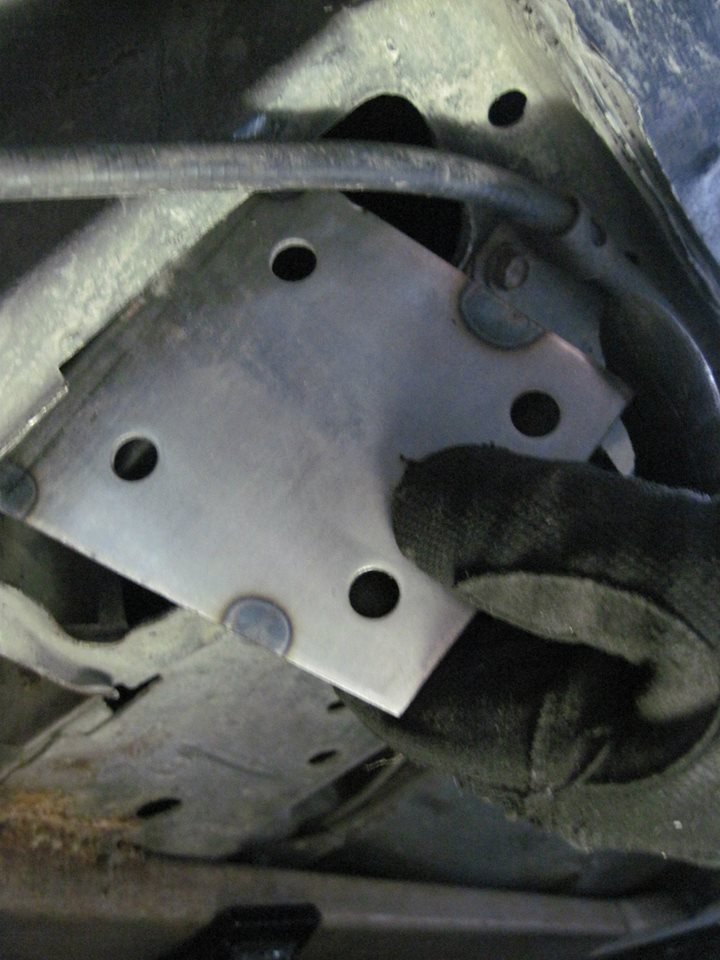
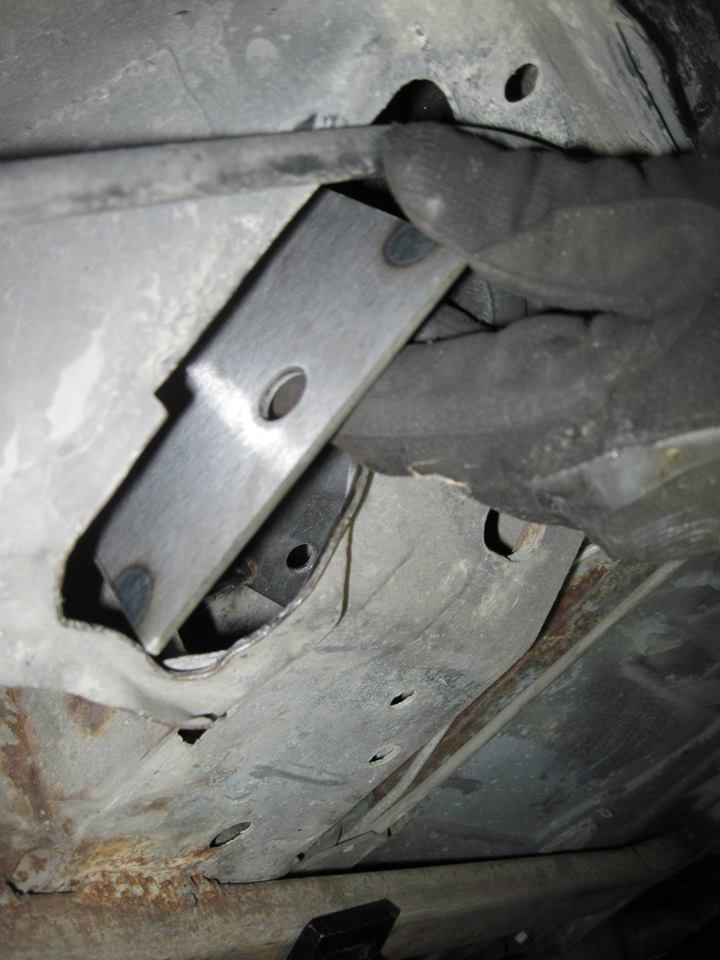
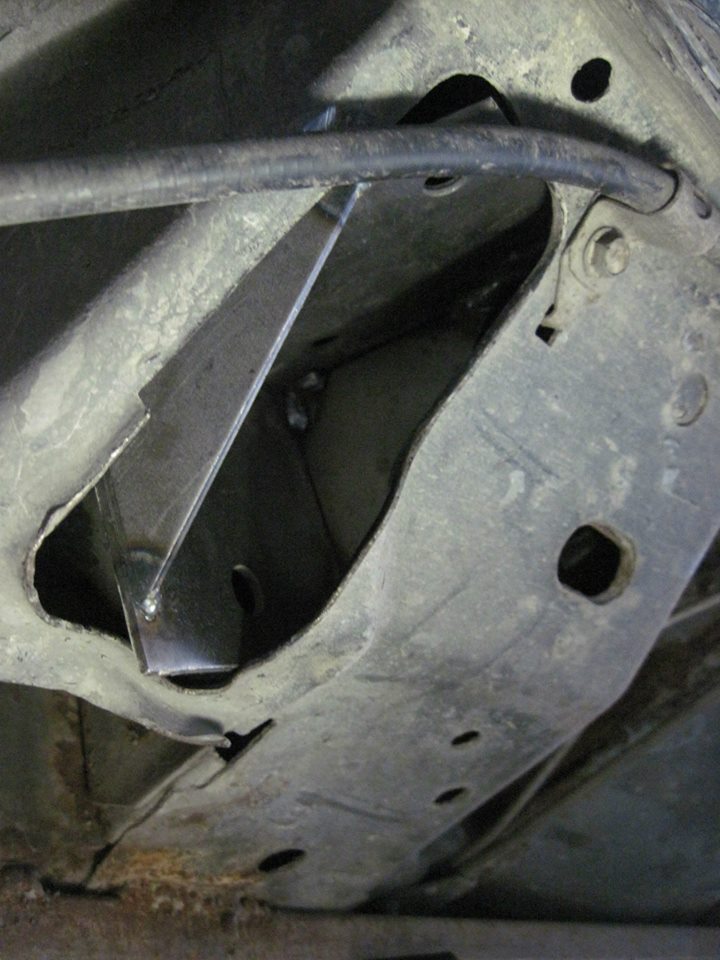
Plate is in place. This is looking up.Control arm hardware"Snugged" down. The four holes in the box , get drilled through the bottom of the seat pan (back seat) and a plate is installed inside the car. Basically sandwiching the floor pan.
Two of the 4 holes drilled and snugged up:

Top plate. They want you to drill the holes from the bottom, however the actual torque box framing is in the way, So I drilled the two that I had access to, and then back drilled the other's. The top plates are location specific, so you shouldn't have a problem, once you locate the two.
Bottom view:


Wild rides recommends welding the top plate, so I wire wheel'd the surrounding perimeter of the plate in prep for the welding:


Installed:

Upper torque box....(pain in the ***)Upper control arms removed

Interior plates:

Final install:
Few notes, make sure you have different size drills, in order to get in those hard to drill spots. I had both air, electric (battery) and corded drills, that accepted 1/2 drill bits. Make sure you get good decent drill bits. 3/8, 7/16 and 1/2. Have a lot of patience. Since driving the car, I've noticed it feels a lot "TIGHTER", it's not as squirrely when getting deep into the throttle. All in all, it was worth the cussing, screaming and of course...ice cold beer afterwards.
Just to those who are thinking about doing this....the lowers are a piece of cake. As long as you remember that you can lower and raise the diff in order to gain you clearance, for drilling your holes (for the uppers). The upper's are a pain in the ***...and I suggest taking breaks when you get to a point that creates a challenge...I was at the point of throwing tools.
Zipped the tires off and got to it:
Torque box:
Removed lower control arm fwd mounting bolt (torque box reinforcement ties in with lower control arm)
Feeding the torque box reinforcment box inside the box:
Plate is in place. This is looking up.Control arm hardware"Snugged" down. The four holes in the box , get drilled through the bottom of the seat pan (back seat) and a plate is installed inside the car. Basically sandwiching the floor pan.
Two of the 4 holes drilled and snugged up:
Top plate. They want you to drill the holes from the bottom, however the actual torque box framing is in the way, So I drilled the two that I had access to, and then back drilled the other's. The top plates are location specific, so you shouldn't have a problem, once you locate the two.
Bottom view:
Wild rides recommends welding the top plate, so I wire wheel'd the surrounding perimeter of the plate in prep for the welding:
Installed:
Upper torque box....(pain in the ***)Upper control arms removed
Interior plates:
Final install:
Few notes, make sure you have different size drills, in order to get in those hard to drill spots. I had both air, electric (battery) and corded drills, that accepted 1/2 drill bits. Make sure you get good decent drill bits. 3/8, 7/16 and 1/2. Have a lot of patience. Since driving the car, I've noticed it feels a lot "TIGHTER", it's not as squirrely when getting deep into the throttle. All in all, it was worth the cussing, screaming and of course...ice cold beer afterwards.

Thread
Thread Starter
Forum
Replies
Last Post
djfllmn
Snapshots
28
Apr 16, 2012 09:31 AM
Fx4wannabe01
Snapshots
255
Aug 21, 2009 03:20 AM


