
Solid Axle Swap started!!!

Thread Starter
|
Member

Joined: Apr 2007
Posts: 483
Likes: 0
From: Apison, TN
Um, no more pics... YET lol. Im going to wash the truck tonight and clean it up. Then I'll snap some pics of all the work. I might even unload the bed (all of the old parts are in it now...) and undo the swaybar quick disconnects and flex it out for you guys... what do you think?
Thread Starter
|
Member
Joined: Apr 2007
Posts: 483
Likes: 0
From: Apison, TN
Yep, are we still meeting at Subway at 5? Which subway you wnat to meet at? There is one on the north shore next to coolige park if you want to meet there.

Thread Starter
|
Member
Joined: Apr 2007
Posts: 483
Likes: 0
From: Apison, TN
OK, ok... you guys wanted pics. So here you go. Sorry, I wasn't able to find anywhere to flex it out, so those pics will have to come later. But anyway, here you go! Let me know what you think...
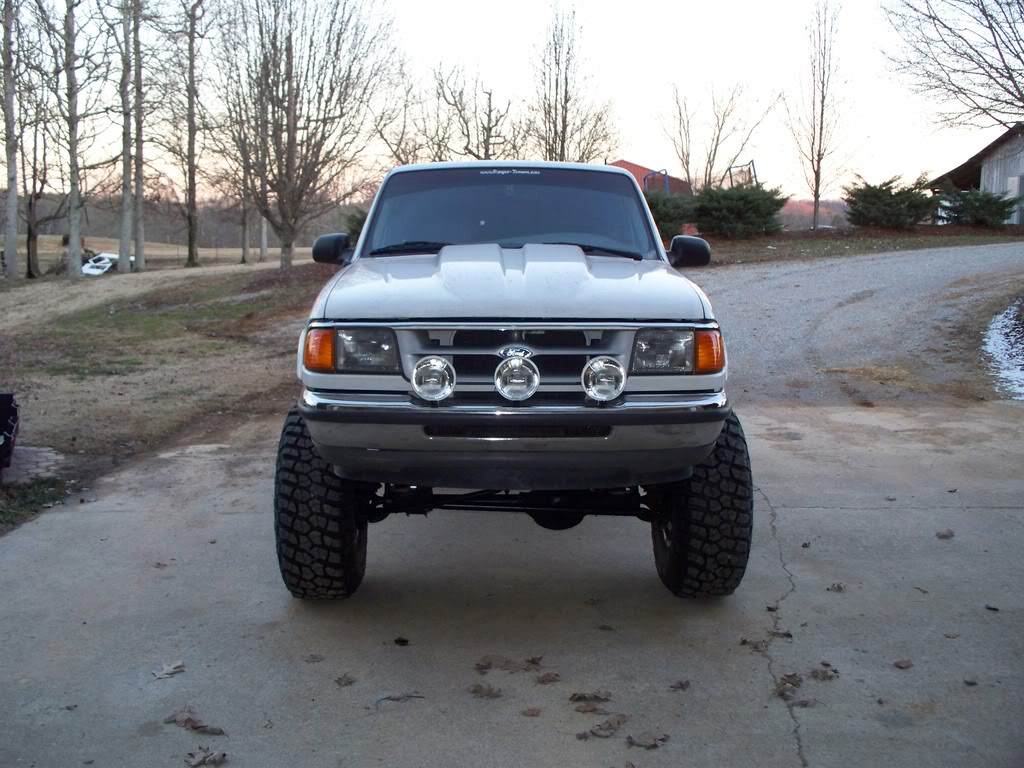
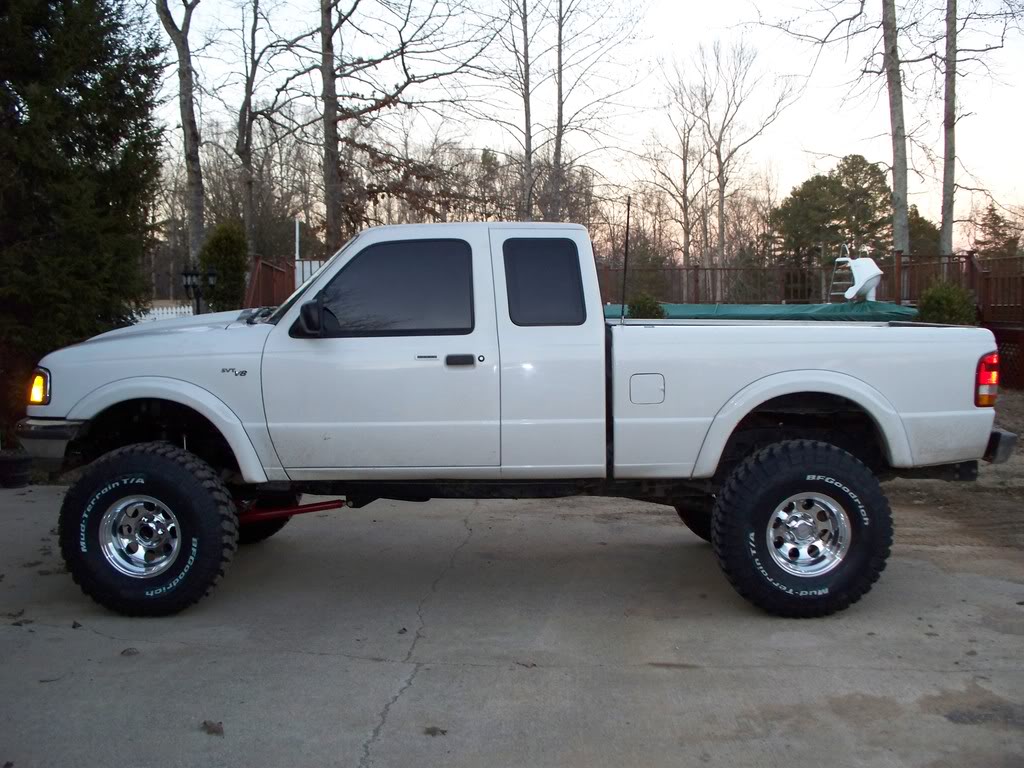
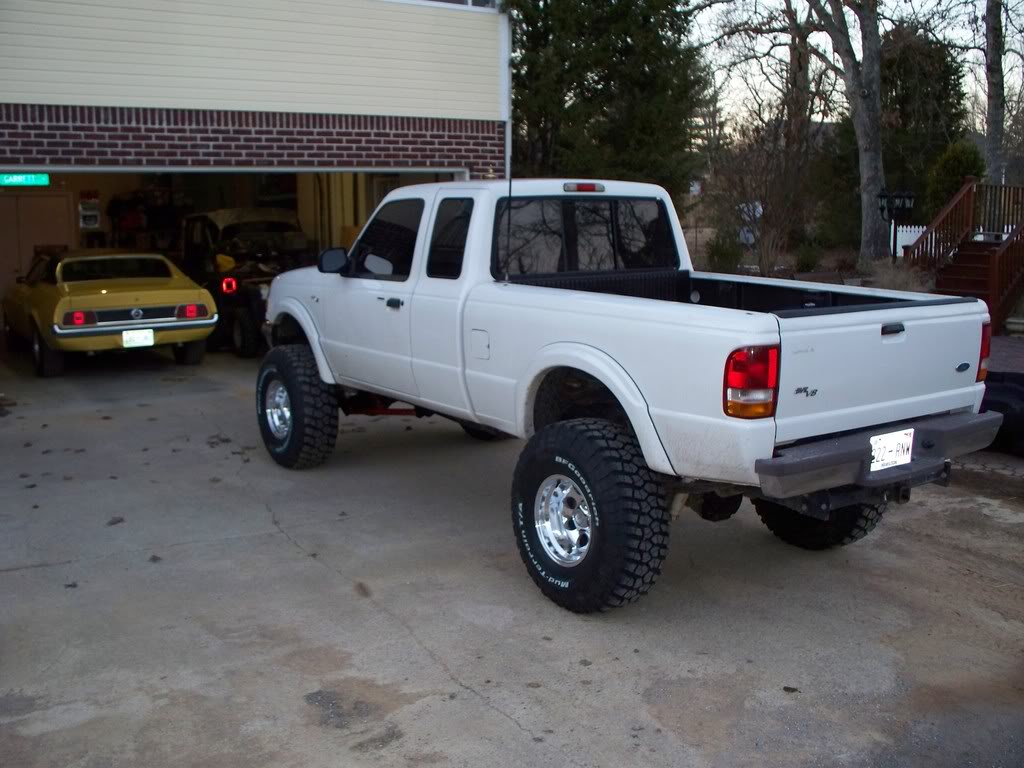
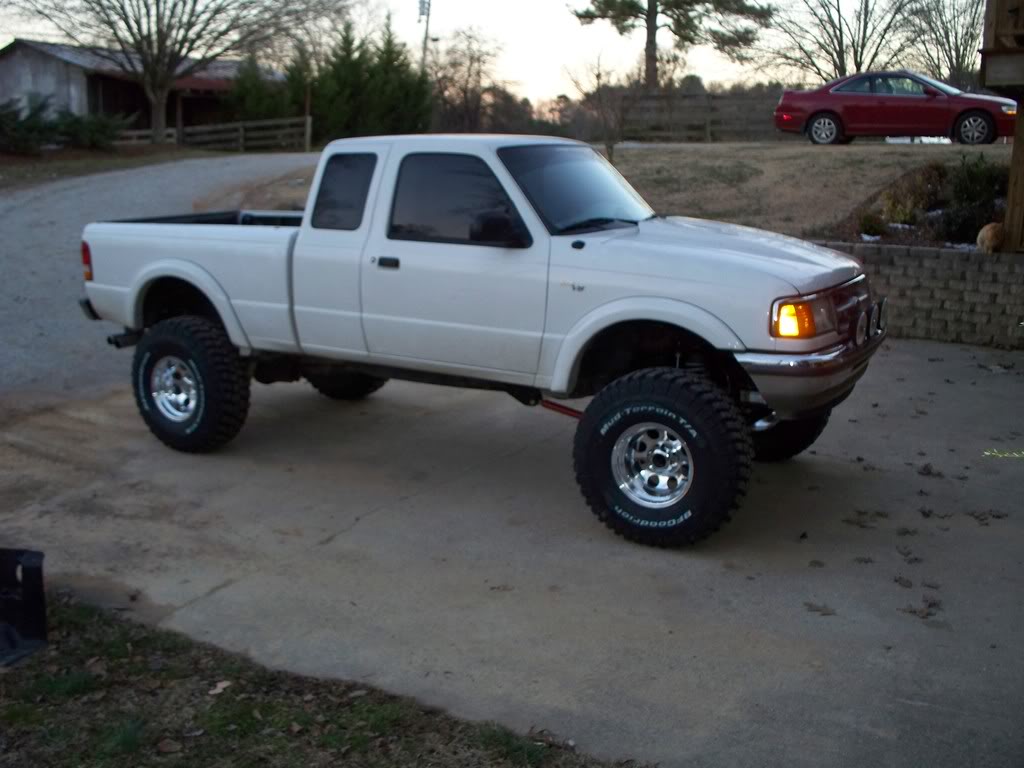
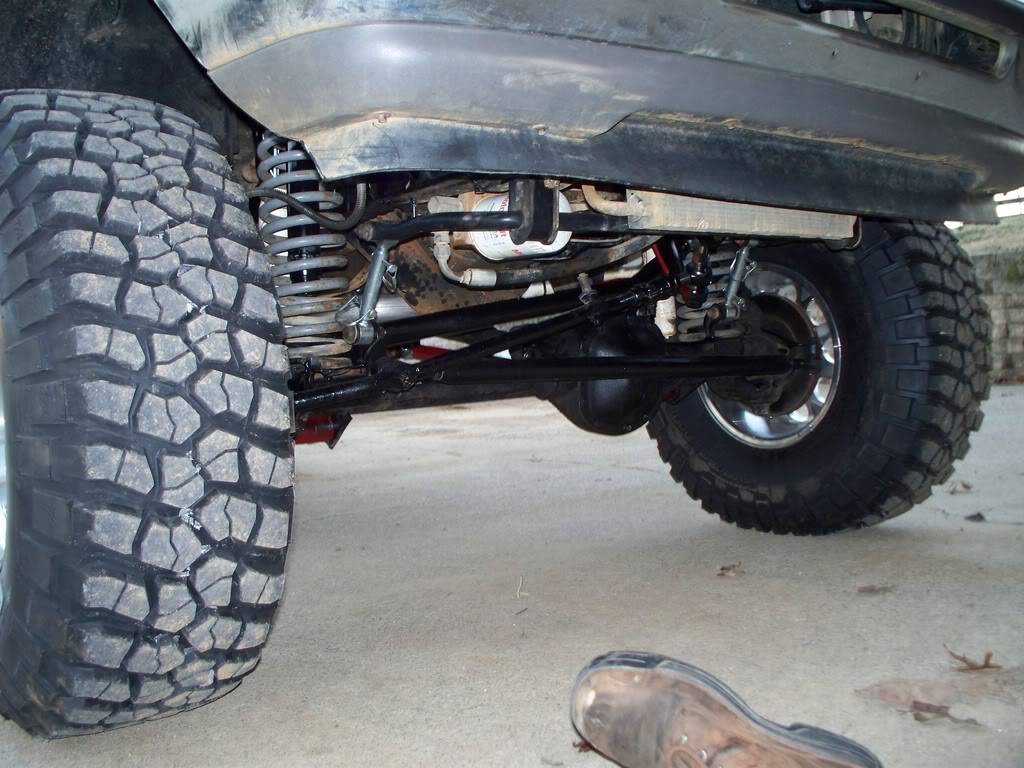

Well, there you go, thats it for now. Like I said, I'll get some pics of it flexed out once I get a chance.
Well, there you go, thats it for now. Like I said, I'll get some pics of it flexed out once I get a chance.


Thread Starter
|
Member
Joined: Apr 2007
Posts: 483
Likes: 0
From: Apison, TN
Handles... differently, lol. The front is a little softer, so it does sway more, but it is a sacrifice I was willing to make to gain off road capability. Im already getting used to it though, so no big deal. I really like it!
Thread Starter
|
Member
Joined: Apr 2007
Posts: 483
Likes: 0
From: Apison, TN
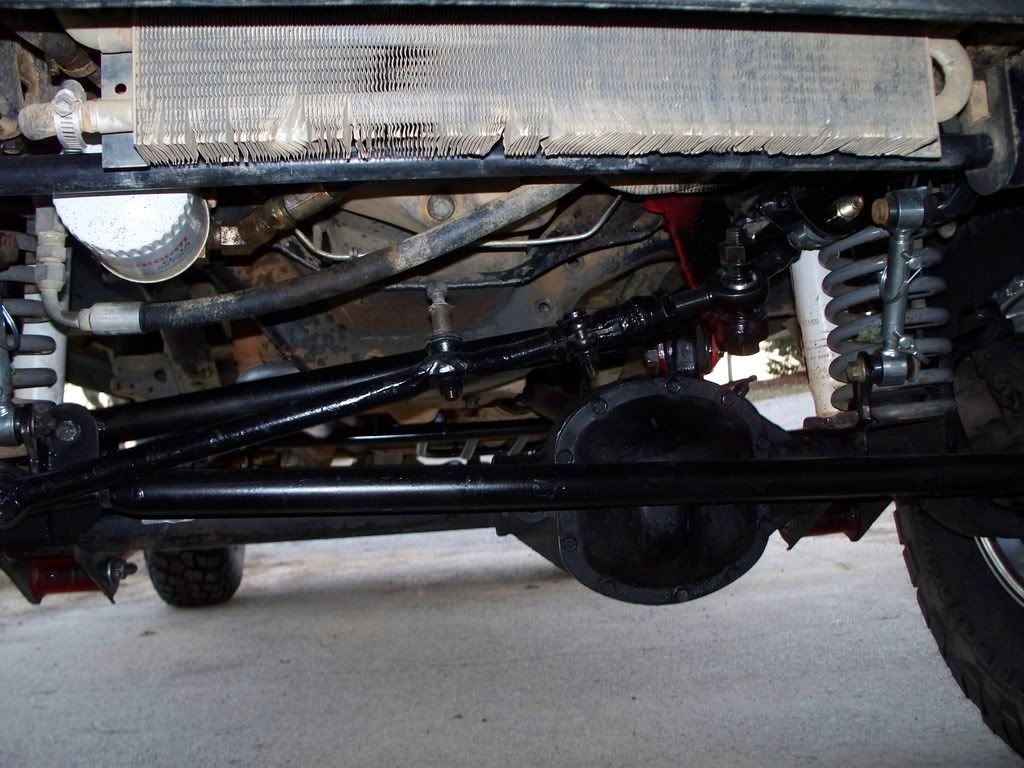
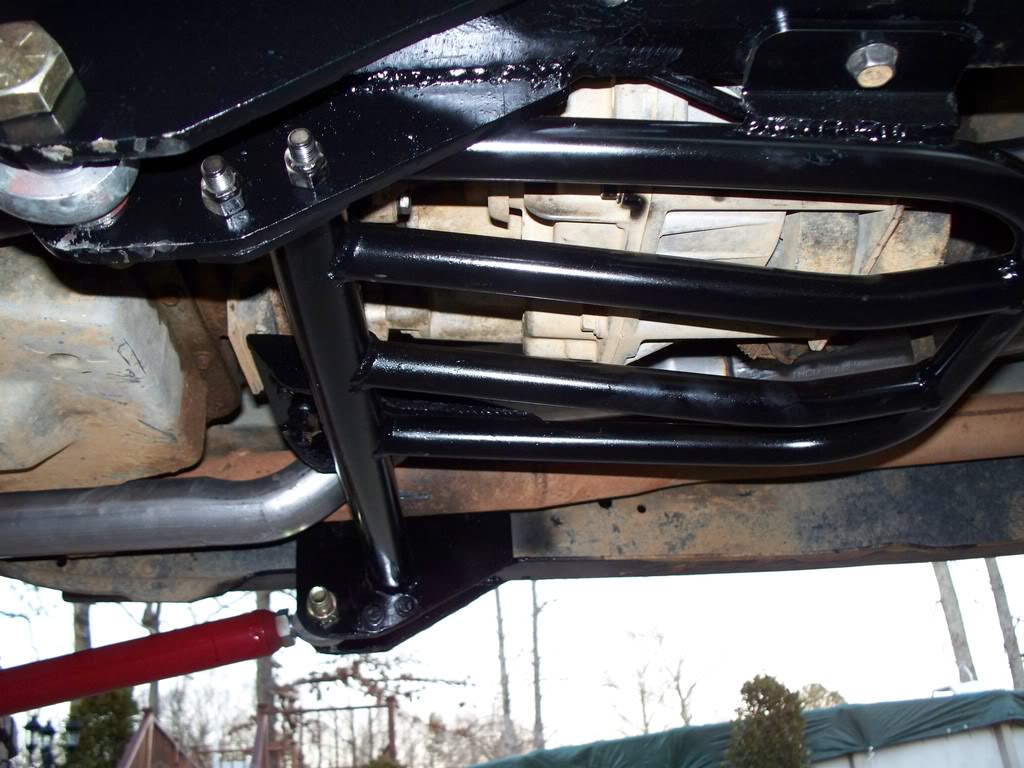
No, the oil filter is easy, there is plenty of room. to get it off. It used to be mounted on the outside of the frame in front of the drivers side front tire, not exactly a safe place for offroad use and a 35 an inch away... so we moved it to where it is in the pictures. I need to check one of the fittings on it, as you can see, there is a slight weep, I hope its just a little loose, I don't want to have to replace the line (which is hyd. line). Not only is that stuff expensive, but getting it off of the adapter on the engine would be a MAJOR PITA.
Member
Joined: Mar 2006
Posts: 919
Likes: 0
From: East Windsor, CT
So how long did this take you to do the SAS? Quick parts list? I mean your setup looks very simple and clean. Gives me some confidence to do a SAS on my ranger at some point. I never know where to position the axle thats all. Not sure of the geometry of the whole thing.
Thread Starter
|
Member
Joined: Apr 2007
Posts: 483
Likes: 0
From: Apison, TN
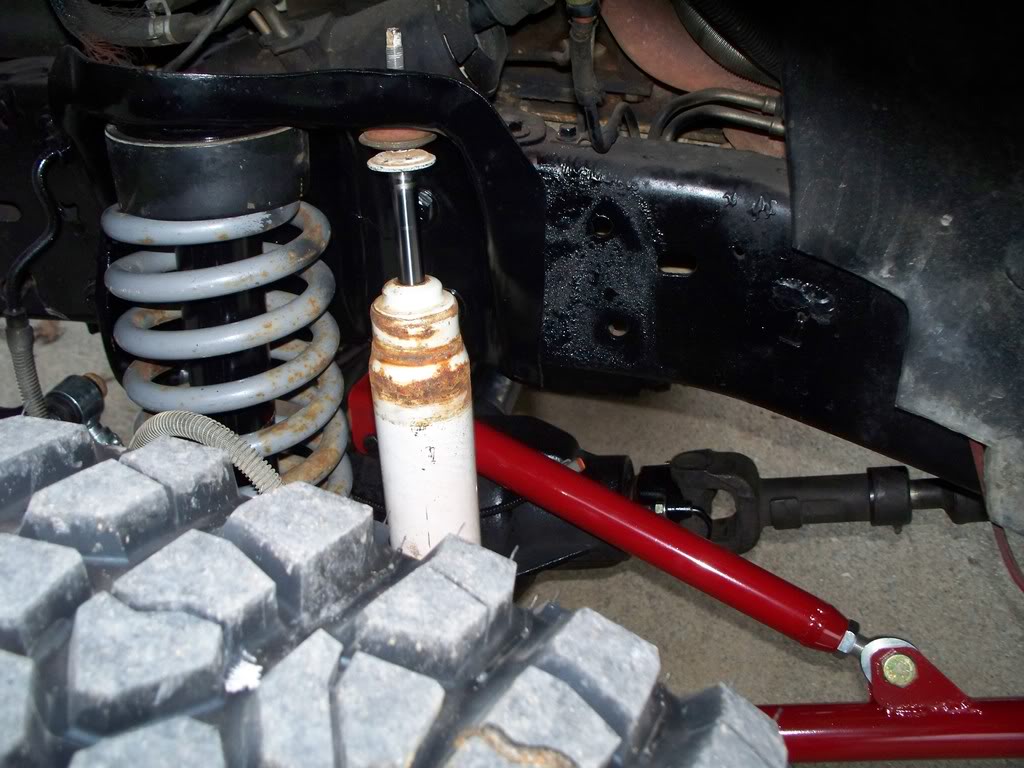
Parts list is pretty simple... The axle is a dana 30 out of a Cherokee, like a 95 model. It is high pinion and non CAD. The steering is also out of the Cherokee, but Has a heavy duty tie rod from Rusty's Off road. However, I had to make a custom adjuster for the drag link because the Jeep tie rod end didn't fit the Ford steering box. The lower links are 1.75" OD .25" wall DOM tubing (1.25 ID) and are 3 feet long. The upper link that makes the radius arm and the trac bar are both 1.5" OD .25" wall DOM (1" ID). The lower bushings at the axle are Just leaf spring bushings for a YJ, and the upper bushing for the radius arm is the stock Jeep one. The heims on the rear of the lower links are 7/8" QA1 parts with super high misaliqnment bushings that reduce the bolt size down to 3/4". The upper link on the Radius arm uses a 3/4" QA1 heim with step down spacers t reduce bolt size down to 5/8. The Trac bar (AKA Pan hard bar) also uses A YJ leaf bushing at the axle end, and a 3/4" QA1 heim and super high misalignments that reduce bolt size to 5/8" on the frame end. All of the inserts for the tube, as well as the misalignments are from Ballistic fab. It took about 5 days to completely do...
Thread Starter
|
Member
Joined: Apr 2007
Posts: 483
Likes: 0
From: Apison, TN
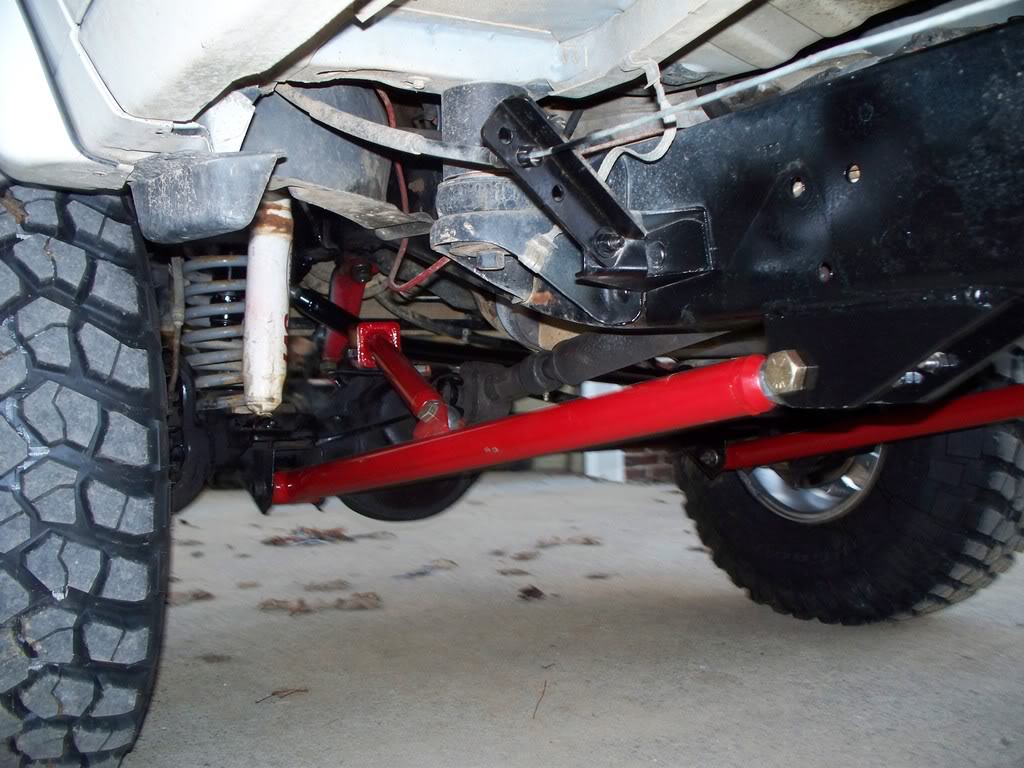
Also, I meant to mention that we moved the front axle forward roughly 2.5". There are a couple of ways to do it, but the easiest way to know how far you have moved is to use a plumb bob and make a mark on the fender flare that lines up with the centerline of the old axle before its removal, then make a mark 2.5" futher forward (on the flare) and then line the centerline of the new axle up with that also using a plumb bob. When you make your brackets for the links on the frame, try to find a common point on each frame rail, such as a hole or rivet. Just make sure you get the brackets in the same place on each side. You do have some adjustment in the heims, but the closer to perfect you get it, the better. Also, with moving the axle up this amount, the front driveshaft from the cherokee is the perfect length to bolt righ into the Ranger without any modifications. This makes for getting spares much cheaper and easier.
Thread Starter
|
Member
Joined: Apr 2007
Posts: 483
Likes: 0
From: Apison, TN
Oh, wait, you maen the black strip thing under the flare on the outside of the truck... I didn't put the flares on, they were like that when I bought the truck, so I have no idea. Maybe it came with the flares.


Member
Joined: Oct 2004
Posts: 2,099
Likes: 0
From: ***
The black stuff? I don't know, I didn't put anything on them. I guess its just armor all or some type of chassis black from the car lot maybe? Im not exactly sure what you are talking about.
Oh, wait, you maen the black strip thing under the flare on the outside of the truck... I didn't put the flares on, they were like that when I bought the truck, so I have no idea. Maybe it came with the flares.
Oh, wait, you maen the black strip thing under the flare on the outside of the truck... I didn't put the flares on, they were like that when I bought the truck, so I have no idea. Maybe it came with the flares.
Thread Starter
|
Member
Joined: Apr 2007
Posts: 483
Likes: 0
From: Apison, TN
It does handle pretty good. Im keeping the steering that is on it, but it is a crossover setup, and has heavy duty steering links on it already (tie rod and drag link). Oh, and for who asked, the SVT badges reflect whats under that hood yall keep talking about  .
.
.


