
How-To: Install Spidertrax Wheel Spacers


Joined: Dec 2009
Posts: 834
Likes: 3
From: Rutland VT
How-To: Install Spidertrax Wheel Spacers
Let the modding Begin!!
This How-To is for installing Spidertrax #WHS-002 1-1/4" aluminum wheel spacers on a 4x4 Ranger. This kit was originally designed for Jeep Wranglers, but it will work on Rangers with some slight modifications since the lug pattern is the same. These spacers are "For Off-Road Use Only" according to the instructions, but many people have had excellent results using these "On-Road" everyday on daily drivers.
Be sure to read the instructions included with the kit. As always "Install at your own risk".
What you will need:
1) 2 sets of Spidertrax #WHS-002 wheel spacers
2) Floor Jack and Jack Stands
3) Breaker Bar
4) Torque Wrench
5) Angle Grinder with 2 cut-off wheels and metal grinding wheel
5) Safety glasses, face shield, hearing protection
6) Long-sleeve shirt, hat, pants, Mechanix gloves
7) Brake cleaner & rags
8) Fire extinguisher--better safe than sorry
9) cheap plastic drop cloth and masking tape
Let's get started!
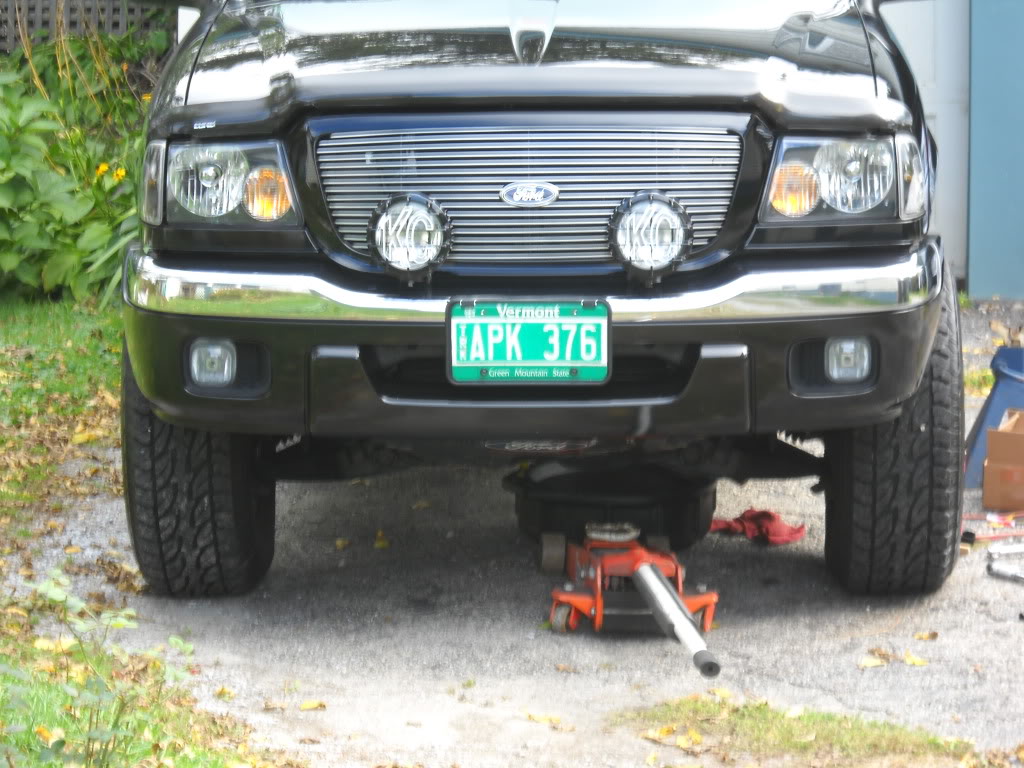
I decided to do the front ones first. Since I was working alone, I put the truck into 4WD to lock the front wheels together and jacked-up one side at a time. If you have help, you can forgo this and jack-up both sides at once and have your helper hold the brakes on.
Jack-up the front of the truck and support with jackstand(s)--be safe here-do not trust just the floor jack. Remove the front wheel(s) and set aside.

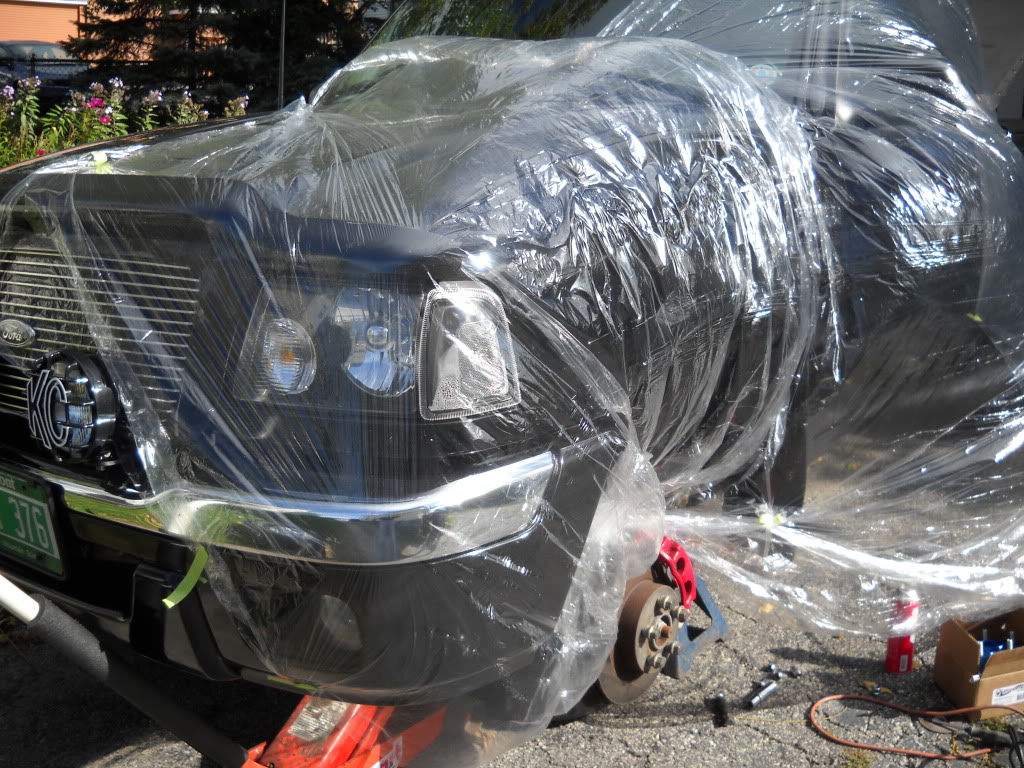
Cover the painted surfaces of your truck with the drop cloth and use some masking tape to hold it in place-if you value your paint, you won't skip this step!
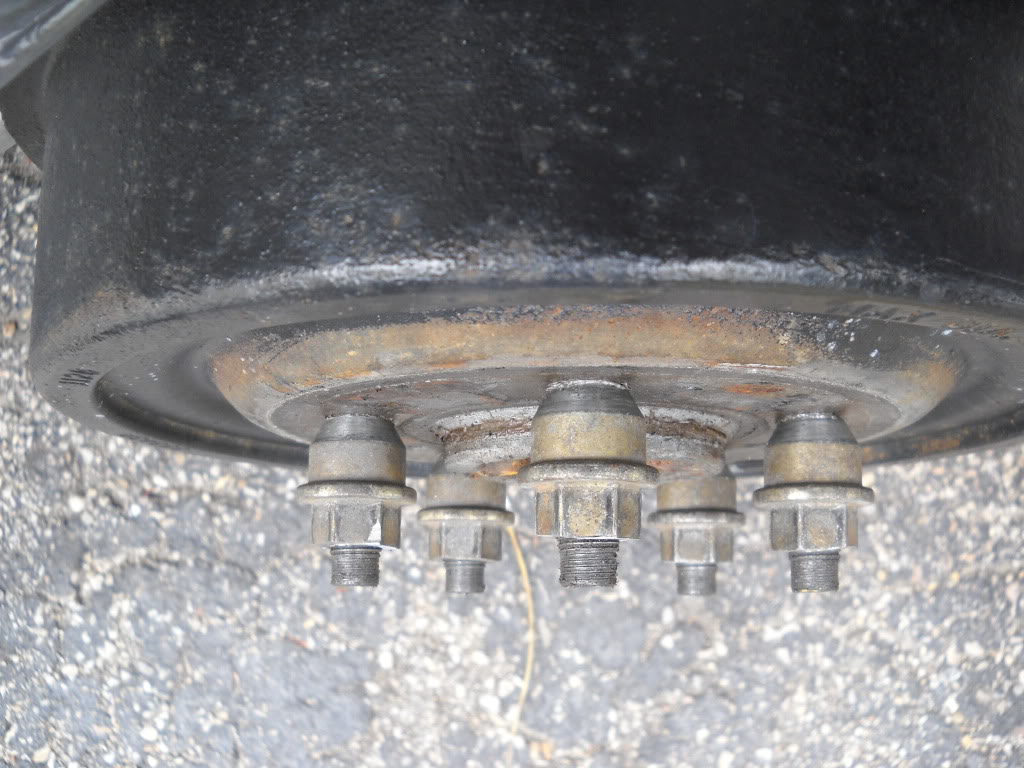
You'll notice that the studs are too long-they'll need to be ground-down so they don't protrude beyond the surface of the spacers.
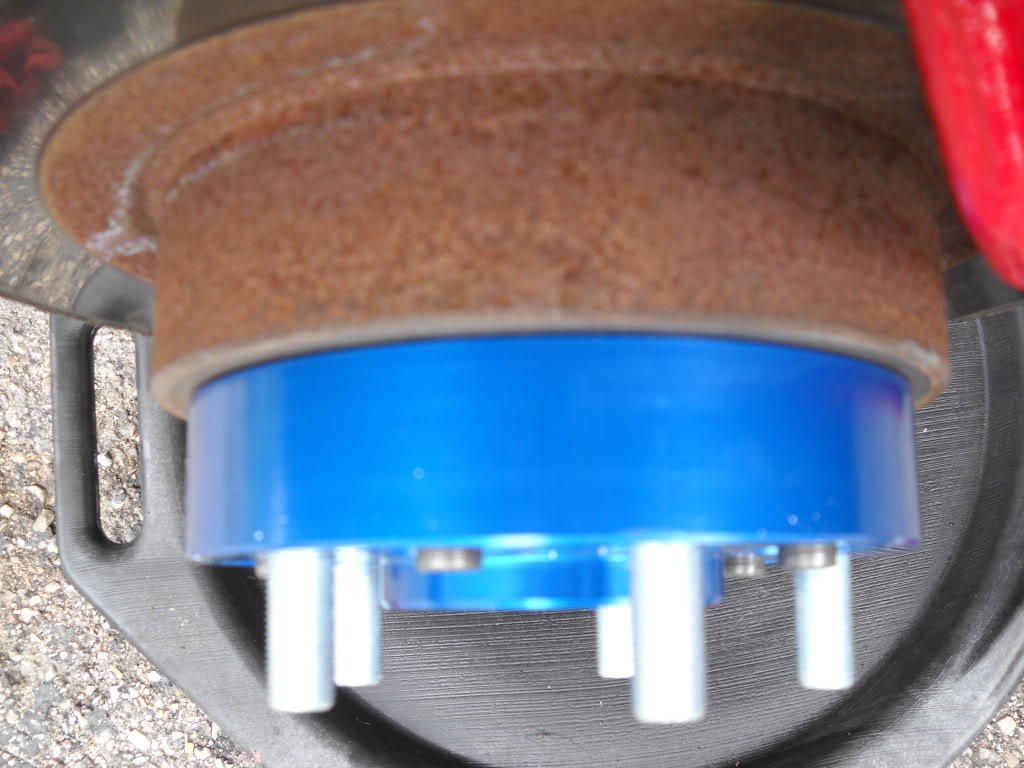
I used an old set of stock lugnuts as guides/spacers while grinding the studs. Be sure to use some lugnuts that you don't care about since they will get ruined (cue Stewie Griffin).
SUIT UP-Don the gear listed above. Hot metal is gonna be flying, so be safe. Have the fire extinguisher accessable. Time to make some sparks.
Use the angle grinder with a cut-off wheel to cut about 1/4" off of the studs. It doesn't have to be perfect-you'll clean everything up with the grinding wheel later.

Grind the studs flush with the lugnuts.
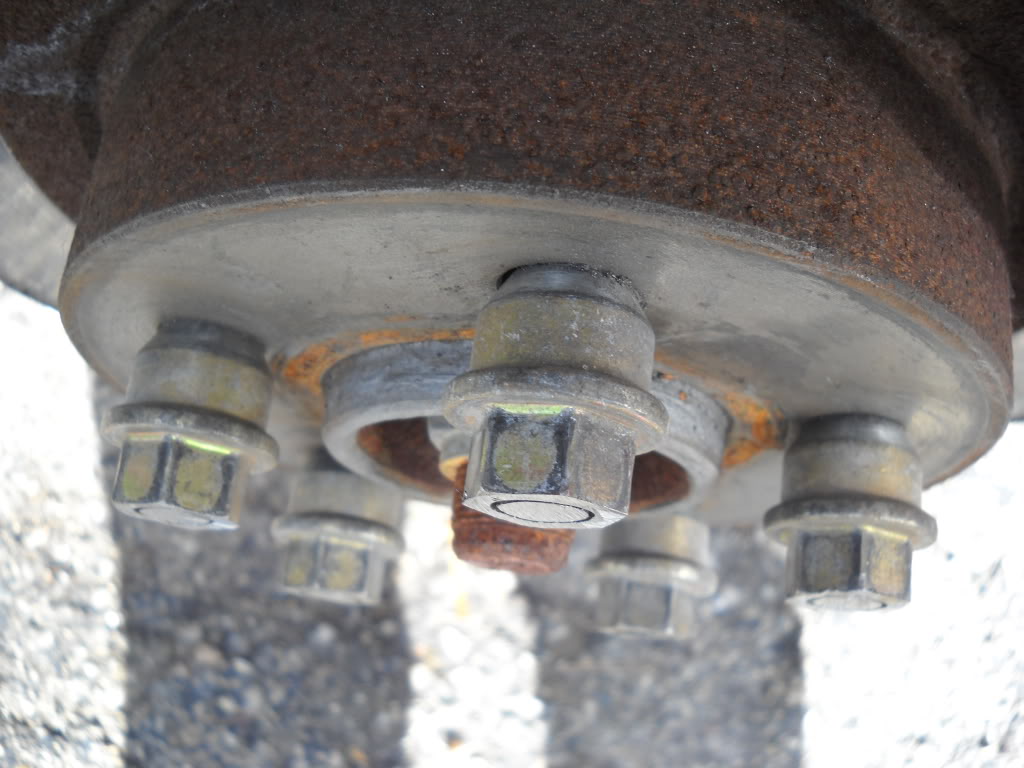
Remove the lugnuts-they should clean-up the threads on the studs as you remove them.
Spray everthing down with brake cleaner.
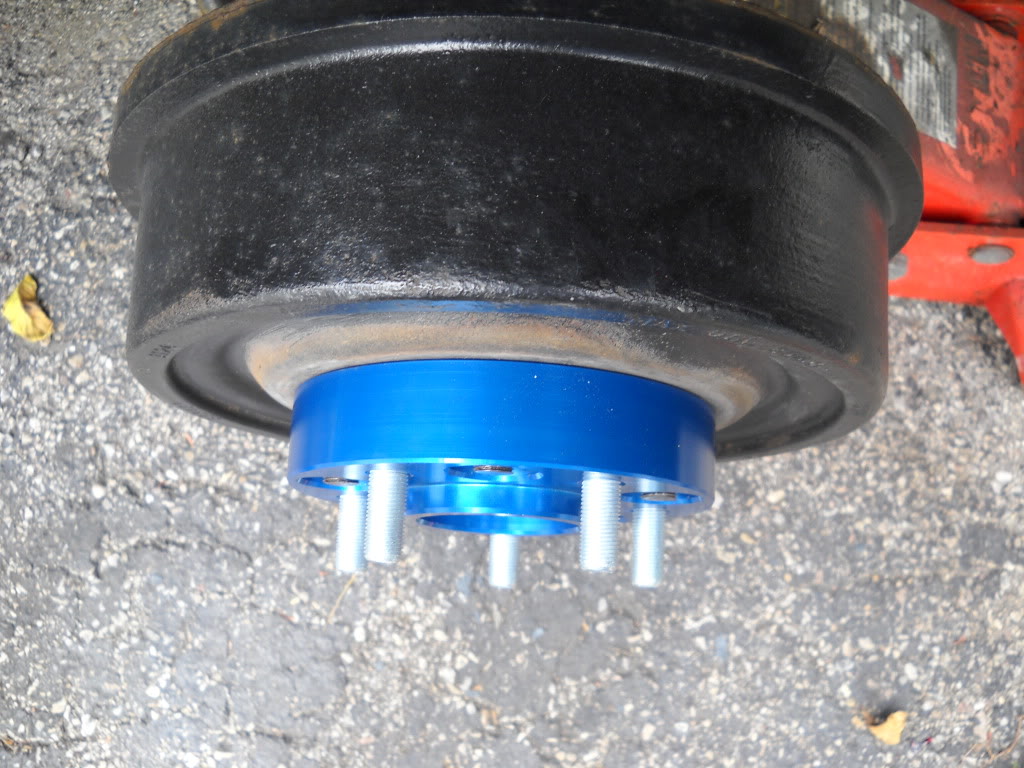
Test-fit the spacers. Install a couple of the nuts included with the kit, but do not use the threadlocker. Make sure that the studs are not protruding AT ALL; if they are, you'll need to do some more grinding.
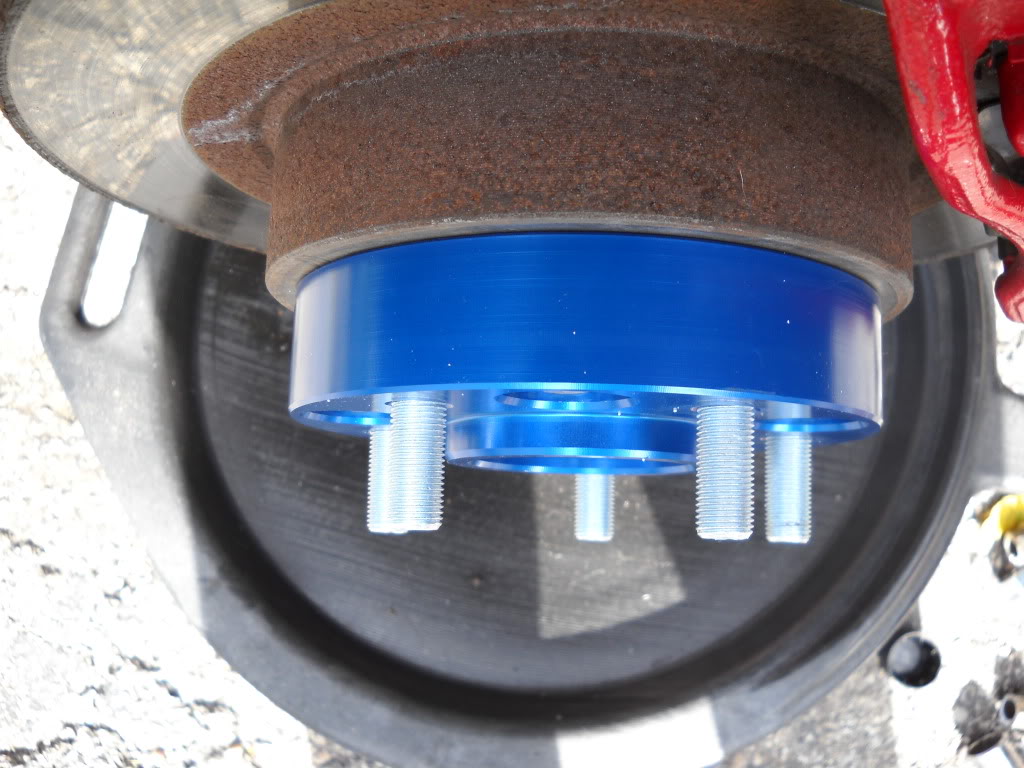
Once you have proper clearance, remove the nuts, apply a drop of threadlocker (included in kit) to one nut at a time, and reinstall.
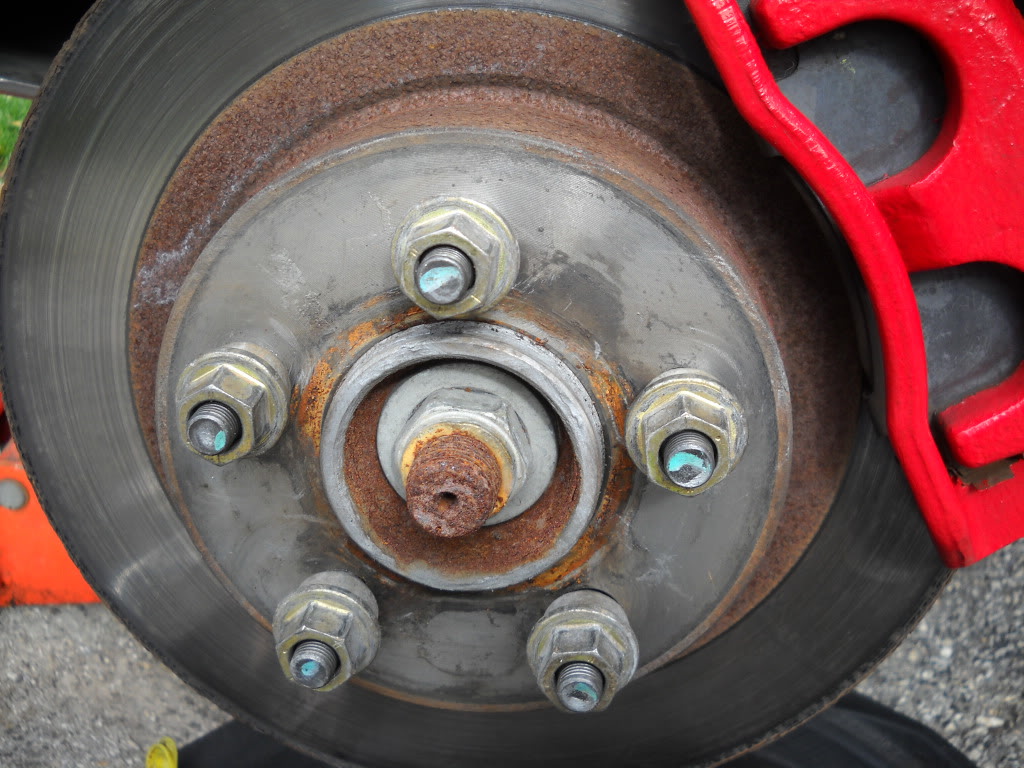
Torque to 90 ft.lbs.
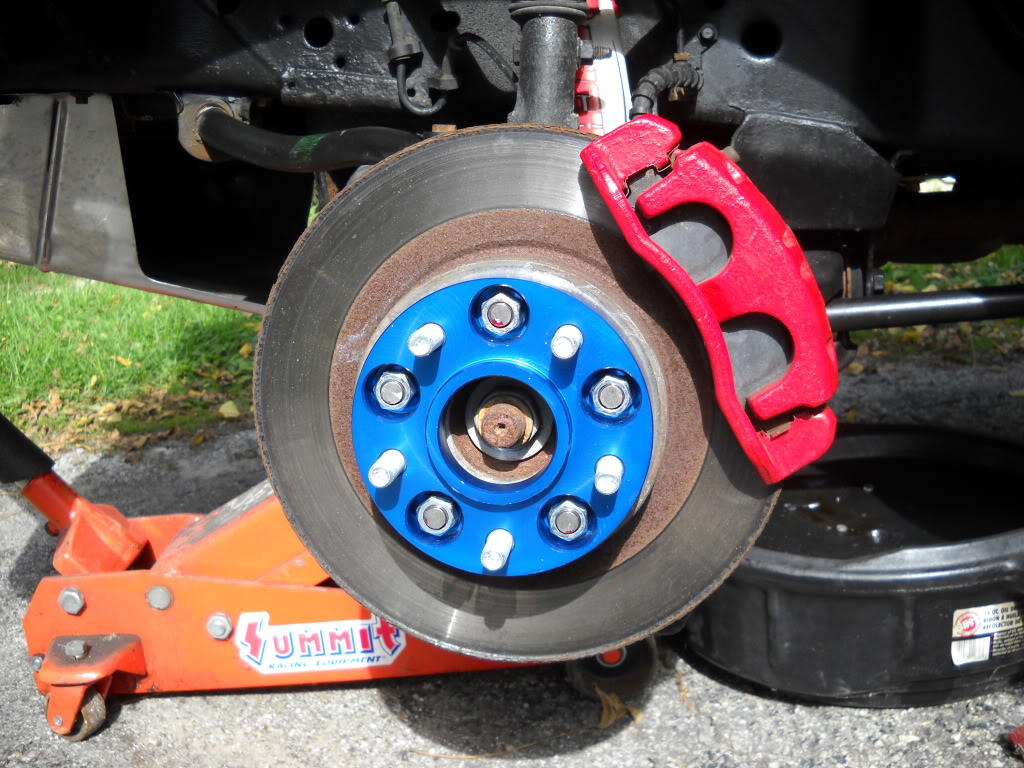
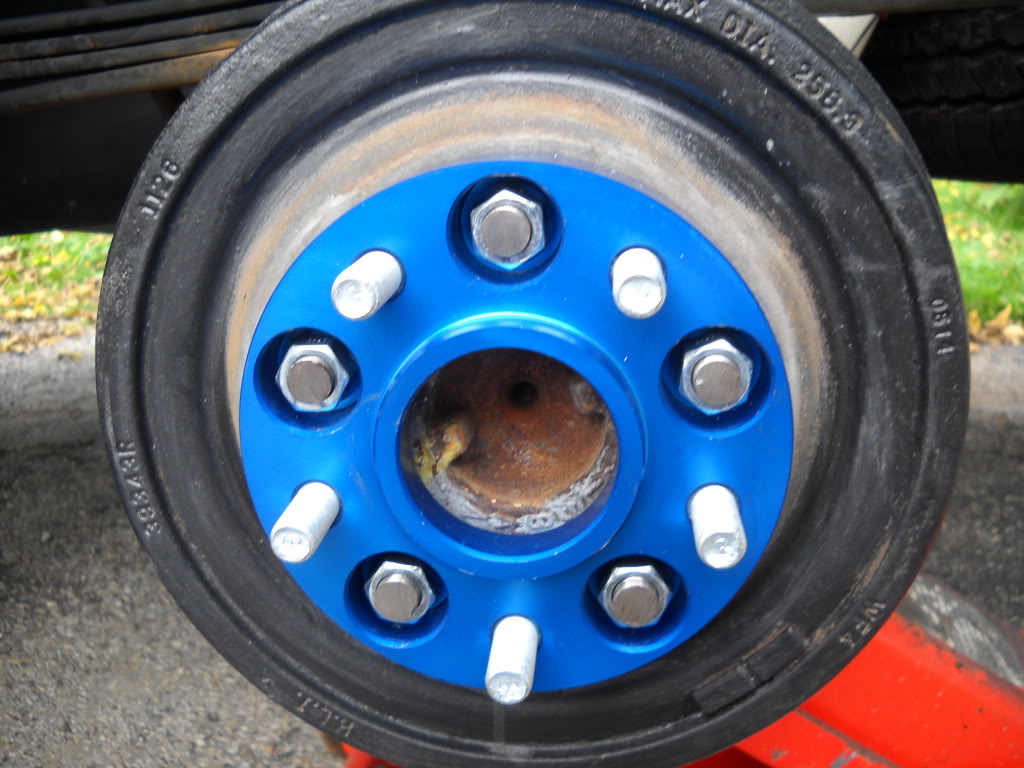
Reinstall wheels and torque to 100 ft. lbs.
Repeat for the other 3 wheels.
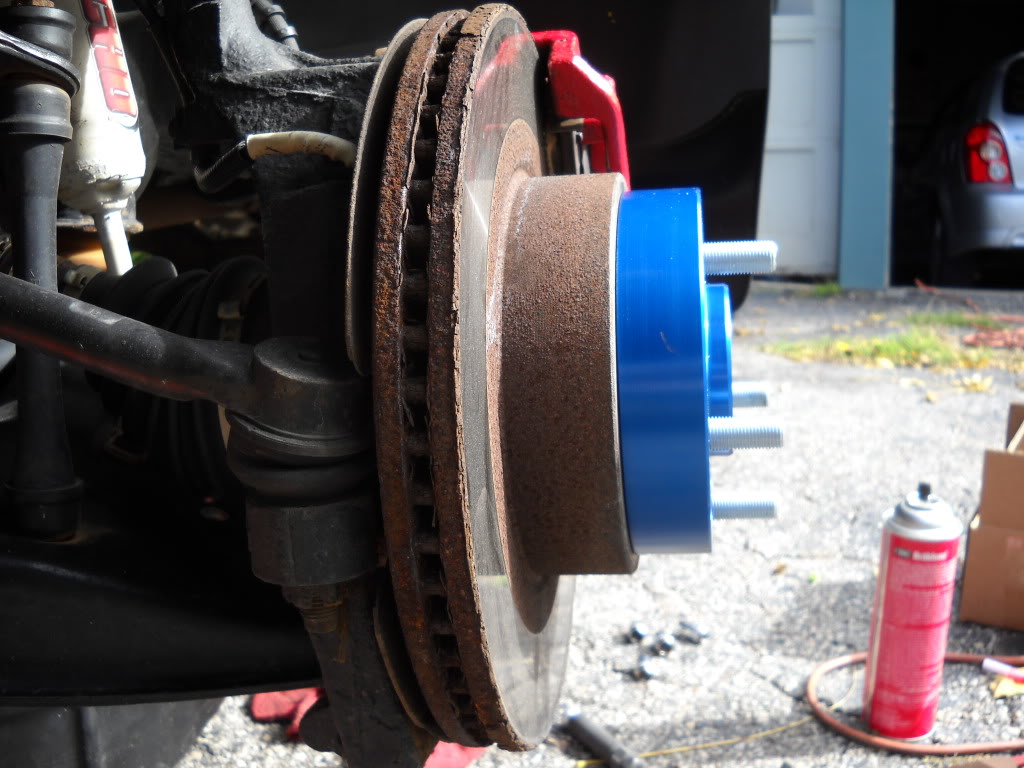
On mine, the rear studs were quite a bit longer than the fronts; just a bit more grinding involved.
Be sure to remove wheels and re-torque the spacers after 50 miles and check them fairly regularly-at least with every oil change, more more often would be better.
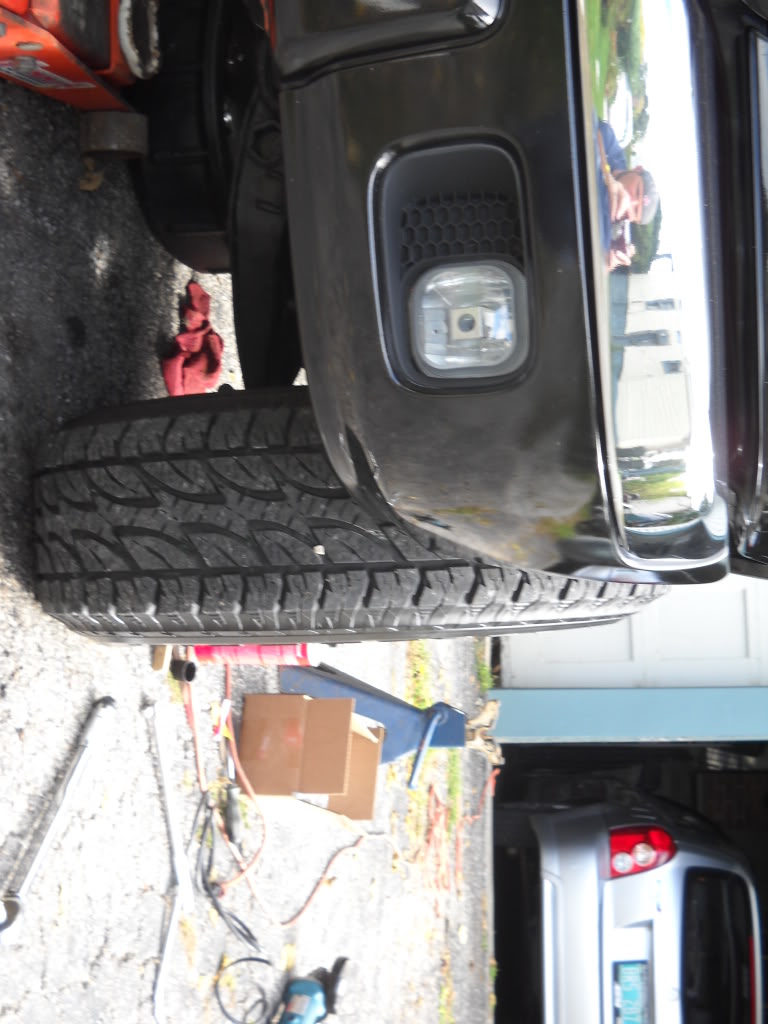
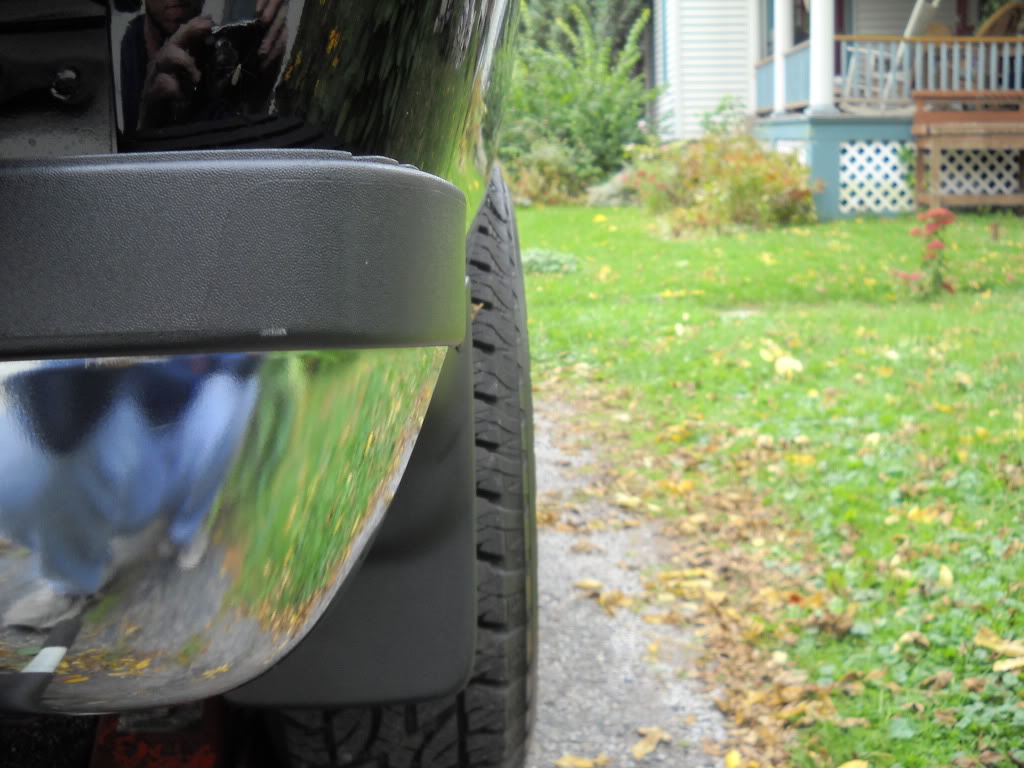
Front without spacer:
Front with spacer:
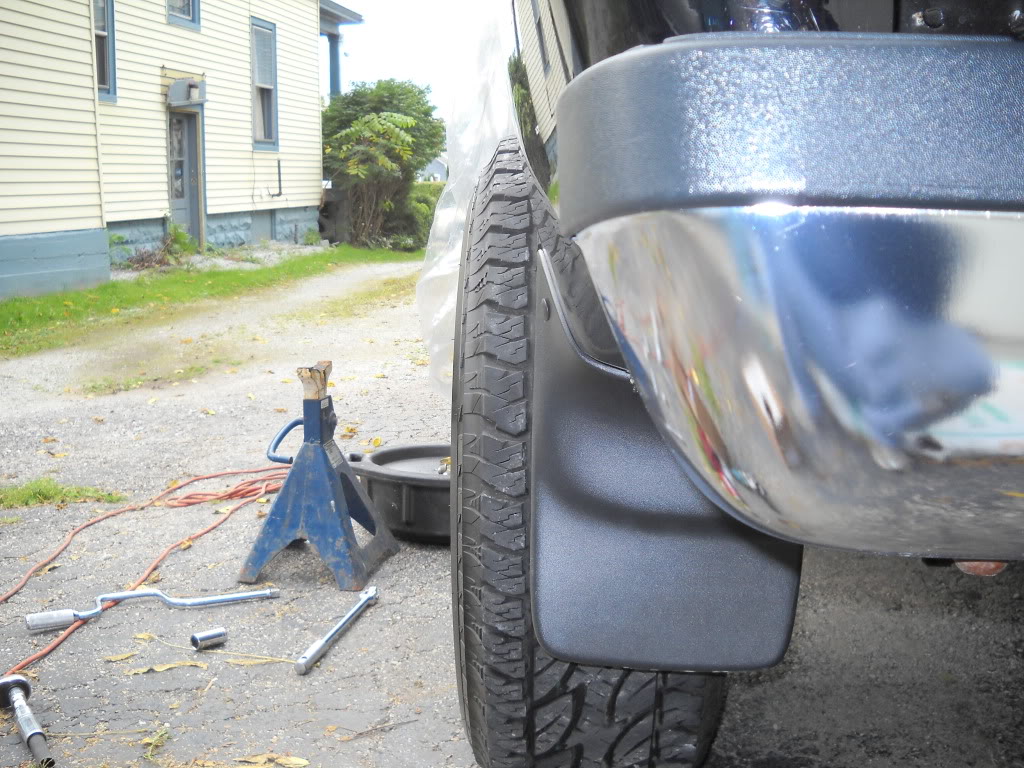
Rear without spacer:
Rear with spacer:
This is a pretty cool mod-definitely make the truck look much beefier. I might have to look into some fender flares now, though. It never ends!
Enjoy
MikeR
This How-To is for installing Spidertrax #WHS-002 1-1/4" aluminum wheel spacers on a 4x4 Ranger. This kit was originally designed for Jeep Wranglers, but it will work on Rangers with some slight modifications since the lug pattern is the same. These spacers are "For Off-Road Use Only" according to the instructions, but many people have had excellent results using these "On-Road" everyday on daily drivers.
Be sure to read the instructions included with the kit. As always "Install at your own risk".
What you will need:
1) 2 sets of Spidertrax #WHS-002 wheel spacers
2) Floor Jack and Jack Stands
3) Breaker Bar
4) Torque Wrench
5) Angle Grinder with 2 cut-off wheels and metal grinding wheel
5) Safety glasses, face shield, hearing protection
6) Long-sleeve shirt, hat, pants, Mechanix gloves
7) Brake cleaner & rags
8) Fire extinguisher--better safe than sorry
9) cheap plastic drop cloth and masking tape
Let's get started!
I decided to do the front ones first. Since I was working alone, I put the truck into 4WD to lock the front wheels together and jacked-up one side at a time. If you have help, you can forgo this and jack-up both sides at once and have your helper hold the brakes on.
Jack-up the front of the truck and support with jackstand(s)--be safe here-do not trust just the floor jack. Remove the front wheel(s) and set aside.
Cover the painted surfaces of your truck with the drop cloth and use some masking tape to hold it in place-if you value your paint, you won't skip this step!
You'll notice that the studs are too long-they'll need to be ground-down so they don't protrude beyond the surface of the spacers.
I used an old set of stock lugnuts as guides/spacers while grinding the studs. Be sure to use some lugnuts that you don't care about since they will get ruined (cue Stewie Griffin).
SUIT UP-Don the gear listed above. Hot metal is gonna be flying, so be safe. Have the fire extinguisher accessable. Time to make some sparks.
Use the angle grinder with a cut-off wheel to cut about 1/4" off of the studs. It doesn't have to be perfect-you'll clean everything up with the grinding wheel later.
Grind the studs flush with the lugnuts.
Remove the lugnuts-they should clean-up the threads on the studs as you remove them.
Spray everthing down with brake cleaner.
Test-fit the spacers. Install a couple of the nuts included with the kit, but do not use the threadlocker. Make sure that the studs are not protruding AT ALL; if they are, you'll need to do some more grinding.
Once you have proper clearance, remove the nuts, apply a drop of threadlocker (included in kit) to one nut at a time, and reinstall.
Torque to 90 ft.lbs.
Reinstall wheels and torque to 100 ft. lbs.
Repeat for the other 3 wheels.
On mine, the rear studs were quite a bit longer than the fronts; just a bit more grinding involved.
Be sure to remove wheels and re-torque the spacers after 50 miles and check them fairly regularly-at least with every oil change, more more often would be better.
Front without spacer:
Front with spacer:
Rear without spacer:
Rear with spacer:
This is a pretty cool mod-definitely make the truck look much beefier. I might have to look into some fender flares now, though. It never ends!
Enjoy
MikeR
Last edited by 98liftedranger; Nov 27, 2011 at 10:52 PM.
Joined: Dec 2009
Posts: 834
Likes: 3
From: Rutland VT
Another very important piece of information....If you have these installed on your vehicle and get into and accident some insurance companies will not cover you, weather the accident has anything to do with the spacers or not. They don't usually care but a couple of people i know have gotten screwed over pretty bad from having them on!


Also if you get your tires balanced at say a "discount tire" place they WILL NOT work on a vehicle that has them. People can be stupid and they don't want the liability of stupid people who dont re-torque or properly install these.
The only way they will continue to re-balance them is if you have them remove them.
The only way they will continue to re-balance them is if you have them remove them.
Member

Joined: Dec 2009
Posts: 547
Likes: 1
From: 954Fl
Also if you get your tires balanced at say a "discount tire" place they WILL NOT work on a vehicle that has them. People can be stupid and they don't want the liability of stupid people who dont re-torque or properly install these.
The only way they will continue to re-balance them is if you have them remove them.
The only way they will continue to re-balance them is if you have them remove them.

Thread
Thread Starter
Forum
Replies
Last Post
nicky919
Wheels & Tires Semi-Tech
5
Nov 30, 2010 09:01 AM
For Sale: spidertrax wheel spacers (pair) LV NV
Tys 4x4 FTW
OLD - Suspension, Tires, & Wheels
15
Oct 22, 2010 08:39 PM
GI_JO_NATHAN
OLD - Suspension, Tires, & Wheels
9
May 3, 2010 08:28 AM


