MUSTANG/TAURUS DOME LIGHT MOD.
#51
 05-14-2009


Join Date: Sep 2007
Location: Corvallis, Oregon
Posts: 92
Likes: 0
Received 0 Likes
on
0 Posts
Also those still looking for this type of dome light, you can find them in T-birds and Crown vics too.
#52
06-13-2009
#53
06-13-2009
There is a How To: on this for the 04+ rangers the one doesnt show where to get the power from though here is the one I did on RPS and Generation Edge
Tools needed:
Philips & small flathead Screwdriver
9/32" 6 point socket/rachet
Replacement Dome Light (From Mustang/Explorer/F-Series etc)
3 screws (should come with new dome light, or you can match one to the two in your current dome light)
1 Wire Tap
About 8 feet of wire
Electric tape
Electrical Fish tape (not required but helpful)
Step 1: Remove existing dome light.
Pop off the plastic cover with a small flathead. Then take out the two philips screws and the old dome light should be off.
Step 2: Removing trim.
You have to run power from the headlight switch to the dome light.
Start by taking off the dash access panel

Remove the grab handles on the A-pillar. This is accomplished by first removing the plastic trim plugs to expose the 9/32" hex bolts


Now you can pull off the A-Pillar trim piece. there are 2 plugs that hold this trim in place. Just pull the trim straight down towards the seat and it'll pop out. Just take your time

Remove the 3 Phillips screws that hold the sun-visor in place. After removing them, you should be able to drop the corner of the headliner, allowing you to run the wiring

You should now have a clear shot to run the wiring. Start from behind the headlight switch, up the a-pillar, tucking the wire behind the rubber strip to hold it into place then through the headliner and to dome light. This is where the wire snake would come in handy to run the wire to the dome light opening
Those with high powered subwoofers may want to take this time to secure the power wire with plenty of tape and/or wire ties. I had to secure mine in many places because it caused a few annoying rattles when the sub hit.
Step 3: Running the constant power wire.
Standard disclaimer: Caution, you can shock yourself, cause a fire and/or blow some fuses if you don't do this right, so be safe and disconnect the battery. Generation-Edge.info and the author of this how to are not responsible for any damage or injuries.
Locate the Green wire with Orange Stripe behind the headlight switch. This is the wire missing behind the dome light on 2004 and newer Rangers. This wire is "behind" the power saver relay, which means this wire will deliver constant power for approximately 10 minutes without a key in the ignition. If you want constant power without any interruptions, you will need to run a line from the battery (with fuse) or tap into the fuse box (passenger kick panel).
Use a wire tap to splice into the Green/orange wire

Now you want your new power wire to connect to the screw circled in Black. The RED circle is for switched power and this hole should line up with the black/blue wire Ford put behind the dome light. As stated before, the ground is the chassis. Just make sure the last screw hole circled in yellow lines up with a pre-drilled hole into the dome light brace.

Black = Constant
RED = Switched
Yellow= Ground

Step 4b: Mounting the light.
By using the screws for ground and switched power (screwed to the factory locations)
should be sufficient for a secure mount.
Step 5: Test the installation.
CHECK ALL WIRING. Make sure all dome light screws are contacting the factory wire, your power wire, or the chassis. Make sure the wire tap is in contact with the wire.
Reconnect the battery.
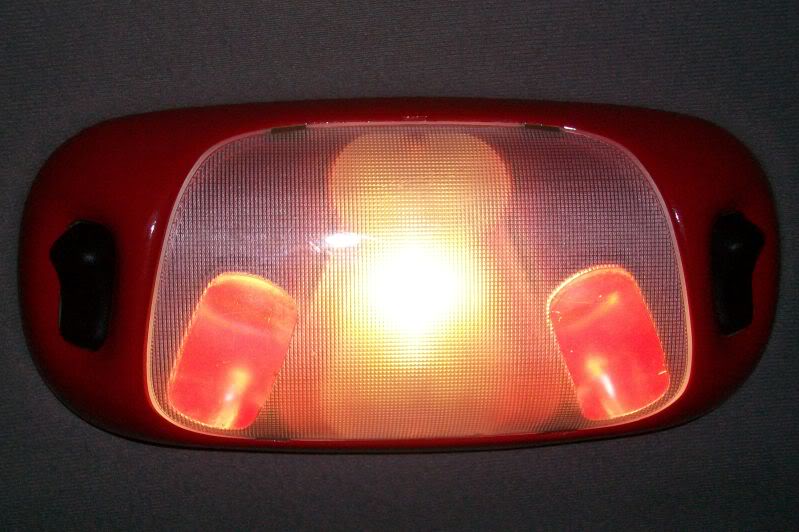
Close all doors to reset the battery saver relay. Then turn the rotary dial by the headlight switch to turn on the dome light. The center bulb should illuminate. Turn the switch back to "off".
Test the map light switches on the dome light. Each switch should turn on one bulb and one bulb only. It should be obvious which one that it. These map light switches should work independently of the headlight dome switch, because of the power wire you ran.
Step 6: Replace trim.
Follow step 2 in reverse order


Tools needed:
Philips & small flathead Screwdriver
9/32" 6 point socket/rachet
Replacement Dome Light (From Mustang/Explorer/F-Series etc)
3 screws (should come with new dome light, or you can match one to the two in your current dome light)
1 Wire Tap
About 8 feet of wire
Electric tape
Electrical Fish tape (not required but helpful)
Step 1: Remove existing dome light.
Pop off the plastic cover with a small flathead. Then take out the two philips screws and the old dome light should be off.
Step 2: Removing trim.
You have to run power from the headlight switch to the dome light.
Start by taking off the dash access panel
Remove the grab handles on the A-pillar. This is accomplished by first removing the plastic trim plugs to expose the 9/32" hex bolts
Now you can pull off the A-Pillar trim piece. there are 2 plugs that hold this trim in place. Just pull the trim straight down towards the seat and it'll pop out. Just take your time
Remove the 3 Phillips screws that hold the sun-visor in place. After removing them, you should be able to drop the corner of the headliner, allowing you to run the wiring
You should now have a clear shot to run the wiring. Start from behind the headlight switch, up the a-pillar, tucking the wire behind the rubber strip to hold it into place then through the headliner and to dome light. This is where the wire snake would come in handy to run the wire to the dome light opening
Those with high powered subwoofers may want to take this time to secure the power wire with plenty of tape and/or wire ties. I had to secure mine in many places because it caused a few annoying rattles when the sub hit.
Step 3: Running the constant power wire.
Standard disclaimer: Caution, you can shock yourself, cause a fire and/or blow some fuses if you don't do this right, so be safe and disconnect the battery. Generation-Edge.info and the author of this how to are not responsible for any damage or injuries.
Locate the Green wire with Orange Stripe behind the headlight switch. This is the wire missing behind the dome light on 2004 and newer Rangers. This wire is "behind" the power saver relay, which means this wire will deliver constant power for approximately 10 minutes without a key in the ignition. If you want constant power without any interruptions, you will need to run a line from the battery (with fuse) or tap into the fuse box (passenger kick panel).
Use a wire tap to splice into the Green/orange wire
Now you want your new power wire to connect to the screw circled in Black. The RED circle is for switched power and this hole should line up with the black/blue wire Ford put behind the dome light. As stated before, the ground is the chassis. Just make sure the last screw hole circled in yellow lines up with a pre-drilled hole into the dome light brace.
Black = Constant
RED = Switched
Yellow= Ground
Step 4b: Mounting the light.
By using the screws for ground and switched power (screwed to the factory locations)
should be sufficient for a secure mount.
Step 5: Test the installation.
CHECK ALL WIRING. Make sure all dome light screws are contacting the factory wire, your power wire, or the chassis. Make sure the wire tap is in contact with the wire.
Reconnect the battery.
Close all doors to reset the battery saver relay. Then turn the rotary dial by the headlight switch to turn on the dome light. The center bulb should illuminate. Turn the switch back to "off".
Test the map light switches on the dome light. Each switch should turn on one bulb and one bulb only. It should be obvious which one that it. These map light switches should work independently of the headlight dome switch, because of the power wire you ran.
Step 6: Replace trim.
Follow step 2 in reverse order
#54
06-13-2009


#60
06-18-2009


Join Date: Jun 2009
Location: Beaumont, CA
Posts: 632
Likes: 0
Received 0 Likes
on
0 Posts
#61
06-18-2009
Join Date: Aug 2007
Location: Golden, CO
Posts: 487
Likes: 0
Received 0 Likes
on
0 Posts
#62
06-18-2009
Join Date: Jun 2009
Location: Beaumont, CA
Posts: 632
Likes: 0
Received 0 Likes
on
0 Posts
 I painted mine
#64
08-14-2009


Thread
Thread Starter
Forum
Replies
Last Post
For Sale: Mustang/Taurus Dome Light - GA
MugenCRX04
OLD - Interior, Exterior, Electrical, & Misc.
2
01-21-2010 10:02 AM
rideabikenick
Interior, Exterior, & Electrical
4
10-07-2009 07:29 AM
MugenCRX04
OLD - Interior, Exterior, Electrical, & Misc.
10
08-03-2009 07:11 PM
Silver
General Technical & Electrical
4
01-01-2009 09:01 AM


