


Body lift waag bar process.....(updated daily)


Thread Starter
|
Member

Joined: Mar 2005
Posts: 4,376
Likes: 1
From: Dearborn Michigan
Body lift waag bar process.....(updated daily)
DAY #3...post 26
DAY #2...post 12
Ok, i spend most of today working on these brackets.
I removed the skid plate and bumper, put the main bracket on the frame and worked from there. After an hour of just simply studying the front end of my truck and the brackets, i came up with how to make the bottom brackets.
I still havent thought on how to do the top bracket, but once i finish the bottom i will think of something.
Im just waiting on material that i will get tomorrow for the bottom.
What i have came up with so far for the bottom is a simple bolt on piece to the main frame bracket. From there i plan to use the "Stock" brackets that come with the kit...only you have to switch the driver and passanger around, and turn them upside down...
I have made a templete out of wood for the piece that i am making, however i drilled the wholes wrong. I have been discussing this with my dad and we have figured out how to make it work easily.....just making the first one will be a pain.
I dont have any pictures right now, basically just planned out today on what to do (there was a lot more planning then expected).
Tomorrow i will finish up the bottom brackets and start on the top.
I can see that the top will be hard. The bracket has to go between the bumper and grill, and there isnt much room. It can be easily done, but the bumper will be so low, that it will look ugly...(almost 1.5 inches gap).
Im thinking i may have to customise this bracket, but i have to finish the bottom first.
This post will be updated daily, ,or maybe twice a day.
I will have pic once i start making parts and putting them together.
any suggestions or help facts, let me no please...these bracktes are HARD!!!
ill keep you updated.
Evan
DAY #2...post 12
Ok, i spend most of today working on these brackets.
I removed the skid plate and bumper, put the main bracket on the frame and worked from there. After an hour of just simply studying the front end of my truck and the brackets, i came up with how to make the bottom brackets.
I still havent thought on how to do the top bracket, but once i finish the bottom i will think of something.
Im just waiting on material that i will get tomorrow for the bottom.
What i have came up with so far for the bottom is a simple bolt on piece to the main frame bracket. From there i plan to use the "Stock" brackets that come with the kit...only you have to switch the driver and passanger around, and turn them upside down...
I have made a templete out of wood for the piece that i am making, however i drilled the wholes wrong. I have been discussing this with my dad and we have figured out how to make it work easily.....just making the first one will be a pain.
I dont have any pictures right now, basically just planned out today on what to do (there was a lot more planning then expected).
Tomorrow i will finish up the bottom brackets and start on the top.
I can see that the top will be hard. The bracket has to go between the bumper and grill, and there isnt much room. It can be easily done, but the bumper will be so low, that it will look ugly...(almost 1.5 inches gap).
Im thinking i may have to customise this bracket, but i have to finish the bottom first.
This post will be updated daily, ,or maybe twice a day.
I will have pic once i start making parts and putting them together.
any suggestions or help facts, let me no please...these bracktes are HARD!!!
ill keep you updated.
Evan
Last edited by rangererv; Nov 6, 2005 at 05:05 PM.




Thread Starter
|
Member
Joined: Mar 2005
Posts: 4,376
Likes: 1
From: Dearborn Michigan
Originally Posted by Redneckstone
hey evan give me a call tomarrow btw you coming to Mike A's house?
Im not sure...i dont no if im going to need to....possible just a bolt on piece that im making..
Ill call you tomorrow morning and you can stop buy if you want. My dad will have the material i need at 11 (lu
nch brake from work)


Thread Starter
|
Member
Joined: Mar 2005
Posts: 4,376
Likes: 1
From: Dearborn Michigan
^^ ok bill sounds good.
Im pretty sure what i have going is going to work...however not 100%
Once i get mine 100% on ill take all the brackets off and doublicate them for ya.
ill call you tomorrow if you want to stop by..i think zach might as well.
Im pretty sure what i have going is going to work...however not 100%
Once i get mine 100% on ill take all the brackets off and doublicate them for ya.
ill call you tomorrow if you want to stop by..i think zach might as well.
Thread Starter
|
Member
Joined: Mar 2005
Posts: 4,376
Likes: 1
From: Dearborn Michigan
Ok, i got my metal pieces that I need today.
it is a 10.5x2x1/4 in piece of metal.
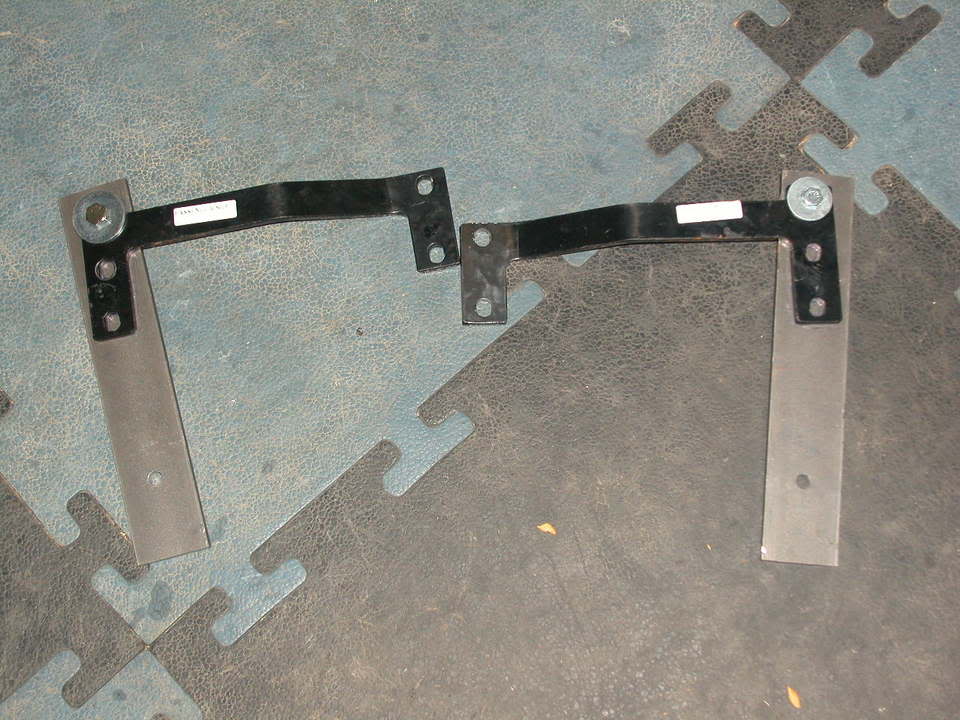
drilled a hole at the bottom to connect to the main "stock" frame bracket.
I bolted these pieces together
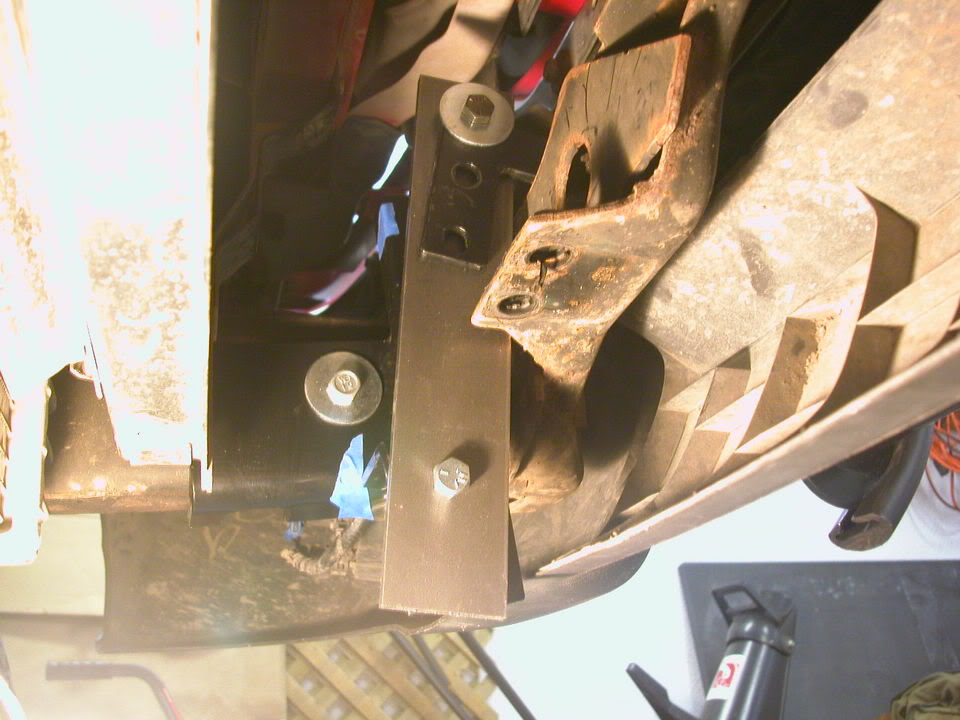
I only have one hole drilled for now untill i can align it perfect, then i will mark and drill out another hole.
Then i connected the PASSANGER bracket that sticks out of the bumper to the DRIVER side bracket. The bracket must be turned upside down.
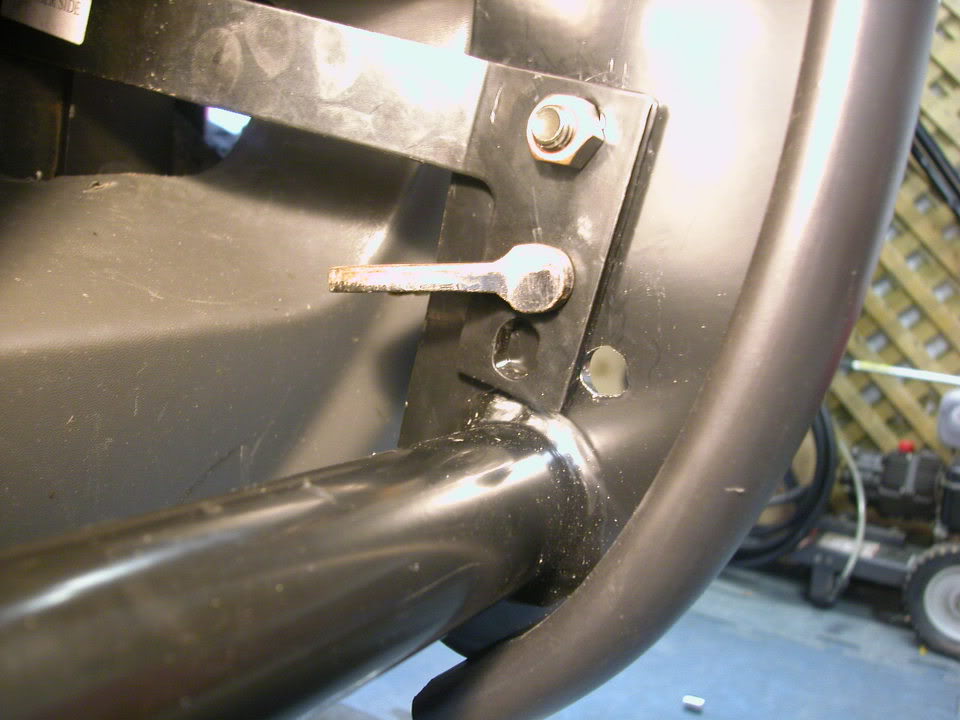
Once i align and level the waag, a new hole must be drilled to attach the bracket to the waag. (one hole will line up, but the other will not)
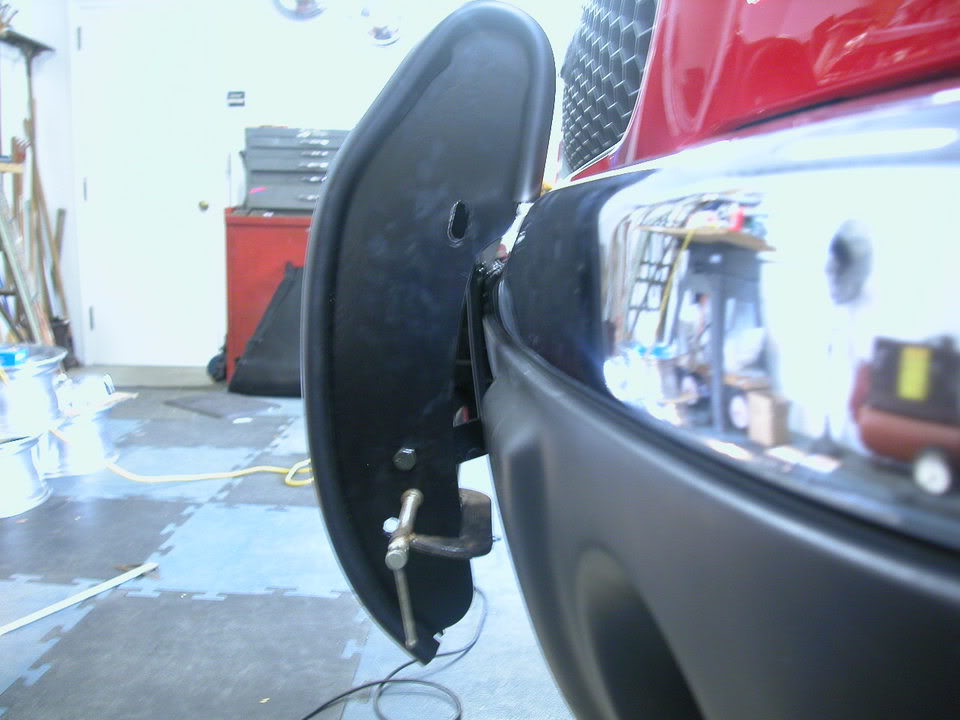
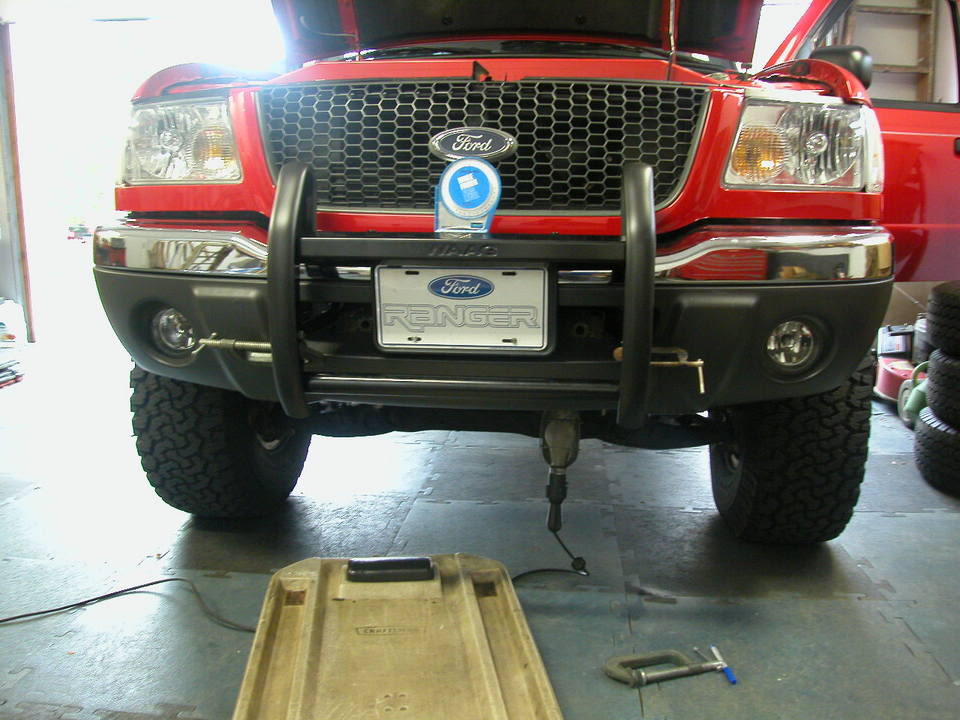
ok gotta go finish..
it is a 10.5x2x1/4 in piece of metal.
drilled a hole at the bottom to connect to the main "stock" frame bracket.
I bolted these pieces together
I only have one hole drilled for now untill i can align it perfect, then i will mark and drill out another hole.
Then i connected the PASSANGER bracket that sticks out of the bumper to the DRIVER side bracket. The bracket must be turned upside down.
Once i align and level the waag, a new hole must be drilled to attach the bracket to the waag. (one hole will line up, but the other will not)
ok gotta go finish..
Thread Starter
|
Member
Joined: Mar 2005
Posts: 4,376
Likes: 1
From: Dearborn Michigan
i have the bottom brackets made and drilled out.
things are going smoth so far.
I have an idea for the top brackets to connect, but well see. I gotts get a piece welded tomorrow.
Dont no if i will be able to update it tomorrow cause i have to work..well see
things are going smoth so far.
I have an idea for the top brackets to connect, but well see. I gotts get a piece welded tomorrow.
Dont no if i will be able to update it tomorrow cause i have to work..well see

Thread Starter
|
Member
Joined: Mar 2005
Posts: 4,376
Likes: 1
From: Dearborn Michigan
Originally Posted by zabeard
u aint done yet?
im doing one part at a time and i am mostly waiting on material.
plus its the weekend...um partying...lol
Originally Posted by HighRollerII
what kind of metal did you use?
tomorrow i am getting 3 inches welded on to the top of the brackets, once i finish that, it should be a smooth finish. (knock on wood)
I have finished the bottom brackets completely today, no pix yet tho.
Maybe tomorrow, but i am pretty busy all day.
Shoud be totally complete by monday or tuesday, and i will take tons of pix and measurements for you all.
Last edited by rangererv; Nov 5, 2005 at 09:58 PM.

Thread Starter
|
Member
Joined: Mar 2005
Posts: 4,376
Likes: 1
From: Dearborn Michigan
Originally Posted by zabeard
evan come on man... saturday i completly designed my new hitch... its currently all welded up and waiting on some primer and paint.
i had to design the parts, then wait untill my dad took it to work to weld it.


