

Headlight mod Q's..Need some A's

Thread Starter
|
Member

Joined: Jul 2007
Posts: 309
Likes: 0
From: Toledo, Ohio
Headlight mod Q's..Need some A's
I have looked at the thread from generationedge.com about the headlight mod and I am highly interested in doin it. I just have some questions. Has anyone painted the corners?? I didnt see any pics of them on the webpage or on FMD's thread when he did it and it would be nice if someone has done it just to see what it looks like. Is it basically the same procedure by popping them in the oven and then seperating the parts with the glue softened?? As a back up waht years of headlights can I purchase in case if I bake some of the parts?? I know the corners are different for my 06 but what about the other section of the headlight...what I dub the main headlights. Thanks for the help guys
Chris
Chris
yea someone posted in a thread i made some 06 corners that were all black, he also niteshaded the inside of the amber rectangle area a little, looked bad ****! for the headlight part 01+ will work on yours...i have heard the corners are harder to separate
RF Veteran
Joined: May 2006
Posts: 6,410
Likes: 0
From: Minnesota

too many people claiming too many problems after doing this mod: headlights became full of moisture/ clouded up, broke the housing while "baking" them, couldn't get the lens and housing to seal togeter properly... just spend about $80 bucks, get a set af blackend headlights off of e-bay. safer. and there done professionally. at a compamy. not in an oven. ovens are for food not truck parts.


Originally Posted by RangerJustin
yea someone posted in a thread i made some 06 corners that were all black, he also niteshaded the inside of the amber rectangle area a little, looked bad ****! for the headlight part 01+ will work on yours...i have heard the corners are harder to separate
Thread Starter
|
Member
Joined: Jul 2007
Posts: 309
Likes: 0
From: Toledo, Ohio
O didnt know so many people were having problems with moisture after doing the mod...And I saw the lights on ebay. I thought 120 for lights that I could make myself was a waste but now that I know more of the problems associated with the mod Ill prolly get the ebay ones.
Member
Joined: Aug 2006
Posts: 860
Likes: 0
From: Logan, Utah
The most difficult part of the process is the baking and prying apart of the lights. Once that's done, your golden. I know I'm stating the obvious but it's really not that bad. I actually ended up cracking the outer shell of the light a little bit while prying it apart and just overcompensated with the sealant at the end and it never leaks moisture in. I guess I got lucky with that. Unless you can find some cheap spare lights like I did ($40) off of craigslist, you mine as well just buy the ebay version, especially if your going black.
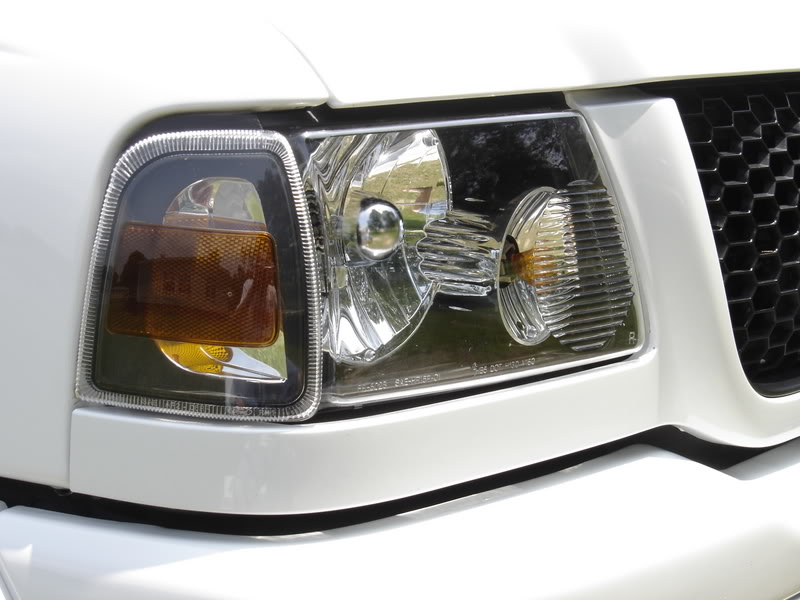
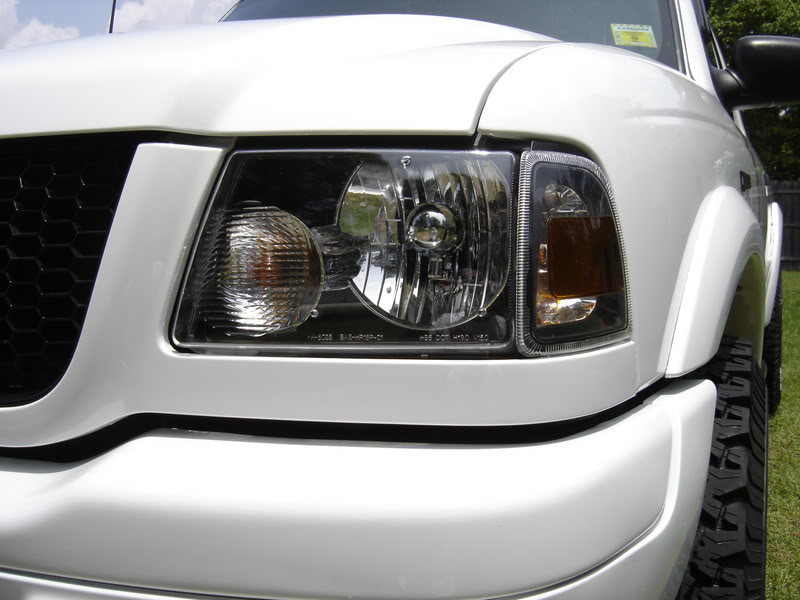
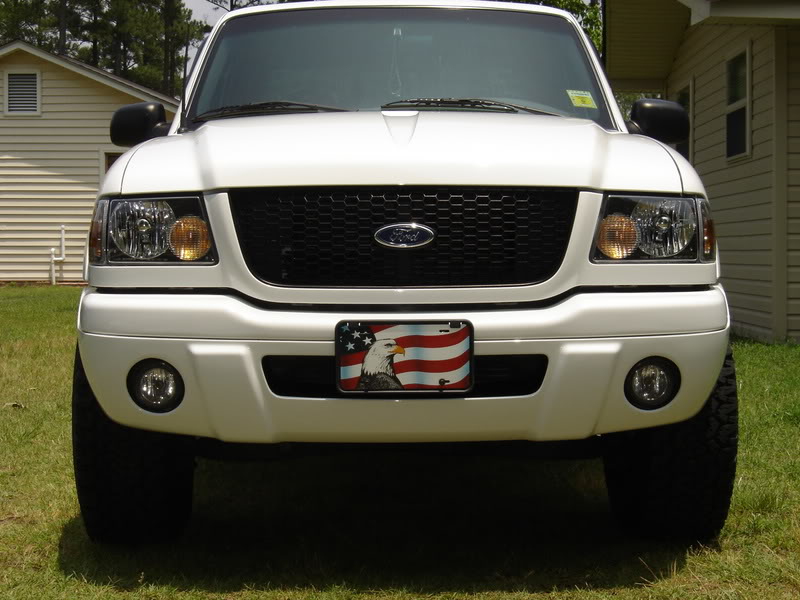
06 factory corners painted black:
Originally Posted by rwenzing
Here are pics of the stock and modified 06 corners. I just followed the headlight mod instructions here, being careful not to pry too hard. I had to heat them twice for 10 minutes at 190F to get them to fully separate. The background and the rim of the clear lens were then painted satin black before reassembly.
Original:

Modded:


Original:
Modded:
Thread Starter
|
Member
Joined: Jul 2007
Posts: 309
Likes: 0
From: Toledo, Ohio
Thanks you for the pics of the 06 painted corners. That is the exact look I want. I want the gold reflector on the corners and the black background. ill probably look at Junkyards here soon to see how much headlights would run me in case I mess something up.
Originally Posted by titanbball2345
O didnt know so many people were having problems with moisture after doing the mod...
Member
Joined: Dec 2007
Posts: 327
Likes: 0
From: Riverside, CA
Bob, those look awesome.
The black outline on the corners almost makes it look like a one piece from that distance pic.
The outline on the corners is painted from the inside right, kinda obvious but just have to ask.
The black outline on the corners almost makes it look like a one piece from that distance pic.
The outline on the corners is painted from the inside right, kinda obvious but just have to ask.

Thread
Thread Starter
Forum
Replies
Last Post
silverfox
General Technical & Electrical
8
Sep 23, 2009 02:20 PM
Wowak
General Ford Ranger Discussion
24
May 6, 2005 10:25 AM


