
Gage lighting problems!

Thread Starter
|
Member
Joined: Jan 2009
Posts: 314
Likes: 0
From: Haddon Heights, NJ


Above is a little diagram i drew up of my dimmer setup. For some reason the black box gets extremely hot and causes the gage lights to flicker on and off...very obnoxious...my theory is that there may be too much draw? please look it over and tell me what you guys think...i installed these gages:
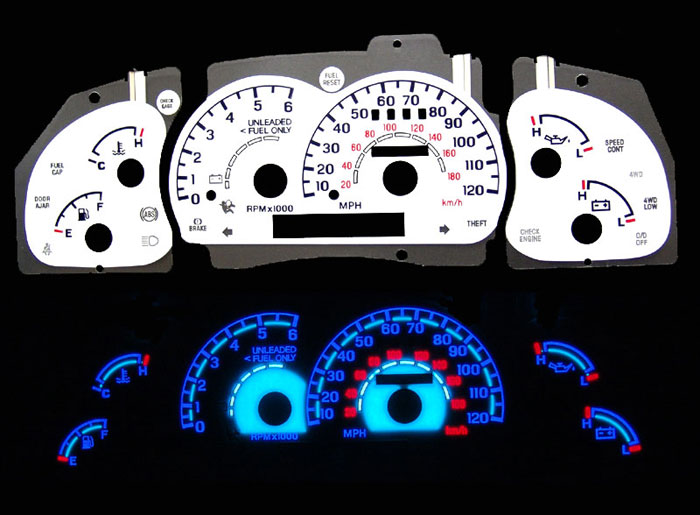
I got them on ebay...here is a direct link CLICK HERE
Thanks in advanced.
if it was me personally, i would have jus ran one dimmer, but it looks as if the aftermarket dimmer is a direct wire in to that black box. I would like to know what power it inverts. higher to lower watts? or Lower to higher watts?
Thread Starter
|
Member
Joined: Jan 2009
Posts: 314
Likes: 0
From: Haddon Heights, NJ
yea that i do not know...if i knew it i could prolly figure out what to do...i think tmrw i am going to try connecting it to a constant source...i really dnt know wat to do lol. this will take a lot of thinking.
Thread Starter
|
Member
Joined: Jan 2009
Posts: 314
Likes: 0
From: Haddon Heights, NJ
mine came with a dimmer and power inverter all on the same wire (there isn't a switch)...are you saying i can cut the wire before the inverter...thus eliminating it and the dimmer?

Thread Starter
|
Member
Joined: Jan 2009
Posts: 314
Likes: 0
From: Haddon Heights, NJ
Yea i'm not 100% sure about what he's saying. What i'm getting out of it is to cut before the inverter and just take the positive and negative wires and tap into the light switch...my only problem with that is...what will happen without the inverter? the last thing i wanna do is short anything or fry the light board.

No no... You need that black box.
That's what I'm assuming is what changes your truck voltage to whatever is rated for for those gauges.
What I think you need to do is find the wire that is how when you turn that *** to on when you turn the gauges on. Then cut that wire from that **** switch and tap that into the factory harness for the on off control of the lights. Find the other wire that controls dimmer via test light and do the same on the dimmer switch and tap them together.
Red is constant power and black is ground...
Hope that makes sense...
Those 3 wires on that **** are power, dimmer, and on/off. I'm almost sure.
Thread Starter
|
Member
Joined: Jan 2009
Posts: 314
Likes: 0
From: Haddon Heights, NJ
No no... You need that black box.
That's what I'm assuming is what changes your truck voltage to whatever is rated for for those gauges.
What I think you need to do is find the wire that is how when you turn that *** to on when you turn the gauges on. Then cut that wire from that **** switch and tap that into the factory harness for the on off control of the lights. Find the other wire that controls dimmer via test light and do the same on the dimmer switch and tap them together.
Red is constant power and black is ground...
Hope that makes sense...
Those 3 wires on that **** are power, dimmer, and on/off. I'm almost sure.
That's what I'm assuming is what changes your truck voltage to whatever is rated for for those gauges.
What I think you need to do is find the wire that is how when you turn that *** to on when you turn the gauges on. Then cut that wire from that **** switch and tap that into the factory harness for the on off control of the lights. Find the other wire that controls dimmer via test light and do the same on the dimmer switch and tap them together.
Red is constant power and black is ground...
Hope that makes sense...
Those 3 wires on that **** are power, dimmer, and on/off. I'm almost sure.
Joined: May 2004
Posts: 0
Likes: 7
From: CT
You can't just go chopping things off and hooking them up to whatever you want. You don't even know what this "black box" is but somehow you think you can just take it out and you'll be fine? Its not an inverter, that much I can assure you. You can't just bypass it and hook things up to other devices. Well, actually you can if you don't mind it going up in smoke.
It gets hot because resistance creates heat. If you're saying it gets really hot and the lights start acting funny, get rid of the system and buy one that isn't a piece of junk. Randomly cutting wires and splicing them into other random circuits will just melt the rest of it.
It gets hot because resistance creates heat. If you're saying it gets really hot and the lights start acting funny, get rid of the system and buy one that isn't a piece of junk. Randomly cutting wires and splicing them into other random circuits will just melt the rest of it.
Last edited by FireRanger; Feb 19, 2009 at 05:23 AM.
Thread Starter
|
Member
Joined: Jan 2009
Posts: 314
Likes: 0
From: Haddon Heights, NJ
You can't just go chopping things off and hooking them up to whatever you want. You don't even know what this "black box" is but somehow you think you can just take it out and you'll be fine? Its not an inverter, that much I can assure you. You can't just bypass it and hook things up to other devices. Well, actually you can if you don't mind it going up in smoke.
It gets hot because resistance creates heat. If you're saying it gets really hot and the lights start acting funny, get rid of the system and buy one that isn't a piece of junk. Randomly cutting wires and splicing them into other random circuits will just melt the rest of it.
It gets hot because resistance creates heat. If you're saying it gets really hot and the lights start acting funny, get rid of the system and buy one that isn't a piece of junk. Randomly cutting wires and splicing them into other random circuits will just melt the rest of it.
I will find out today once i check it out (i have all of the tools i need, so no need to lecture me on test lights, ohmmeters, etc...). Also as far as buying one "that isn't a piece of junk" I don't have that kind of money, so unless you wanna buy it for me I am going to stick with this one. Thanks for the concern though.
Joined: May 2004
Posts: 0
Likes: 7
From: CT
Ah, pretty sure you don't know what you're talking about. You can't just make up names for electronic devices that sound cool and throw in some smart sounding words here and there. Your logic and theory proves this as it makes no sense and is electrically incorrect. I'm not breaking you *****. You are just talking about things you don't understand.
So if you have this thing hooked up in a way that is contrary to the instructions it came with, I suggest you undo it and put it back the way it is supposed to be before it burns out. You should not be hooking this thing up some other way when you do not have the electrical skills and understanding to know what you're getting yourself into. Otherwise you are going to have to buy a new one anyway because its going to burn up.
So if you have this thing hooked up in a way that is contrary to the instructions it came with, I suggest you undo it and put it back the way it is supposed to be before it burns out. You should not be hooking this thing up some other way when you do not have the electrical skills and understanding to know what you're getting yourself into. Otherwise you are going to have to buy a new one anyway because its going to burn up.
Thread Starter
|
Member
Joined: Jan 2009
Posts: 314
Likes: 0
From: Haddon Heights, NJ
Ah, pretty sure you don't know what you're talking about. You can't just make up names for electronic devices that sound cool and throw in some smart sounding words here and there. Your logic and theory proves this as it makes no sense and is electrically incorrect. I'm not breaking you *****. You are just talking about things you don't understand.
So if you have this thing hooked up in a way that is contrary to the instructions it came with, I suggest you undo it and put it back the way it is supposed to be before it burns out. You should not be hooking this thing up some other way when you do not have the electrical skills and understanding to know what you're getting yourself into. Otherwise you are going to have to buy a new one anyway because its going to burn up.
So if you have this thing hooked up in a way that is contrary to the instructions it came with, I suggest you undo it and put it back the way it is supposed to be before it burns out. You should not be hooking this thing up some other way when you do not have the electrical skills and understanding to know what you're getting yourself into. Otherwise you are going to have to buy a new one anyway because its going to burn up.

Member

Joined: Feb 2009
Posts: 161
Likes: 0
From: Las Vegas, NV
Thread Starter
|
Member
Joined: Jan 2009
Posts: 314
Likes: 0
From: Haddon Heights, NJ


