


Interior HELP ME PLZZZZZ~!@#!!@~!

Thread Starter
|
Member

Joined: Apr 2010
Posts: 13
Likes: 0
From: Muncie IN
Interior HELP ME PLZZZZZ~!@#!!@~!
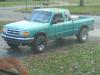
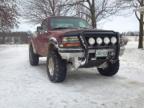
Ok so here's what's up. Ive got a 94 supercap ranger that im looking to do some interior modifications to. I have removed the headliner and all the trim pieces from the truck and im looking to cover the headliner in a camo but dont know what fabric to use. I also want to Stitch into the middle of the seat back and seat bottom camo fabric as well as cover the cloth on the door panels in camo. I have no clue what kind of special material to use if there is one i thought about using just regular material but didnt know what kind of differences there might be. I also encountered a problem when trying to remove the seat belt bolts that run through the body of the truck. Ive tried pb blaster heat and beatin on it to get it to jar loose but to no avail she's holdin steady lol. I need some advice from someone who has done a carpet R&R seeking their advice. I will also either cleaning or buyin a new carpet. If you have ANY advice or you are doing what im doing then let me know. Maybe we can colaborate and figure some things out together. Here's some pics of the progress so far. Im goin crazy tryin to figure some stuff out seein as how i jumped into the deep in before doin the research lol.


when i did my headliner in my golf, it was easy. i took the old stuff off and sprayed glue onto the headliner. i put the fabric down and made sure it was streched out, no wrinkles or creases. i used a thick camo fabic. i have a ton left and was debaing if i wanted to do it to the ranger or not.
as long as you use enough glue, any fabric would work. the stuff i used was heavy/thick and i had no problems. as for hte stiching, i can't say since i never got into that stuff.
as long as you use enough glue, any fabric would work. the stuff i used was heavy/thick and i had no problems. as for hte stiching, i can't say since i never got into that stuff.
i took my carpet out today and had a little problem with seatbelt bolts but that was because i didnt have the right tip to take them out with. i got them lose and worked the seat belt through it. if you are sure your going to replace the carpet you can just cut a bigger hole and it would be just fine.

Member
Joined: Mar 2010
Posts: 14
Likes: 0
From: Fort Bragg, NC
As far as the headliner goes most fabrics will work, but don't go too thin.
If there is any residue from the old fabric take sandpaper and sand it off / make the whole liner a little smoother. Don't go to town though if it's not needed. Then you can buy spray adhesive at most hardware stores and use that to hold your new fabric onto the headliner. Apply the spray adhesive on evenly and then put the new fabric on starting in the middle and work your way outward stretching it and making it stick evenly across your headliner, wrinkle free. Where your headliner stops your going to want to have some extra cloth (1-2 Inches) so you can overlap it on the back to give it a professional look to it so that the new fabric just doesn't stop abruptly and look like ****.
If there is any residue from the old fabric take sandpaper and sand it off / make the whole liner a little smoother. Don't go to town though if it's not needed. Then you can buy spray adhesive at most hardware stores and use that to hold your new fabric onto the headliner. Apply the spray adhesive on evenly and then put the new fabric on starting in the middle and work your way outward stretching it and making it stick evenly across your headliner, wrinkle free. Where your headliner stops your going to want to have some extra cloth (1-2 Inches) so you can overlap it on the back to give it a professional look to it so that the new fabric just doesn't stop abruptly and look like ****.
Thread Starter
|
Member
Joined: Apr 2010
Posts: 13
Likes: 0
From: Muncie IN
Well fellas i got everything done besides the seats. They wanted too damn much to simply stitch in camo in the inserts so i bought camo seat covers for buckets ( since i converted a set of 60/40's) BUT i didnt like how there was nothing in the middle. Nor did i like how worn down the foams were SO hopefully 2/12/2011 i will be buyin a set of grey leather expo seats with the grey full center console ALL FOR ONLY 60 BUCKS!!!!!!!!!!!!!! Hella stoked about that deal. Will upload pics i ended up also buying 200 sq ft of gorrilla sheild (same if not better as dynomat) Did the entire cab in this stuff. Went from a wicked pop can to a brand new truck with this stuff. HIGHLY recommend it! Also installed auto page two way transmitter alarm and car started only hooked up the alarm stuff since it's a manual. Now on to the exterior and engine. Got huge HUGE plans for both so keep checkin back with me for pics and stuff.

Member
Joined: Jul 2007
Posts: 277
Likes: 0
From: Lancaster, CA
I have heard some great things about Gorilla shield, Dynamat is way over priced for what it is. I know because I did the whole inside of my Ranger with it about 140 bucks to do everything. It does make a big difference though makes our little tin cans into Cadillacs and really keeps the temps down in the summer.
Good luck and post more pictures
Good luck and post more pictures
Thread Starter
|
Member
Joined: Apr 2010
Posts: 13
Likes: 0
From: Muncie IN
Will do if this site let's me if not i'll make it happen. Right now i've got over 200 pics of just redoing the interior in camo. So far it looks good. Oh one thing i havent mentioned anywhere is that i bought one of those shelf it's from lmc truck and wrapped that in camo too. Works like a champ! Love the extra storage room but one draw back was when you reinstall the visors there's limited view. So i took the liberty of takin those completely out the equation. Hope tomorrow goes well and i get my seats and console installed in the nice 36 ddegree weather HA! Also gotta bleed my clutch since it hates being shifted after it runs for a good while. Hoping it's just an air bubble instead of the clutch b/c i'm swapping engine and trans so i really dont wanna waste the money in putting a new clutch in this thing.
Didn’t look at the date…
How did you finish up the interior...
How did you finish up the interior...
Last edited by Scrambler82; Feb 19, 2011 at 05:51 AM.



Member
Joined: May 2007
Posts: 417
Likes: 0
From: Mundelein, ill

ok cupple more questions.
1. does it have a lip to it or something to keep stuff from sliding forward when you hit the breaks or the gas?
2. what are the dimensions? i knw its gonna be as wide as the cab but i wanna know how deep it is front to back and whats the distance between it and the roof?
thanks alot for your help man. everything i can find online is either ppl judging it that dont own it or its for a fullsize.
1. does it have a lip to it or something to keep stuff from sliding forward when you hit the breaks or the gas?
2. what are the dimensions? i knw its gonna be as wide as the cab but i wanna know how deep it is front to back and whats the distance between it and the roof?
thanks alot for your help man. everything i can find online is either ppl judging it that dont own it or its for a fullsize.

Thread
Thread Starter
Forum
Replies
Last Post
BlackRanger04
Interior Semi-Tech
13
Jan 27, 2011 08:50 PM
Strider0O0
Interior Semi-Tech
14
Jul 11, 2006 03:03 PM


