
Custom HID Projector Lens in an 01'+ Housing

Thread Starter
|
Member

Joined: Oct 2007
Posts: 2,583
Likes: 4
From: Stevenson, WA
Custom HID Projector Lens in an 01'+ Housing
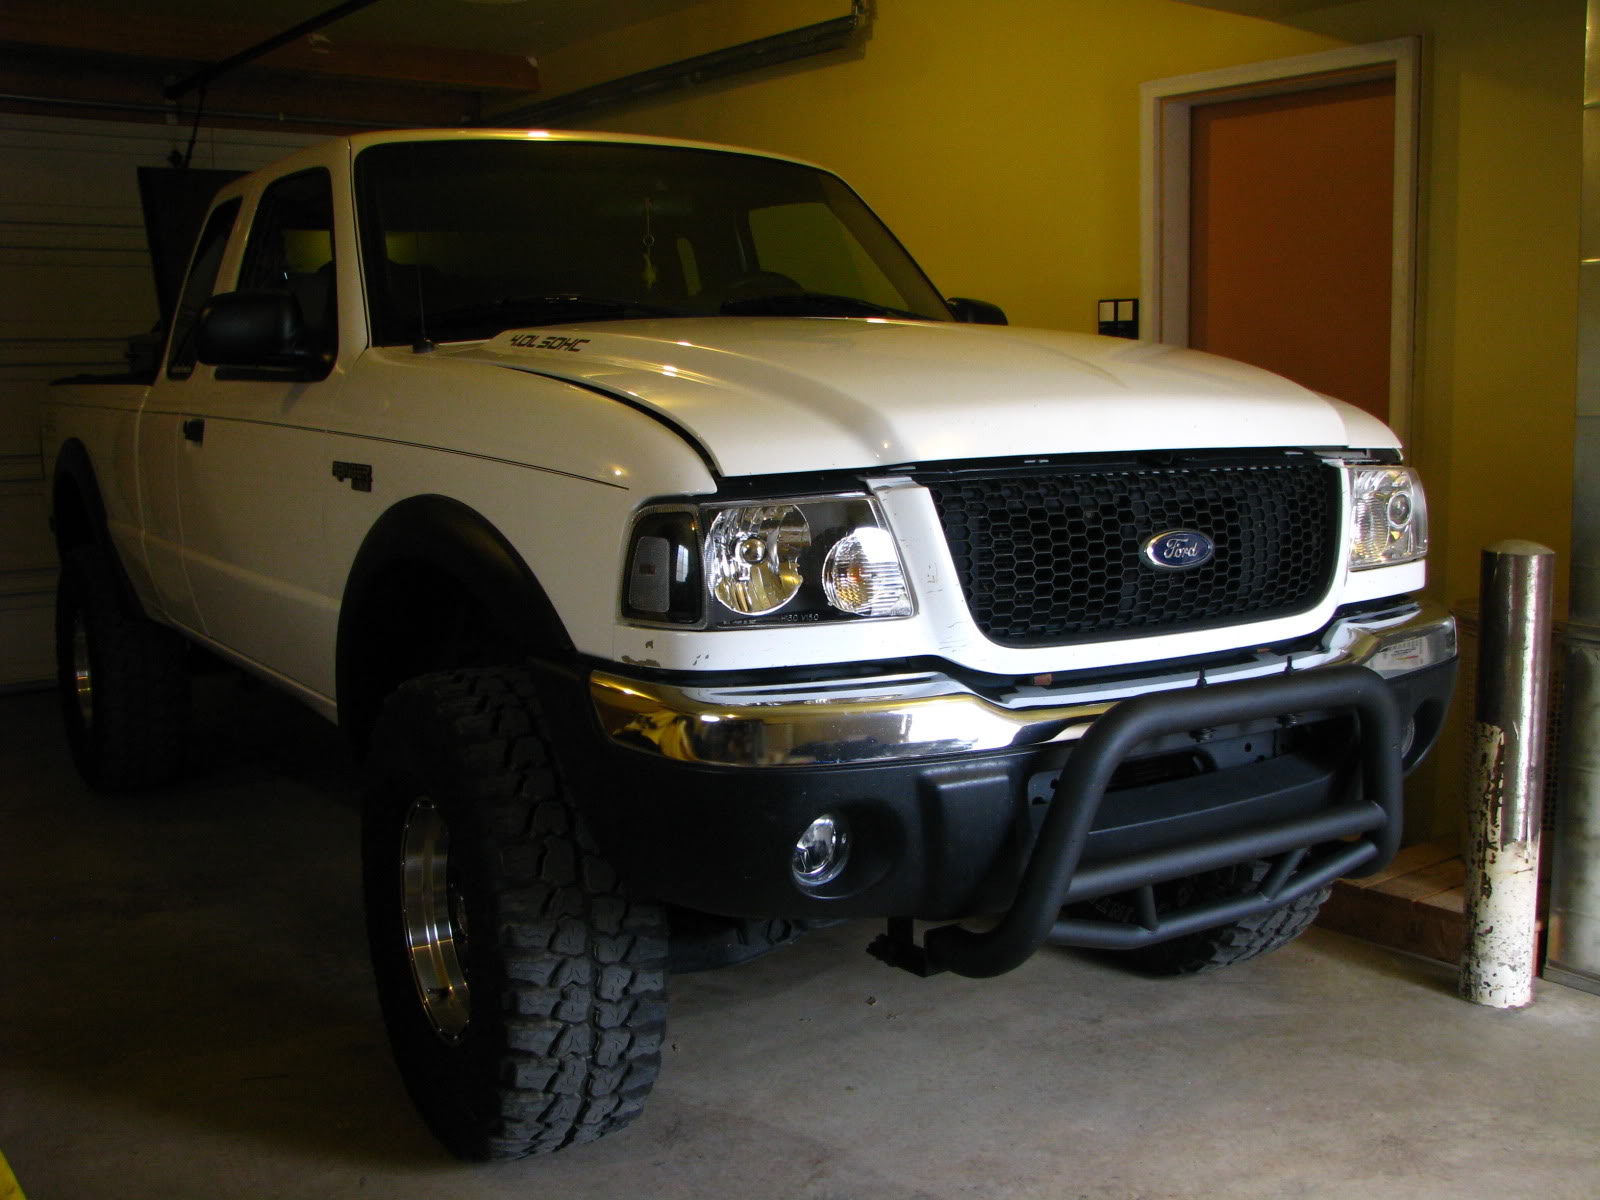
Just rough-finished up a rather VERY intense project I had set out to do several weeks back.. finally began getting parts in the mail last week - after a 5 day vacation from work (Taking time off for the Blue Lake Meet), I finally sat down to begin a very lengthy process last night... to install a full set of projector lenses, including high and low beams, in a stock headlight housing for the '01+ Ranger.
18+ Straight Hours of bending over these things (my back hurts!!) and taking a bit of a break from it to finally start up a post in the project logs - I am going to update this continually, I am about ~70% done with the project as of beginning this post.
Stay tuned, I am updating this very frequently with logs + pictures.. lots and lots of pictures!


Thread Starter
|
Member
Joined: Oct 2007
Posts: 2,583
Likes: 4
From: Stevenson, WA
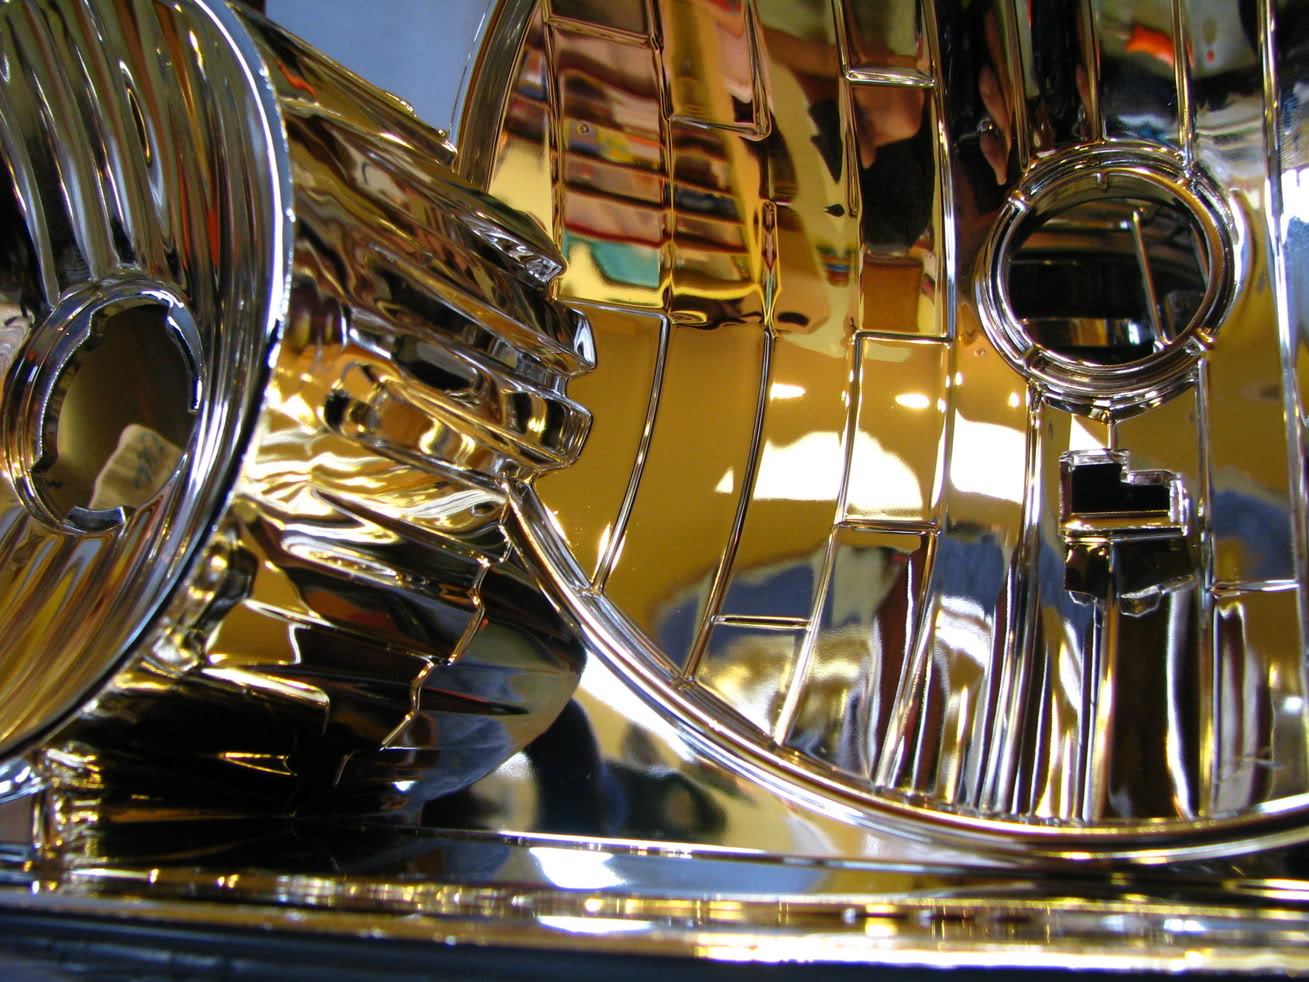
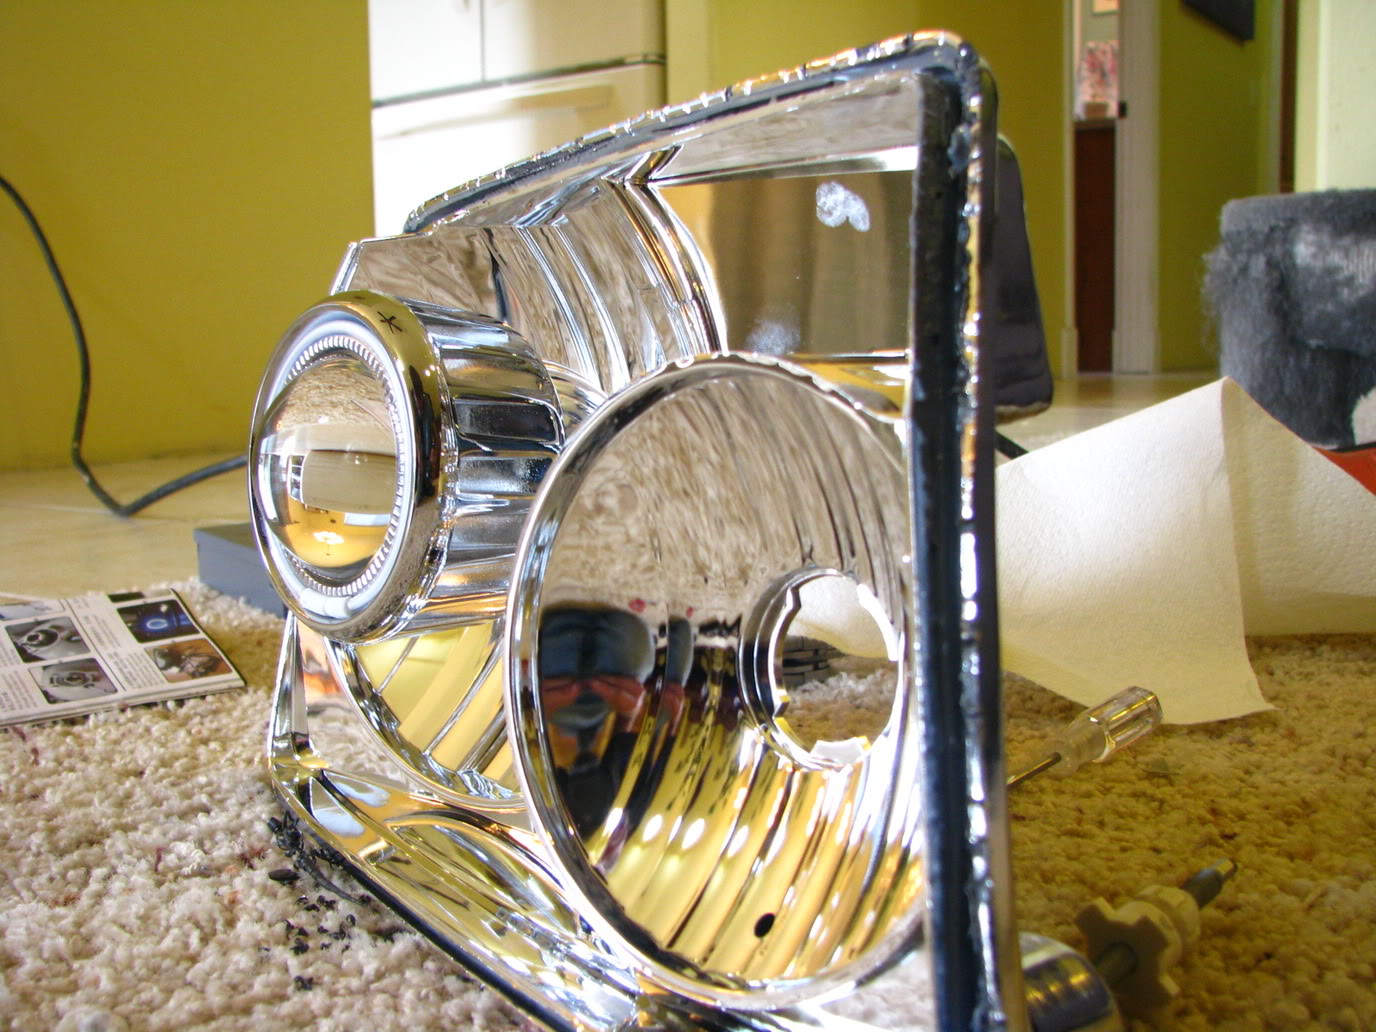
First began with the standard baking the headlights - I don't have any pictures of this.. because honestly - I was getting pissed off at how lengthy and annoying a process it was. Eventually, my system required me to sit a stool next to the oven, wearing some mechanic gloves to protect my hands from the heat - and slaving away with a handful of screwdrivers and sitting in front of the oven continually re-baking to soften the glue up, and prying away with a set of tools in both hands to attempt popping up the clear frame from the chrome housing.
Keep in mind, these are 100% stock chrome housings, I refused to take pictures at this point as mentioned above - if any of you have actually baked the housings - you know just why I didn't feel to take the time to actually snap photo's... It took me 6+ hours to pry up both clear housings from the lens area.
Completely removed both lenses, and also withdrew both of the reflector lens's that help focus the light on a standard halogen bulb.
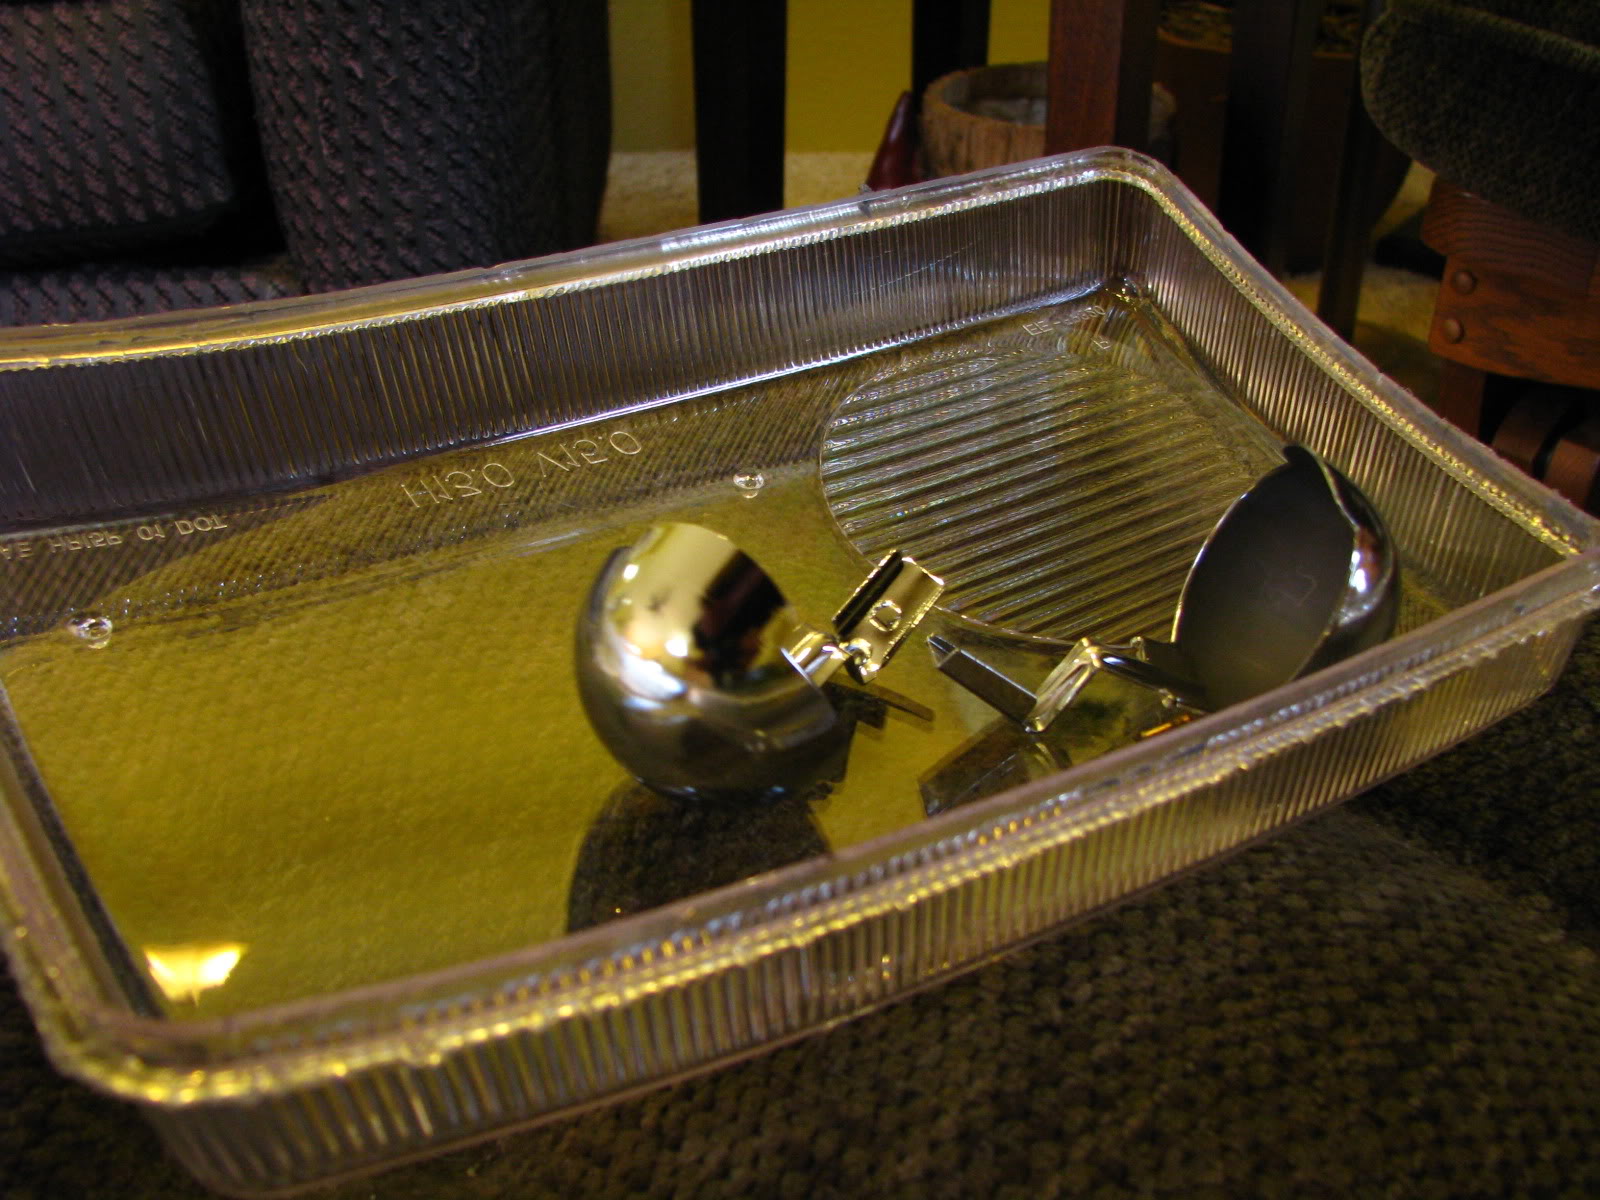
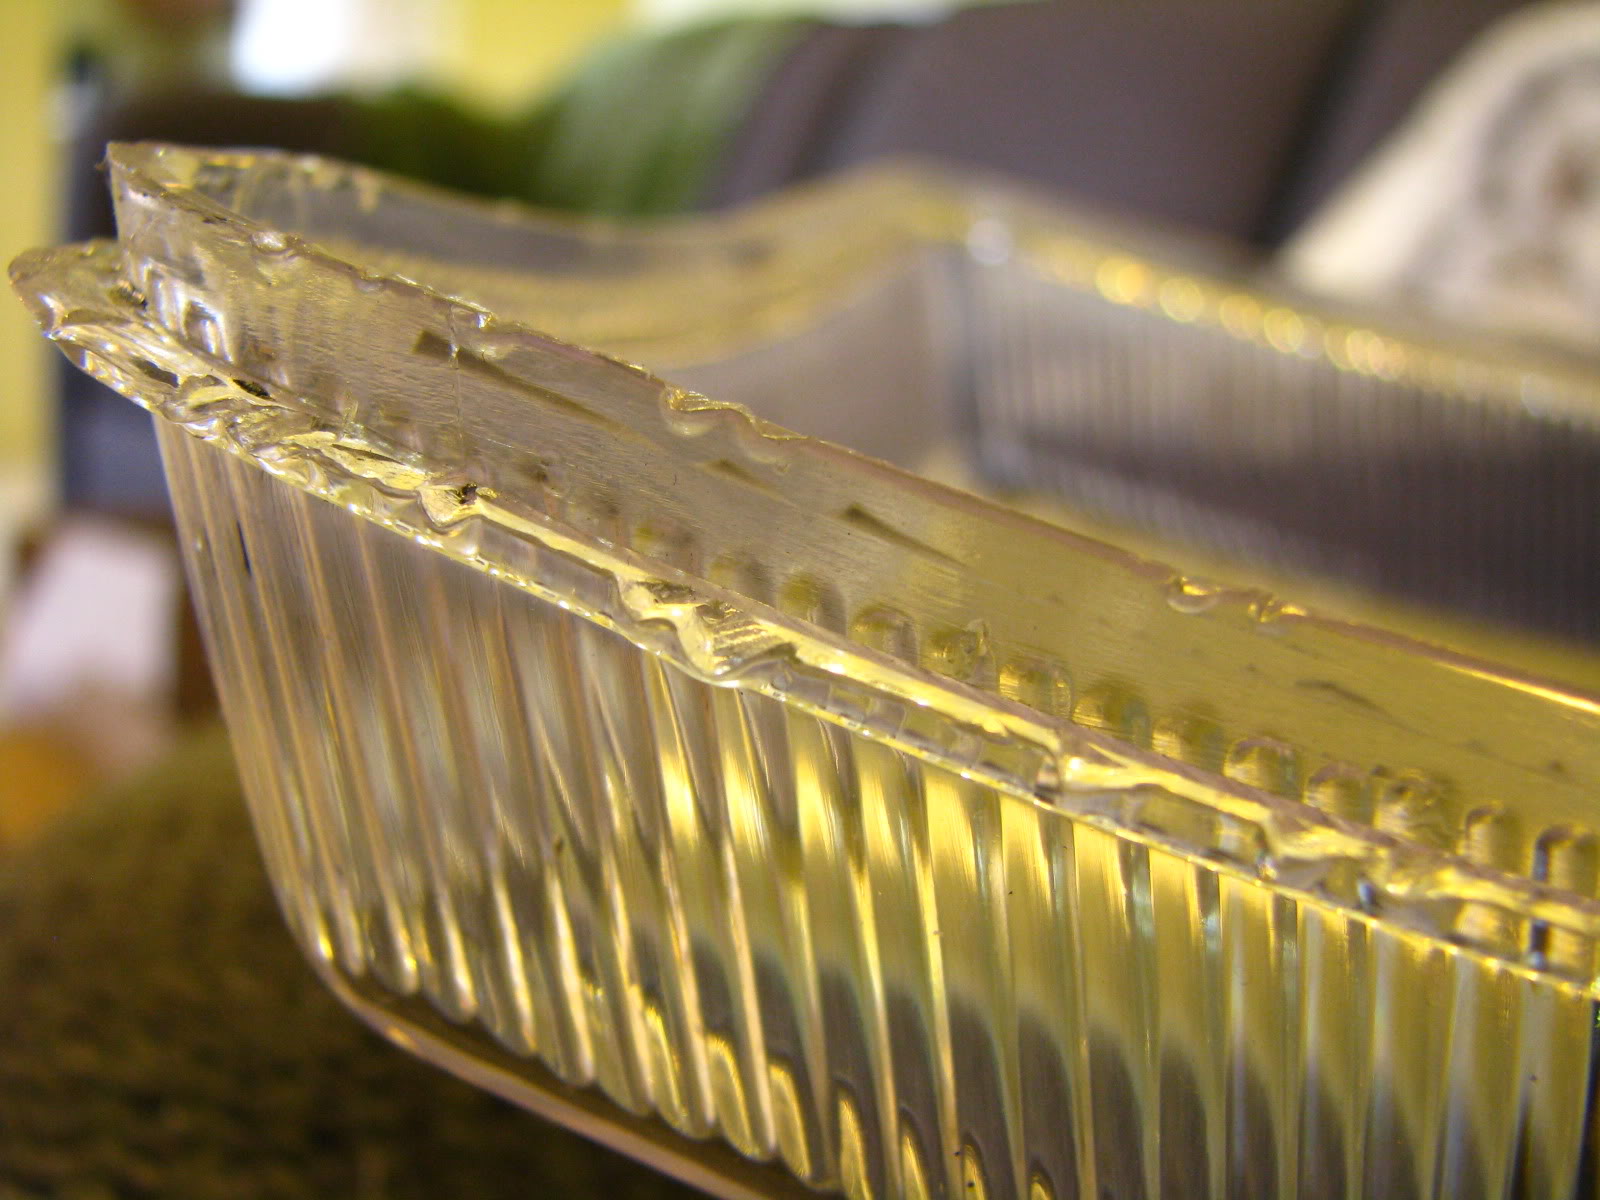
Some war damage that will always happen while baking your headlights:
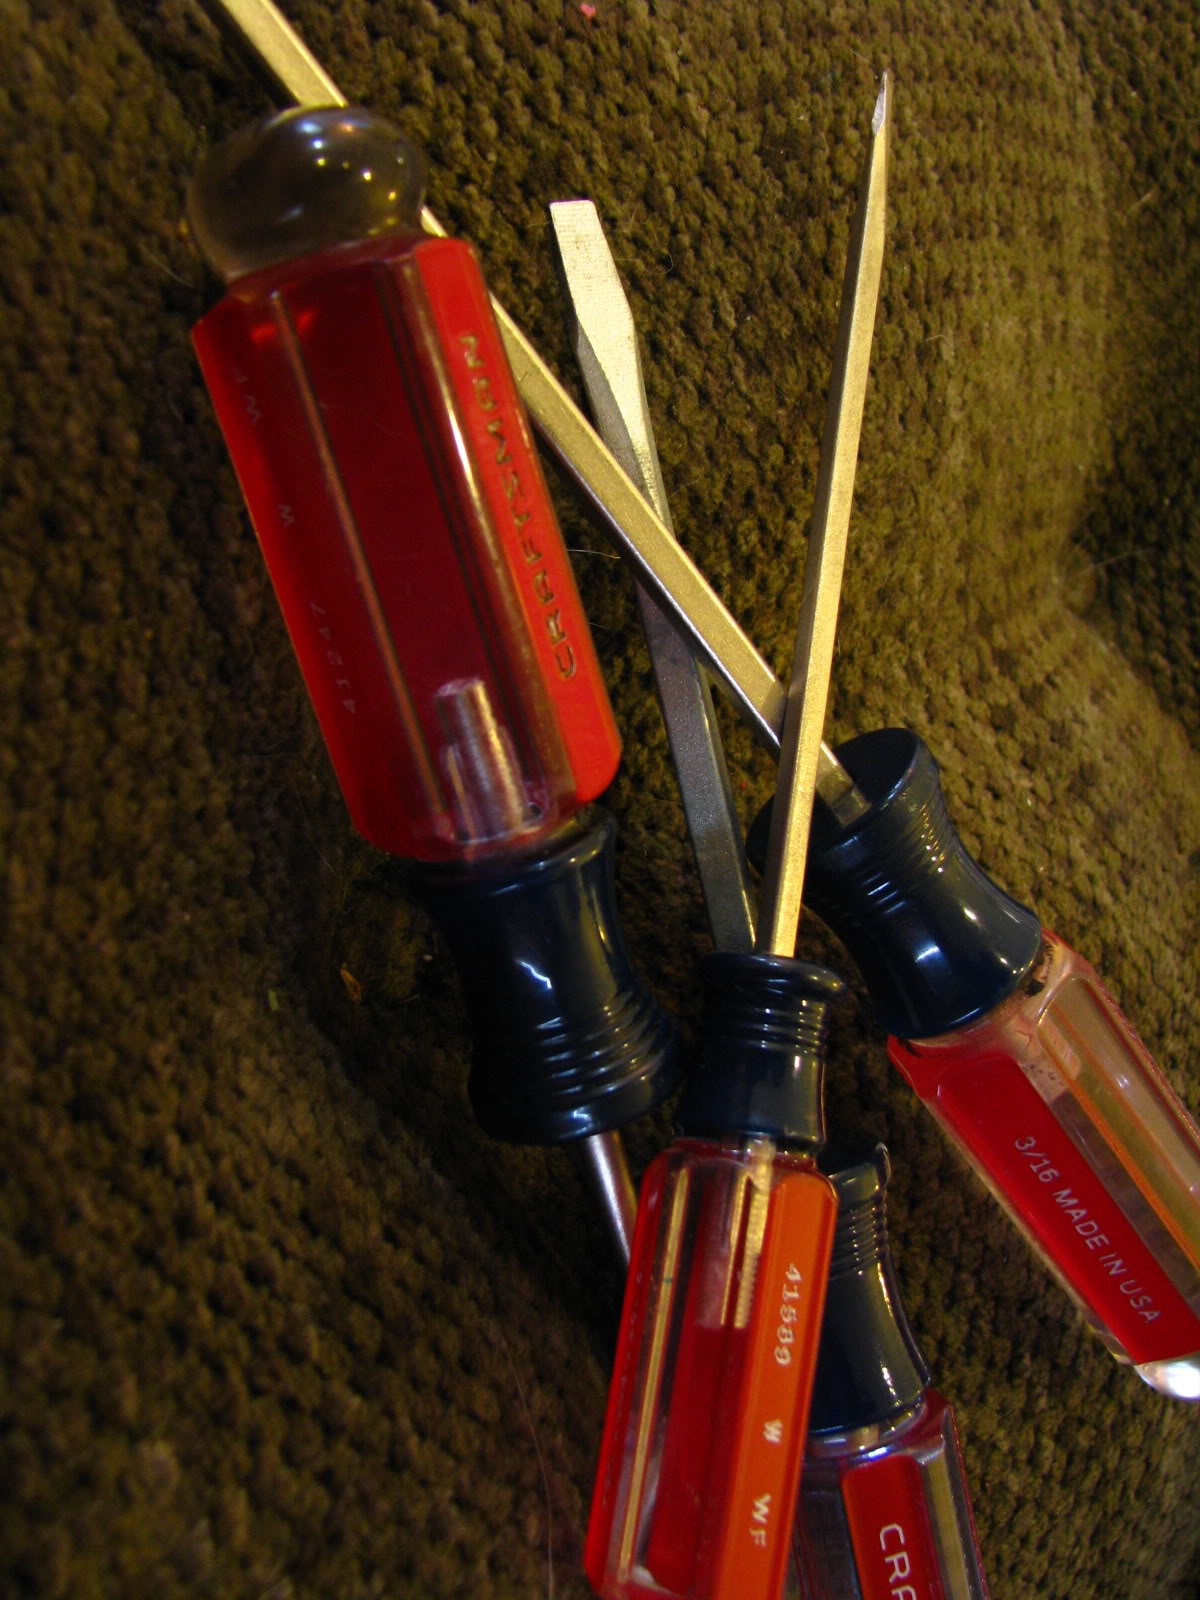
And, the trusty tools of the trade - can never go wrong with owning a set or dozen of these!
Keep in mind, these are 100% stock chrome housings, I refused to take pictures at this point as mentioned above - if any of you have actually baked the housings - you know just why I didn't feel to take the time to actually snap photo's... It took me 6+ hours to pry up both clear housings from the lens area.
Completely removed both lenses, and also withdrew both of the reflector lens's that help focus the light on a standard halogen bulb.
Some war damage that will always happen while baking your headlights:
And, the trusty tools of the trade - can never go wrong with owning a set or dozen of these!
Thread Starter
|
Member
Joined: Oct 2007
Posts: 2,583
Likes: 4
From: Stevenson, WA
Next up: The Baking stage, and removing the reflector housing is complete - Its as simple as just pulling it out with a slight bit of pressure - very easy to do..
After that stage - you get to unbox your projector's - I purchased this set off of Ebay, a standard search for 'projector lens kit' is all you need to find a link to these - it comes with everythign you need, except for a ballast - these bulbs are stock with 35w HID bulbs, so you need a full set of 2 35w ballasts, or you can overdrive them with 50/55w ballasts (Slightly reduces the life span, but produces about 20-25% more light then a standard 35w ballast)
This kit features the "Angel Eyes" LED Ring - I ordered mine with White, all the orange and reds and blue's are sold out - I emailed the company asking for orange, but the company that produces the kit has stopped making the other colors for now - white is the only option.
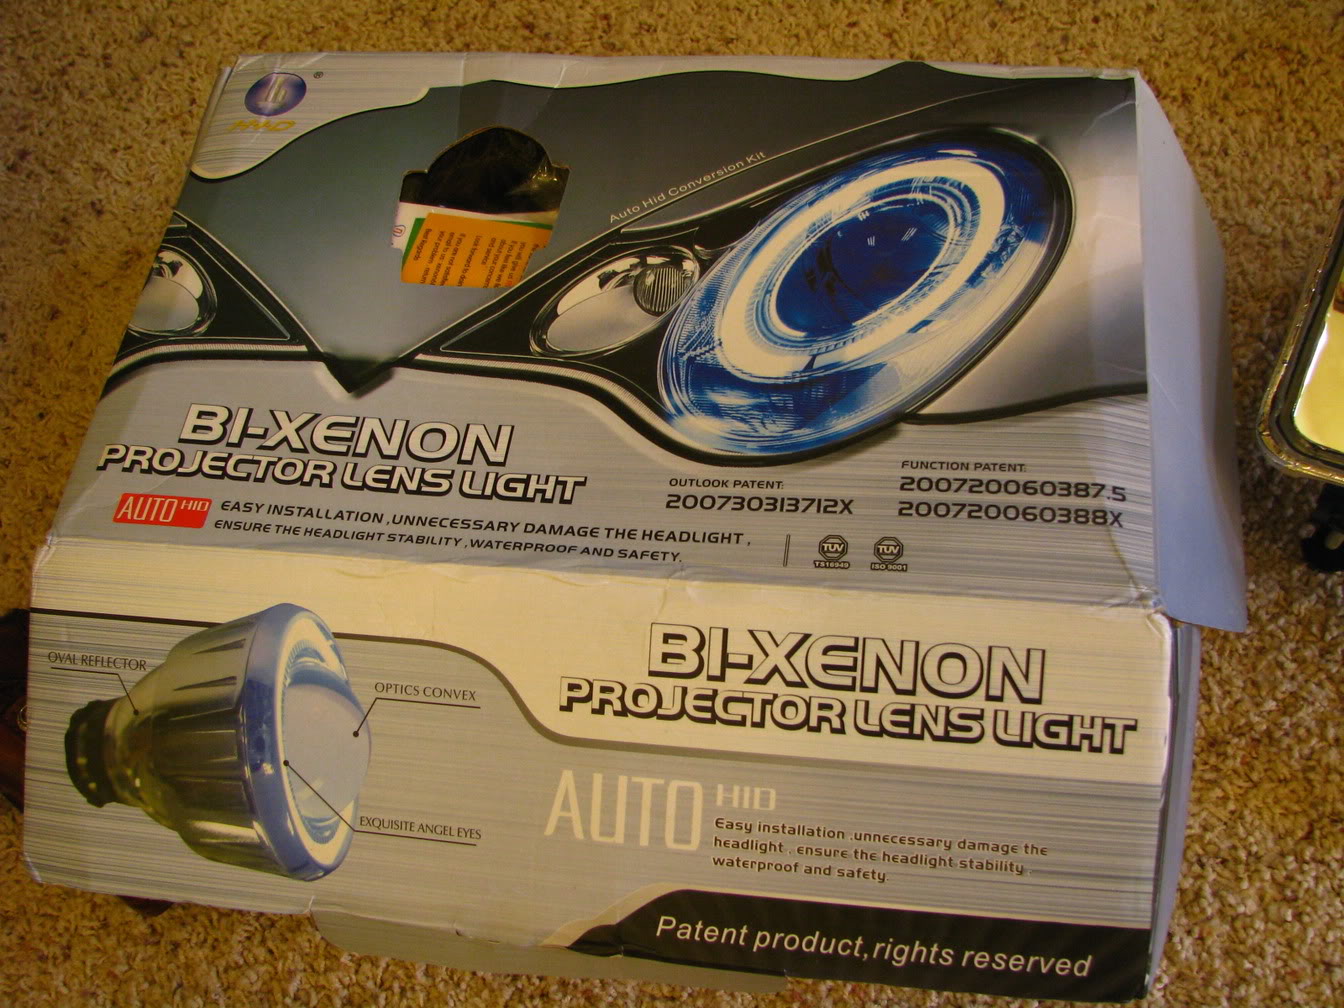

Thread Starter
|
Member
Joined: Oct 2007
Posts: 2,583
Likes: 4
From: Stevenson, WA

(Waiting for more pictures to upload to photobucket to post)
Thread Starter
|
Member
Joined: Oct 2007
Posts: 2,583
Likes: 4
From: Stevenson, WA
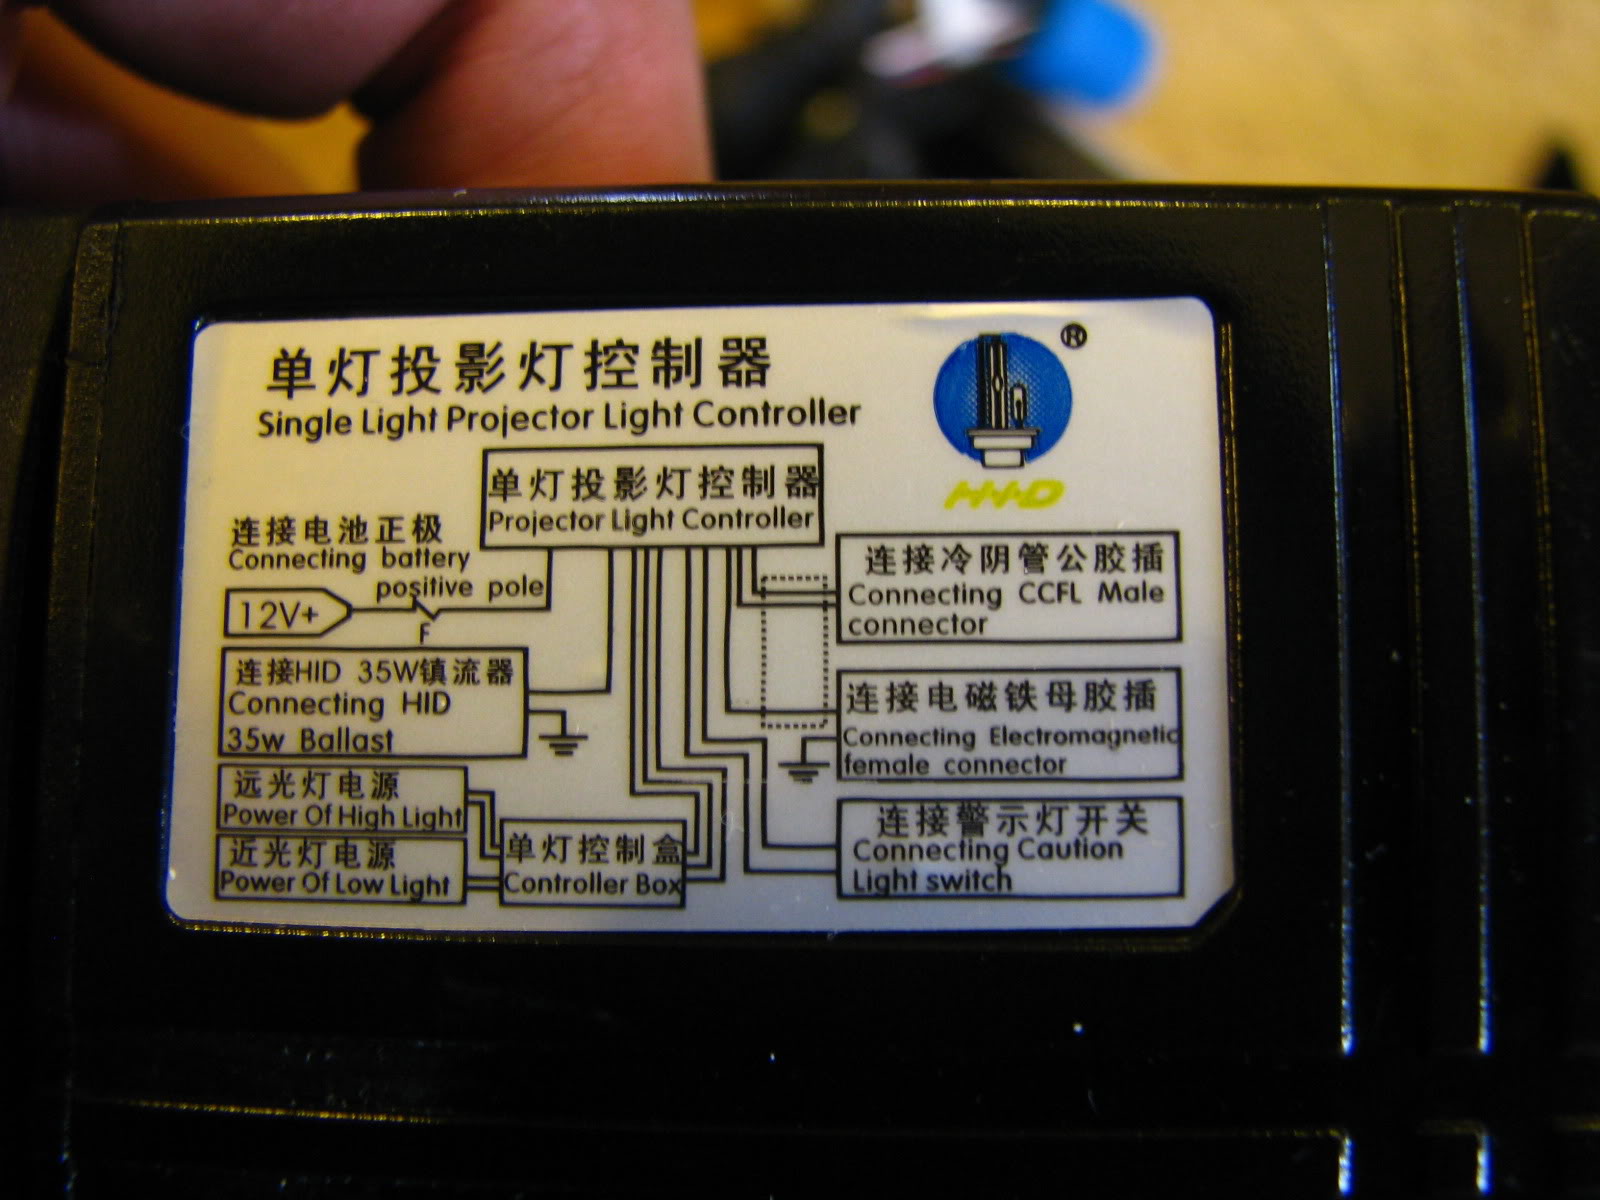
More Photo's from the kit:
2 standard "Control Boxes" for operating High/Low/CFL Lamp (Angel Eyes), the high/low uses an actuator to move a metal piece up and down to give your high and low settings.
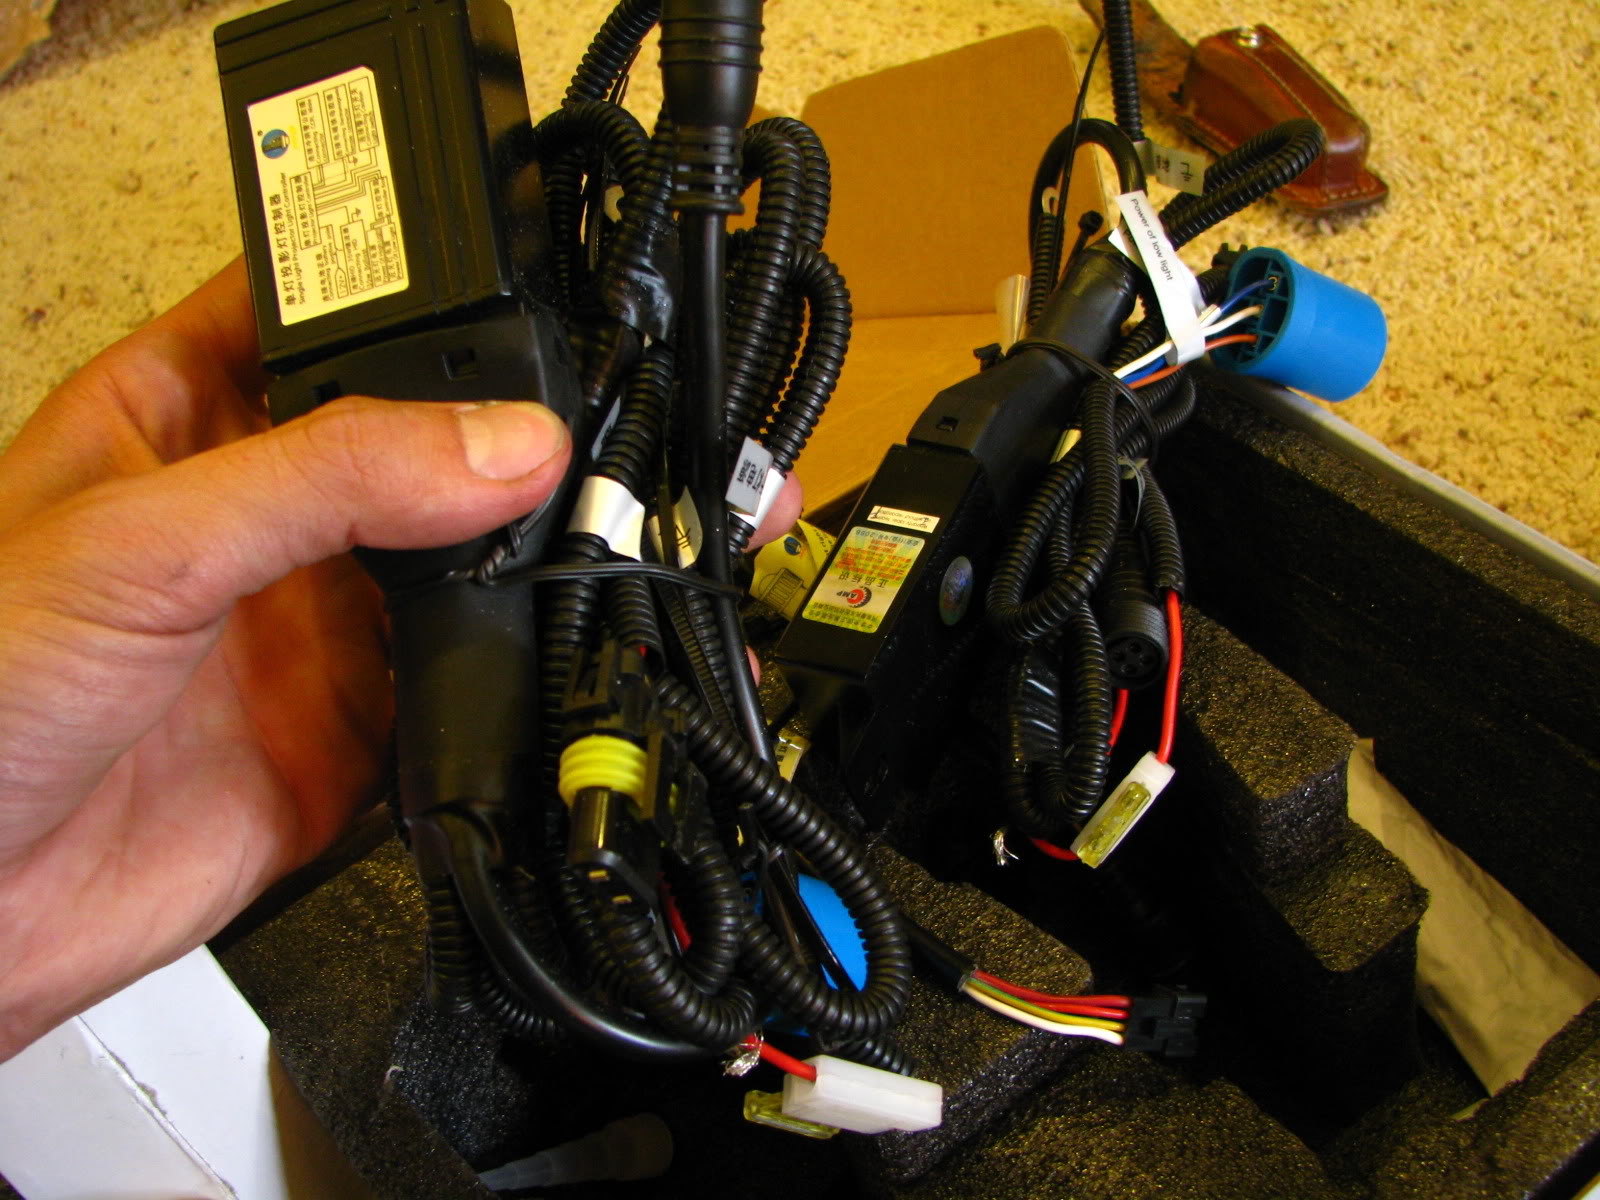
The Diagram in Engrish:

2 standard "Control Boxes" for operating High/Low/CFL Lamp (Angel Eyes), the high/low uses an actuator to move a metal piece up and down to give your high and low settings.
The Diagram in Engrish:
Thread Starter
|
Member
Joined: Oct 2007
Posts: 2,583
Likes: 4
From: Stevenson, WA
Next Up:
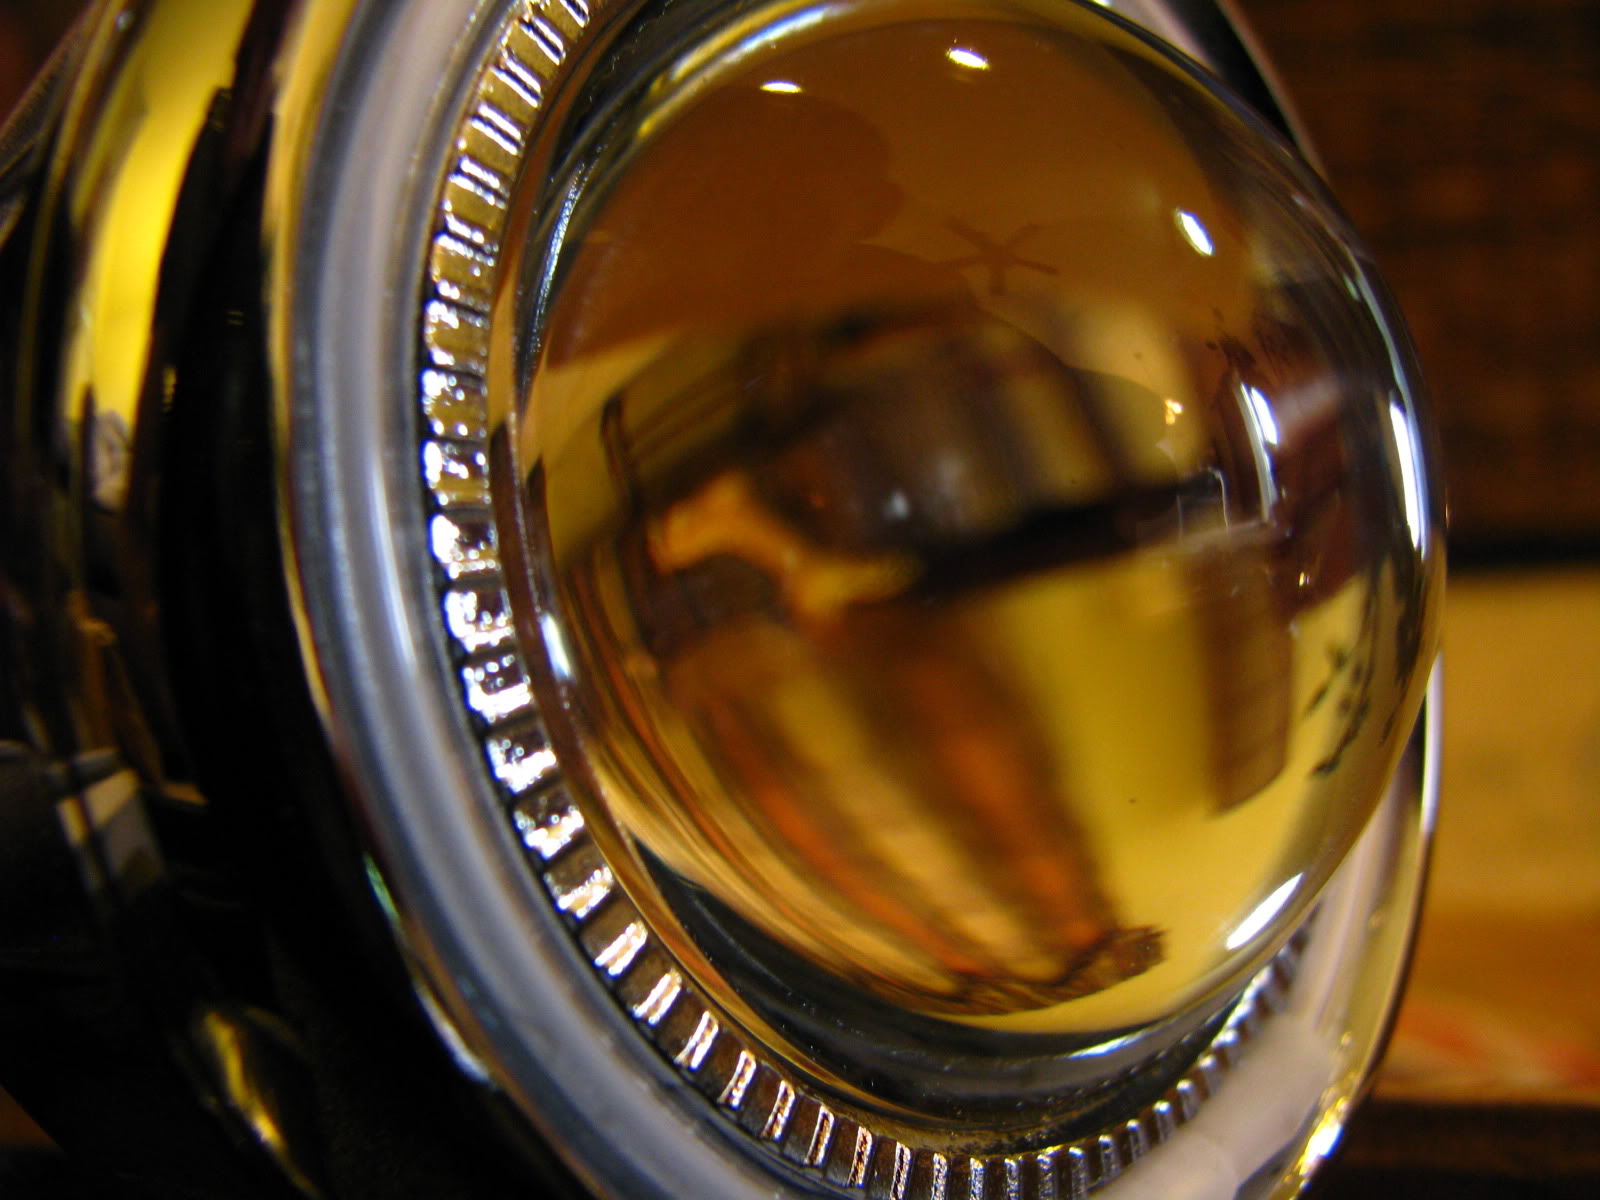
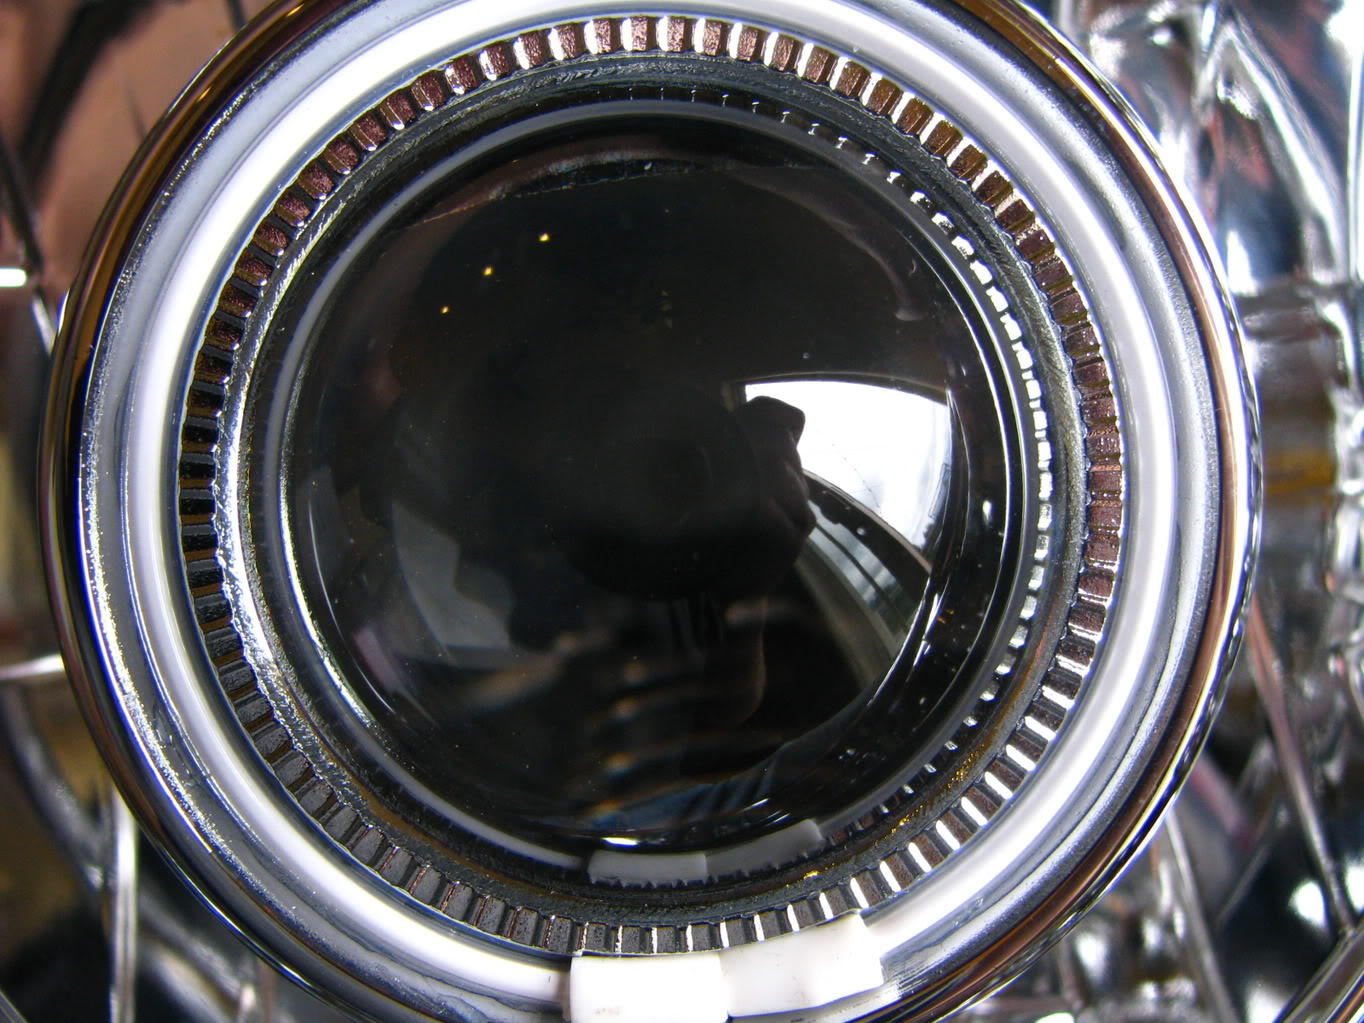
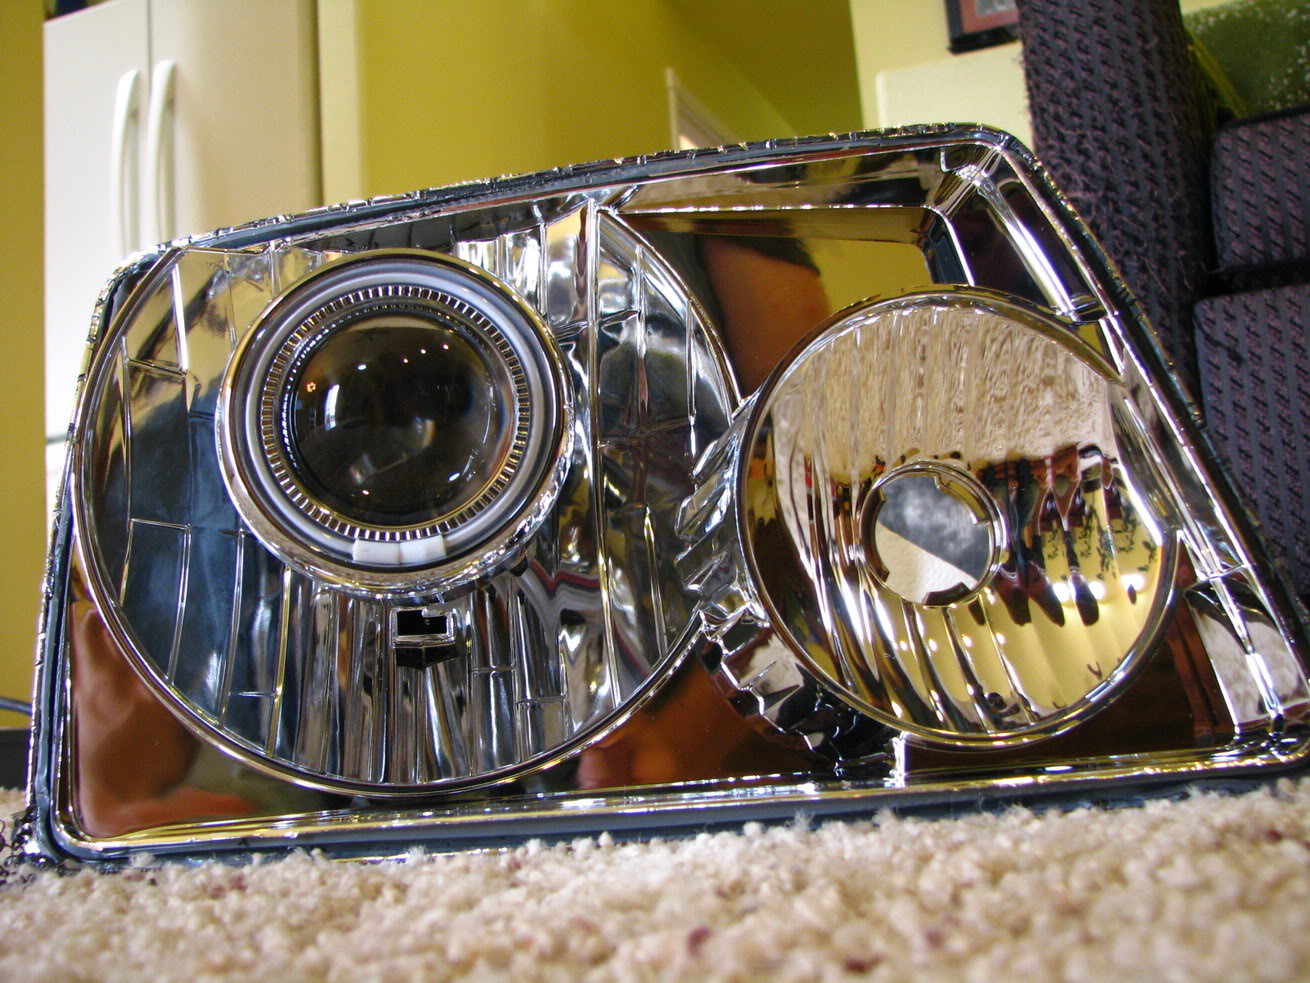
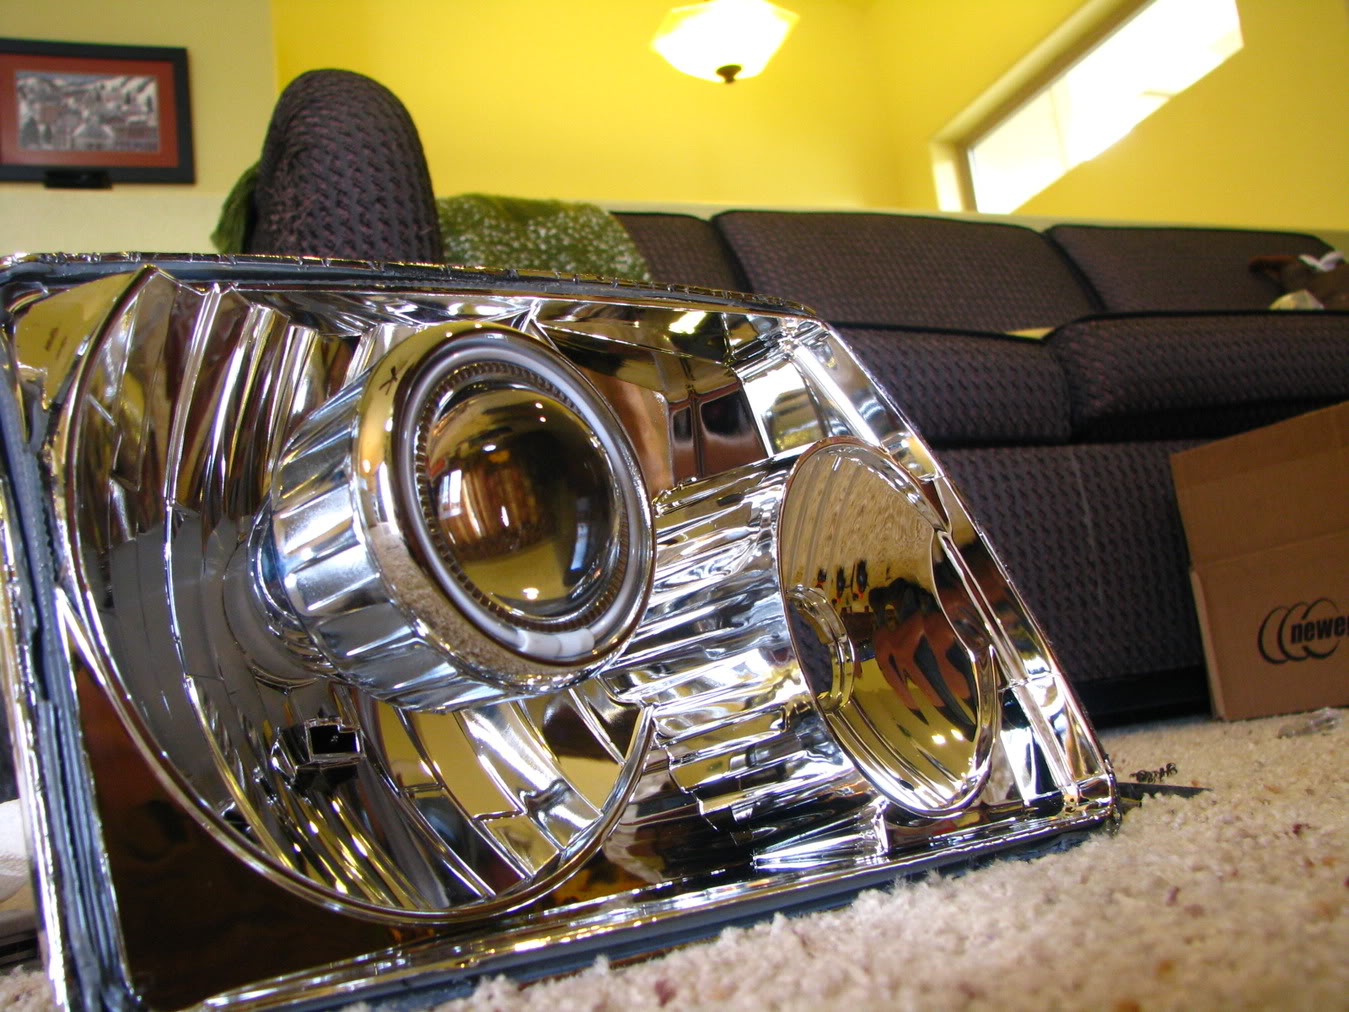
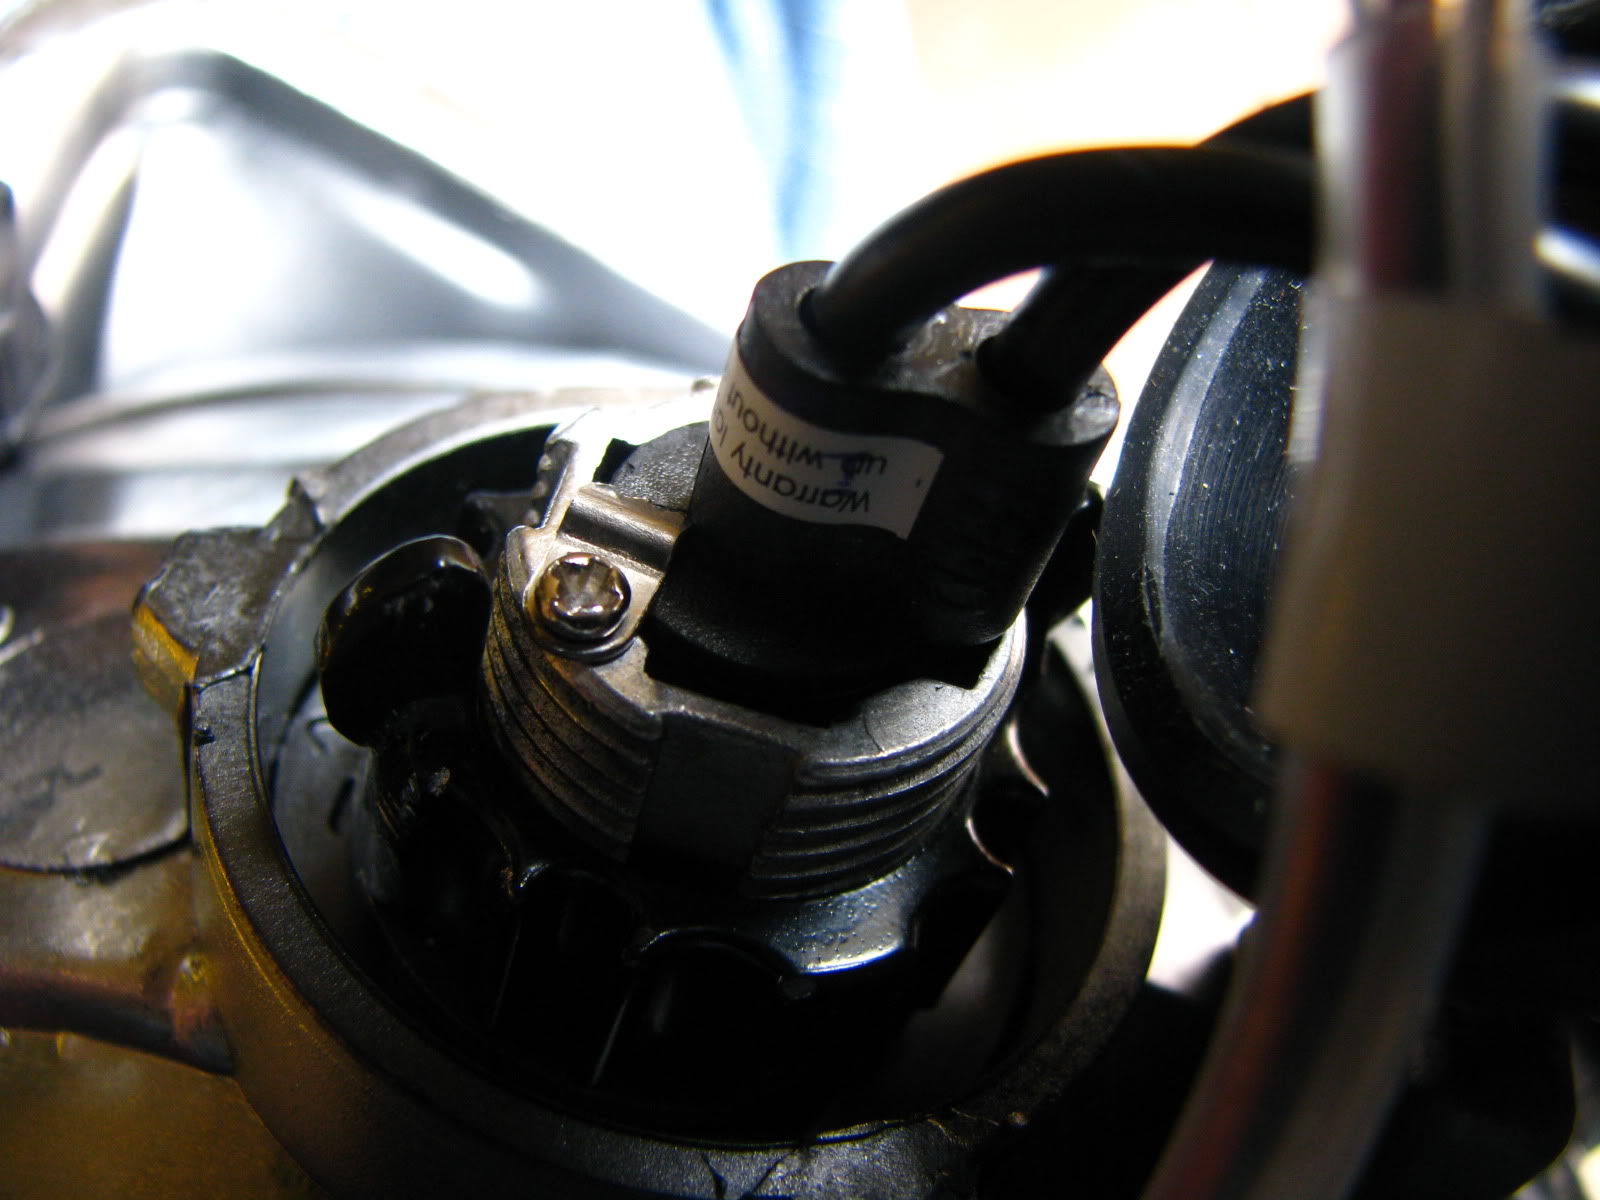
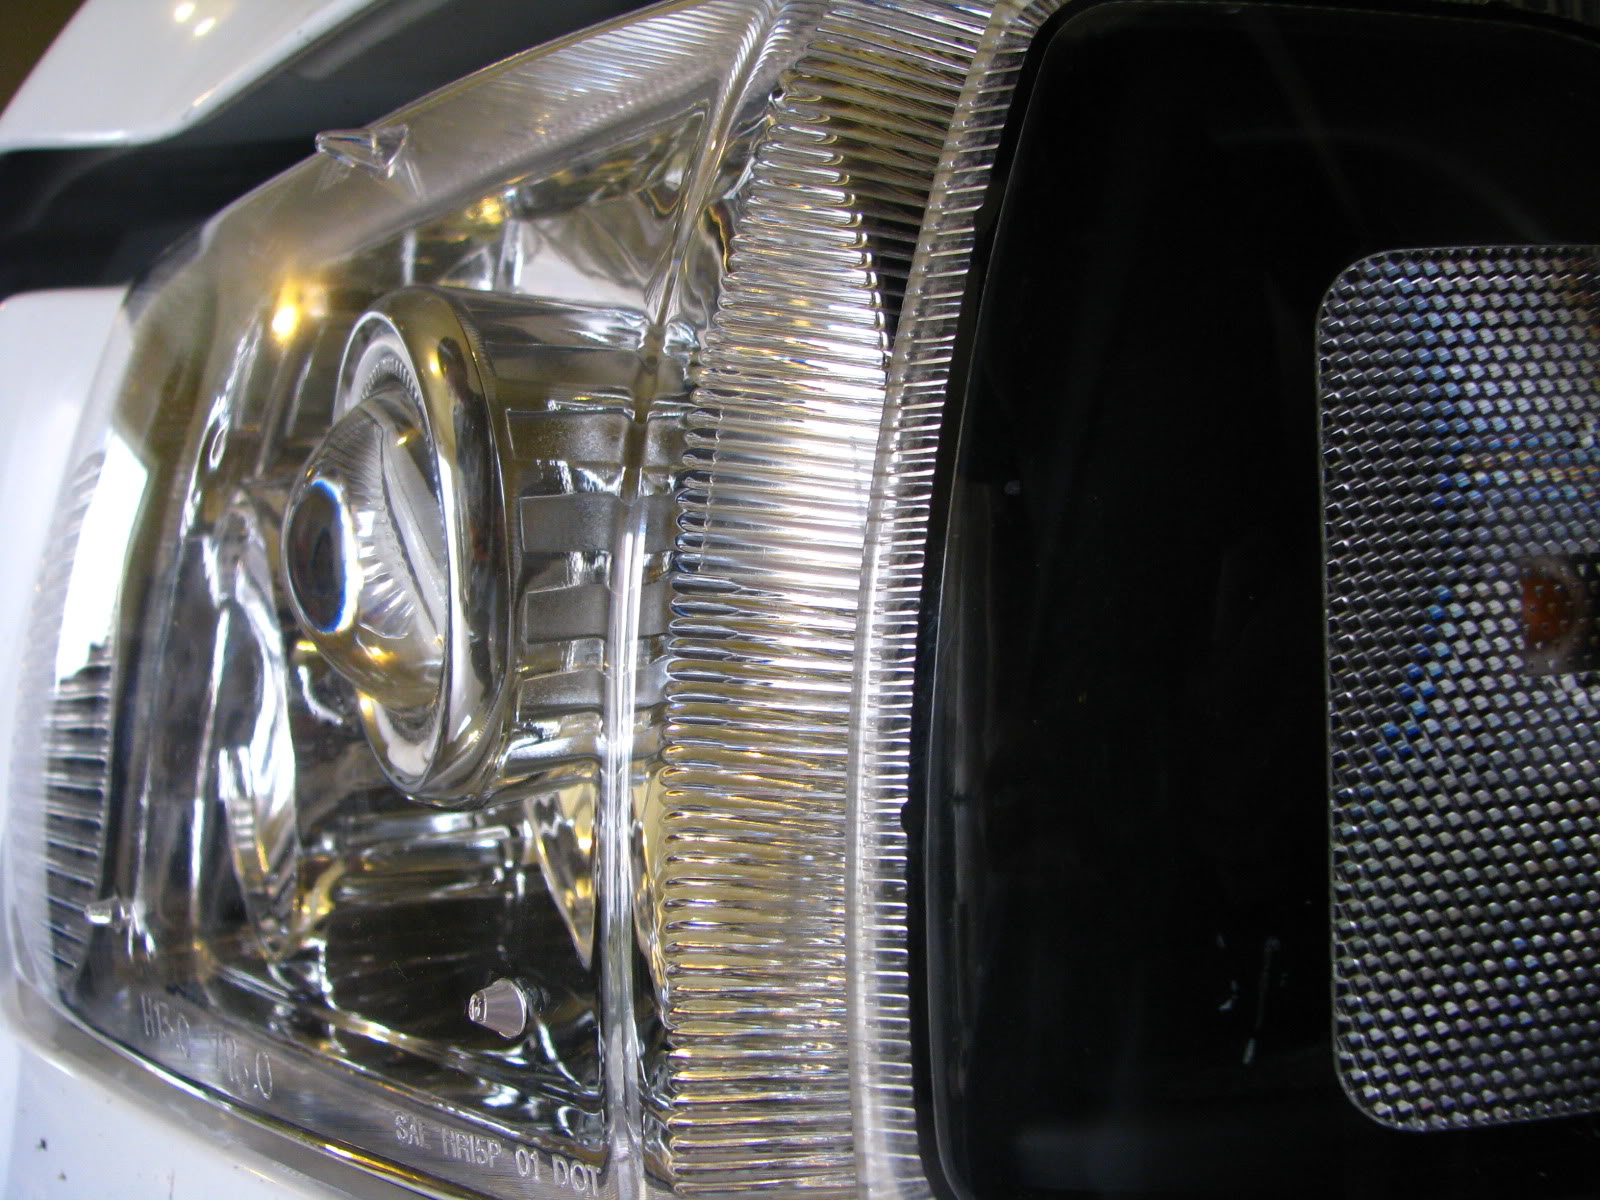
The projector lens housing is a sort of 'Insert" into the standard 9007 bulb socket - a metal piece slides in, and you push the projector lens in from the reflector housing area, it has several poles to line you up so the projection beam will be oriented in the proper direction.
It is then slid through, and secured with a locknut and large heavy metal screw that mounts aroudn the housing for the HID Bulb socket. A few pictures here will show you the standard insertion point for the bulb into the projector lens:
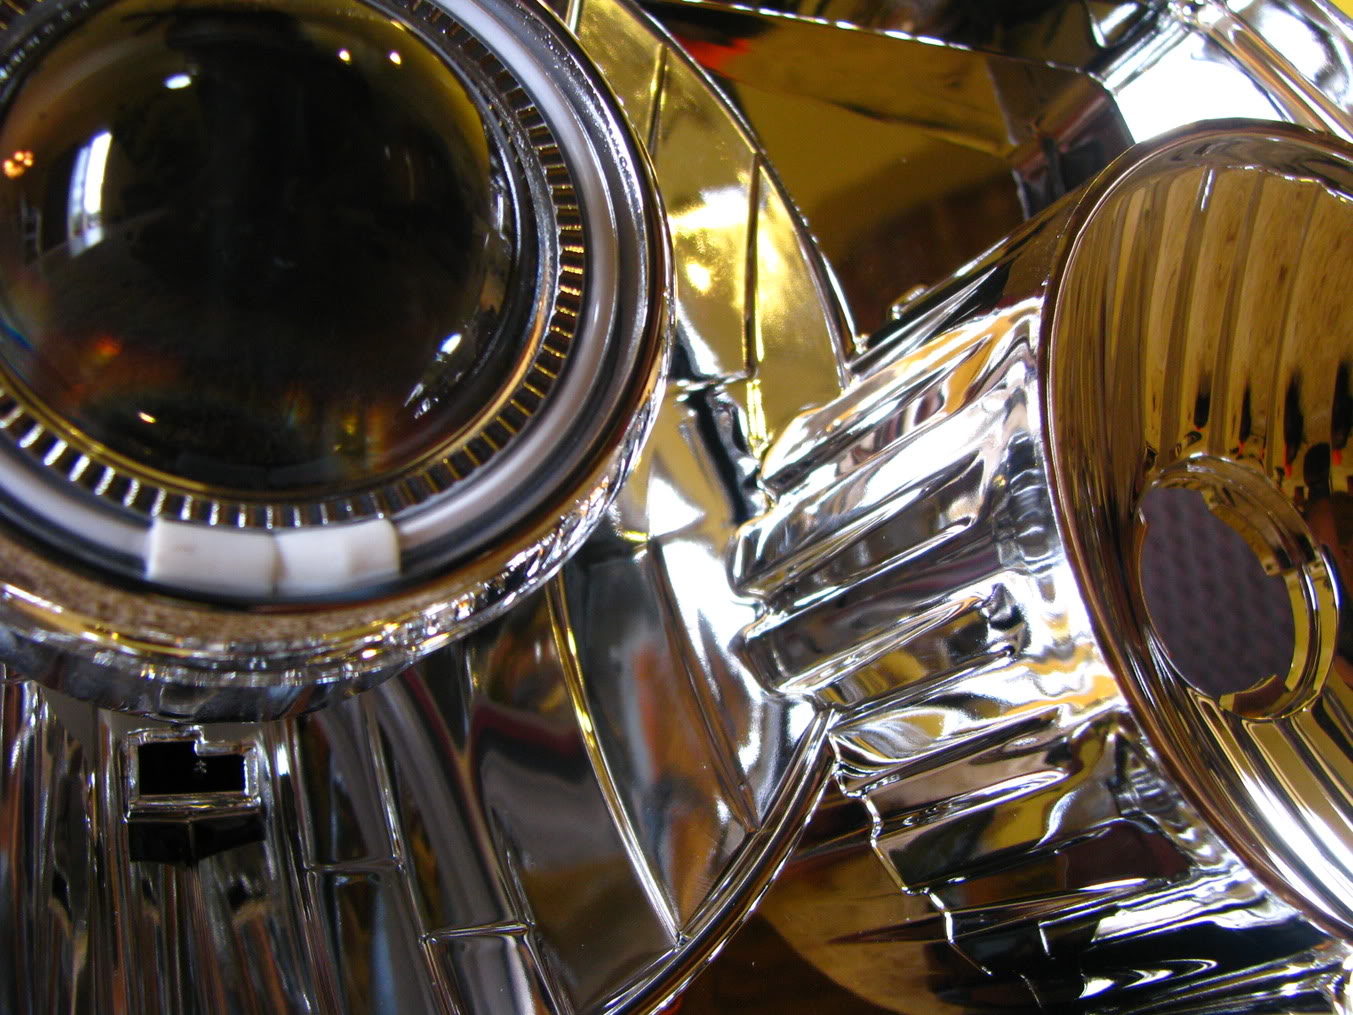
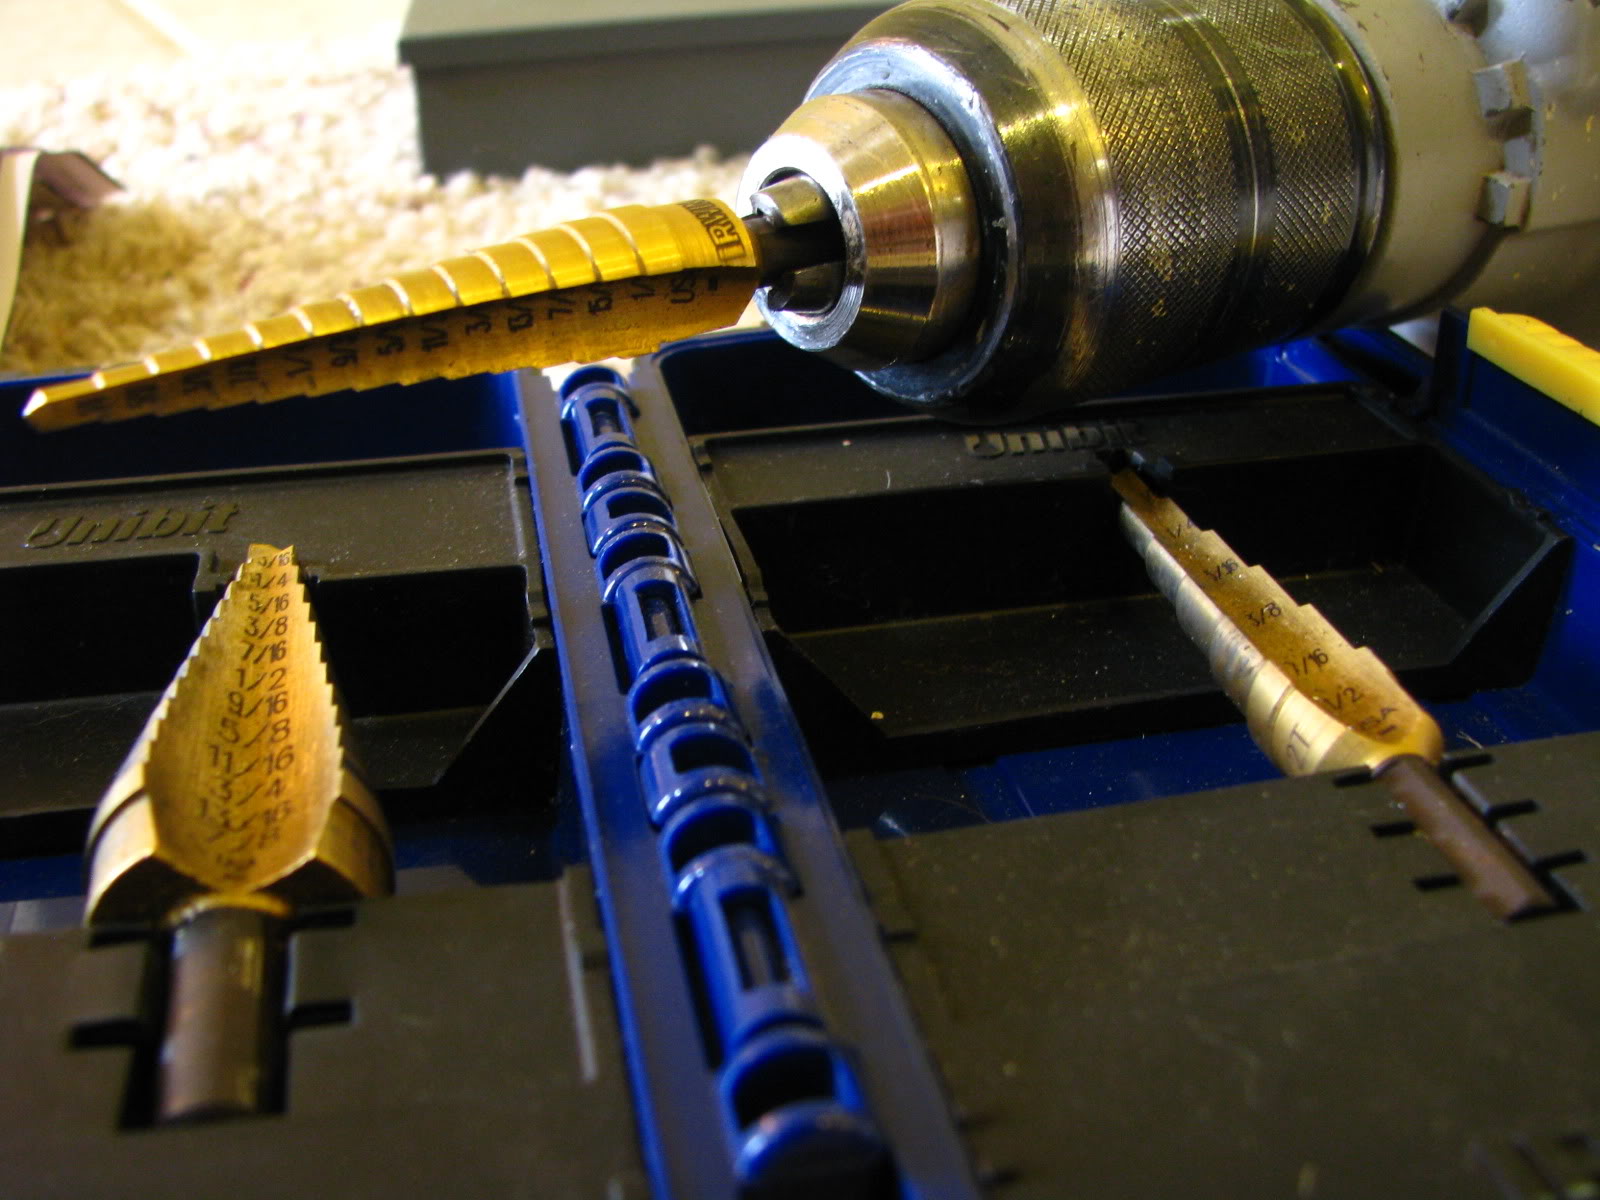
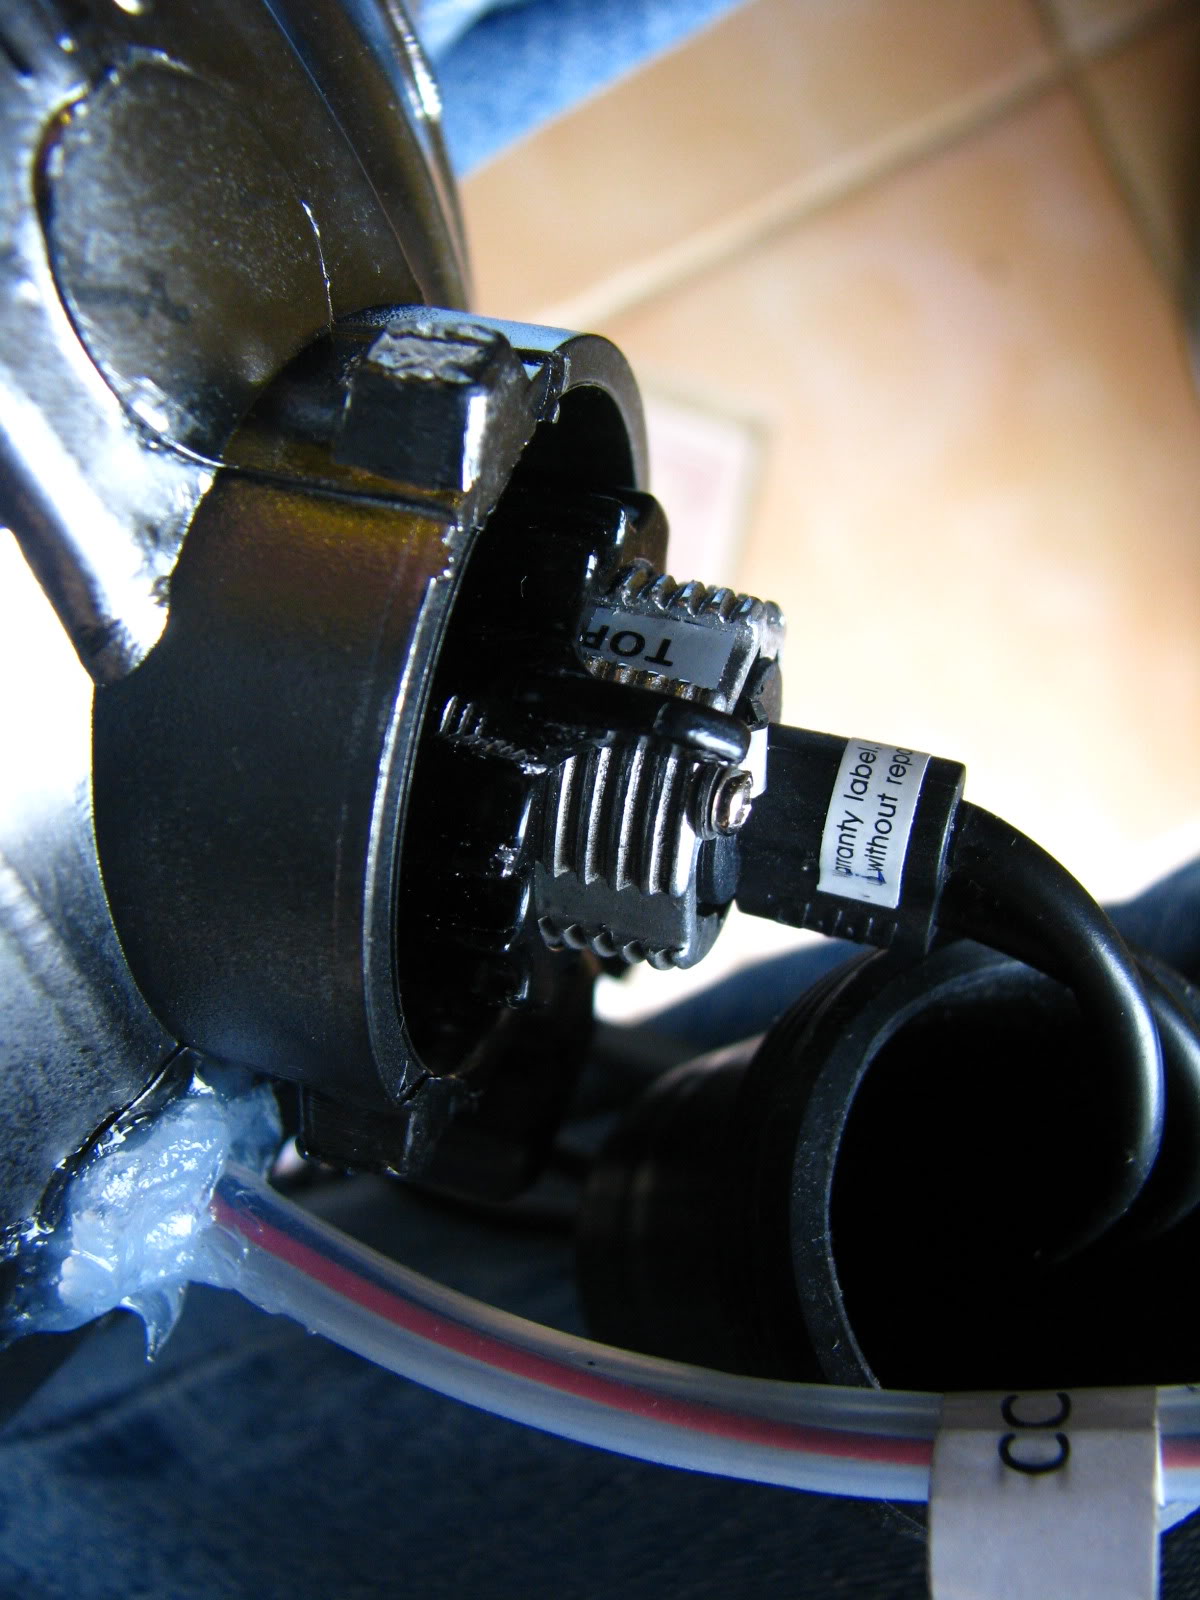
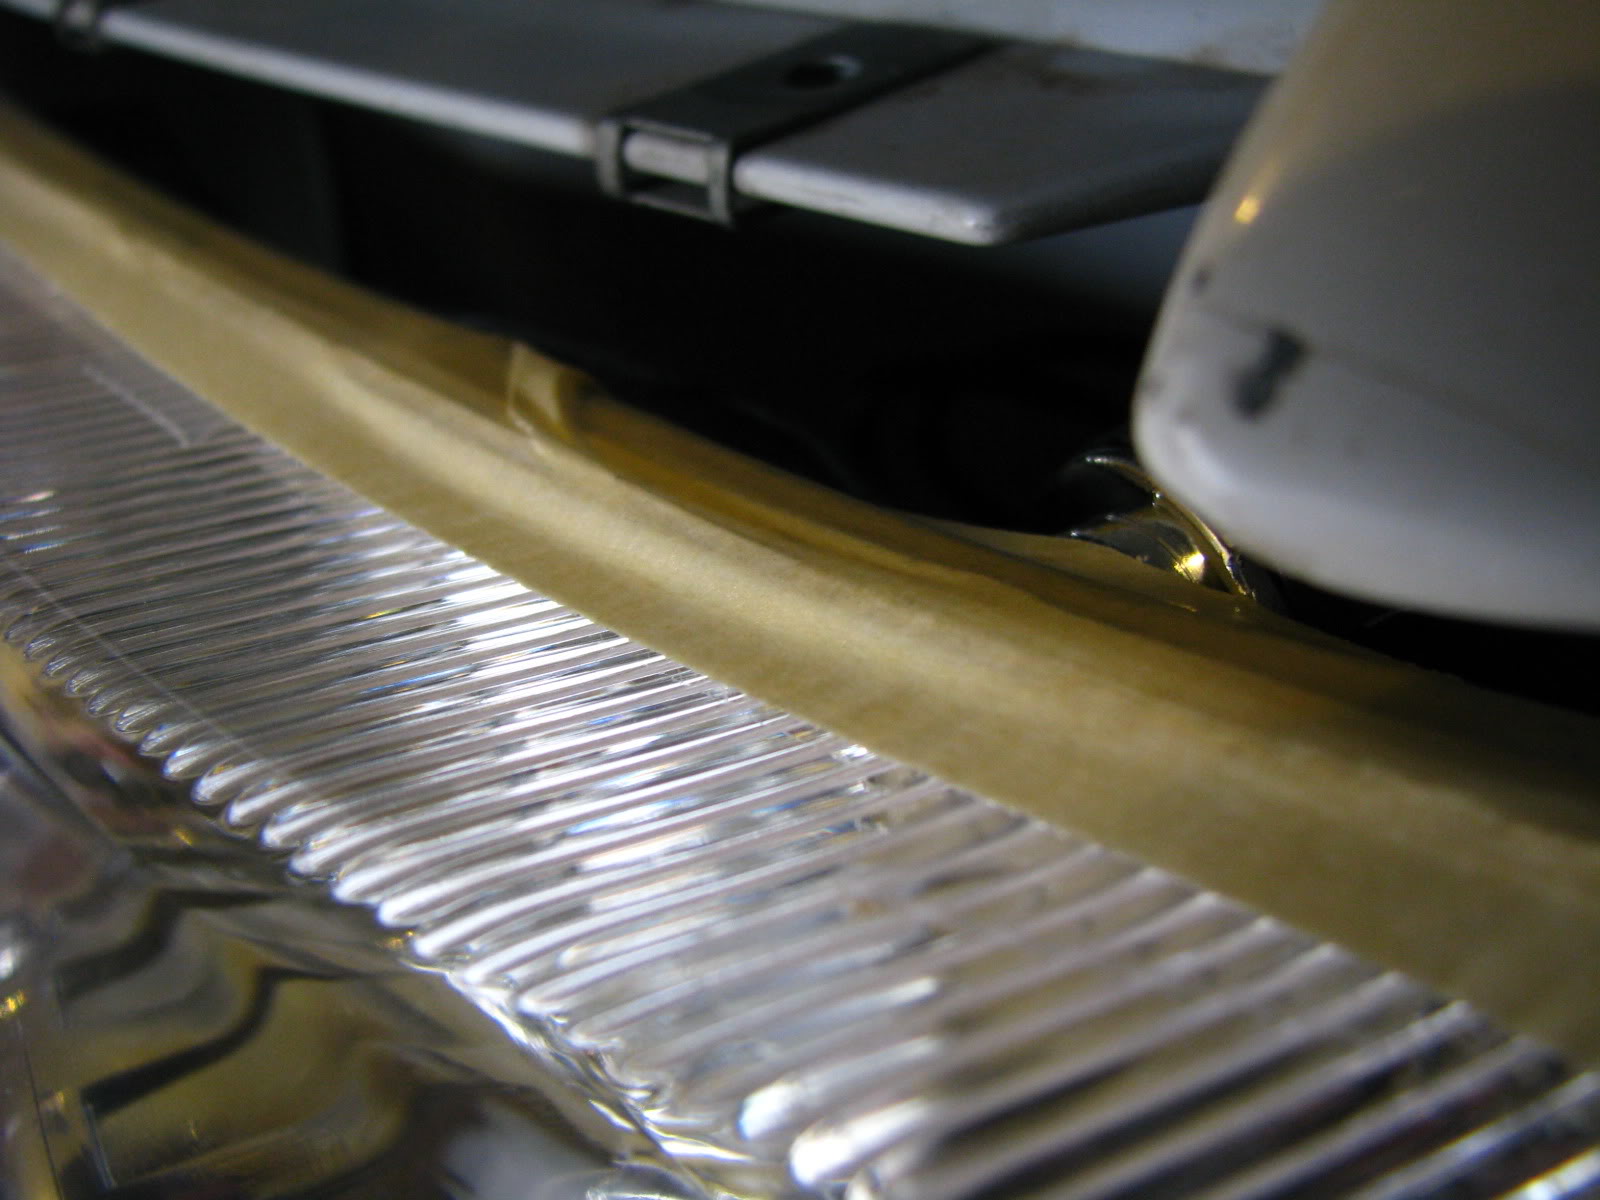
The base of the projection lens has a heavy, thick rubber screen - when you tighten the locknut on the back with the hand twist (Needs around 20 Ftlbs torque with some pliers), the rubber gasket there seals off the housing completely, creating a very watertight/moisture resistant seal. A hole needs drilled out just to the lower left of the back of the housing where the locknut is, its roughly a 3/8" hole, I used my trusty Irwin step bits to do this - do NOT use standard drill bits - I tried it the first time.. and they do not drill through plastic for crap.. darn thing ended up picking up the housing and spinning it like a top till the drill slowed down My bad, hah!
After the hoel is drilled, you need to locate the wires coming out of the cap of the projection lens, and feed them through - to do this, you have to unclip the little connectors in this clip, then re-attach them on the other side.. the wire has a heavy rubber gasket in place to seal the hole after you drill it adn run the wires - I sealed it with silicone on the back to make sure it was resistant to all moisture and weather.
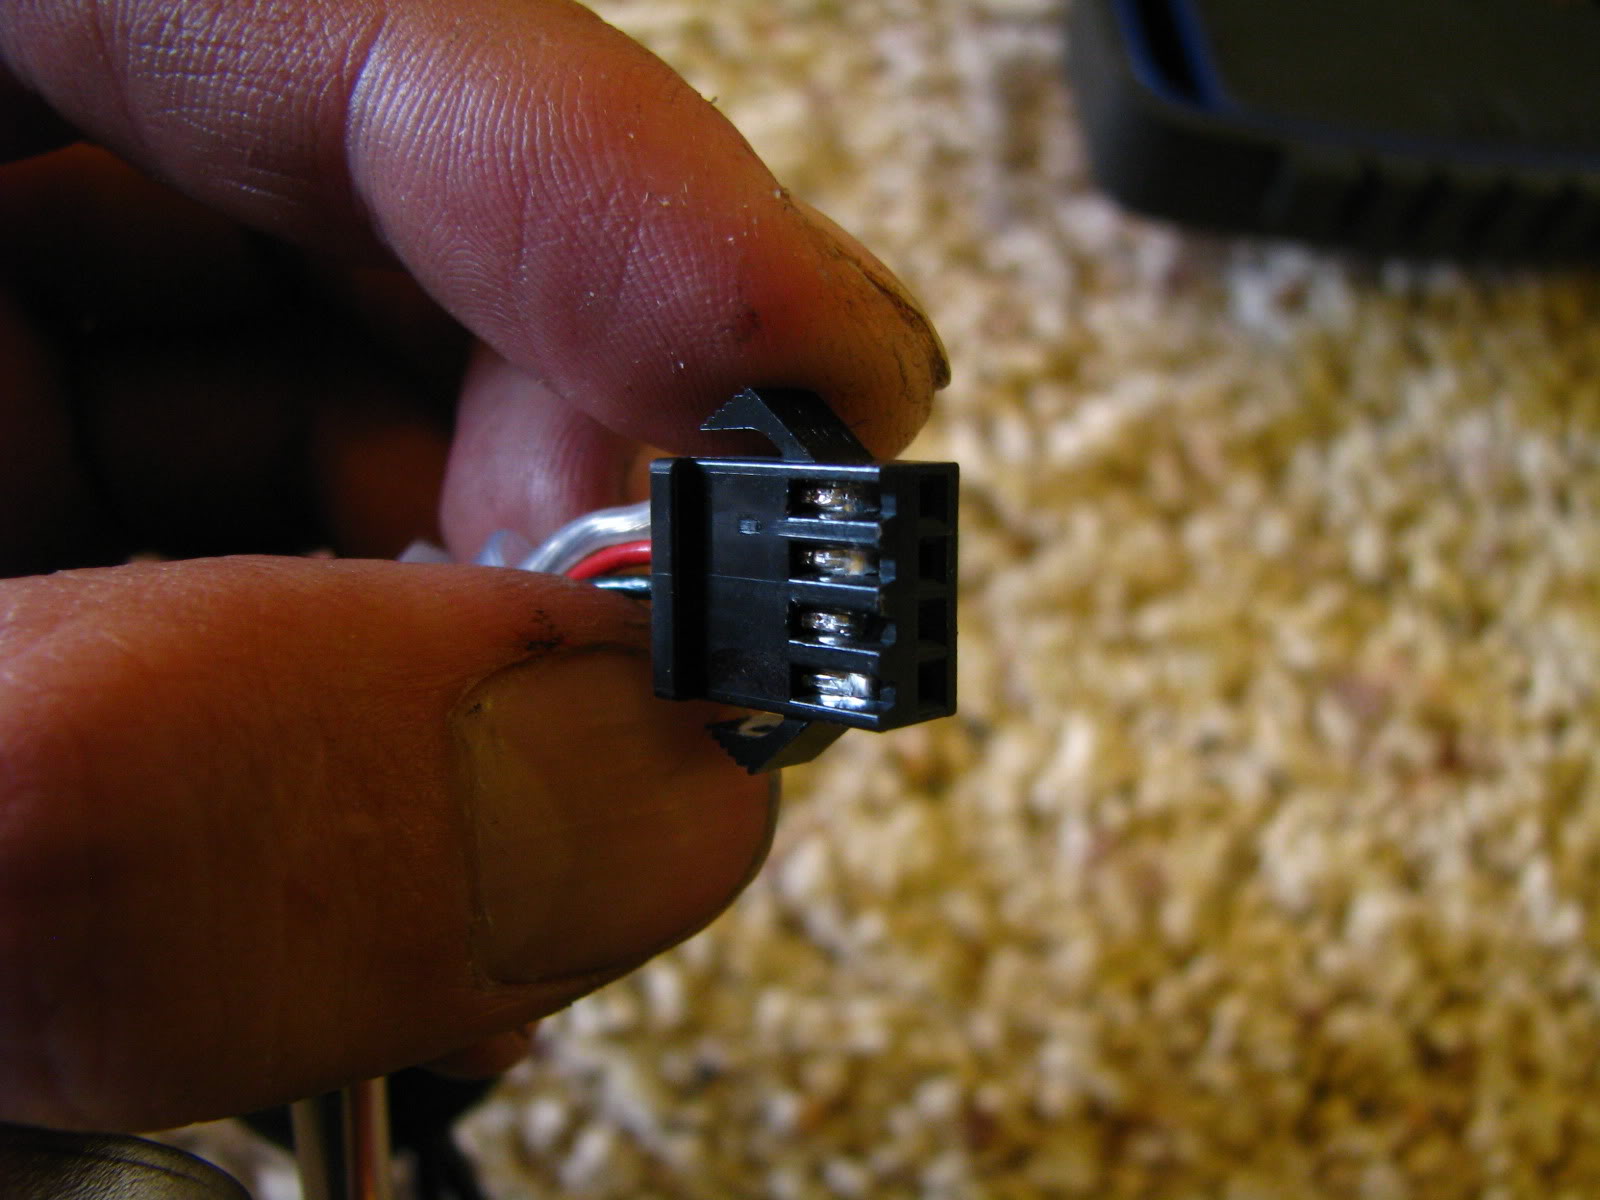
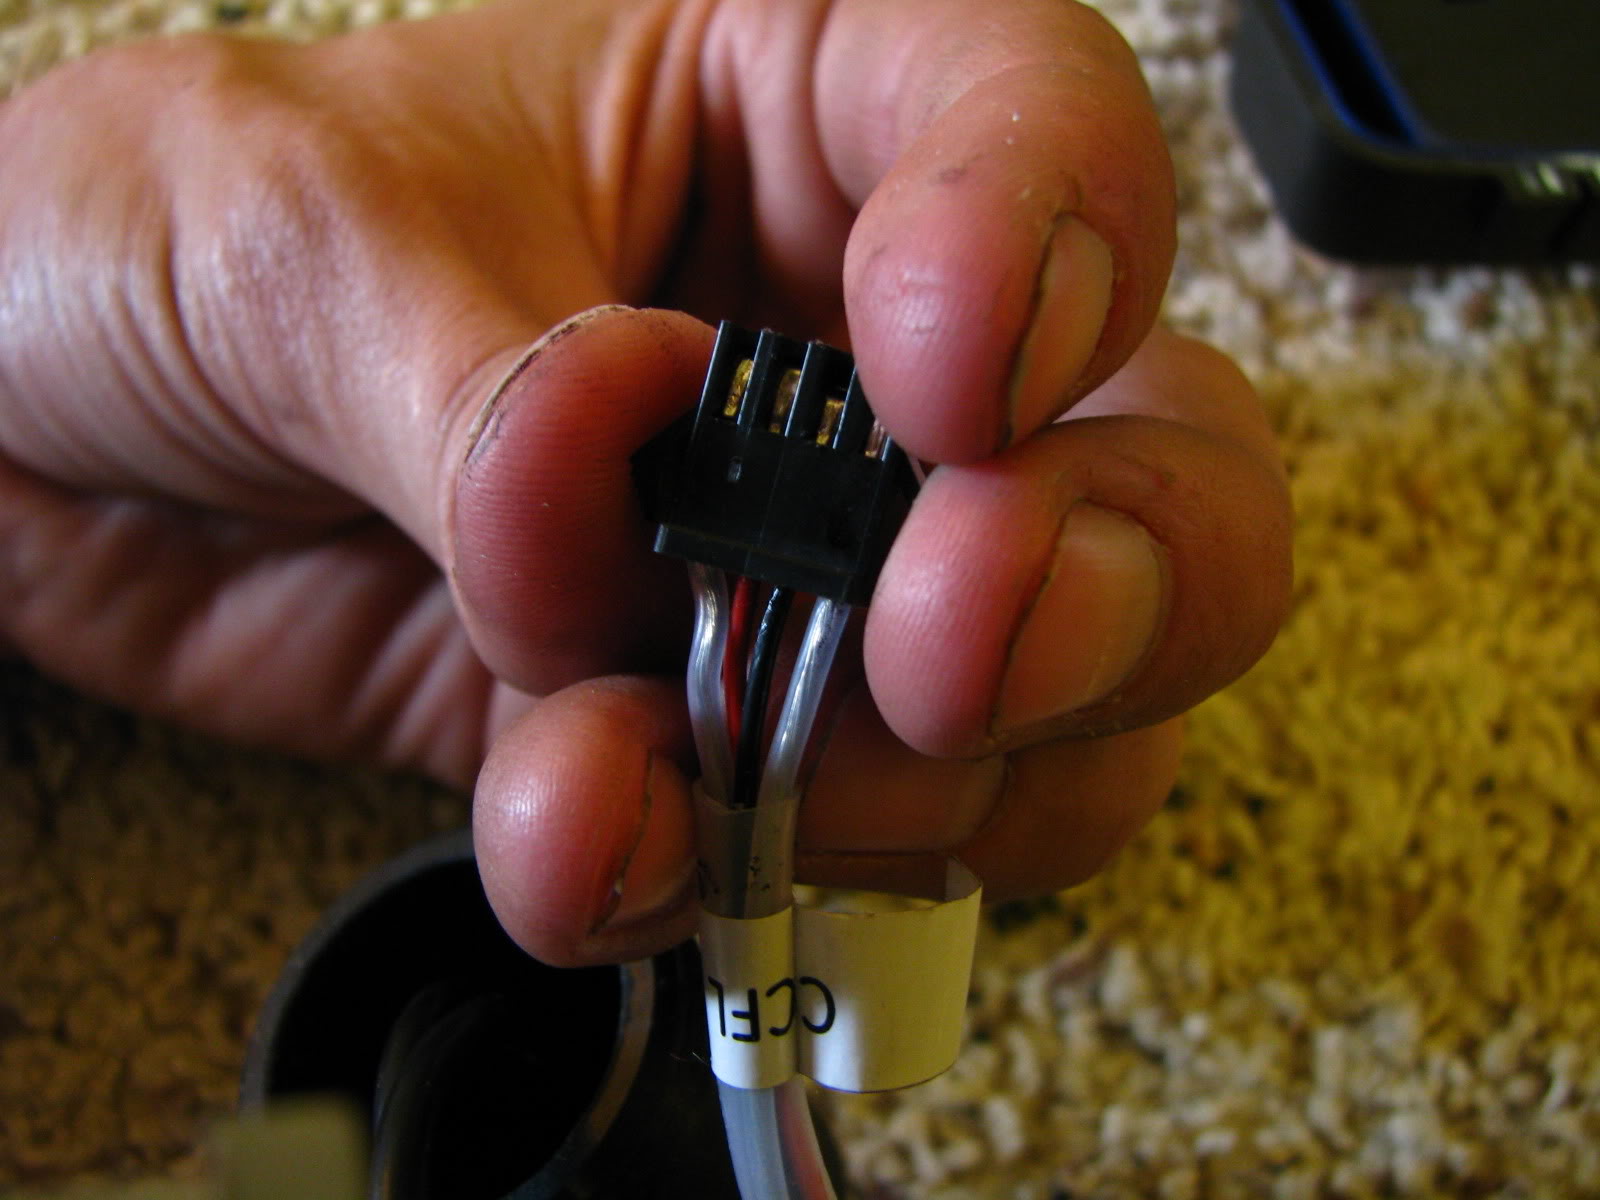
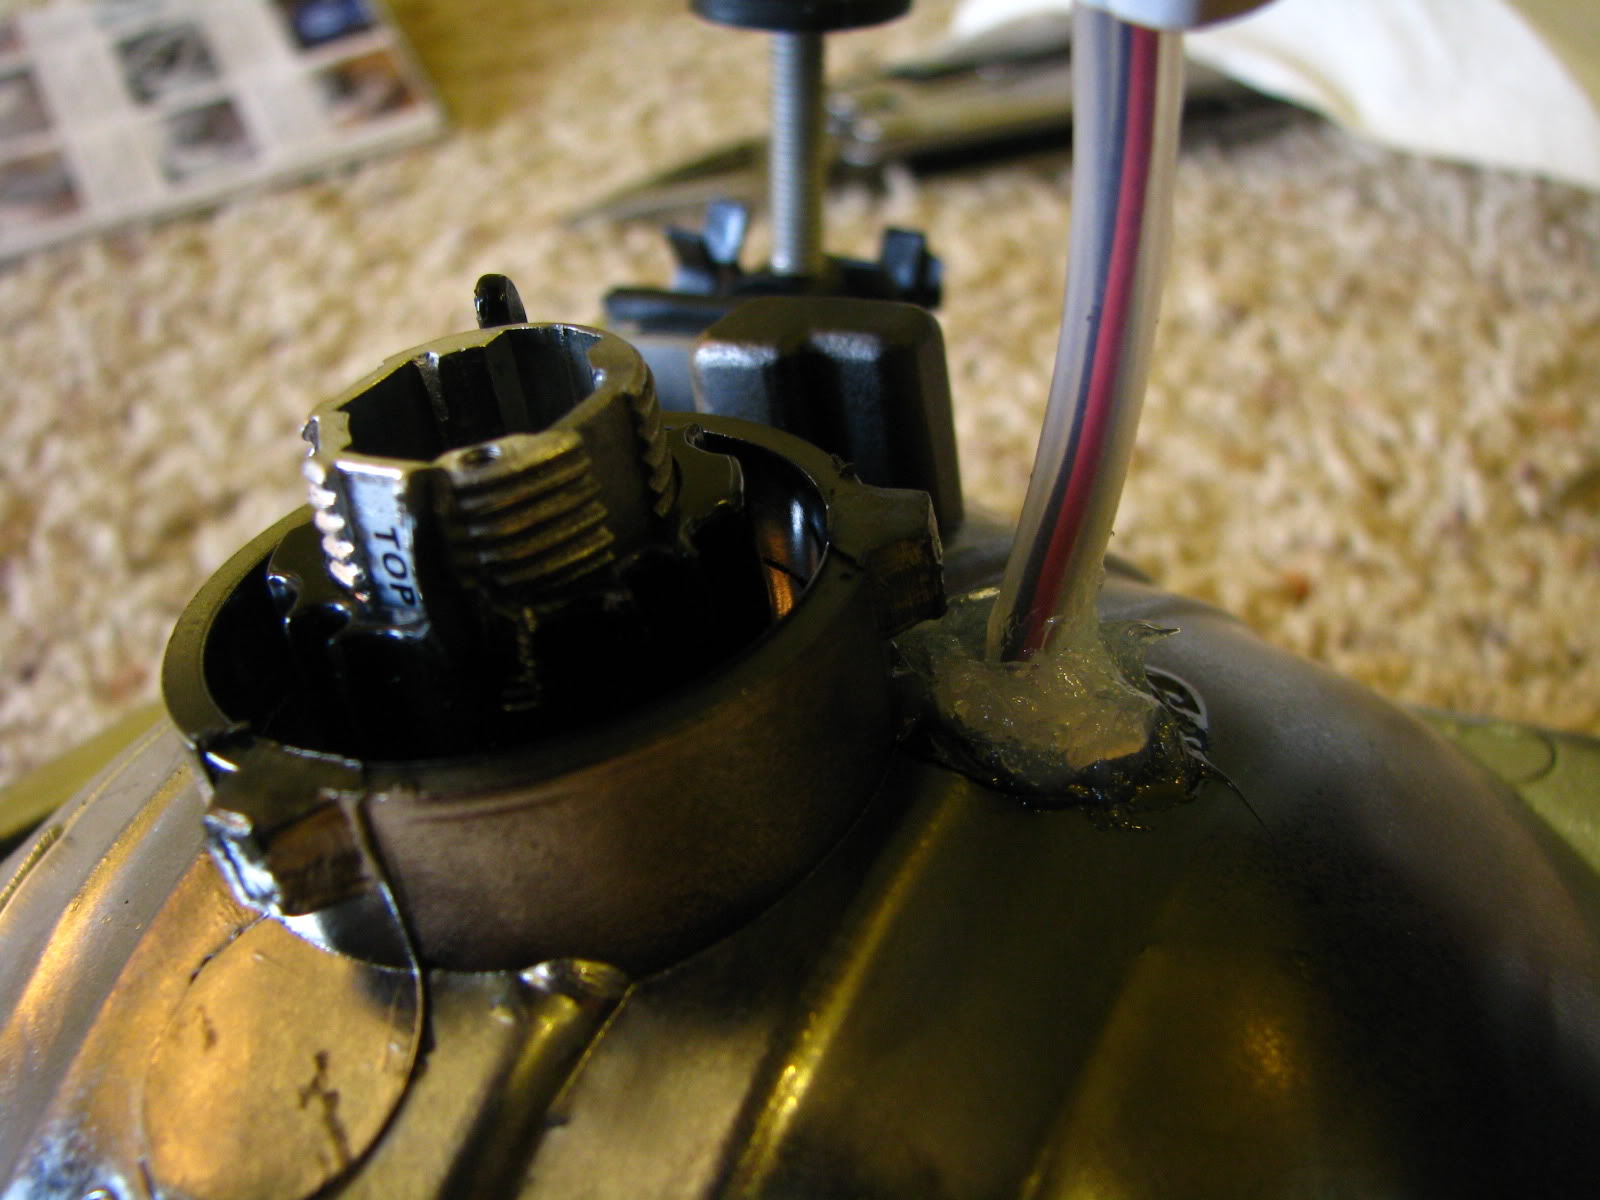

The small control plug houses the positive and negative for the CFL lens, and the left adn right wires are pisitive and negative actuators for the high and low beam setup.
The projector lens housing is a sort of 'Insert" into the standard 9007 bulb socket - a metal piece slides in, and you push the projector lens in from the reflector housing area, it has several poles to line you up so the projection beam will be oriented in the proper direction.
It is then slid through, and secured with a locknut and large heavy metal screw that mounts aroudn the housing for the HID Bulb socket. A few pictures here will show you the standard insertion point for the bulb into the projector lens:
The base of the projection lens has a heavy, thick rubber screen - when you tighten the locknut on the back with the hand twist (Needs around 20 Ftlbs torque with some pliers), the rubber gasket there seals off the housing completely, creating a very watertight/moisture resistant seal. A hole needs drilled out just to the lower left of the back of the housing where the locknut is, its roughly a 3/8" hole, I used my trusty Irwin step bits to do this - do NOT use standard drill bits - I tried it the first time.. and they do not drill through plastic for crap.. darn thing ended up picking up the housing and spinning it like a top till the drill slowed down
My bad, hah! After the hoel is drilled, you need to locate the wires coming out of the cap of the projection lens, and feed them through - to do this, you have to unclip the little connectors in this clip, then re-attach them on the other side.. the wire has a heavy rubber gasket in place to seal the hole after you drill it adn run the wires - I sealed it with silicone on the back to make sure it was resistant to all moisture and weather.
The small control plug houses the positive and negative for the CFL lens, and the left adn right wires are pisitive and negative actuators for the high and low beam setup.
Last edited by WowMike2001; Aug 25, 2009 at 01:46 PM.
Thread Starter
|
Member
Joined: Oct 2007
Posts: 2,583
Likes: 4
From: Stevenson, WA
The work area - the fridge stopped working 3 days ago, so ALL of the counter space is taken up by refrigerator shelving, all cleaned up and neat - waiting on the repairman to come out and fix it 
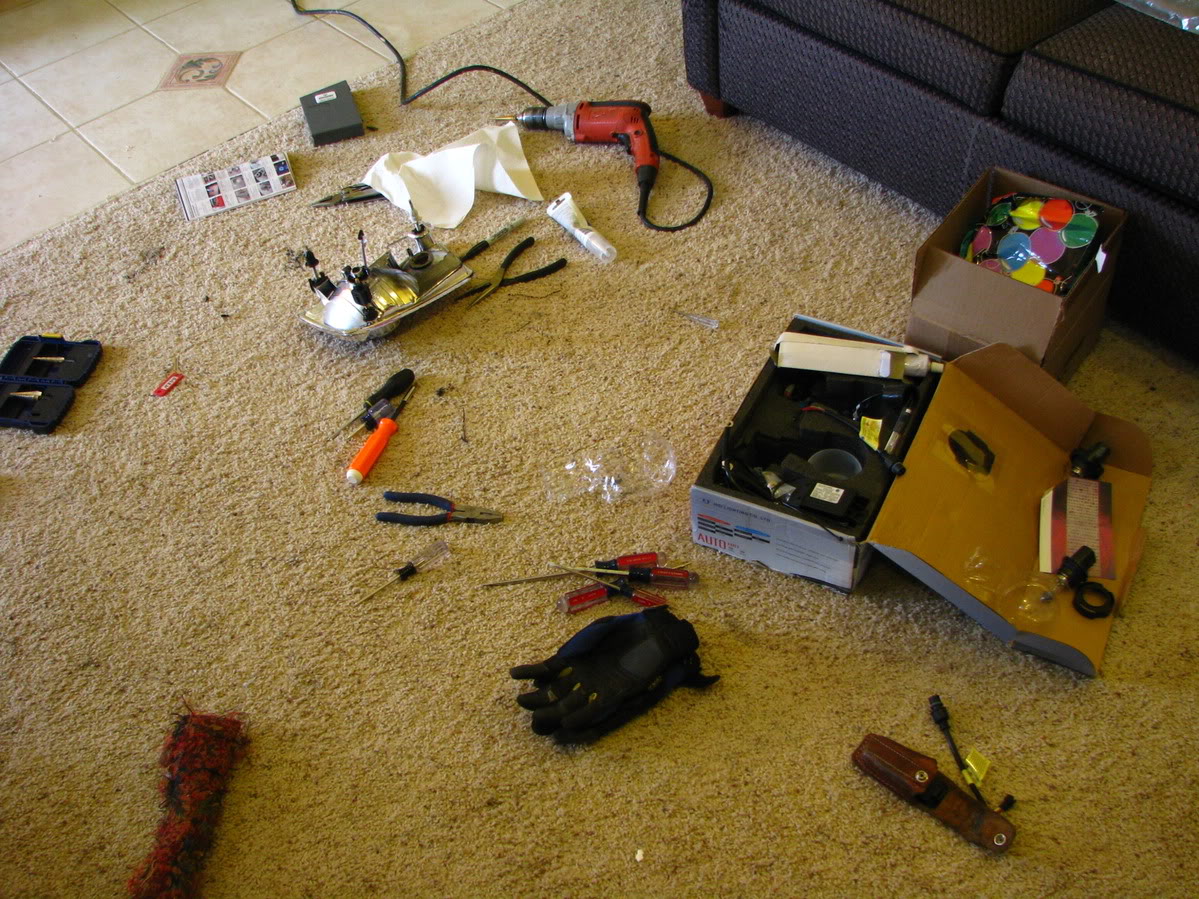
I hate workign on carpet and tiel floor by the way, hah
I hate workign on carpet and tiel floor by the way, hah

Too bad you couldn't pull the projector back like an inch or whatever so that the chrome ring is flush with the reflector, did you have clearance issues or something? And I wonder how these will compare to an OEM projector as far as light distribution and cutoff.
Thread Starter
|
Member
Joined: Oct 2007
Posts: 2,583
Likes: 4
From: Stevenson, WA
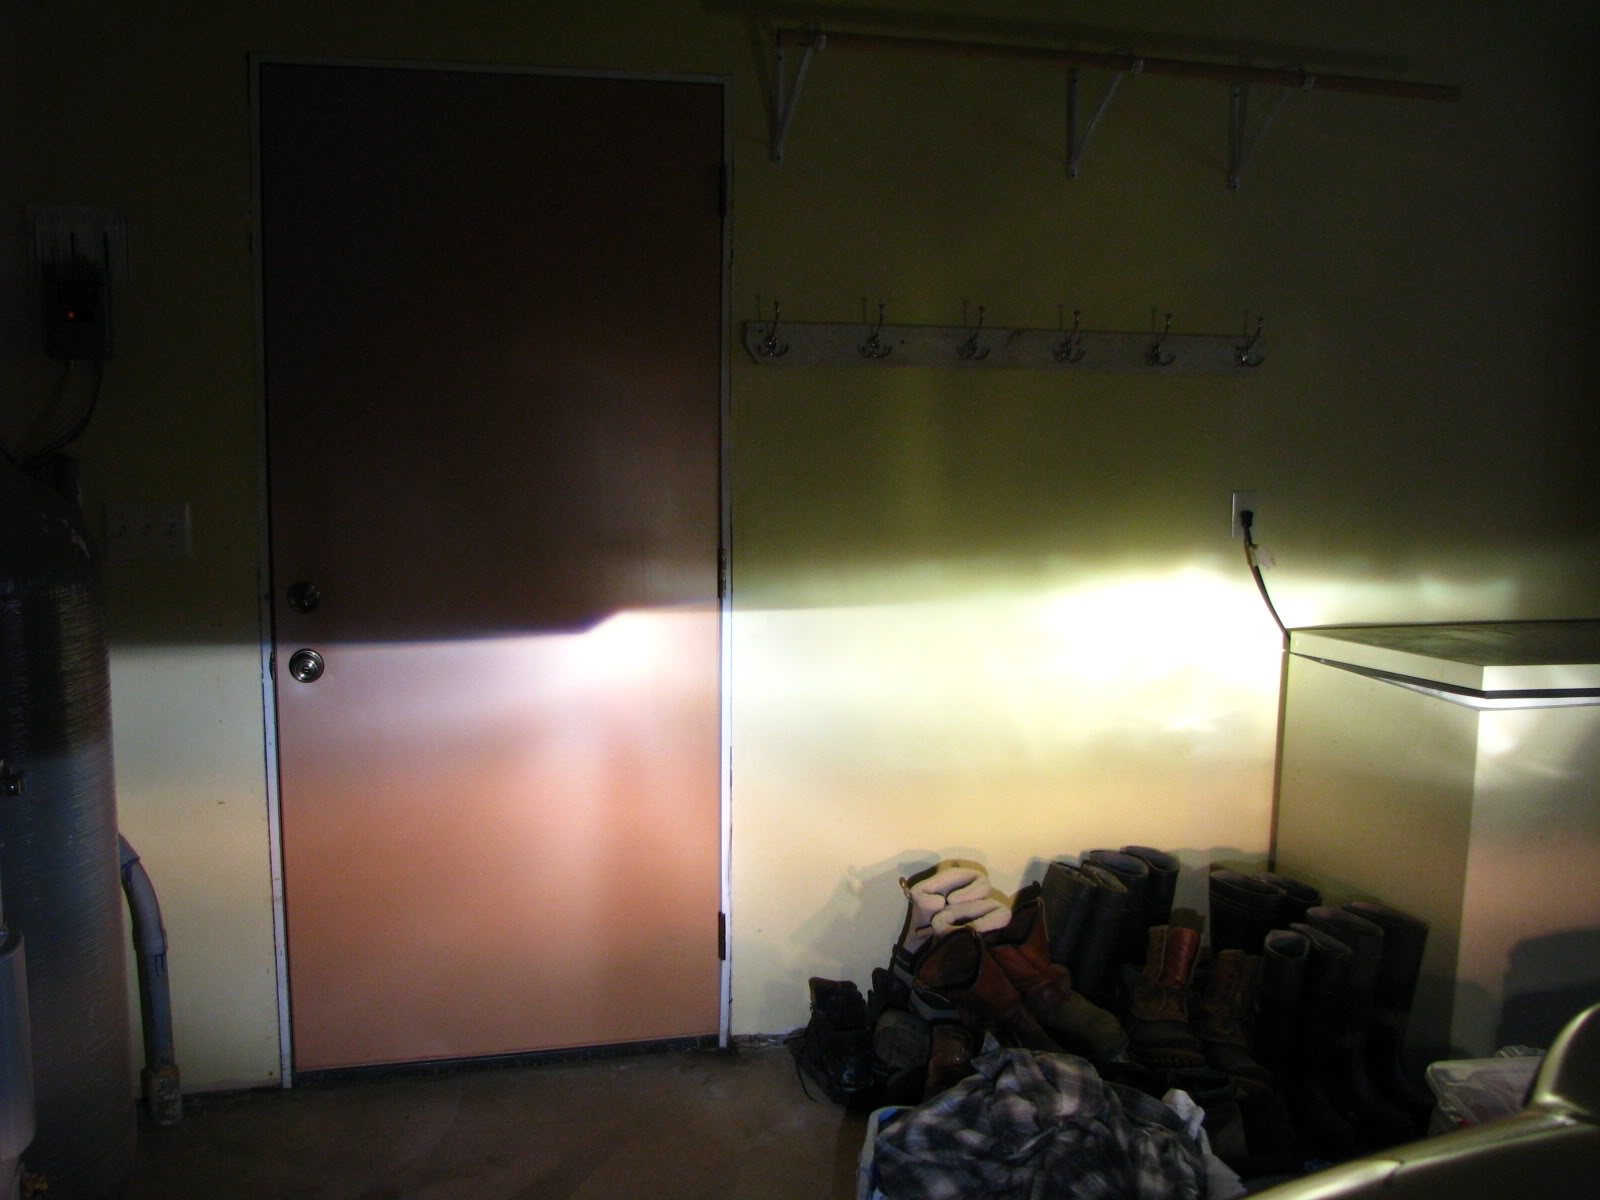
Since I half cheated - I already have dual 50/55w ballasts in my truck powering dual 9007-4 High/Low bulb HID's.. Since the ballasts are in place, and wired up with a relay through my battery - I decided to give this a quick test run...
(Uploading pictures.. ugh, wish it was instant!)
Keep in mind - I do not have the eye's hooked up.. this is straight bulb to ballast without the control module hooked up.
(Uploading pictures.. ugh, wish it was instant!)
Keep in mind - I do not have the eye's hooked up.. this is straight bulb to ballast without the control module hooked up.
Thread Starter
|
Member
Joined: Oct 2007
Posts: 2,583
Likes: 4
From: Stevenson, WA
I taped the cover to it.. so sue me - I wanted to see some quick results! :-D

Is it just me - or with the headlights like this - does this make my truck look like a dog blind in one eye? :-D
Is it just me - or with the headlights like this - does this make my truck look like a dog blind in one eye? :-D
Thread Starter
|
Member
Joined: Oct 2007
Posts: 2,583
Likes: 4
From: Stevenson, WA
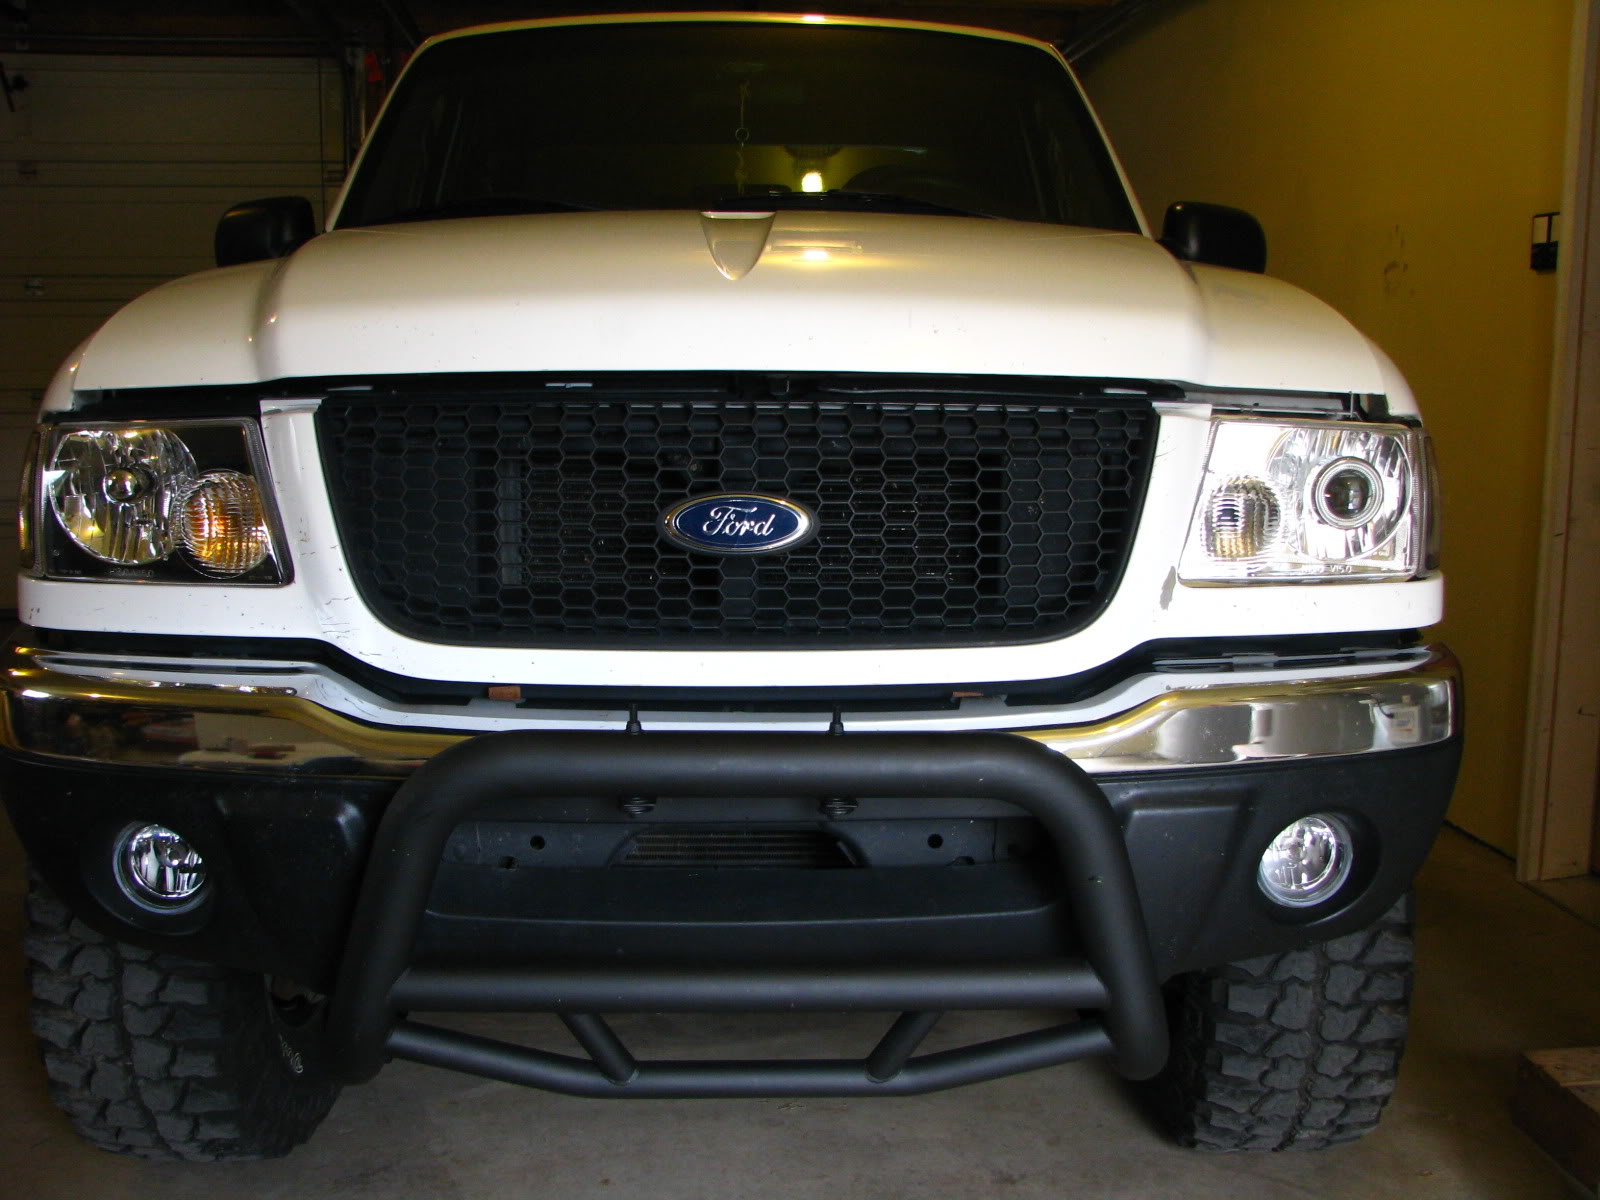
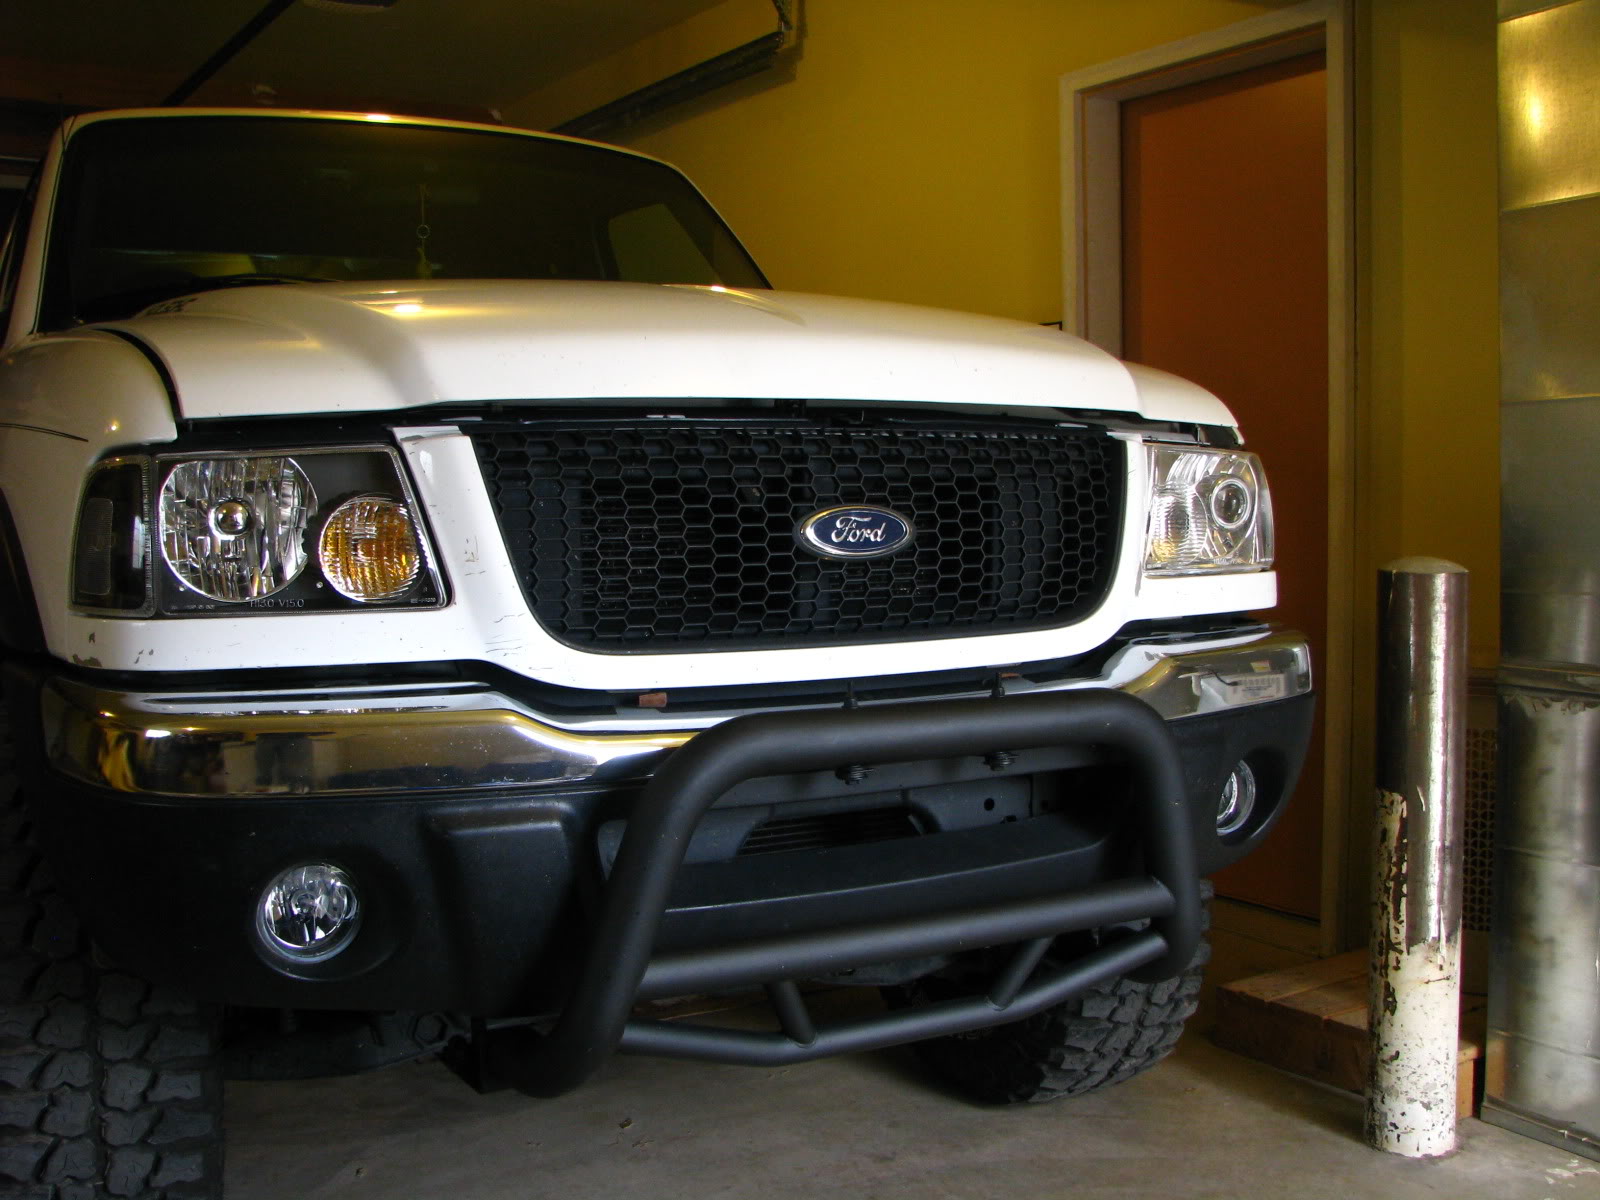
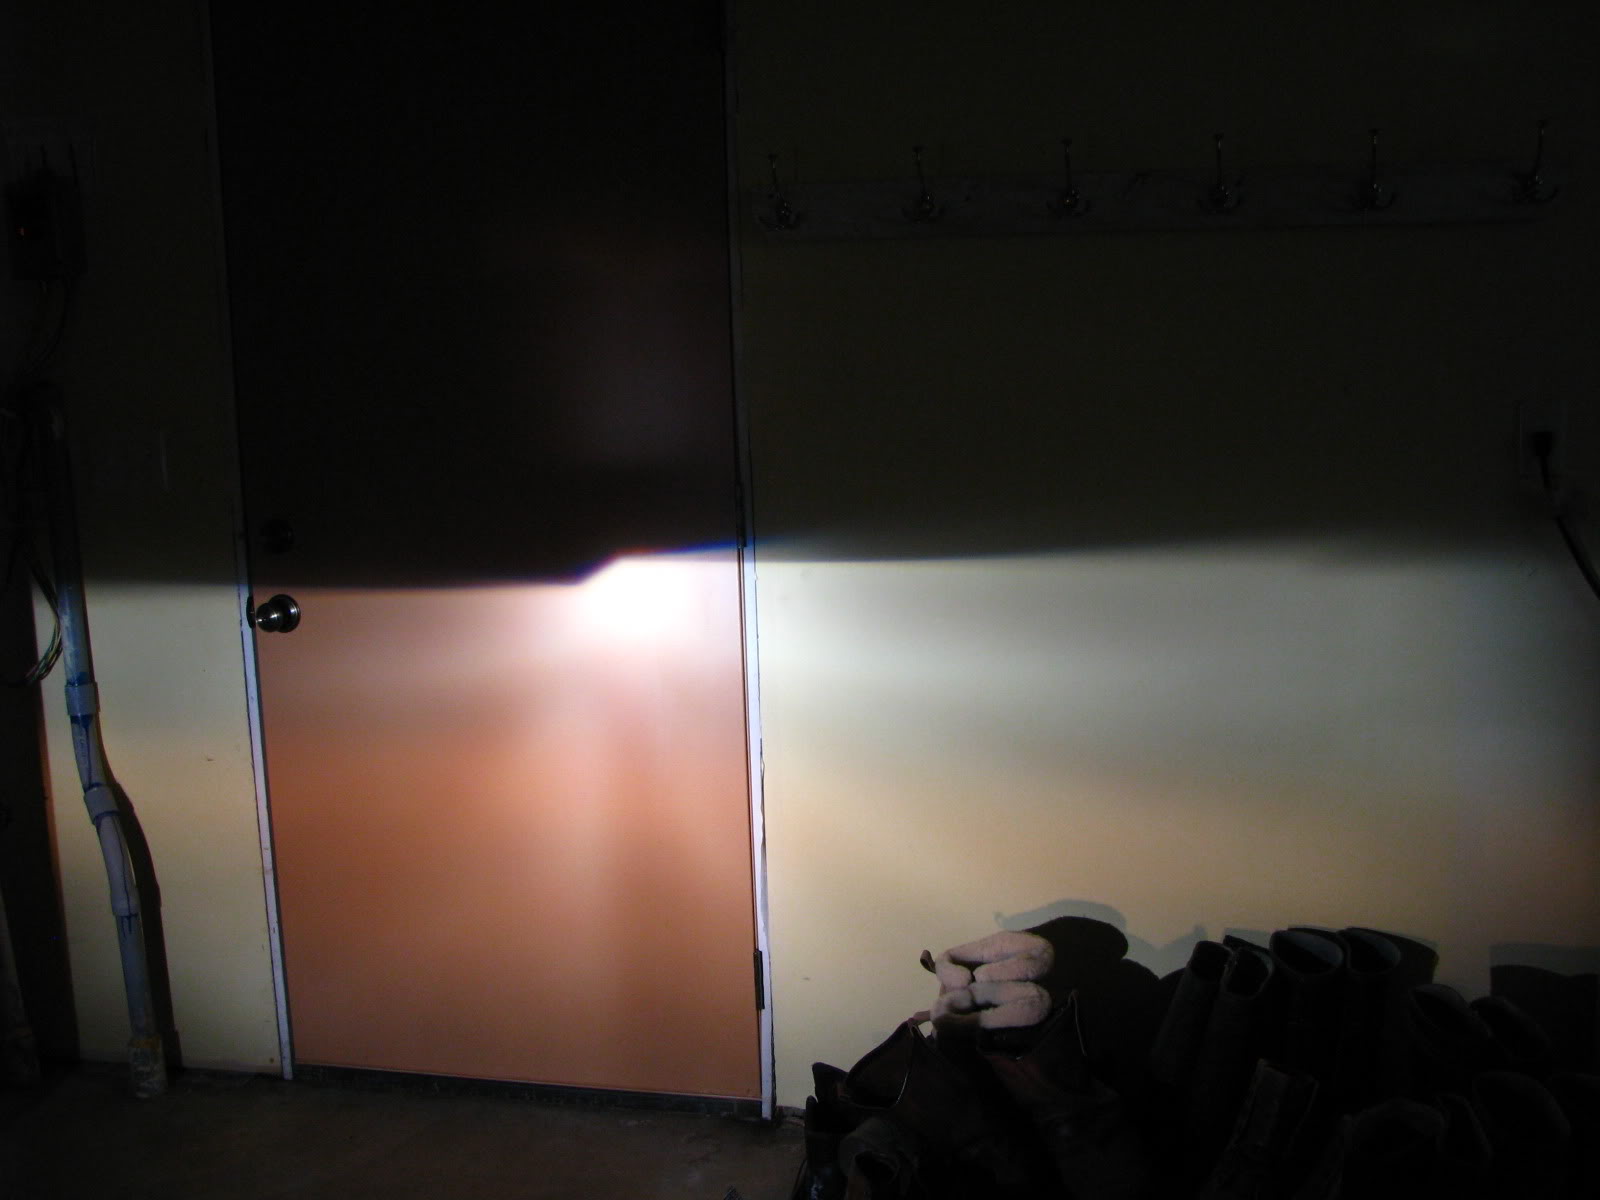
And - what you have all been waiting for!
Left:
01'+ Projector Housing w/ Chrome Stock Headlight
6000k 35w Bulb w/ 50w Ballast HID
Right:
Blacked Out Stock Reflector
4300k 50w Bulb w/ 50w Ballast HID
Standing in front of the projector housing to show the reflector housing against the wall.
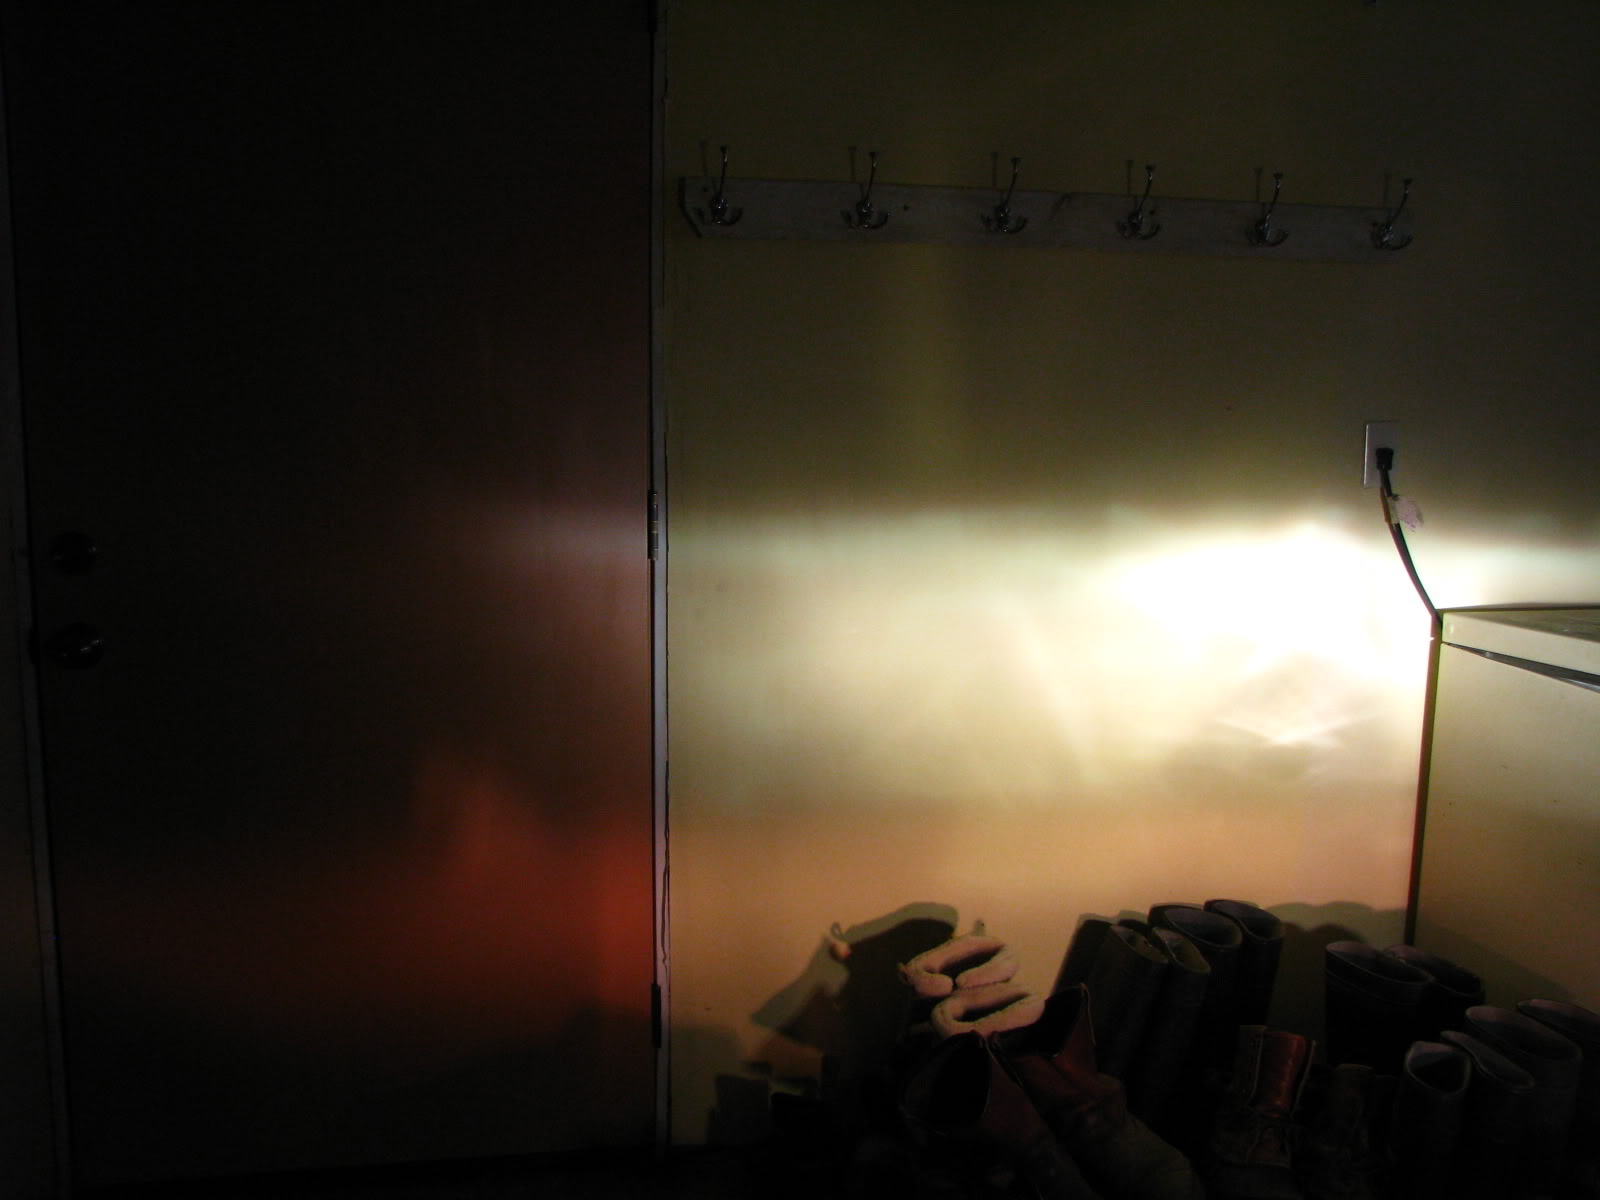
Standing in front of the reflector housing, to show the projector on the wall.
Left:
01'+ Projector Housing w/ Chrome Stock Headlight
6000k 35w Bulb w/ 50w Ballast HID
Right:
Blacked Out Stock Reflector
4300k 50w Bulb w/ 50w Ballast HID
Standing in front of the projector housing to show the reflector housing against the wall.
Standing in front of the reflector housing, to show the projector on the wall.
Thread Starter
|
Member
Joined: Oct 2007
Posts: 2,583
Likes: 4
From: Stevenson, WA
Works great so far - I still have to seal the housing.. but first I plan on painting the unit - perhaps blacking it out, and getting rid of the chrome housing behind the projector lens - I need to keep the one for the turn signal there, perhaps I'll VHT Tint it and add an LED turn signal, give it some oomph with those fancy $50 SMT ones.
Thread Starter
|
Member
Joined: Oct 2007
Posts: 2,583
Likes: 4
From: Stevenson, WA
Sadly - I think I will be keeping most of the HID Setup - I need the ballasts, the bulbs wont fit into this projector housing sadly - those I can probably get rid of, the Relay that came with the kit I have wired up to the projectors - I am looking at perhaps throwing an extra extra high beam into the turn signal area, insetting my 9007-4 bulb into it so I can click a switch somewhere and get an extra high beam for when Im out and about in the woods - that is to be determined though, I want to wrap up what the current housing is sitting in right now


