
The EDGE Project - Scrambler82 - MA


The EDGE Project - Scrambler82 - MA
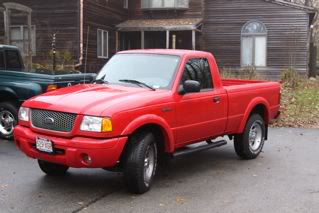
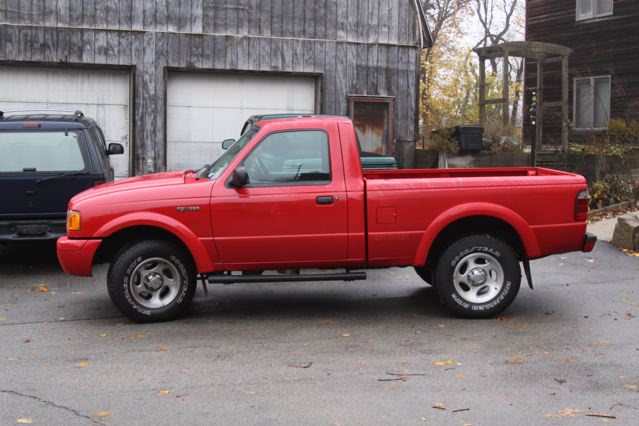
i purchased my latest Ranger in Nov of �08 with 25K miles on it; the truck appeared to be brand new, loved it !
My first changes were little things:
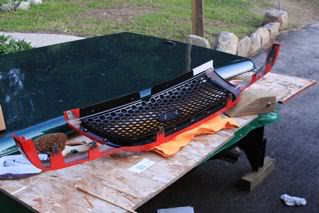
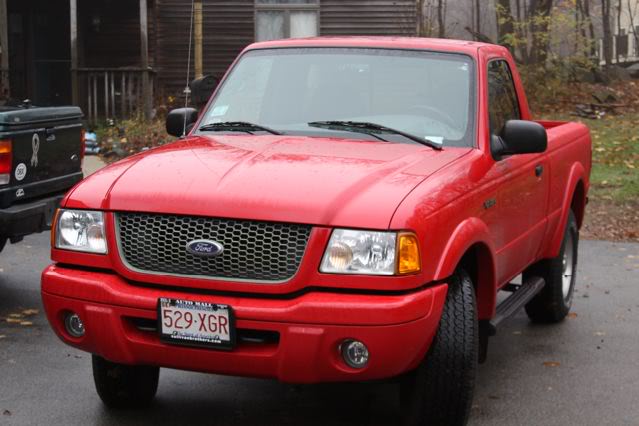
Cleaning up the grill.
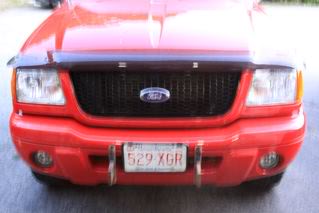
Broke the lower part of the grill shell, cracked it and repaired with fiberglass.
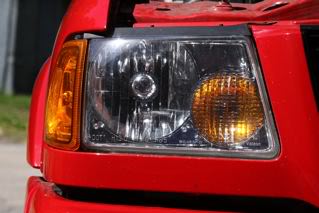
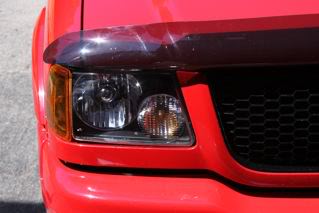
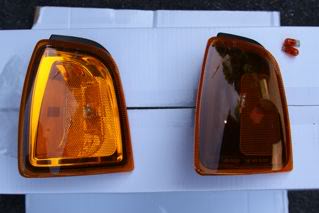
Changed the Headlights to black ones and the Side Markers too; part of a kit.
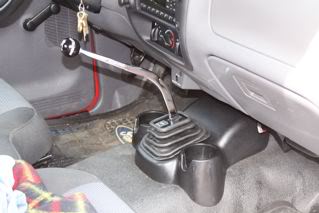
Then the Hurst Shifter went in.
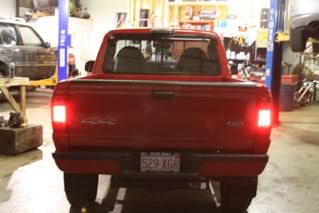
LED Tail Lights
Changed the Bak-up Lights to Directionals and high Output Bulbs.
I turned n the flashers in this pic but you can imagine them flasing right.
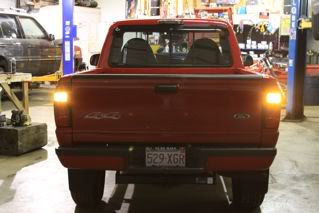
LED Third Brake Lights went in and changed the Cargo Lights to Directionals.
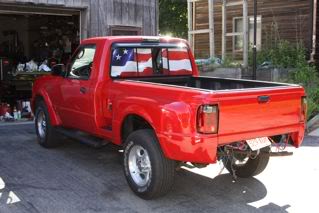
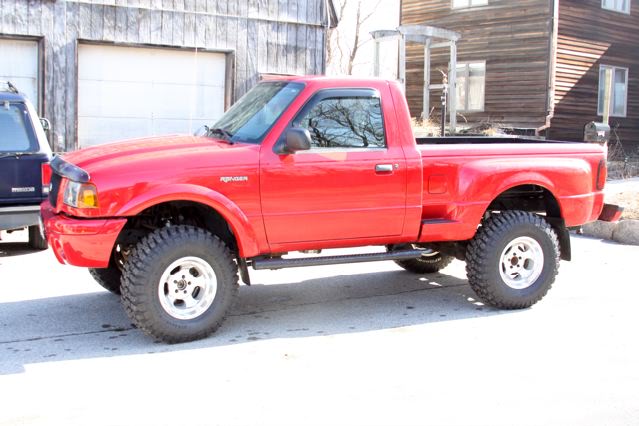
Then somewhere along this line I did the mod what I had wanted to buy already installed but was never able to locate on the right truck, the Step Side Bed. Still need a rear bumper but the bed is installed and looks GREAT.
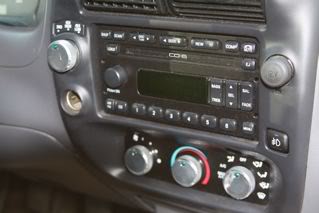
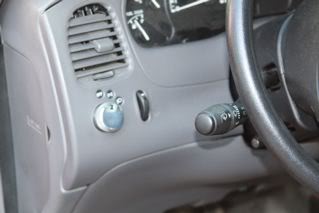
I changed the HVAC ***** to Aluminum Billet *****, then the Head Light Sw and the 4x4 Switch got changed.
My first changes were little things:
Cleaning up the grill.
Broke the lower part of the grill shell, cracked it and repaired with fiberglass.
Changed the Headlights to black ones and the Side Markers too; part of a kit.
Then the Hurst Shifter went in.
LED Tail Lights
Changed the Bak-up Lights to Directionals and high Output Bulbs.
I turned n the flashers in this pic but you can imagine them flasing right.
LED Third Brake Lights went in and changed the Cargo Lights to Directionals.
Then somewhere along this line I did the mod what I had wanted to buy already installed but was never able to locate on the right truck, the Step Side Bed. Still need a rear bumper but the bed is installed and looks GREAT.
I changed the HVAC ***** to Aluminum Billet *****, then the Head Light Sw and the 4x4 Switch got changed.
So where were we ?
Oh ya, added ***** to the Truck.
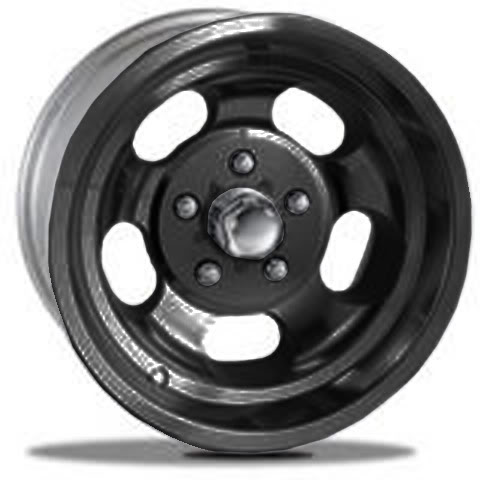
Bought these rims for the future lift mod.

Here they are in black but I am using them in polished aluminum first to see, will go from there. I am thinking of painting the open slot area black.
Don’t have good pics yet but these are the seat I just purchased last week.
No Console, I want a Shorty Console, need one on Dark Gray if possible if anyone happens to see one for a good price.

I have the SL Lift Kit waiting for a few little parts to get started on that, along with the Coil-Over Conversion and new 6” Rear leaf Springs… NO BLOCKS.
285x75x16 KM2s, purchased, mounted to the Slotted Rims and waiting in the corner.
Ordered a RED Character Gauge Face, HVAC Face and LED Lighting for the same parts.
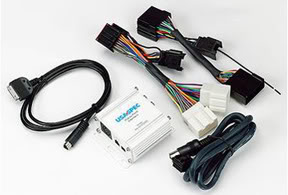
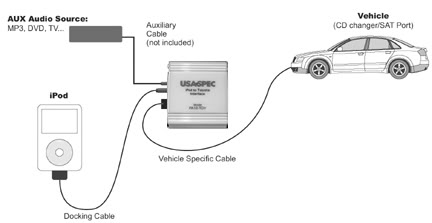
Added a US Spec iPod Adapter X-Mas ’09, really nice sounds.
Turned the OEM Stereo into a really good sounding music machine. You do have to understand that my tin ear is what I use to determine the “Really Good Sounding” but believe me three people so far have asked what I did to the tunes, they sound great.
More to come.
Oh ya, added ***** to the Truck.
Bought these rims for the future lift mod.
Here they are in black but I am using them in polished aluminum first to see, will go from there. I am thinking of painting the open slot area black.
Don’t have good pics yet but these are the seat I just purchased last week.
No Console, I want a Shorty Console, need one on Dark Gray if possible if anyone happens to see one for a good price.
I have the SL Lift Kit waiting for a few little parts to get started on that, along with the Coil-Over Conversion and new 6” Rear leaf Springs… NO BLOCKS.
285x75x16 KM2s, purchased, mounted to the Slotted Rims and waiting in the corner.
Ordered a RED Character Gauge Face, HVAC Face and LED Lighting for the same parts.
Added a US Spec iPod Adapter X-Mas ’09, really nice sounds.
Turned the OEM Stereo into a really good sounding music machine. You do have to understand that my tin ear is what I use to determine the “Really Good Sounding” but believe me three people so far have asked what I did to the tunes, they sound great.
More to come.
Last edited by Scrambler82; Jan 24, 2010 at 07:43 AM.
Changed the LED in the Radio Face to RED instead of OEM Green.
See my How To - https://www.ranger-forums.com/f59/ho...-color-101698/
Next I put in Plug in the Power Outlet and the Cig Lighter Socket - No pics yet.
Now the truck is headed to the shop once more but this time for the long time coming SL / Coil-Over Lift and new Rims and 33� KM2.
Next is LEDs for all of the ***** in the truck; RED LEDs mounted in the **** Hole so the lights will be full on the indicator and then the Explorer Dk Grey Leather/Pwrd Seats and Console.
Once that is done I will start my search in earnest for a front and rear Tubular Bumper.
Future will be a 302 or 289 CI EFI Transplant� not sure when this will happen but it is a hopeful thing.
that�s the update as of 3/4/10.
Ltr,
And the Beat Goes On !
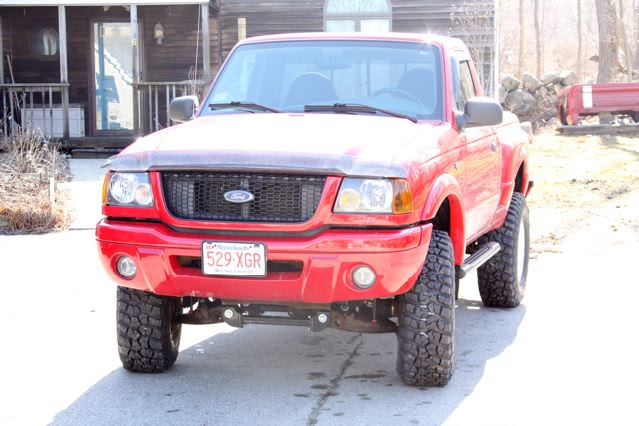
Got the Lift in and the weather is warming up; where to now ?
Here is the side before and after the lift.
The Front before and after:
The Infamous Tire comparison:

And the Rim - Old School: i decided to keep the bright aluminum look for now, maybe latter consider BLACK.

Next is the complete tear out of the interior, sound proofing material install, new carpet, new Shifter Boot and RCM Cover (Thanks to rwenzing) and Shorty console.
After that can be anyone guess; maybe the Gauge cluster will be ready to install.
Here is the side before and after the lift.
The Front before and after:
The Infamous Tire comparison:
And the Rim - Old School: i decided to keep the bright aluminum look for now, maybe latter consider BLACK.
Next is the complete tear out of the interior, sound proofing material install, new carpet, new Shifter Boot and RCM Cover (Thanks to rwenzing) and Shorty console.
After that can be anyone guess; maybe the Gauge cluster will be ready to install.
Last edited by Scrambler82; Mar 16, 2010 at 09:31 AM.


you either need to put the new wheels center caps in or put your factory center caps on the new wheels. other than that, lookin sharp! I'll tell you what, there is a dang KM2 pandemic going on around here...lol When its time for tires again, i may try to go that route depending on price
you either need to put the new wheels center caps in or put your factory center caps on the new wheels. other than that, lookin sharp! I'll tell you what, there is a dang KM2 pandemic going on around here...lol When its time for tires again, i may try to go that route depending on price
The center caps are being bead blasted and will be painted black.
I didn’t like the ones that came with it and asked to exchange them for something else but got told NOT !
So it is up to me to find something different.
Funny you didn’t pick up on the rear bumper, styleside on a steppie, can’t find something I like, maybe will have to make one. I had to put something on for a Sticker so the original got the job.
285x75x16
With the tire at 32 psi they ride very hard; lowered it to 24 frt 22 rear and the ride improved a lot, less of a Bckboard affect.
Next step is to the lower psi 22 psi frt and 18/20 rear, we will see.
With the tire at 32 psi they ride very hard; lowered it to 24 frt 22 rear and the ride improved a lot, less of a Bckboard affect.
Next step is to the lower psi 22 psi frt and 18/20 rear, we will see.
Haven’t added it yet but I got a Center console at the JY.
A different one than I started out looking for but I was thinking it might be a good idea.
I got the one that has the removable bag, I hope the bag holds up.
Got an extra bag also; one bag will be for general stuff and the other will be setup for my Camera and a couple of Lenses.
The console is dk grey but the Arm Rest is a little lighter color, may have to have it done over in Dk Grey or Blk..
The bags are both black Nylon.
If it doesn’t work out at least another shorty will bolt in.
I pulled three std shorty consoles and then located the Bag Type Console.
Pulled three of them to get all the arts needed and the extra Bag too.
No pics hopefully today though aftr I clean it up.
Tell me about finally getting it lifted.
Took forever on the Lift Kit let alone the other parts, at least it is done.
The Coil-Over went in as all others, no problems, except how long it took to get them.
The only real problem was the adjusting nuts on the shocks, they are in a **** poor location vs the upper control arm but that too worked out.
i am hopping the ride soften up a little but everything went ok.
The truck sits very level now but that is part of the problem, I think the front spring have been cranked to compensate for the rear; now the front will get too bouncy. the guy that did the job for me ask if I wanted the truck level and I said yes without thinking, then it looked good like it sits, I let it be but all will work out.
Shane,
I uses 750s, I think, because of the front bumper that is planned but not ready yet (Plate w/9.5XP Winch); 850s were suggested but I thought they would be too much (what do I know).
Also, people talked about the springs sagging and I thought the extra 100 lb rate might save me a little in the long run.
Next we need to consider the new KM2s, load range “E”, big truck type tires so that isn’t good either, even when running 22/20 lbs pressure.
I am sure between the springs giving a little, front and rear, and the tire pressure being adjusted the ride will get better.
ltr,
Member

Joined: Nov 2006
Posts: 3,650
Likes: 2
From: Hillsboro, Oregon
I didn't realize you lifted it either, it looks good! Well aside from the stepside bed. 
Yeah the load range E tires are definitely a problem. That is why I often encourage people to step down to 15s with standard sizes (33x12.50s) that have a C load rating. Hell my KM2s on my F150 are only load range D and I run pressure in the mid 30's.
Yeah the load range E tires are definitely a problem. That is why I often encourage people to step down to 15s with standard sizes (33x12.50s) that have a C load rating. Hell my KM2s on my F150 are only load range D and I run pressure in the mid 30's.
Got the Bumper from C4x4…
This isn’t my Bumper but it is The Bumper:
Need to wait until next week for the bumper and the new speakers for the radio install.
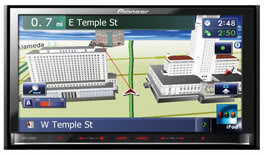
and got the new Radio:
This isn’t my Bumper but it is The Bumper:
Need to wait until next week for the bumper and the new speakers for the radio install.
and got the new Radio:


