Harvest Gold 1999 Ranger
#301
 09-19-2016


Thankfully the whole thing is surrounded by plastic. No metal really to short on. Was more worried about the plastic itself catching fire due to heat.
I have what I believe to be a quality fuse installed. If I have to, I'll use maxifuses I pulled from Fords at the junkyards. Those'll handle the current no problem.
I'll note that the box didn't sustain any damage whatsoever. Fuse is toast, though. I'll keep the fuses in a separate container for sacrificial purposes. That's about all I can somewhat trust them for. Removed every single one of those cheapies and put good ones in their place. If one melted, the others would too I'm sure. I oughta sue for that....
I digress. Pics of the setup while I had it out to install the capnuts.
#302
09-20-2016
Well guys, I had every owner's worst (or one of them) nightmares today. And I'm going to throw myself under the bus here with hopes someone will learn something from my mistakes and save themselves the hassle.
Today I went over to the dollar store. Made my purchase, and walked back out to my truck to find a puddle underneath the engine. My initial reaction was "Oh, the AC is sweating again" but then I remembered I didn't use the AC on my trip and also saw that the fluid was green.
An immediate "oh sh**!" popped into my mind as I realized I had sprung a leak. But why? So, I set my things in the passenger seat, popped the hood and grabbed a trusty flashlight to start hunting; see if maybe it was something simple that I didn't have to worry about.
I looked, looked, and looked some more but I couldn't find the source of the leak. While I'm frantically looking, I ask my father (who used to be a mechanic back in the days of points, plugs, and distributers) for some advice. Since I hadn't lost a large amount of coolant, but enough to throw up a red flag, I was adviced to get it home before I lost even more. Thankfully I was less than 5 miles away; just long enough for the engine to get warm. I did manage to get home, where I stop in the driveway and immediately turn off the engine.
Of course, there's more coolant being wasted to the ground. With my best flashlight and a sunny day, I'm searching around the block for the source. It seemed to be coming from everywhere. At this point I'm thinking the gasket on the pump had failed on me in a spectacular way; but no, it didn't. It also appeared to be coming from between the passenger side head and the block.
Thankfully, none of these catastrophic failures were the case. This is where I throw myself under the bus for no other reason than to save someone else a little embarrassment.
On the water pump, there's a hose coming off of it that leads to the heater core. Unbeknownst to me, I had been running this hose without it's clamp for about 60 miles. For some reason it decided to leak today and not immediately after I refilled the cooling system. So, knowing the problem I breathed a sigh of relief and kicked back in the cab with my phone and EricTheCarGuy on youtube, waiting for the engine to cool.
After the engine cooled down, I then reinstalled the clamp onto the hose. After taking care of my other duties, I took it for a drive near home to confirm the problem had been solved. Appears that's a 'yes'.
So, fellow DIY-ers, check your work, check your work again, then check it again a couple of hours later. Save yourself some hassle, embarrassment, and miniature heartattack.
#303
09-20-2016


Don't feel bad Cameron. When I replaced the heater hoses on my truck, I re-used the stock clamps for the two hoses that go to the heated PCV valve. I neglected to take into account the smaller O.D. of the new hose. About a week later, I came up on a merge zone where two lanes turn into one. I gunned it to get ahead, and when I did that, I guess the engine shifted and one of the hoses came loose. It dumped about a gallon of coolant all over my engine. It was hitting the exhaust manifolds, so white smoke was pouring out from behind the truck. I thought for sure I had majorly blown a head gasket. Once I got it pulled over, It was apparent that the smoke was coming from the engine bay and not the exhaust. After a few minutes I found the hose that had come off. Re-installed it and bent the stock clamp a little so I could get to the nearest auto parts store and buy smaller clamps.
Luckily I'm paranoid about stuff like that and I always carry a gallon of coolant with me. I had just enough to replace what I had lost on the road.
Luckily I'm paranoid about stuff like that and I always carry a gallon of coolant with me. I had just enough to replace what I had lost on the road.
#304
09-20-2016
#305
09-20-2016
#306
09-21-2016
Great. My first time being stolen from! No, I'm not happy, as you can probably imagine.
My wolf reese hitch cover is no more. Walked around the back of the truck today and bam, it's gone. I guess now I have an excuse to stuff a tow ring in the hitch now, but that's not the way I wanted to get said excuse. Sigh....
This time, I'm getting a locking pin if I don't decide to just not bother and paint the rust black. I liked that cover, but I guess now someone else can enjoy it. This, right here, is why I don't trust the majority of the population. I digress.
I suppose this also grants me the opportunity to make my own cover, too. Idk. Pitch an idea or suggestion if you want.
My wolf reese hitch cover is no more. Walked around the back of the truck today and bam, it's gone. I guess now I have an excuse to stuff a tow ring in the hitch now, but that's not the way I wanted to get said excuse. Sigh....
This time, I'm getting a locking pin if I don't decide to just not bother and paint the rust black. I liked that cover, but I guess now someone else can enjoy it. This, right here, is why I don't trust the majority of the population.
I digress.I suppose this also grants me the opportunity to make my own cover, too. Idk. Pitch an idea or suggestion if you want.
#307
09-21-2016


Join Date: Apr 2016
Location: Buckeye, AZ
Posts: 40
Likes: 0
Received 0 Likes
on
0 Posts
I will not tell you of a couple of bone headed things I did, while doing the electrical work. I do have an excuse though, was a wrench turner on big diesels for years, not a sparktrician. Good to have people like you to give assist when needed. Too bad some schleprock had to steal from you. It just amazes me how people work hard for the things they want and then someone just comes and takes it. Guess they feel they were entitled.
#308
09-21-2016
I've done some pretty boneheaded things, too. Working with wires, like anything else, is forever a learning process. You just learn less each time. What I've found is that most applications are wired the same way (except when you get into EATCs and the like). the main difference a lot of times is what the device is that is being powered.
And yeah, that's basically how I feel about it. Granted, I didn't give a dime for it initially (my mother bought it for me as a truck-warming present), but even if I had given no more than a dime for it, it's still the principle of it. I'm glad I didn't have anything stowed away in there, like a spare key. Otherwise my truck would be gone, too. At the end of the day, though, I'd rather have something like that be stolen were no physical damage is done, rather than someone busting my window and tearing my stereo out of the dash.
I'm thinking about one of these as a replacement.....with a locking pin.
BULLY 1.25"/2"CHROME TRAILER TOW HITCH RECEIVER COVER STEP+LED BRAKE LIGHT BAR
#309
09-21-2016
#310
09-21-2016
Wouldn't surprise me. Believe me, when I realized it, the whole neighborhood heard me. Called Menards to ask to see their CCTV footage, assuming it was stolen there, and much to my surprise, they don't have ANY cameras! Just kills me, the kind of world we live in. I should be able to leave my doors open and my wallet and keys on the dash, go inside and the next day come out and it all still be there when I come back. Unfortunately if I did that, well, you know what would happen. This is why everything I own is locked and chained down.
Oh well. I've accepted I'll never get it back, and whoever has it will have something nice. ....I ever see it though, it's coming home with me. It was custom, no "I bought it at autozone" here. Maybe take out all four valve cores of the thief's car and pitch 'em across the parking lot; but you didn't hear me say that.
...anyway; on another topic, I've got two new things I want to do. These likely will take place after winter.
First and foremost, I want to swap out my driveshaft with an aluminum expo shaft. I can get one from the yard for about 10 dollars. The less weight that engine and tranny have to move, the better. Every little bit helps.
Second, I want to add a second set of (for want of a better word) running lights to the rear of my truck. At night, on the front, you've got two headlights, two fog lights, two low-side turn signals on each side (four total) and two corner lights. All together that's (if I counted correctly) ten lamps total. You can't not see me coming, and I like it.
The rear, however, is dismal. You have the two rear tail lights and two plate lights, if you even want to count the tail lights. I want to add a second set of red 'running lights' to the rear for a bit better visibility. Nothing big, just two, small, inconspicuous lights for each side.
Ultimately, I'd like to use these.
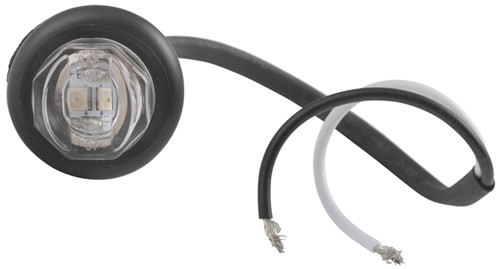
Do a google search for '3/4 grommet light' and you'll come up with lots of these little gems. You drill out a hole for the grommet to stuff into. Once the hole is drilled, deburred and the grommet is installed, the light pushes into the grommet. This one is white, but I've seen them in green, blue, amber, red, and I think purple. I've also seen smoked varieties, not to mention you can buy packs of these for dirt cheap. I saw a pack of 10 for 10 on amazon today.
Anyway, this example is white, but the one I'd use is red, although I'd like the smoked ones more. My goal is not drill any holes in the truck to install these. I want to bolt them on somewhere. I'm thinking down by the trailer hitch, as there's plenty for me to work with. If I do wind up using these and mounting them at the hitch, the goal there is to mount them in such a way that I can still insert a hitch or plug without causing any obstructions to the lights or to the plug/hitch.
However, upon closer inspection of that step I posted earlier, I see four wires going to what would be a trailer plug. Of course, that's ground, left stop/turn, right stop/turn and tail. Seeing as all four wires appear to run to the step, this would indicate to me that all of those functions are used here. If that's the case, total win. Solves my desire for the extra running lights.
Oh, and if/when I do wind up with that step..... a locking pin will be installed too. I'm NOT having the same thing stolen twice.
....however, it has also occurred to me to utilize something I already have... my cargo lens. My Ranger is equipped with functioning cargo lights, which come on with the door. Obviously, I don't want to get rid of this feature. Rather, I'd want to add to it. On the rear of the housing, there's spots where small holes can be drilled into the respective chambers of the cargo lenses, as well as the third brake light.
I could use either of these to insert and glue in (or snap in with rings) some small, 5mm LEDs to come on with the park circuit. Nothing else is added to the vehicle in an extra stealthy way that, I personally haven't seen done before. This therefor keeps all the functionality I currently have and adds even more. The best part is, I can get prewired LEDs with the proper resistor that includes the snap ring for panel mounting for dirt cheap. Here's the link to the product I'm talking about.
https://www.superbrightleds.com/more.../attributes/13
One last thing. For a while I've been considering posting a video walk around of my truck and posting it here. Would anyone be interested in that?
Oh well. I've accepted I'll never get it back, and whoever has it will have something nice. ....I ever see it though, it's coming home with me. It was custom, no "I bought it at autozone" here. Maybe take out all four valve cores of the thief's car and pitch 'em across the parking lot; but you didn't hear me say that.
...anyway; on another topic, I've got two new things I want to do. These likely will take place after winter.
First and foremost, I want to swap out my driveshaft with an aluminum expo shaft. I can get one from the yard for about 10 dollars. The less weight that engine and tranny have to move, the better. Every little bit helps.
Second, I want to add a second set of (for want of a better word) running lights to the rear of my truck. At night, on the front, you've got two headlights, two fog lights, two low-side turn signals on each side (four total) and two corner lights. All together that's (if I counted correctly) ten lamps total. You can't not see me coming, and I like it.
The rear, however, is dismal. You have the two rear tail lights and two plate lights, if you even want to count the tail lights. I want to add a second set of red 'running lights' to the rear for a bit better visibility. Nothing big, just two, small, inconspicuous lights for each side.
Ultimately, I'd like to use these.
Do a google search for '3/4 grommet light' and you'll come up with lots of these little gems. You drill out a hole for the grommet to stuff into. Once the hole is drilled, deburred and the grommet is installed, the light pushes into the grommet. This one is white, but I've seen them in green, blue, amber, red, and I think purple. I've also seen smoked varieties, not to mention you can buy packs of these for dirt cheap. I saw a pack of 10 for 10 on amazon today.
Anyway, this example is white, but the one I'd use is red, although I'd like the smoked ones more. My goal is not drill any holes in the truck to install these. I want to bolt them on somewhere. I'm thinking down by the trailer hitch, as there's plenty for me to work with. If I do wind up using these and mounting them at the hitch, the goal there is to mount them in such a way that I can still insert a hitch or plug without causing any obstructions to the lights or to the plug/hitch.
However, upon closer inspection of that step I posted earlier, I see four wires going to what would be a trailer plug. Of course, that's ground, left stop/turn, right stop/turn and tail. Seeing as all four wires appear to run to the step, this would indicate to me that all of those functions are used here. If that's the case, total win. Solves my desire for the extra running lights.
Oh, and if/when I do wind up with that step..... a locking pin will be installed too. I'm NOT having the same thing stolen twice.
....however, it has also occurred to me to utilize something I already have... my cargo lens. My Ranger is equipped with functioning cargo lights, which come on with the door. Obviously, I don't want to get rid of this feature. Rather, I'd want to add to it. On the rear of the housing, there's spots where small holes can be drilled into the respective chambers of the cargo lenses, as well as the third brake light.
I could use either of these to insert and glue in (or snap in with rings) some small, 5mm LEDs to come on with the park circuit. Nothing else is added to the vehicle in an extra stealthy way that, I personally haven't seen done before. This therefor keeps all the functionality I currently have and adds even more. The best part is, I can get prewired LEDs with the proper resistor that includes the snap ring for panel mounting for dirt cheap. Here's the link to the product I'm talking about.
https://www.superbrightleds.com/more.../attributes/13
One last thing. For a while I've been considering posting a video walk around of my truck and posting it here. Would anyone be interested in that?
#311
09-22-2016
Well, joy. that 30 amp fuse for my fan blew. Didn't melt, but it blew.
It has crossed my mind to use a 30 amp fuse because there's a circuit breaker on the fan. One is rated for 20, the other 40. I presume 20 is low, 40 is high. A 25 amp straight up blew, the 30 held. It's possible the fuse I'm using is just not high enough, but at the same time I don't want to give it more leeway than what there should be.
So, I'm going to find a 92-95 Taurus owners manual, which will tell me what it was given from the factory. I'll use whatever it tells me to. Right at the moment, I have it hooked directly to the battery, relying only on the circuit breaker. Far from ideal, but if I have to go somewhere, I can. That being said, I'm keeping it's use to a minimum until it's resolved.
#312
09-22-2016
Mystery solved! Thanks to a user over on taurusclub forums, he posted photos of his 93 owners manual, which claims a 60 amp fuse is used for the cooling fan. Since neither mode is on at the same time, it stands to reason both sides of the fan can use one fuse.
Lucky for me, these are the size of the maxi fuses I pull most often. That being said I don't have many, but I have more than enough for my needs.
as of right now I'm running a 30 amp maxifuse with 3/8ths spade connectors. If I'm honest, I did this in the midterm to get myself running. I wouldn't recommend using these as a permanent solution; but I feel it was worth the 3 dollars. Reason being is, the spade connectors really don't have a solid grip on the fuse's tabs. They're good enough though for a midterm solution.
Unfortunately, I cannot use my fuse box for the fan, anymore. I need to use a maxifuse holder coming off the battery terminal. Do I regret buying the box? No, not at all. It's a much cleaner solution to the two, and would now be three, inline fuse holders. So, bottom line, I'm just not using a fuse rated high enough for the application. Makes sense; although it still surprises me how that 30 amp fuse survived as long as it did.
Now, however, I want to do something to clean up my installation of various components. Right now it is very not polished at all. To give you an idea, I don't even want to post pictures of the mess I have until I get it sorted out.
Ideally, I want a box that has either the ATO fuses or the mini fuses (ATA?), four heavy duty (at least two fan capable slots) for the relays, and two maxifuse slots. Not to mention I would also like to have a master fuse, if the wire itself gets damaged.
Unfortunatly I highly doubt there exists this type of box in the aftermarket. However, here's what I can do. Because I'm all about cleanliness, I can get a fuse box from a wrecked vehicle, like (drumroll) the Taurus!
There's a few reasons why I want to go this route. If I'm honest, I should have done this in the first place; but at the time I thought an ATO fuse would do the job. Unfortunately for me, I was wrong.
For one thing, all of my fuses and relays are all in one, clean, factory looking box coming off the battery terminal with the possible exception of my inverter. I'm still wondering how I'm going to fuse that in some reasonable manner. I may have to shrink it's capabilities to suit this project. Let's be honest about that for a minute though; when would I ever need a full 800 peak watts? I mostly use it for my laptop or maybe a work light, which on the DC side draws less than 10 amps. Right now it's rigged for 60 with 4 AWG wire. I may revisit that later on.
Second reason, I have no way to protect my relays from shorting out against something. Not to mention, the spade connectors are so loose that I had to solder them on to keep them from coming apart on me. ....That's not exactly user friendly. I'll kick myself later for doing that.
Second, a master fuse box like that looks OEM, along side my existing mass distribution box. Unfortunately there are no empty slots that would be appropriate for this, otherwise I'd utilize those.
Third, it solves the problem of covering my relay's connections, and also solves the problem of their connections being sub par and rather shade tree. I've got a plastic bag wrapped around one of the relays, for crying out loud. And no, I don't like that solution, but it beats shorting out all over the place.
Fourth, I can get one reasonably cheap if I pull it myself.
However, aside from all that, I'm faced with the physical constraints which don't allow me to do this. So, with that being said, I can't go that route. What I'll likely end up doing is using a maxi-fuse holder somewhere off to the side, and using four 'skirted' relays all mounted on a strip of steel. Although not as pretty as having one box for it all from Ford. If I had a bigger engine bay, I'd be able to. Unfortunately; well.... You all know how that is.
Speaking of relays, a normal ford relay is working just fine for that fan; if anyone is wondering. The relay is specifically a white-bottom ford relay. Tough puppies.
#313
09-23-2016
While messing around, I found a use for two amber LED strips I had lying around left over from a failed project. I'll give you guys a hint: mirror.
I'll work on that over the next week while I let my mind chill out about the fan and come back when it's done. I think you all will like it. Lord knows I do.
I'll work on that over the next week while I let my mind chill out about the fan and come back when it's done. I think you all will like it. Lord knows I do.
#314
09-26-2016
Well, bummer. My idea isn't going to work for my mirrors.
My idea was to run LED strips on the inside of the mirror, so that the perimeter of the glass would illuminate with the turn signals.
The thing that ultimately kills the project all together is the fact there's no way to route the wires through the manual mirrors. Perhaps the power mirrors would be able to accommodate these wires.
#315
09-26-2016
Man that looks like a battle. At least you're winning now. I'm curious how well that e-fan setup is gonna perform over the long run, like in rush hour traffic, summer heat etc. Time will tell. Nice work though, you're setup looks pretty clean.
I saw a member on here do that to his manual mirrors, can't remember who though. If I remember correctly he drilled a small hole near the "hinge". There's always a way.
I saw a member on here do that to his manual mirrors, can't remember who though. If I remember correctly he drilled a small hole near the "hinge". There's always a way.
#316
09-26-2016
#317
09-26-2016
Yeah this guy here. https://www.ranger-forums.com/exteri...irrors-116598/
He drilled his manual mirrors & took a pic for you. What a cool guy.
He drilled his manual mirrors & took a pic for you. What a cool guy.
#318
09-26-2016
I wish I would have seen that earlier! You're a life saver. When I saw there was no hole, I was very disappointed.
On another note, I have these RGB strips laying around. I've got an idea that I want to toss out to the people reading this thread. Thank you for reading, btw. As a brief concept, I could put those strips up in my overhead console to shine through that lens and down onto the area below, with appropriate dimming circuitry. I would have it illuminate with the dash lighting, and dimmed in such a manner that it's not reflecting off anything, distracting, or overall too bright. Just soft light with a gentle glow, of course with the option to change in a moment's notice if, say, someone drops something and they need to see where it is.
On another note, I have these RGB strips laying around. I've got an idea that I want to toss out to the people reading this thread. Thank you for reading, btw. As a brief concept, I could put those strips up in my overhead console to shine through that lens and down onto the area below, with appropriate dimming circuitry. I would have it illuminate with the dash lighting, and dimmed in such a manner that it's not reflecting off anything, distracting, or overall too bright. Just soft light with a gentle glow, of course with the option to change in a moment's notice if, say, someone drops something and they need to see where it is.
Last edited by TheArcticWolf1911; 09-26-2016 at 09:22 PM.
#319
09-27-2016
Finally figured out what that two pin cable is for going to my seat. Seatbelt minder.
According to the schematic, when the circuit is open, the GEM sees the belt is buckled and therefor doesn't complain. However with the seatbelt harness disconnected, circuit is always open, therefor it seems like nothing is happening.
According to the schematic, when the circuit is open, the GEM sees the belt is buckled and therefor doesn't complain. However with the seatbelt harness disconnected, circuit is always open, therefor it seems like nothing is happening.
#320
09-27-2016
Working on this today.....

At this angle, the strips are very visible, but when you're not looking at it head on like this the strips are hardly visible. You gotta really be looking in the gap to see the actual strip. Having black strips helps here.
1/4 inch drillbit through the center of the mirror, specifically the 'locator' pin. On the driver's side my bit was long enough, however on the passenger side wasn't. I had to cut down the locator pin slightly to allow the bit to go through the mirror. I'm not sure how this will effect the breakaway-ability, however. Ideally, you want to use power mirrors for this, where wires are already run through.
#321
09-28-2016
#322
09-28-2016
Thank you! I plan on taking some photos of them in action hear shortly.
If I'm honest, they're grounded to existing grounds, either via eyelet and screw or other means, and the wires are brought under the dash to the turn signal wires themselves and t-tapped in. Normally I'm against t-taps but there's so many wires in such an awkward space that there's no way any sane person can solder them in without a face shield.
If I'm honest, they're grounded to existing grounds, either via eyelet and screw or other means, and the wires are brought under the dash to the turn signal wires themselves and t-tapped in. Normally I'm against t-taps but there's so many wires in such an awkward space that there's no way any sane person can solder them in without a face shield.
#323
09-28-2016
Took a 30 second clip of the mirrors in action at night inside my dark garage.
The LED strips I used were simple single color strips in orange from, you guessed it, superbrightleds.com. I say orange because that's the color they call it, not amber. Although close enough to amber that I don't think it makes a difference.
I already had the strips on hand, so I didn't have to buy them for this. They were my jumpseat lighting strips, but I found they didn't work well in that application and I rarely used them, so I took 'em out and repurposed 'em. Why waste a good strip, right?
I removed the mirror from the vehicle, and had to drill a 1/4 inch hole through the base, extending far enough for the wires to go through the mirror entirely. Be careful, as the locator pin (where I drilled through) is a bit higher than the frame of the mirror itself. Make sure the bit isn't going in a direction that it goes outside of the housing, ruining the mirror. If you have a fairly long bit, that will help. If you don't, cut down the locator pin with a saw or dremel. Either works. I find the locator pin isn't necessary as the three studs are there anyway. You will want to remove the foam backing.
A length of wire or string is fed through the locator pin hole and out the mirror from behind the glass. Make sure the wire isn't wrapped around anything, and correct the issue if it is. I recommend soldering this 'puller wire' that we just fed through to the led strip's leads. Effective way of attaching them for this purpose.
Pull the wire back the other way so the strip's wire is pulled through. the other side. Add more wire if necessary.
Wrap the LED strip around the inside of the mirror, using either a screwdriver or the BACK SIDE of a knife to push the led strip GENTLY against the mirror housing. Ensure you space the strip back far enough otherwise it will impede the mirror's ability to move back into position.
You'll want weather proof strips for this, btw.
The wires were run through the door's boot and into the cab. Helps to remove the speaker during this time. A stiff coat hanger or the like is useful to pull the wires through.
At this point, if you have open slots in your door plugs, feel free to use them for the new strips. Otherwise just run them through. Ensure they aren't scraping on any metal. Wire split loom is handy here. THat and electrical tape to keep the loom from sliding later if necessary.
The ground wire can be grounded anywhere you please. Personal preference reigns here. Solder, t-tap, eyelet, all acceptable.
The positive wire is a bit more tricky though. I found my wires under the dash, but if you really want to burden yourself, feel free to run a wire from the turn signal into the cab; but this is highly unnecessary by such a longshot.
There are four wires you will find. Front right turn signal, front left turn signal, rear right turn signal, rear left turn signal. Depending on your year the color of the wire will vary. Either a test light or multimeter will be handy here.
This is the schematic for my particular year model, looking at the front signals. Optionally, you can look at the color of your turn signals at the signals themselves at the front or rear, then look for that color under the dash.

For some reason though, they use the same color wire for multiple applications, so be aware of that.
Once you splice in the positive wire to the turn signal wire, repeat the process for the other side, and it's done. Your mod is complete! *windows ta-da*
There really isn't a lot to photograph that you haven't seen already. Taking the door panels off, removing the mirrors and other panels are all explained to death. Although I will post this video which may offer some assistance for getting the wires from the mirror to the cab. Gotta love ChrisFix.
The LED strips I used were simple single color strips in orange from, you guessed it, superbrightleds.com. I say orange because that's the color they call it, not amber. Although close enough to amber that I don't think it makes a difference.
I already had the strips on hand, so I didn't have to buy them for this. They were my jumpseat lighting strips, but I found they didn't work well in that application and I rarely used them, so I took 'em out and repurposed 'em. Why waste a good strip, right?
I removed the mirror from the vehicle, and had to drill a 1/4 inch hole through the base, extending far enough for the wires to go through the mirror entirely. Be careful, as the locator pin (where I drilled through) is a bit higher than the frame of the mirror itself. Make sure the bit isn't going in a direction that it goes outside of the housing, ruining the mirror. If you have a fairly long bit, that will help. If you don't, cut down the locator pin with a saw or dremel. Either works. I find the locator pin isn't necessary as the three studs are there anyway. You will want to remove the foam backing.
A length of wire or string is fed through the locator pin hole and out the mirror from behind the glass. Make sure the wire isn't wrapped around anything, and correct the issue if it is. I recommend soldering this 'puller wire' that we just fed through to the led strip's leads. Effective way of attaching them for this purpose.
Pull the wire back the other way so the strip's wire is pulled through. the other side. Add more wire if necessary.
Wrap the LED strip around the inside of the mirror, using either a screwdriver or the BACK SIDE of a knife to push the led strip GENTLY against the mirror housing. Ensure you space the strip back far enough otherwise it will impede the mirror's ability to move back into position.
You'll want weather proof strips for this, btw.
The wires were run through the door's boot and into the cab. Helps to remove the speaker during this time. A stiff coat hanger or the like is useful to pull the wires through.
At this point, if you have open slots in your door plugs, feel free to use them for the new strips. Otherwise just run them through. Ensure they aren't scraping on any metal. Wire split loom is handy here. THat and electrical tape to keep the loom from sliding later if necessary.
The ground wire can be grounded anywhere you please. Personal preference reigns here. Solder, t-tap, eyelet, all acceptable.
The positive wire is a bit more tricky though. I found my wires under the dash, but if you really want to burden yourself, feel free to run a wire from the turn signal into the cab; but this is highly unnecessary by such a longshot.
There are four wires you will find. Front right turn signal, front left turn signal, rear right turn signal, rear left turn signal. Depending on your year the color of the wire will vary. Either a test light or multimeter will be handy here.
This is the schematic for my particular year model, looking at the front signals. Optionally, you can look at the color of your turn signals at the signals themselves at the front or rear, then look for that color under the dash.
For some reason though, they use the same color wire for multiple applications, so be aware of that.
Once you splice in the positive wire to the turn signal wire, repeat the process for the other side, and it's done. Your mod is complete! *windows ta-da*
There really isn't a lot to photograph that you haven't seen already. Taking the door panels off, removing the mirrors and other panels are all explained to death. Although I will post this video which may offer some assistance for getting the wires from the mirror to the cab. Gotta love ChrisFix.
#324
09-29-2016
#325
09-29-2016


