Project : Un-Ghetto a truck.
#1
 07-31-2008
Unregistered User
Posts: n/a
Project : Un-Ghetto a truck.
This truck has potential.. if only the owner would stop letting ricers destroy it. 
I have this truck for about a week while its owner has gone on vacation. They are a member here and won't have a clue as to how it is going to look when they get back. I'm hoping it will be a total surprise and she doesn't have net access where shes going.
To Do list and timeframe.
To Do :
-OHC
-Fix the door where it was broken into
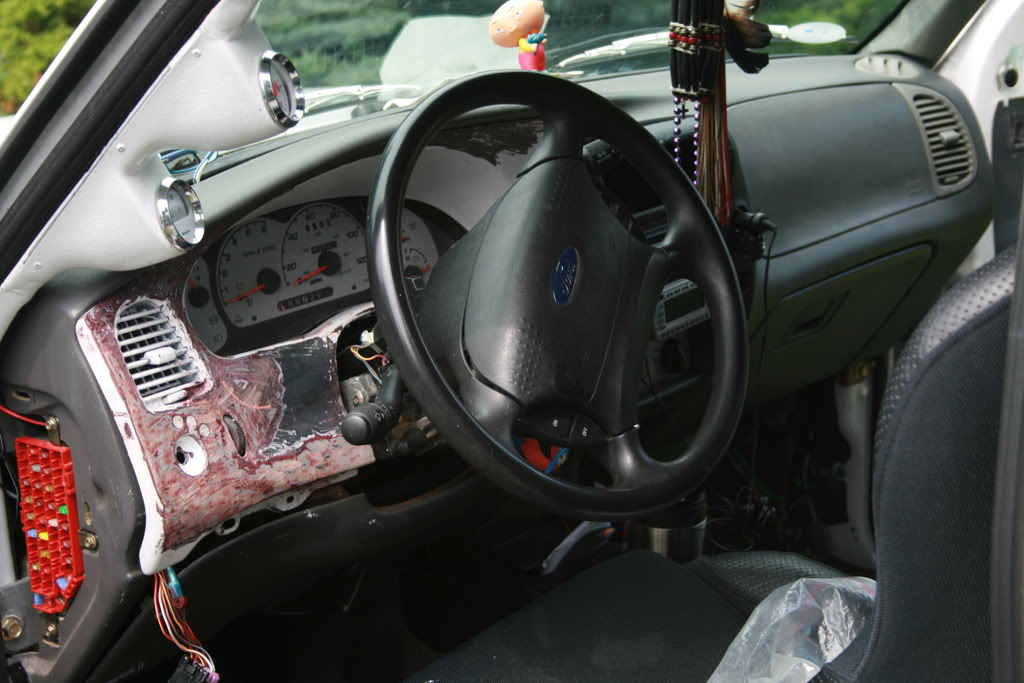
-Un-Ghetto the whole dash.
-Un-Ghetto the dashes wiring harness ( I about cried when I took a GOOD look at it ).
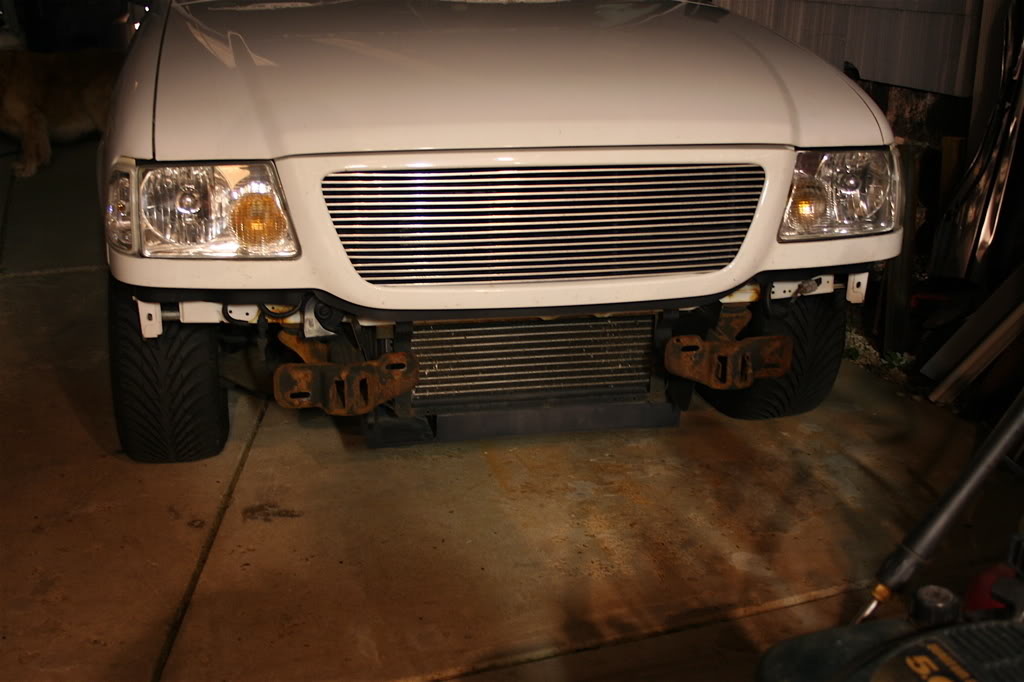
-Lower Billit grill insert. Its for an ' edge ' or 4x4 torsion front. It presently has NO way to mount to anything.
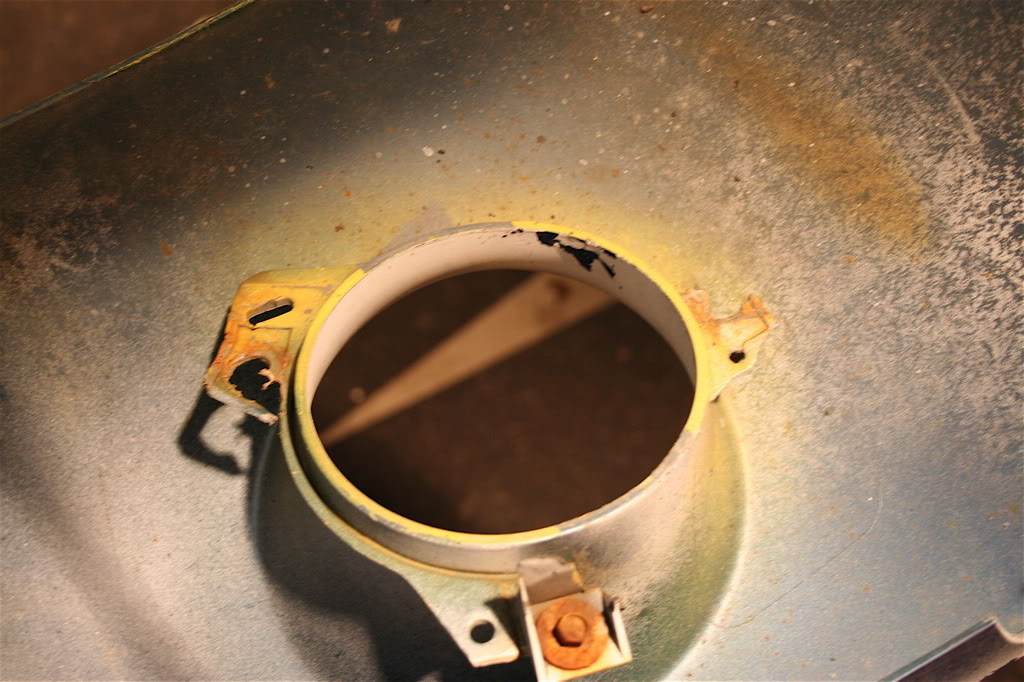
-Fix lower vailience
-Put on a powerdome hood
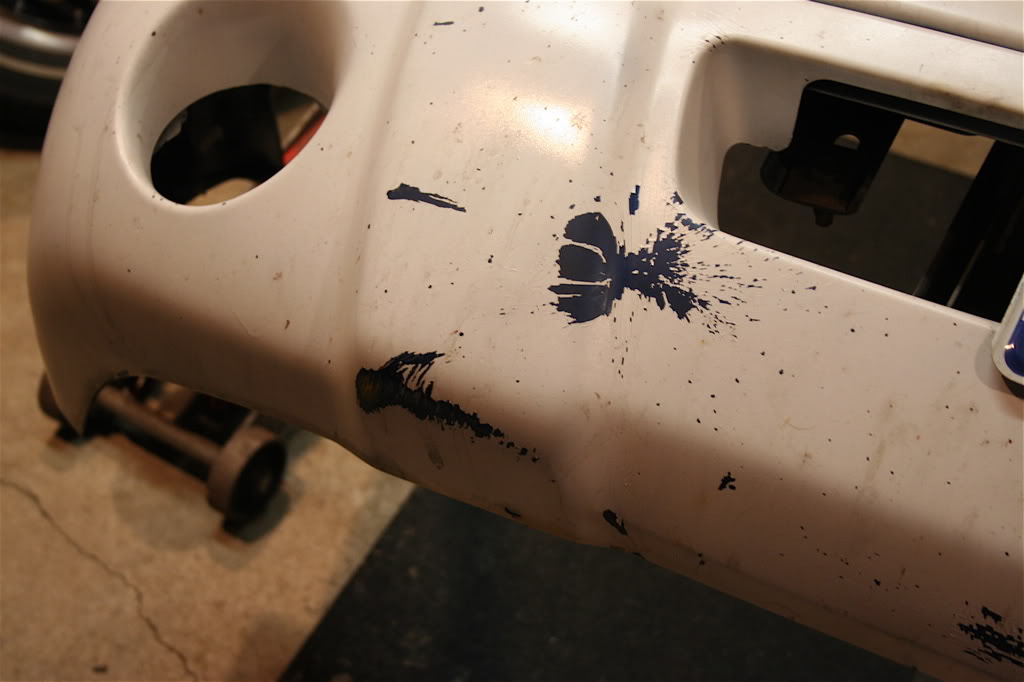
-Straighten the bumper AND its brackets
-Paint all the exterior parts and make the interior presentable.
I have ( roughly ) 1 weeks time to get it all done. I have some local help ( some are members here ). The paint was going to be about 100$ for the Oxford White and I was going to use the Urethans Clear coat I have here. She posted something about pinstriping.. Pinstriping is best on Acrylics or a harder based paint so.. 120$ later, I have a quart of Acrylic. I'm hoping that will be enough to do a Hood, Bumper/Vailence and a door ( Chris/Gumby.. will that be enough and should I change filters in my respirator from when I used it last a month ago?? ).
Anyway.. What I'm starting with..
Fog light mount..
This isn't cheap..
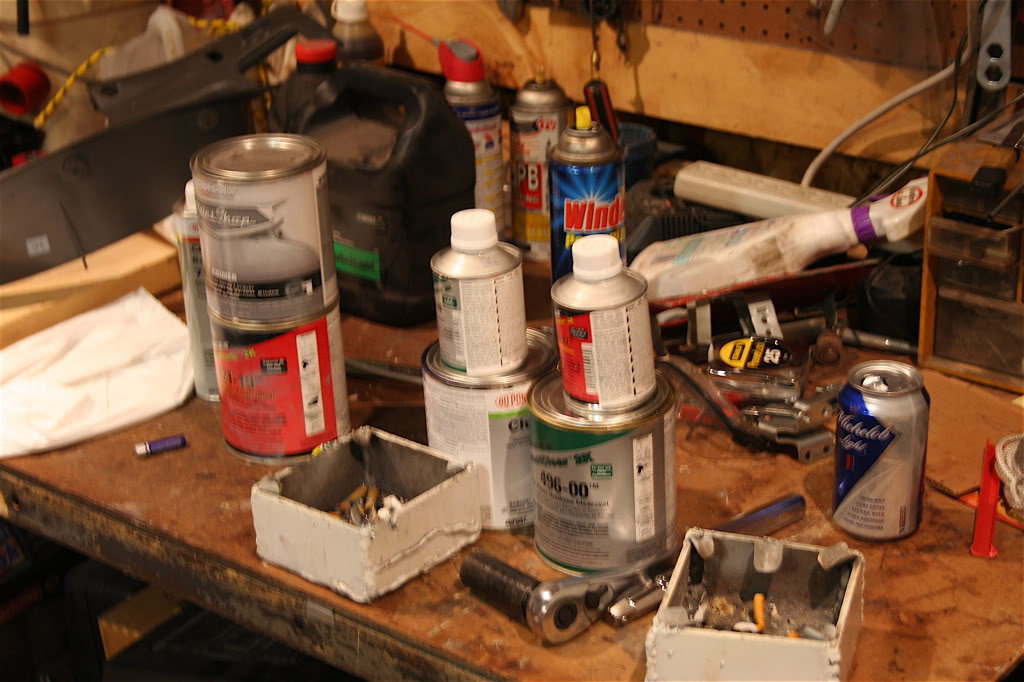
Dupont Imron Paints and activators.
I have this truck for about a week while its owner has gone on vacation. They are a member here and won't have a clue as to how it is going to look when they get back.
I'm hoping it will be a total surprise and she doesn't have net access where shes going.To Do list and timeframe.
To Do :
-OHC
-Fix the door where it was broken into
-Un-Ghetto the whole dash.
-Un-Ghetto the dashes wiring harness ( I about cried when I took a GOOD look at it ).
-Lower Billit grill insert. Its for an ' edge ' or 4x4 torsion front. It presently has NO way to mount to anything.
-Fix lower vailience
-Put on a powerdome hood
-Straighten the bumper AND its brackets
-Paint all the exterior parts and make the interior presentable.
I have ( roughly ) 1 weeks time to get it all done. I have some local help ( some are members here ). The paint was going to be about 100$ for the Oxford White and I was going to use the Urethans Clear coat I have here. She posted something about pinstriping.. Pinstriping is best on Acrylics or a harder based paint so.. 120$ later, I have a quart of Acrylic. I'm hoping that will be enough to do a Hood, Bumper/Vailence and a door ( Chris/Gumby.. will that be enough and should I change filters in my respirator from when I used it last a month ago?? ).
Anyway.. What I'm starting with..
Fog light mount..
This isn't cheap..
Dupont Imron Paints and activators.


#5
07-31-2008
Unregistered User
Posts: n/a
 . Chris knows his stuff when it comes to painting and such :).

#9
07-31-2008
Unregistered User
Posts: n/a

#11
07-31-2008
Unregistered User
Posts: n/a
She knows ' ricers '. Rochester has a LOT of them.. Its just a typical example of the import crowd in this area.
Thanks.. going to need a cheering section for this one.
You've got alot of work and long nights ahead of you! Good luck, and I'll be rooting for you!
#13
07-31-2008
Unregistered User
Posts: n/a
What kind of pin-striping were you 2 planning to do? I need to know so I use the right paint. Ive seen some clear-finishes come OFF when people remove the pin-stripes when they grow bored of them.
Another problem I have seen is over time, the UV rays change the paints tone.. people remove the pin-stripes and viola! different colored stripe in the paint as it wasnt exposed.
Are you just going to use that auto-zone tape-type or paint them on?
Another problem I have seen is over time, the UV rays change the paints tone.. people remove the pin-stripes and viola! different colored stripe in the paint as it wasnt exposed.
Are you just going to use that auto-zone tape-type or paint them on?
#14
08-01-2008
Join Date: Nov 2005
Location: Royal Oak, Michigan
Posts: 1,022
Likes: 0
Received 0 Likes
on
0 Posts
#17
08-01-2008


#18
08-01-2008
Join Date: Nov 2006
Location: Rochester, NY
Posts: 1,124
Likes: 0
Received 0 Likes
on
0 Posts
What kind of pin-striping were you 2 planning to do? I need to know so I use the right paint. Ive seen some clear-finishes come OFF when people remove the pin-stripes when they grow bored of them.
Another problem I have seen is over time, the UV rays change the paints tone.. people remove the pin-stripes and viola! different colored stripe in the paint as it wasnt exposed.
Are you just going to use that auto-zone tape-type or paint them on?
Another problem I have seen is over time, the UV rays change the paints tone.. people remove the pin-stripes and viola! different colored stripe in the paint as it wasnt exposed.
Are you just going to use that auto-zone tape-type or paint them on?
#19
08-01-2008
Join Date: May 2004
Location: Charlotte, NC
Posts: 1,126
Likes: 0
Received 0 Likes
on
0 Posts

#22
08-01-2008
is that quart of clear "ready to spray" or will you be reducing it?
we talked about sprayin clear and isocyanates, and how you should be using a fresh air hood for all clear work.....get the best damn filters you can buy if youre only wearing a respirator, 3M makes some specifically for isocyanates i think. problem is, since isocyanates are attracted to moisture, they will enter thru your eyeballs and skin as well as mouth/nose breathing.
we talked about sprayin clear and isocyanates, and how you should be using a fresh air hood for all clear work.....get the best damn filters you can buy if youre only wearing a respirator, 3M makes some specifically for isocyanates i think. problem is, since isocyanates are attracted to moisture, they will enter thru your eyeballs and skin as well as mouth/nose breathing.
#23
08-01-2008
Unregistered User
Posts: n/a
Also, less resistance and less of a current draw on the whole system. It all adds up.
#24
08-01-2008
Unregistered User
Posts: n/a
Its a 4:1, needs activator. Its Imron.
I have a whole suit I borrowed from the collision shop at work. I also picked up fresh filters for my mask.
Welp.. Out to the shop. I'm supposed to take the bumper to Daves and have it blasted with pool sand. I'm wondering if its a light enough sand to trust on a vailience..
we talked about sprayin clear and isocyanates, and how you should be using a fresh air hood for all clear work.....get the best damn filters you can buy if youre only wearing a respirator, 3M makes some specifically for isocyanates i think. problem is, since isocyanates are attracted to moisture, they will enter thru your eyeballs and skin as well as mouth/nose breathing.
Welp.. Out to the shop. I'm supposed to take the bumper to Daves and have it blasted with pool sand. I'm wondering if its a light enough sand to trust on a vailience..
#25
08-01-2008
Unregistered User
Posts: n/a
Day 2 start :
Didn't get to blast that bumper, going to do it sunday.. theres PLENTY of things to do right now.
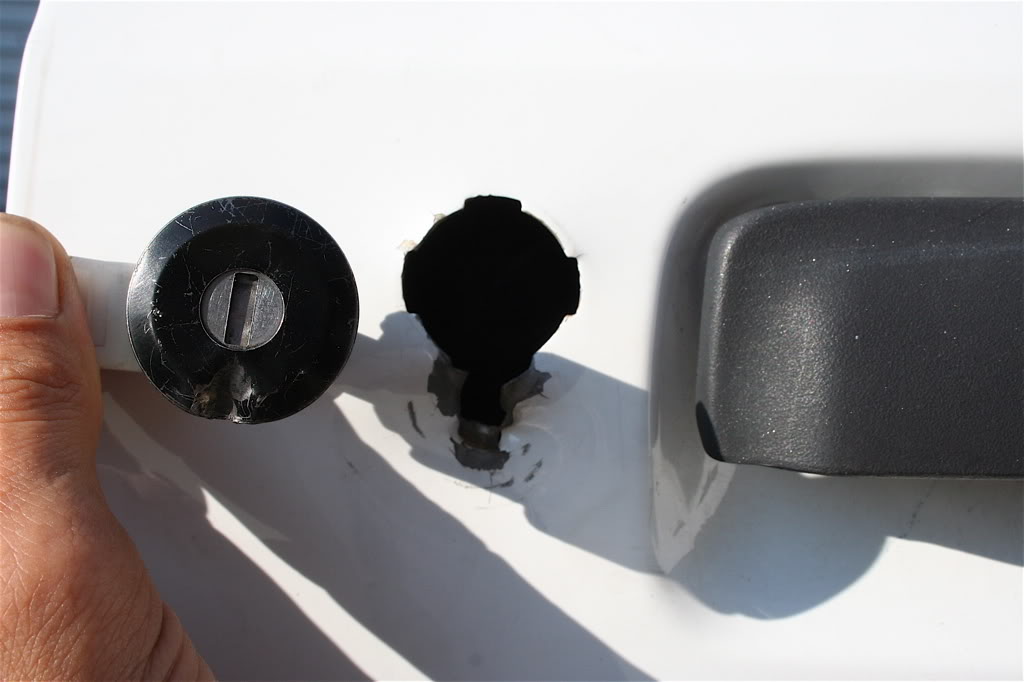
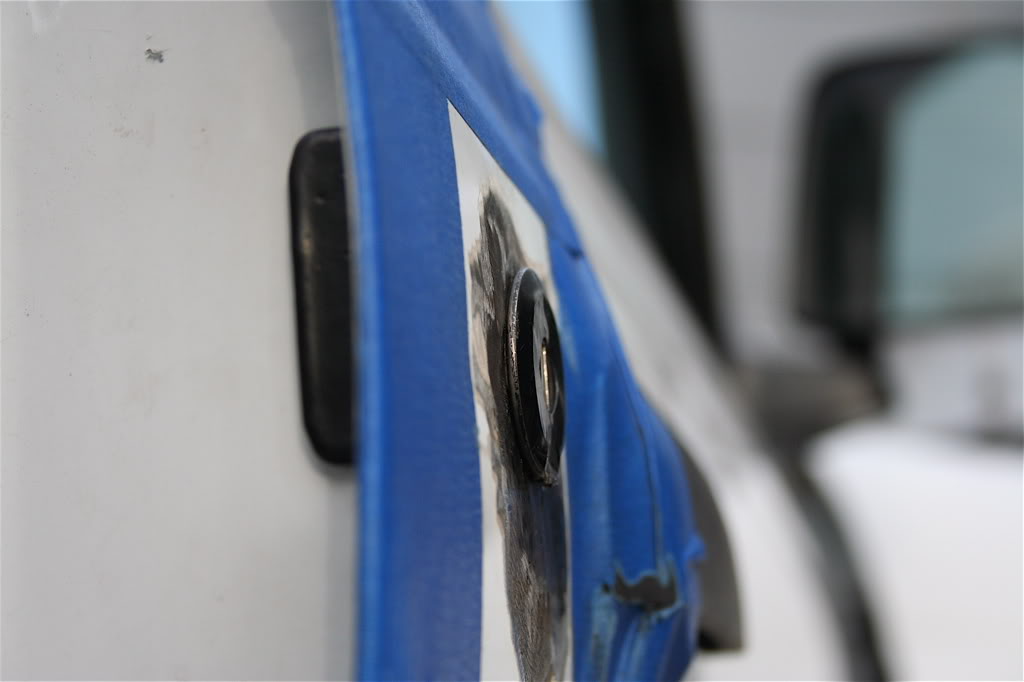
I did the passengers side door. Some ****** decided to break in and steal her stereo. Sorry, If your white and living in a ' bad ' neighborhood, its sometimes best to NOT show off anything. The way they did it was kinda brutal IMO. They took a dead-blow type of device right under the lock and tore the doorskin apart to get the lock out of the door itself. She said she found the lock laying on the ground near her truck.
Lock and hole in door.
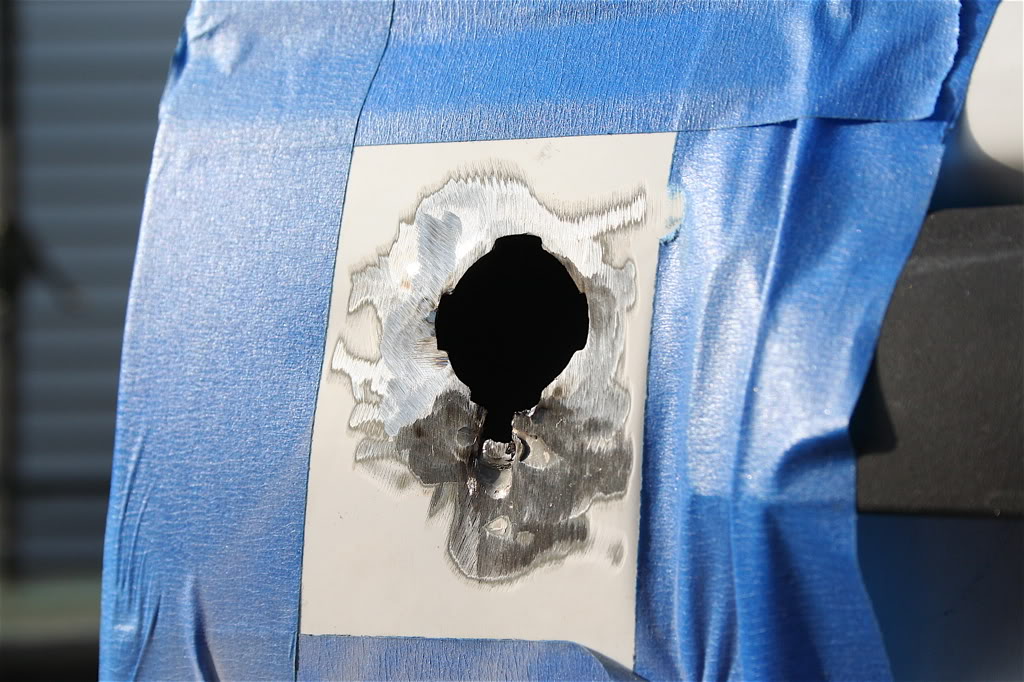
First round with filling some of it in. I'm just doing small tacs and letting them cool as I don't want to chance warping anything. Slow feed, low voltage, .023 wire using co2.
Done and ground down some.
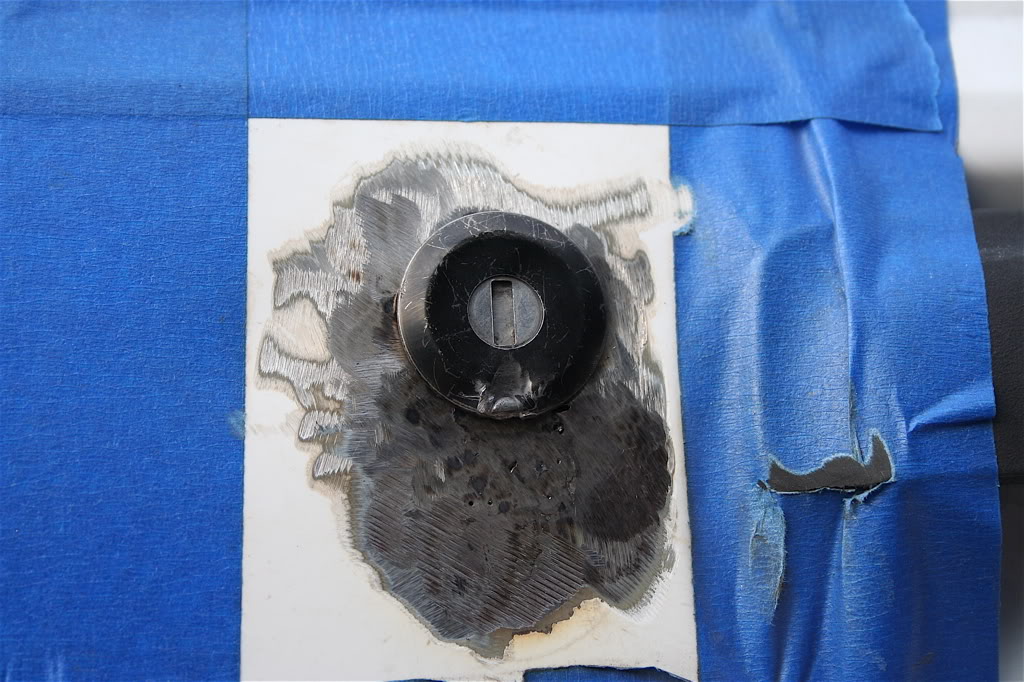
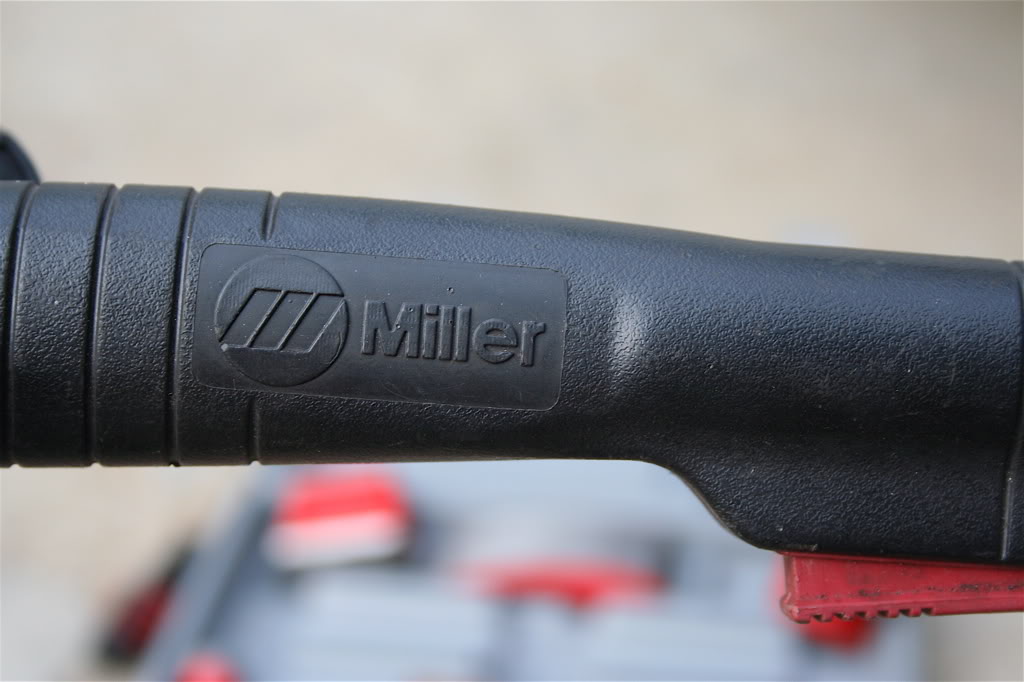
Miller is my friend :)
I need to get some glaze to smooth out the area before priming it and getting it ready to be painted. I also need to go pick up some fiberglass hardener for filling in the dash panels from all the holes that have been drilled and all the parts that were broken off.. all those little tabs that hold everything together..
Off to the store mates..
Didn't get to blast that bumper, going to do it sunday.. theres PLENTY of things to do right now.
I did the passengers side door. Some ****** decided to break in and steal her stereo. Sorry, If your white and living in a ' bad ' neighborhood, its sometimes best to NOT show off anything. The way they did it was kinda brutal IMO. They took a dead-blow type of device right under the lock and tore the doorskin apart to get the lock out of the door itself. She said she found the lock laying on the ground near her truck.
Lock and hole in door.
First round with filling some of it in. I'm just doing small tacs and letting them cool as I don't want to chance warping anything. Slow feed, low voltage, .023 wire using co2.
Done and ground down some.
Miller is my friend :)
I need to get some glaze to smooth out the area before priming it and getting it ready to be painted. I also need to go pick up some fiberglass hardener for filling in the dash panels from all the holes that have been drilled and all the parts that were broken off.. all those little tabs that hold everything together..
Off to the store mates..


