
OHC Question

Thread Starter
|
Member

Joined: May 2005
Posts: 12
Likes: 0
From: Livonia, Mi
OHC Question
ok well, i got an OHC.
im looking at the how-to and the bracket i have isn't the same, mine is the one with the sunroof buttons.. im stumped on how to install it now..
but, i did find out what im going to use the sunroof buttons for..
door lock/unlock when i get my alarm installed, that way i can remove my lock rods.
im also going to put my other switches on it, with some rocker switches.
like these.
im going to paint it black tonight, something tells me gray wont go well with my blue interior.
Thread Starter
|
Member
Joined: May 2005
Posts: 12
Likes: 0
From: Livonia, Mi
i couldn't sleep tonight.. soo.. 
it came out perfect, i also painted my the vents on top of the dash.
i wanted to paint it flat black but i had high gloss paint laying around..
next is the door handles and stuff..
it came out perfect, i also painted my the vents on top of the dash.
i wanted to paint it flat black but i had high gloss paint laying around..
next is the door handles and stuff..
Member
Joined: Aug 2006
Posts: 151
Likes: 0
From: SAN ANTONIO
Here's how mine went
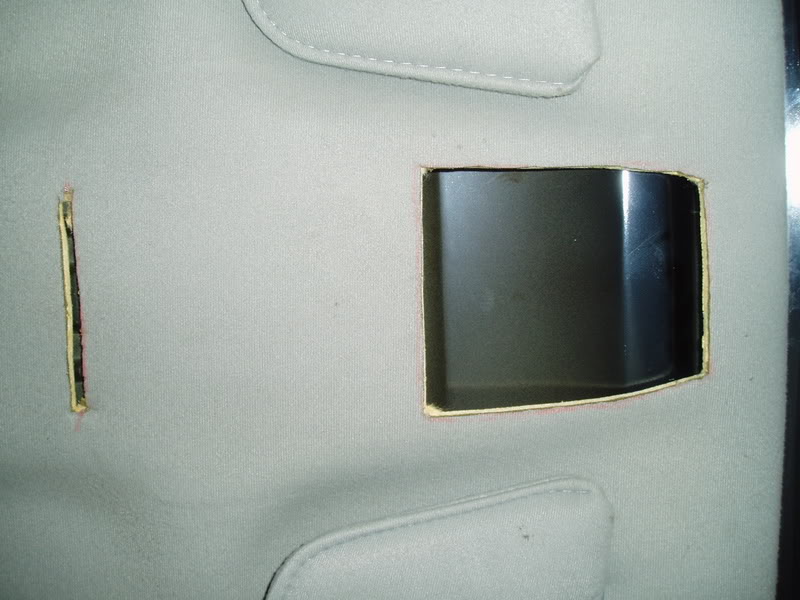
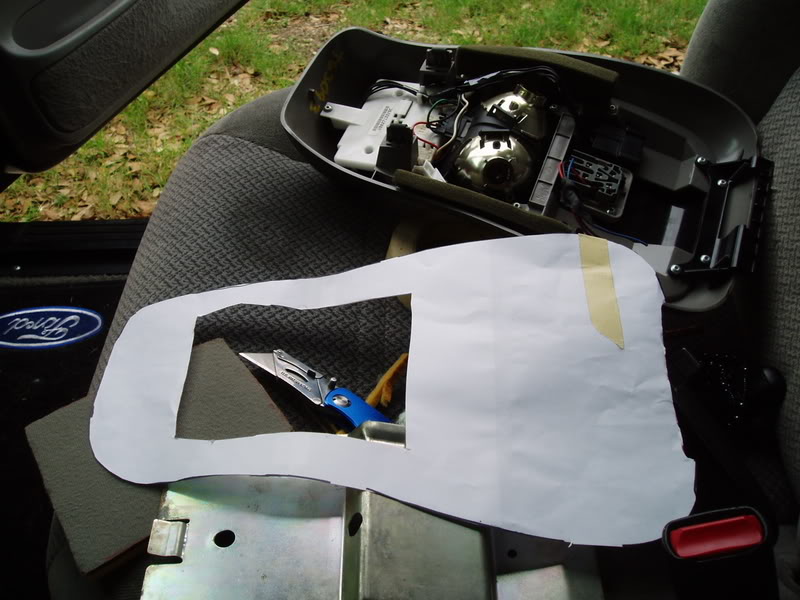
P9230005.jpg?t=1172159232 Cut it this way
P9230006.jpg?t=1172159318 Used a template to make the cuts accurate
P9230007.jpg?t=1172159367 Where I cut into the metal
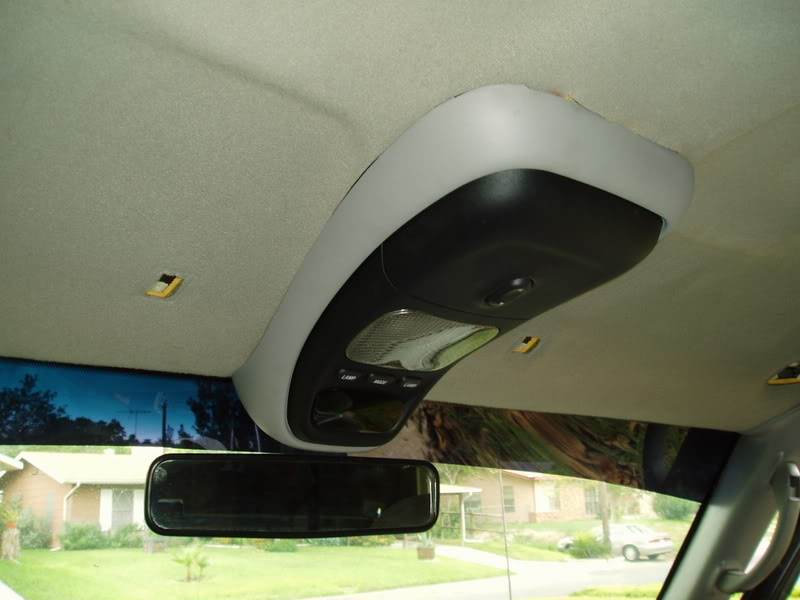
P9230010.jpg?t=1172159435 End Result. Hope this helps.
P9230006.jpg?t=1172159318 Used a template to make the cuts accurate
P9230007.jpg?t=1172159367 Where I cut into the metal
P9230010.jpg?t=1172159435 End Result. Hope this helps.


Gopher18 has one in his Ranger. From the pictures, it looks like he cut a slot in the headliner to hold up the rear of the sunroof console. Just like what Juan posted above.
There are pictures of the installed bracket here:
http://home.kc.rr.com/thoe/03_ranger/ohc.htm

There are pictures of the installed bracket here:
http://home.kc.rr.com/thoe/03_ranger/ohc.htm
Last edited by V8 Level II; Feb 23, 2007 at 05:44 AM.
Member
Joined: Nov 2005
Posts: 1
Likes: 4
From: Charlestown, IN
Originally Posted by rwenzing
Gopher18 has one in his Ranger. From the pictures, it looks like he cut a slot in the headliner to hold up the rear of the sunroof console. Just like what Juan posted above.
There are pictures of the installed bracket here:
http://home.kc.rr.com/thoe/03_ranger/ohc.htm
There are pictures of the installed bracket here:
http://home.kc.rr.com/thoe/03_ranger/ohc.htm
Member
Joined: Aug 2006
Posts: 151
Likes: 0
From: SAN ANTONIO
I got a LARGE piece of paper, and placed it on the OHC side (that makes contact with the headliner). After I traced the shape of the ohc, I traced out an outline of a box in the center where I thought i needed to cut so the components of the ohc would go into the headliner and the edges of the ohc would fit flush against the headliner. Then I held the paper template against the headliner to and used a wax pencil to draw out the center box and the area where the "rear slit" needed to be cut (if you look in the picture there is red wax pencil where I cut). And that's how I did it. Hope this helps. And yes, thet rear slit is what holds up the rear of the OHC to the headliner.
Member
Joined: Aug 2006
Posts: 151
Likes: 0
From: SAN ANTONIO
The only PITA thing to do is running the wiring (keeping track of which wire is what) and connecting the wires. Cutting the holes (with the proper tools) into the headliner and into the metal behind the headliner is the easiest part. Just give yourself a whole morning/ afternoon. Don't expect to finish in several hours. Take your time and do it right the first time, believe me, this mod is definitely worth it.

Thread Starter
|
Member
Joined: May 2005
Posts: 12
Likes: 0
From: Livonia, Mi
i helped install andrews (rangerboy03fx4) OHC.
the wiring part should be really easy for me, im a pro with that stuff.
being that i have an older ranger, i have a hot wire on the dome light, so thats one less wire i have to run.
the wiring part should be really easy for me, im a pro with that stuff.
being that i have an older ranger, i have a hot wire on the dome light, so thats one less wire i have to run.

Member
Joined: Dec 2006
Posts: 731
Likes: 0
From: Lehi, Utah
This is a good thread. I too have the sunroof style OHC with the rear lip. Though I have the full size mounting bracket coming in the mail. Will be interesting to see what (if anything) I have to mod to make mine work.
Member
Joined: Aug 2006
Posts: 151
Likes: 0
From: SAN ANTONIO
Originally Posted by D94R
This is a good thread. I too have the sunroof style OHC with the rear lip. Though I have the full size mounting bracket coming in the mail. Will be interesting to see what (if anything) I have to mod to make mine work.
Thread Starter
|
Member
Joined: May 2005
Posts: 12
Likes: 0
From: Livonia, Mi
Originally Posted by Texas501
I used the full bracket and did not have to "mod" anything. Should go smoothly.

Thread
Thread Starter
Forum
Replies
Last Post
MugenCRX04
OLD - Interior, Exterior, Electrical, & Misc.
12
Sep 29, 2009 03:18 PM


