
How-To: SuperCab Storage Box


Joined: Dec 2009
Posts: 834
Likes: 3
From: Rutland VT
How-To: SuperCab Storage Box
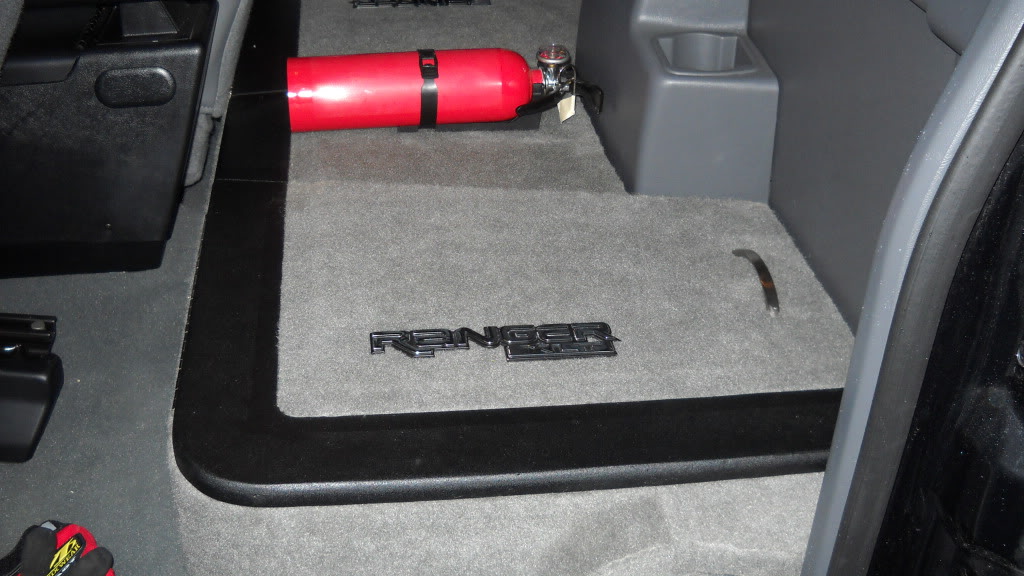
As many of you know, there's a serious need for storage in these trucks. Sure, you can just throw stuff behind the seats, but wouldn't it be nice to have a dedicated, covered storage area for things like laptops, fire extinguishers, MagLites, tow straps, etc.?
This is one that I started when i first got my Ranger in '04, but I wasn't happy with the progress, so I shelved it--for 7 years! It is an updated version of one that I built for my '00 that went with the truck when I sold it. This one is made out of 3/4" MDF for the main box, and the lids are 3/4" AC plywood.
I really love this box--it works really well, it holds all of my crap, and it looks great--but it's a little too big, so I cant slide my seats all the way back. Since the PowerDome project is on hold until warmer weather hits, I decided to tackle Version 2.0.
This is an on-going project--I've gotten a lot done this week, but some of the "finishing" work might be put off for a bit, depending on weather.
Materials List:
For this one, I used 3/4" Baltic Birch plywood; it's a little on the expensive side, but it is so much easier to work with than MDF. One 5'x5' sheet is plenty.
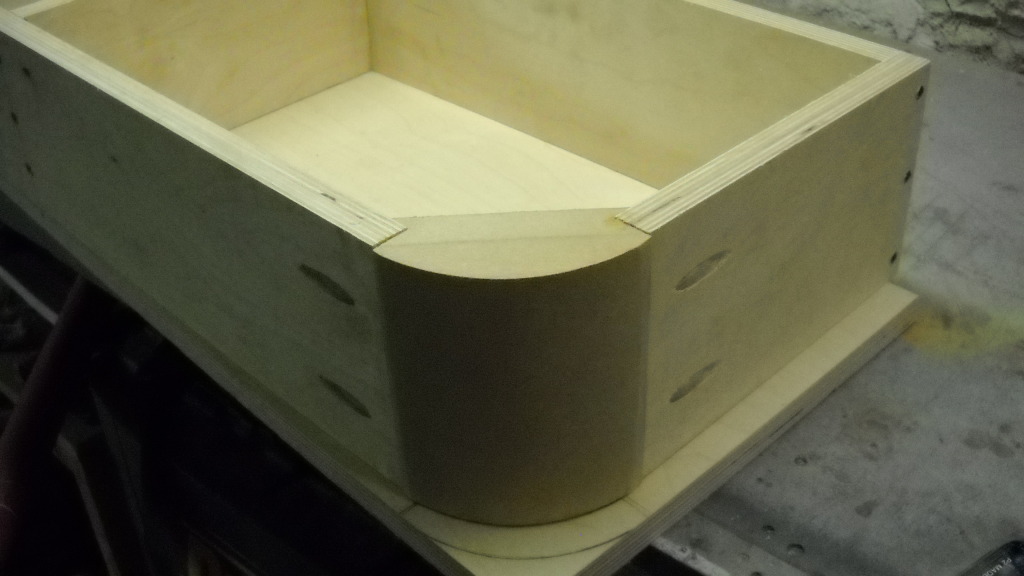
I used some rounded MDF corners that I got from Rockler.com when I built the first box--they add a bit of style, but certainly not required. It would have been much easier to just butt the sides and the front together, and then round the corner with a router.
You'll also need: 2-12" piano hinges, some magnetic catches (I used some 1/2" rare earth magnets), a bunch of sheetrock screws, some angle braces, and some miscellaneous bolts. I will be polyurethaning the inside, and on the outide, I'll do the same thing that I did on the old box-Rustoleum Spray-on Bedliner and speaker box carpet.
Wood Glue
Spray adhesive
Tools needed:
Power saw of some sort--table saw, circular saw with clamp-on guide or what I used:
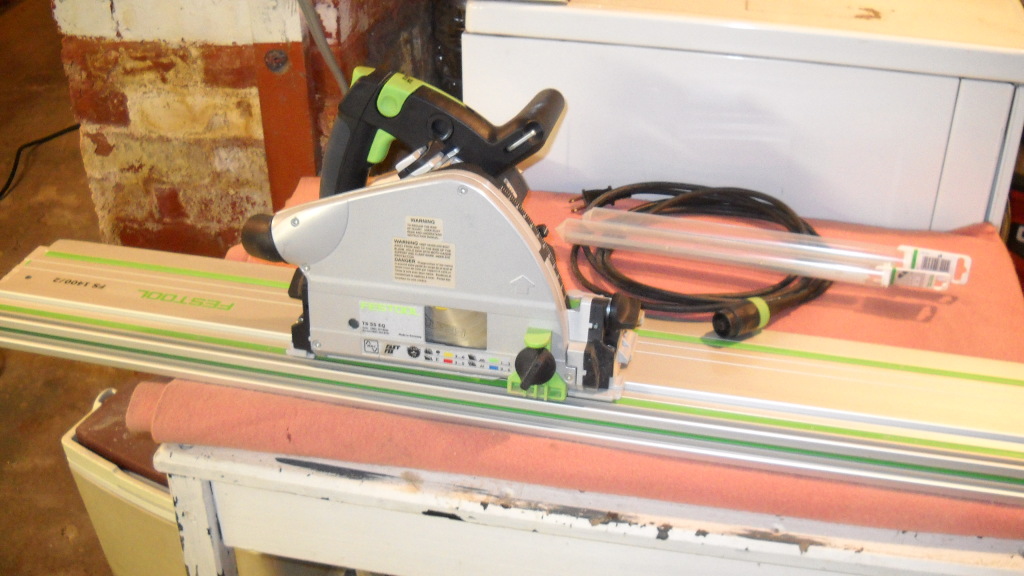
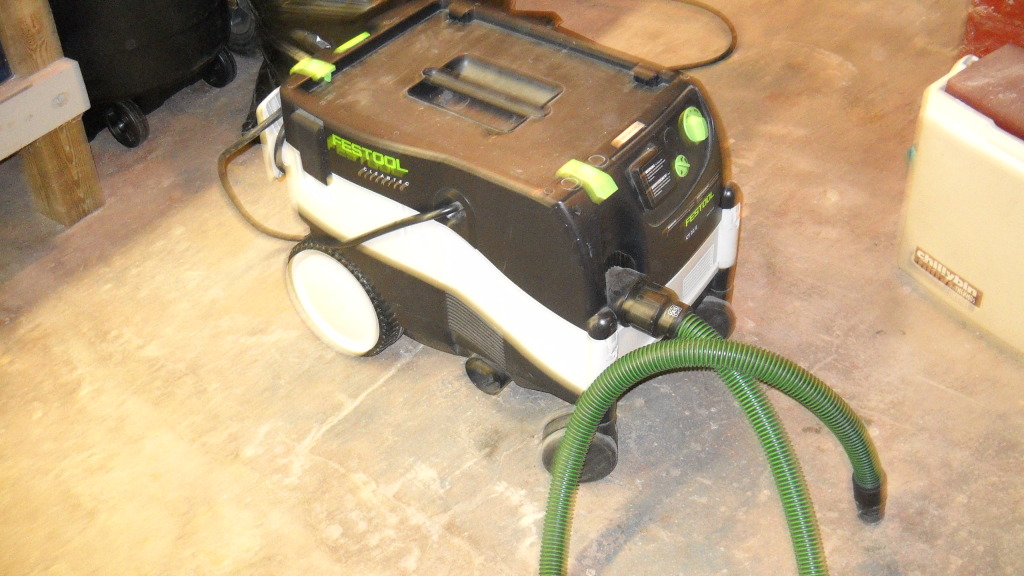
Greatest saw ever--Festool TS55EQ plunge saw with guide rails and CT26E dust extractor--we sell Festool at work, so I borrowed the demo.
Router with plunge base and guide, roundover bit, mortising bit.
Drill with driver bits, countersink, and assorted drill bits
One of these is handy to have, but not required:
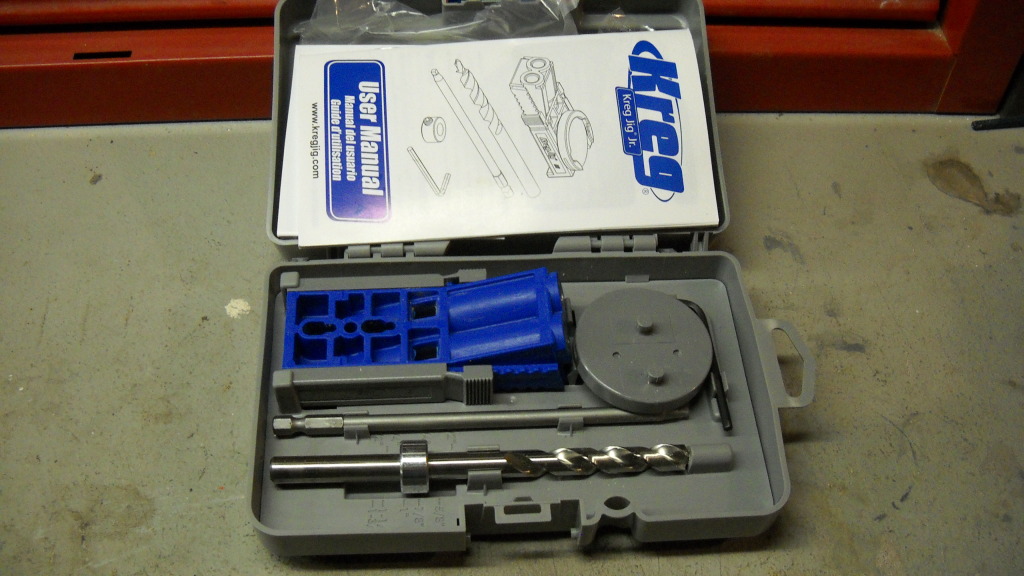
Kreg pocket jig
Jig Saw
Tape measure, square, speed square, a sharp pencil, sawhorses, clamps, lots of patience, and average woodworking skills.
Cut List:
1-12"x44", 2-5-1/4"x42-1/2", 2-5-1/4"x12", 2-5-1/4"x10-1/2" for the box
1-20"x44-1/2" for the lid
You'll also need some of the leftover pieces for the mounting brackets-specs will be listed when I get to that part.
Cut all of your parts from the cut list first; that way you can just start assembling.
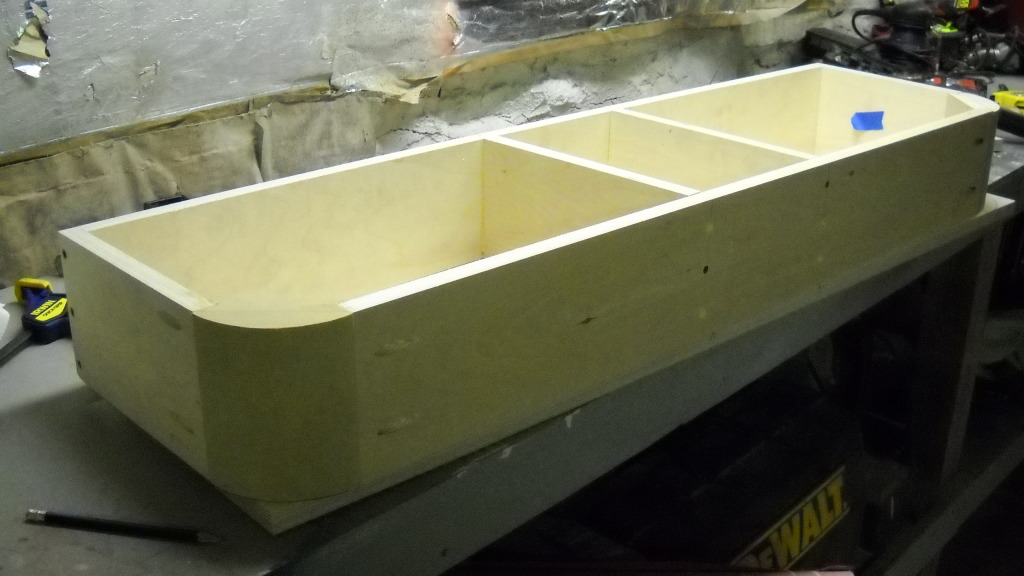
I started by squaring-up the back with the sides. I used a 90-degree corner jig and clamps, then drilled pilot holes, applied wood glue, and screwed them together. It's super-important to keep everything square.
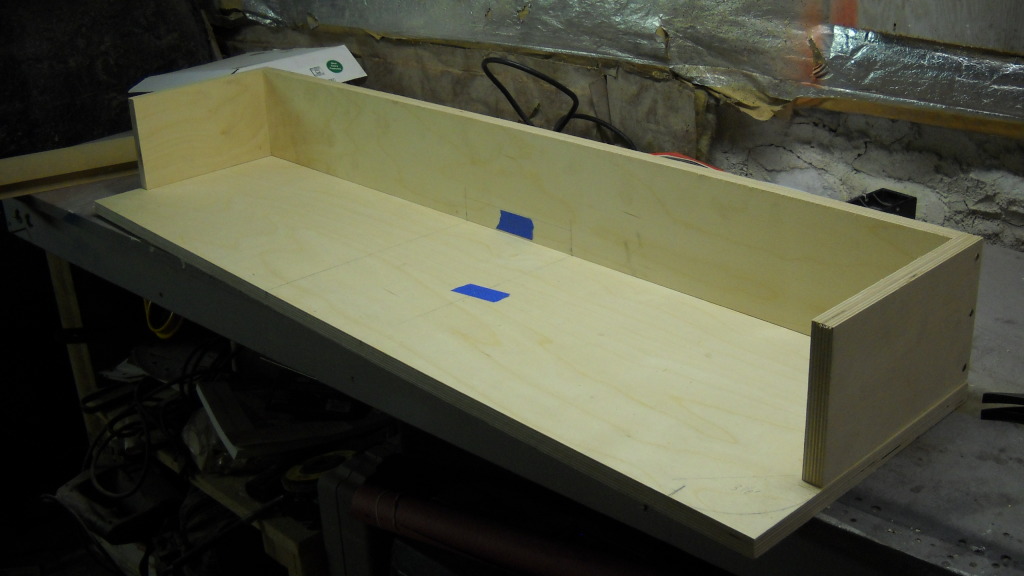
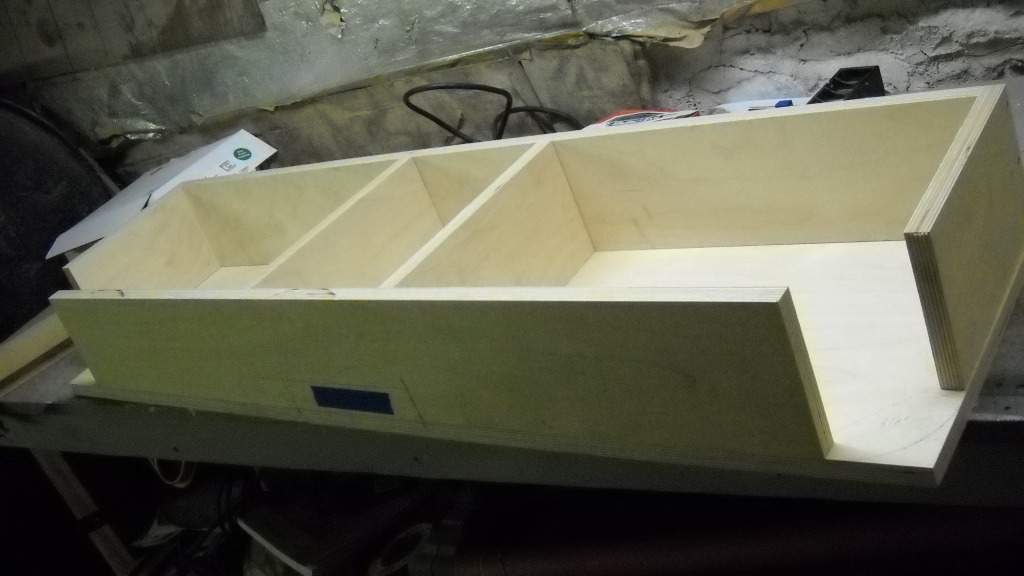
Lay the 12"x44" panel on your work surface--this is the bottom panel, but it will help you with the layout. Measure 18-1/2" (maximum) in from both sides and marl a square line; these are the layout lines for the inside edge of the center dividers. This is a pretty critical measurement, as this is where the bottom, front, and back of the box will be notched to clear the transmission tunnel. Align the back/sides assembly on the bottom panel. Square-up the 10-1/2" divider panels, keepeing the panel on the line that you marked. Double-check that the dividers are located properly-the dimension from the inside edge of the divider to the outside edge of the side panel must be equal to the measurement chosen earlier. Clamp it square, drill pilot holes through the back panel, glue it and screw it. Align the front panel, drill pilot holes, glue it and screw it. In my pics, there's a pretty big gap. No, I'm not that bad a carpenter-that's for the rounded corner blocks!
OPTIONAL: Corner blocks intalled using glue and pocket screws
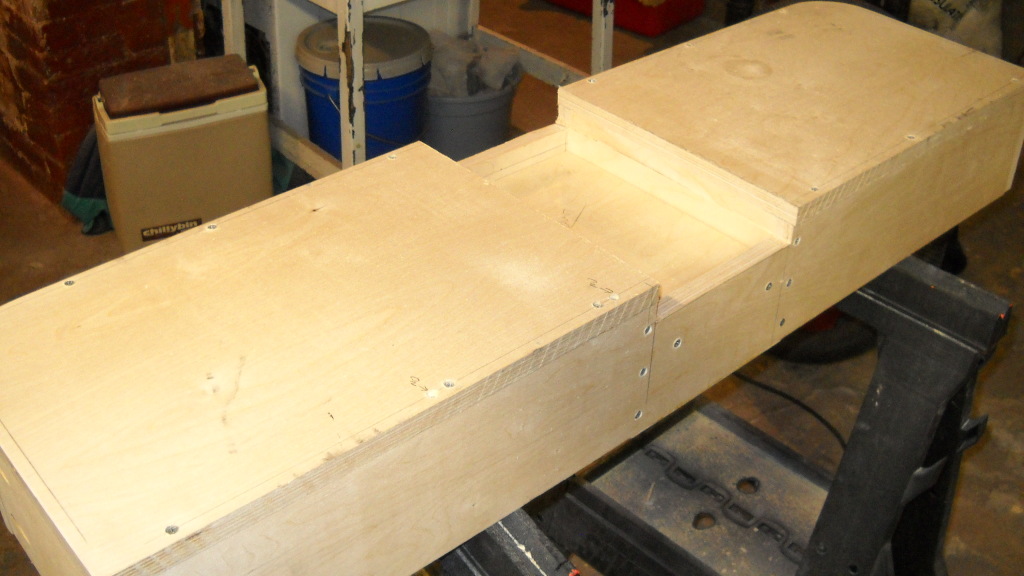
Flip the box frame over on your work surface, then align the bottom panel, getting all of the edges as flush as possible-they should be pretty close if you kept everything square while assembling. Drill pilot holes through the bottom panel and drive a few screws on each side. I didn't glue mine at this point since I will need to take the bottom panel back off to apply carpet. Measure in 18" to 18-1/2" from each side and mark a square line. Transfer these lines to the front and back panels using a speed square. Measue a minimum of 1-1/2" (2" is better) from the bottom panel on the front and rear panels and make a mark, then connect the marks. These are the layout lines for the tranny tunnel notch. Drill a 1/2" hole in each corner marked; these will be pilot holes for the jigsaw. Clamp your saw guide in place, set your depth of cut to the dimension chosen above, and make your 2 cuts on your layout lines on the box bottom. Use the jigsaw to finish-off the notch front and rear.
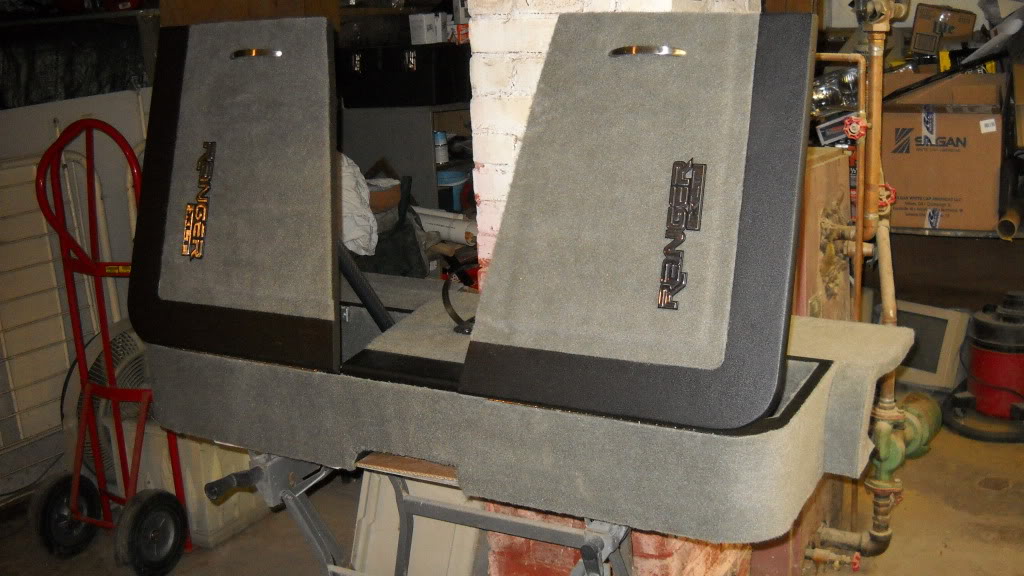
Next up is the box top. Mine will actually be 2 lids with a stationary panel in the middle, but it's easier to do all of the milling and mock-up with it all in one piece, then cutting the lids to size afterward. I rounded the corners with a jigsaw first, to better match the rounded corners of the box. Next, I used a 1/2" radius roundover bit and rounded-over the front and sides. For some extra style, I routed a 2" wide mortise about 2" in from the front and sides; this mortise is about 1/4" deep, and once the carpet is applied, it will create a nice transition from the border to the carpet, plus with the "step", it adds a little interest to the panel. Definitely need the router guide for this.
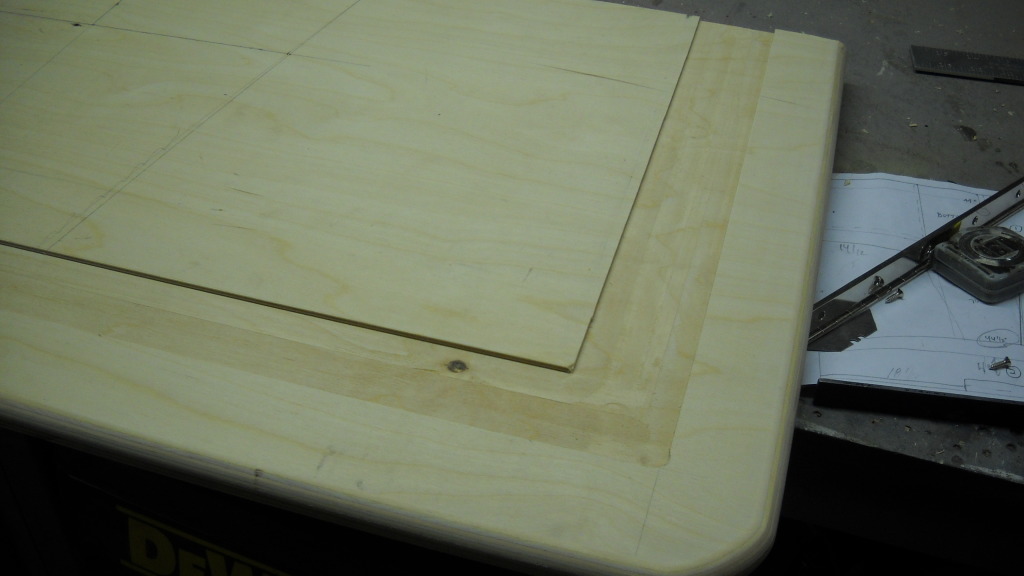
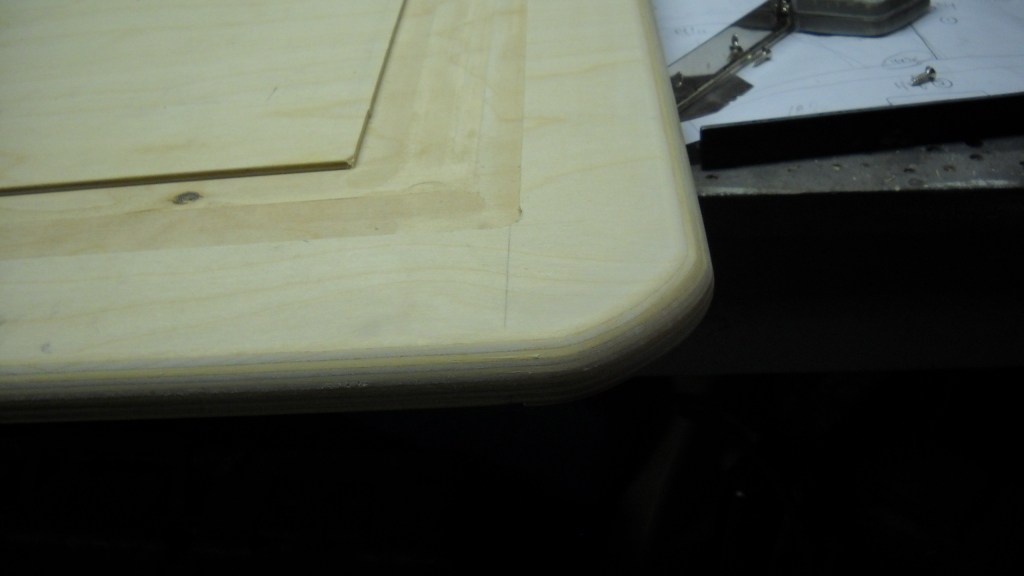
Transition detail (old box):
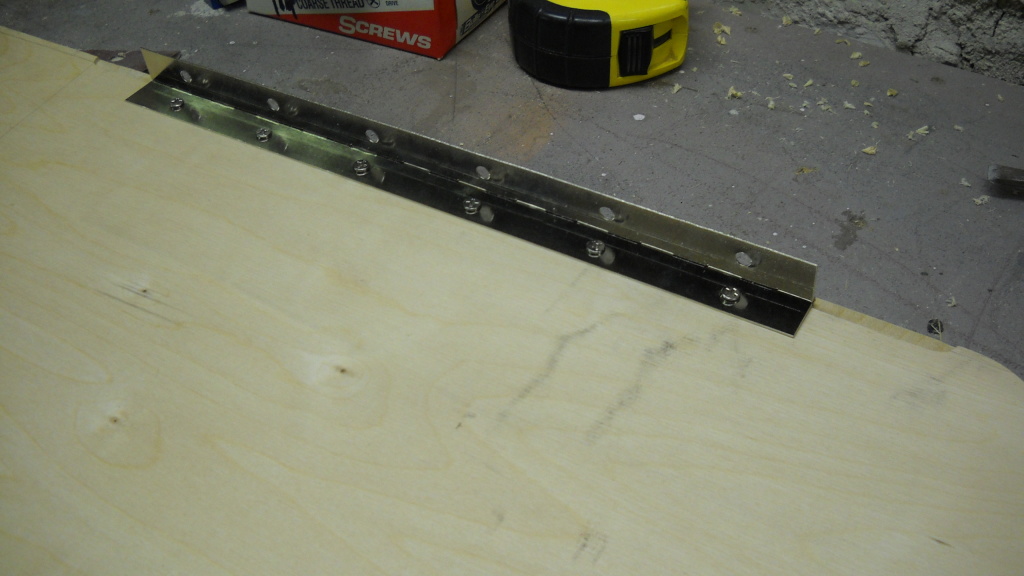
While I had the mortising bit in the router, I cut some mortises in the front edge for clearance for the piano hinges, then mounted the hinges to the top.
Drilled some 1/2" holes with a forstner bit, then epoxied 4 "rare earth" magnets in place to keep the lids closed.
That's it for now, but that should get you started. Next-up is poly and carpet on the inside, bedliner and carpet on the outside, and the mounts that utilize the existing jump seat mounting points--oh, I didn't mention that this is a "bolt-in"? More pics and tutorial to come then.
MikeR
This is one that I started when i first got my Ranger in '04, but I wasn't happy with the progress, so I shelved it--for 7 years! It is an updated version of one that I built for my '00 that went with the truck when I sold it. This one is made out of 3/4" MDF for the main box, and the lids are 3/4" AC plywood.
I really love this box--it works really well, it holds all of my crap, and it looks great--but it's a little too big, so I cant slide my seats all the way back. Since the PowerDome project is on hold until warmer weather hits, I decided to tackle Version 2.0.
This is an on-going project--I've gotten a lot done this week, but some of the "finishing" work might be put off for a bit, depending on weather.
Materials List:
For this one, I used 3/4" Baltic Birch plywood; it's a little on the expensive side, but it is so much easier to work with than MDF. One 5'x5' sheet is plenty.
I used some rounded MDF corners that I got from Rockler.com when I built the first box--they add a bit of style, but certainly not required. It would have been much easier to just butt the sides and the front together, and then round the corner with a router.
You'll also need: 2-12" piano hinges, some magnetic catches (I used some 1/2" rare earth magnets), a bunch of sheetrock screws, some angle braces, and some miscellaneous bolts. I will be polyurethaning the inside, and on the outide, I'll do the same thing that I did on the old box-Rustoleum Spray-on Bedliner and speaker box carpet.
Wood Glue
Spray adhesive
Tools needed:
Power saw of some sort--table saw, circular saw with clamp-on guide or what I used:
Greatest saw ever--Festool TS55EQ plunge saw with guide rails and CT26E dust extractor--we sell Festool at work, so I borrowed the demo.
Router with plunge base and guide, roundover bit, mortising bit.
Drill with driver bits, countersink, and assorted drill bits
One of these is handy to have, but not required:
Kreg pocket jig
Jig Saw
Tape measure, square, speed square, a sharp pencil, sawhorses, clamps, lots of patience, and average woodworking skills.
Cut List:
1-12"x44", 2-5-1/4"x42-1/2", 2-5-1/4"x12", 2-5-1/4"x10-1/2" for the box
1-20"x44-1/2" for the lid
You'll also need some of the leftover pieces for the mounting brackets-specs will be listed when I get to that part.
Cut all of your parts from the cut list first; that way you can just start assembling.
I started by squaring-up the back with the sides. I used a 90-degree corner jig and clamps, then drilled pilot holes, applied wood glue, and screwed them together. It's super-important to keep everything square.
Lay the 12"x44" panel on your work surface--this is the bottom panel, but it will help you with the layout. Measure 18-1/2" (maximum) in from both sides and marl a square line; these are the layout lines for the inside edge of the center dividers. This is a pretty critical measurement, as this is where the bottom, front, and back of the box will be notched to clear the transmission tunnel. Align the back/sides assembly on the bottom panel. Square-up the 10-1/2" divider panels, keepeing the panel on the line that you marked. Double-check that the dividers are located properly-the dimension from the inside edge of the divider to the outside edge of the side panel must be equal to the measurement chosen earlier. Clamp it square, drill pilot holes through the back panel, glue it and screw it. Align the front panel, drill pilot holes, glue it and screw it. In my pics, there's a pretty big gap. No, I'm not that bad a carpenter-that's for the rounded corner blocks!
OPTIONAL: Corner blocks intalled using glue and pocket screws
Flip the box frame over on your work surface, then align the bottom panel, getting all of the edges as flush as possible-they should be pretty close if you kept everything square while assembling. Drill pilot holes through the bottom panel and drive a few screws on each side. I didn't glue mine at this point since I will need to take the bottom panel back off to apply carpet. Measure in 18" to 18-1/2" from each side and mark a square line. Transfer these lines to the front and back panels using a speed square. Measue a minimum of 1-1/2" (2" is better) from the bottom panel on the front and rear panels and make a mark, then connect the marks. These are the layout lines for the tranny tunnel notch. Drill a 1/2" hole in each corner marked; these will be pilot holes for the jigsaw. Clamp your saw guide in place, set your depth of cut to the dimension chosen above, and make your 2 cuts on your layout lines on the box bottom. Use the jigsaw to finish-off the notch front and rear.
Next up is the box top. Mine will actually be 2 lids with a stationary panel in the middle, but it's easier to do all of the milling and mock-up with it all in one piece, then cutting the lids to size afterward. I rounded the corners with a jigsaw first, to better match the rounded corners of the box. Next, I used a 1/2" radius roundover bit and rounded-over the front and sides. For some extra style, I routed a 2" wide mortise about 2" in from the front and sides; this mortise is about 1/4" deep, and once the carpet is applied, it will create a nice transition from the border to the carpet, plus with the "step", it adds a little interest to the panel. Definitely need the router guide for this.
Transition detail (old box):
While I had the mortising bit in the router, I cut some mortises in the front edge for clearance for the piano hinges, then mounted the hinges to the top.
Drilled some 1/2" holes with a forstner bit, then epoxied 4 "rare earth" magnets in place to keep the lids closed.
That's it for now, but that should get you started. Next-up is poly and carpet on the inside, bedliner and carpet on the outside, and the mounts that utilize the existing jump seat mounting points--oh, I didn't mention that this is a "bolt-in"? More pics and tutorial to come then.
MikeR


Joined: Dec 2009
Posts: 834
Likes: 3
From: Rutland VT
That's what I did with the one that I built for the '00. It was shallower, and I also "dished" the lids for clearance, so that I could still use the jump seats. I had to drill holes through the floor to mount it though, which I didn't like doing.
MikeR
MikeR
Joined: Dec 2009
Posts: 834
Likes: 3
From: Rutland VT
I got the lid cut into the 3 sections last night, did some mortising for the hinges and magnetic catches the night before, and as of tonight, I have 3 coats of polyurethane on the inside.
More pics to come this weekend.
MikeR
More pics to come this weekend.
MikeR
Joined: Dec 2009
Posts: 834
Likes: 3
From: Rutland VT
I hit it hard last night and this morning.
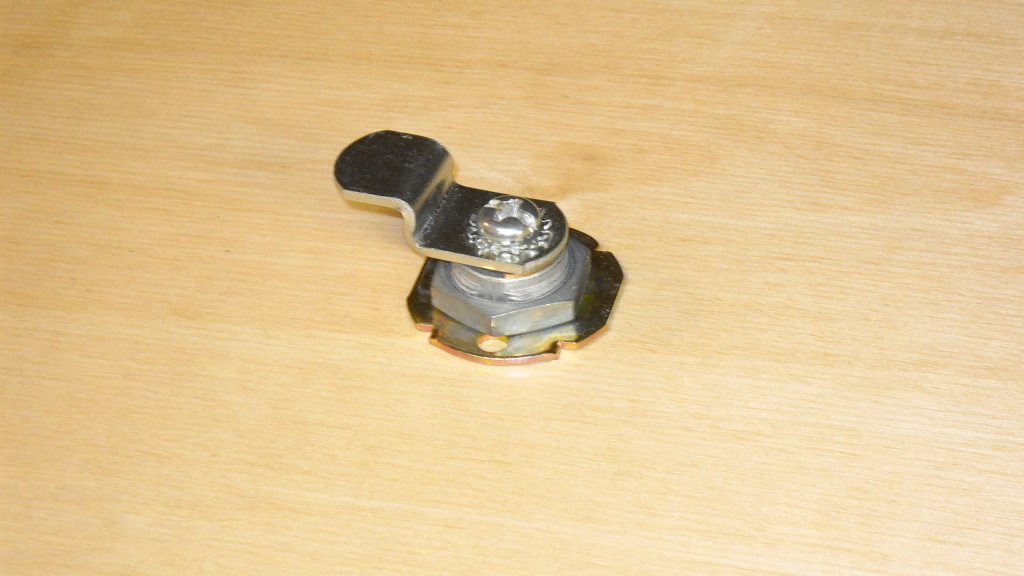
I thought it would be nice to have some lockable storage in the cab, so I brought home a 3/4" cam lock to install in the passenger-side lid. I used a scrap of plywood to mock everything up first, of course.
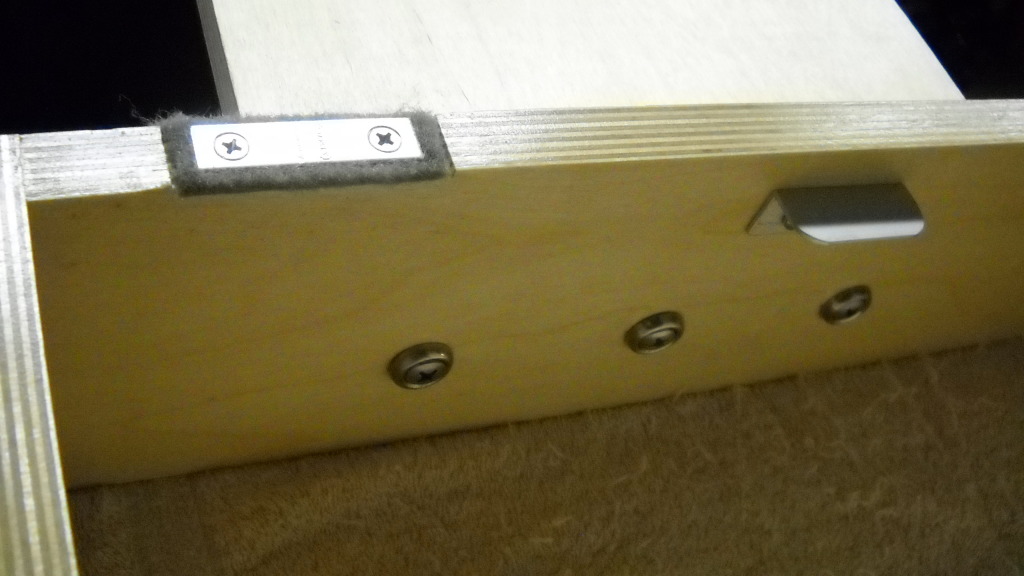
I used a piece of 3/4"x3/4"x1/8" aluminum angle stock that I had lying around for the strike; I cut it 2" long, rounded the corners, and drilled 2 holes in it. It's centered at 9-3/8" on the back wall of the box, and 3/4" down from the top edge. Once I had the strike located, I drilled through the back wall, then elongated the holes slightly for some up-and-down adjustment. Strike is held in place with some machine screws with fender washers and stop nuts on the back side.

Next, I drilled the lid for the cam lock. It's located 9-1/2" in from the side, and 9-3/4" from the back edge of the lid. Center punch the mark, then use a 3/4" forstner bit to drill the hole. Clamp a block of scrap to the bottom side to keep the hole from blowing out. For this application , I used the bent arm that came with the cam lock. Mount according to the instructions on the package.
Top side:

Bottom:
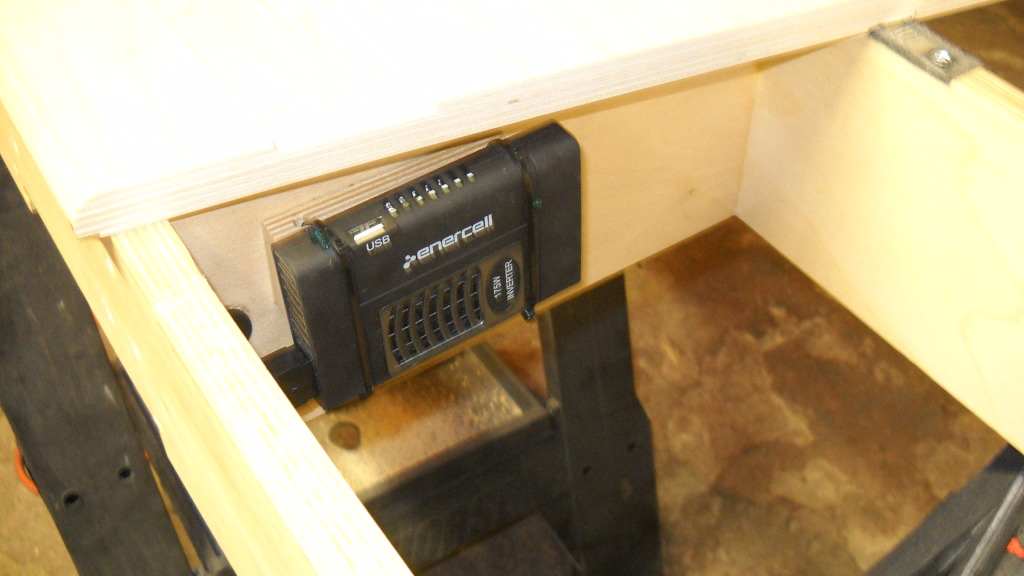
I also made a mounting block for my 175W power inverter-it needed to be spaced-out from the wall for plug clearance. It's a small block of scrap Baltic Birch, cut to the size of the inverter. I chiseled some 1/2" wide dados on the back side for some velcro straps (like is used for computer cord control), drilled a 1/2" hole for the cord, then screwed the block to the inside of the box and poly'd it to match. Once dry, I zip-tied the inverter in place to see how it looked.
From underneath:
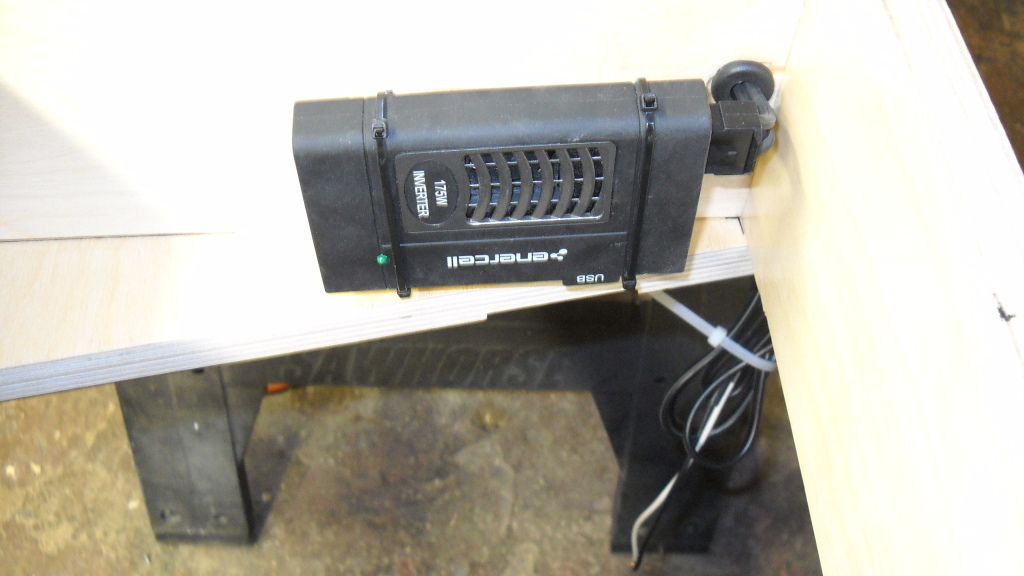
From above:
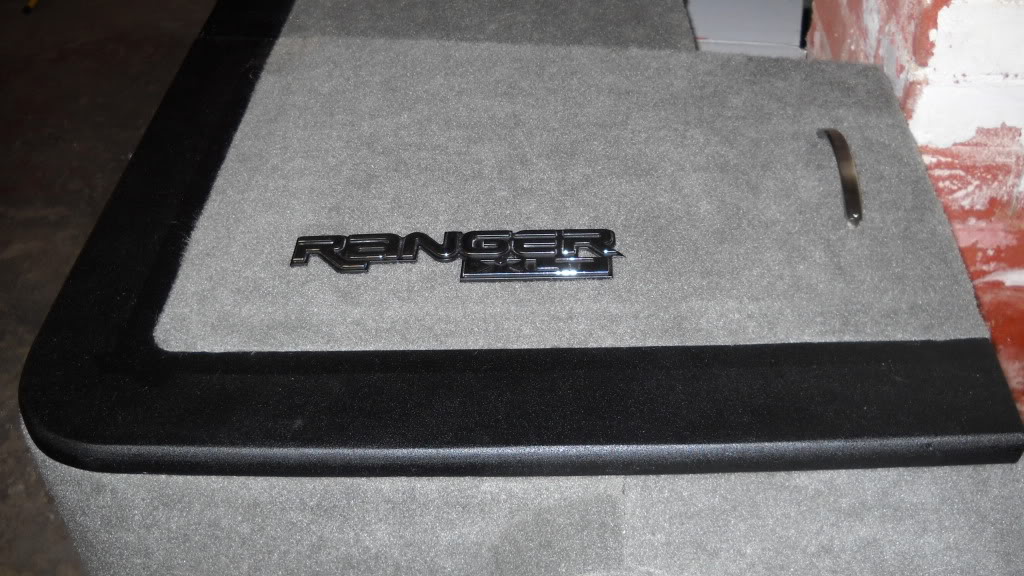
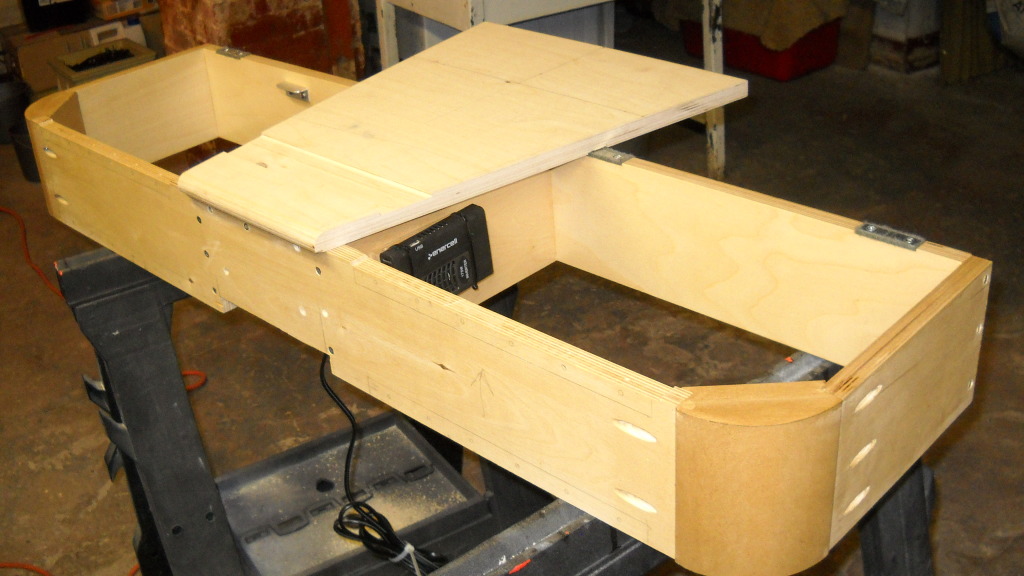
Center "dummy" panel mocked in place:
And the handles that I'm using:
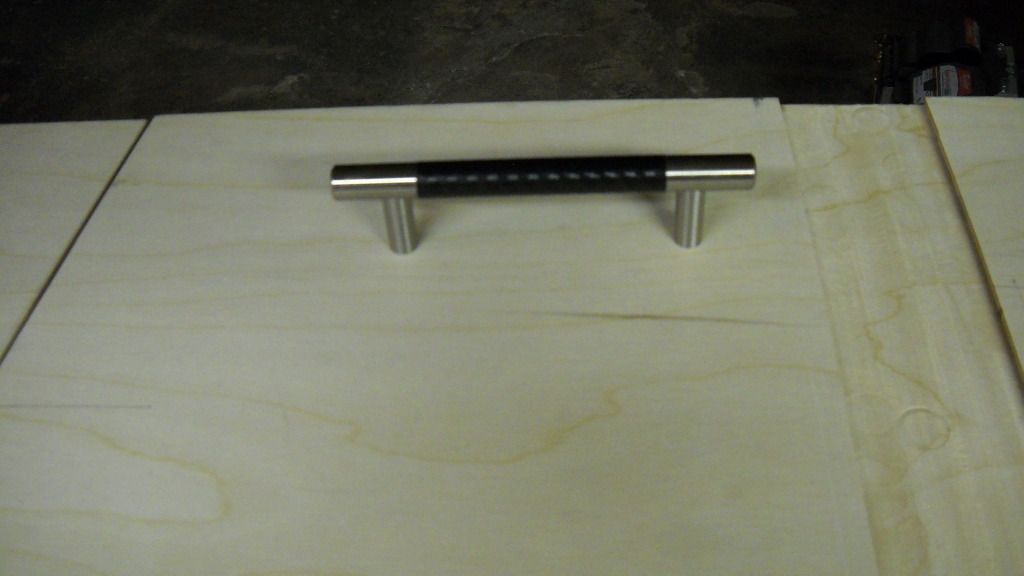
Brushed stainless steel bar pulls with carbon fiber accent to match the rest of the interior. Mounting holes are 2-3/4" from the back edge of the lid.
I also filled the screw holes on the outside of the box to keep them from telegraphing through the carpet once it's applied. Carpet should be here in a couple of days.
I thought it would be nice to have some lockable storage in the cab, so I brought home a 3/4" cam lock to install in the passenger-side lid. I used a scrap of plywood to mock everything up first, of course.
I used a piece of 3/4"x3/4"x1/8" aluminum angle stock that I had lying around for the strike; I cut it 2" long, rounded the corners, and drilled 2 holes in it. It's centered at 9-3/8" on the back wall of the box, and 3/4" down from the top edge. Once I had the strike located, I drilled through the back wall, then elongated the holes slightly for some up-and-down adjustment. Strike is held in place with some machine screws with fender washers and stop nuts on the back side.
Next, I drilled the lid for the cam lock. It's located 9-1/2" in from the side, and 9-3/4" from the back edge of the lid. Center punch the mark, then use a 3/4" forstner bit to drill the hole. Clamp a block of scrap to the bottom side to keep the hole from blowing out. For this application , I used the bent arm that came with the cam lock. Mount according to the instructions on the package.
Top side:
Bottom:
I also made a mounting block for my 175W power inverter-it needed to be spaced-out from the wall for plug clearance. It's a small block of scrap Baltic Birch, cut to the size of the inverter. I chiseled some 1/2" wide dados on the back side for some velcro straps (like is used for computer cord control), drilled a 1/2" hole for the cord, then screwed the block to the inside of the box and poly'd it to match. Once dry, I zip-tied the inverter in place to see how it looked.
From underneath:
From above:
Center "dummy" panel mocked in place:
And the handles that I'm using:
Brushed stainless steel bar pulls with carbon fiber accent to match the rest of the interior. Mounting holes are 2-3/4" from the back edge of the lid.
I also filled the screw holes on the outside of the box to keep them from telegraphing through the carpet once it's applied. Carpet should be here in a couple of days.
Joined: Dec 2009
Posts: 834
Likes: 3
From: Rutland VT
Pulled the old box out of the truck and started fabbing the mounts for the new one. Just a reminder--this set-up utilizes the stock threaded holes for the jump seat mounts.
Mounts are made from the same 3/4" Baltic Birch plywood. Each is made from one piece 3"x10" and one piece 8-1/4"x10". They are held together with with 2 3-1/2"x3/4" corner braces (National #N220079) and reinforced with screws.
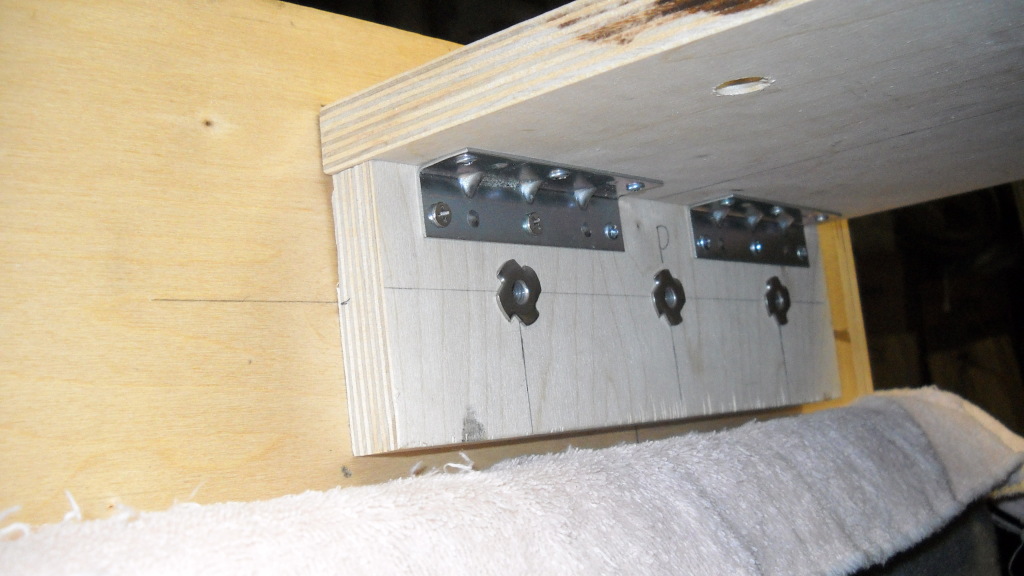
I clamped the mounts in place 1-1/8" down from the top edge of the box and drilled 9/32" holes though the back wall of the box and into a pice of scrap to keep the holes from blowing out. I then re-drilled the holes in the mount to 5/16" and pressed in some 1/4" t-nuts. The mounts will be held in place with 1/4"x1-1/2" oval head screws with finishing washers, screwed into the t-nuts.
The trickiest part, and probably the most critical part, is locating the 3 holes to attach the mounts to the jump seat mounting holes. I'll see if I can get these posted later.
Mounts are made from the same 3/4" Baltic Birch plywood. Each is made from one piece 3"x10" and one piece 8-1/4"x10". They are held together with with 2 3-1/2"x3/4" corner braces (National #N220079) and reinforced with screws.
I clamped the mounts in place 1-1/8" down from the top edge of the box and drilled 9/32" holes though the back wall of the box and into a pice of scrap to keep the holes from blowing out. I then re-drilled the holes in the mount to 5/16" and pressed in some 1/4" t-nuts. The mounts will be held in place with 1/4"x1-1/2" oval head screws with finishing washers, screwed into the t-nuts.
The trickiest part, and probably the most critical part, is locating the 3 holes to attach the mounts to the jump seat mounting holes. I'll see if I can get these posted later.


Joined: Dec 2009
Posts: 834
Likes: 3
From: Rutland VT
So, back to the mounts.
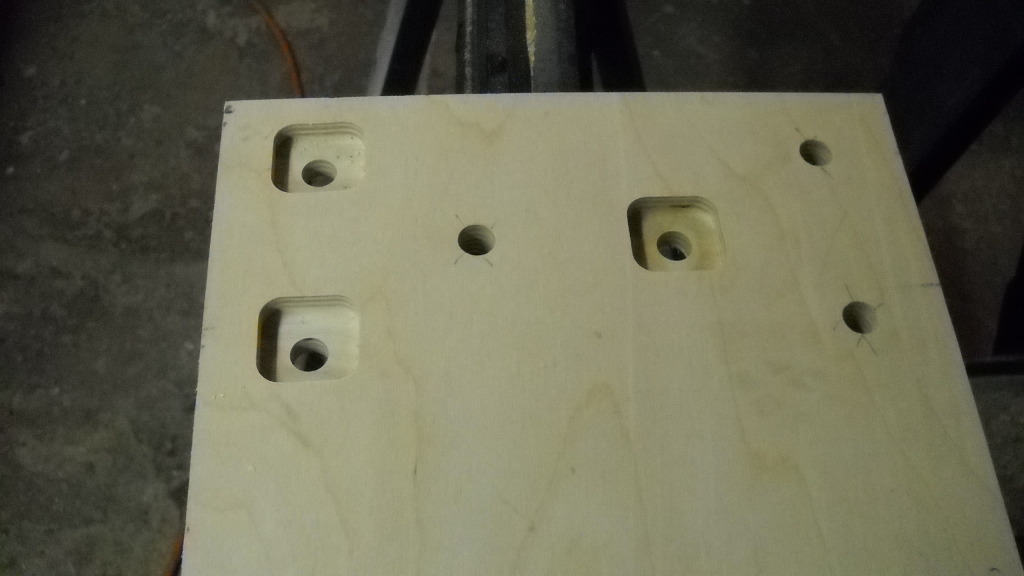
The pic above is the passenger-side, but they are mirror images of each other, so once you have one "drilled", you can flip it over and use the holes to mark the other one. Since that picture is pretty clear, I'll use it to give you the hole layout---"A" is the side closest in the pic, "B" is the back edge (right side of pic".
Measure in 1-1/2" from "A" and mark a line parallel to "A". From "B", measure up 1-1/8" and 4-1/8" along the line and mark. These are the center points for 2 of the mounting holes.
Measure 6-1/2" in from "A" and mark another line parallel to "A". Measure up 2-3/4" from "B" and mark-this is the center point for the 3rd hole.
Use a center punch or awl to mark your center points to keep the drill bit from walking, then drill with a 1/2" forstner bit.
Once the holes are drilled, take the mount out to your truck and see how the holes line-up with the jump seat holes; if they're good, mark and drill the other side.
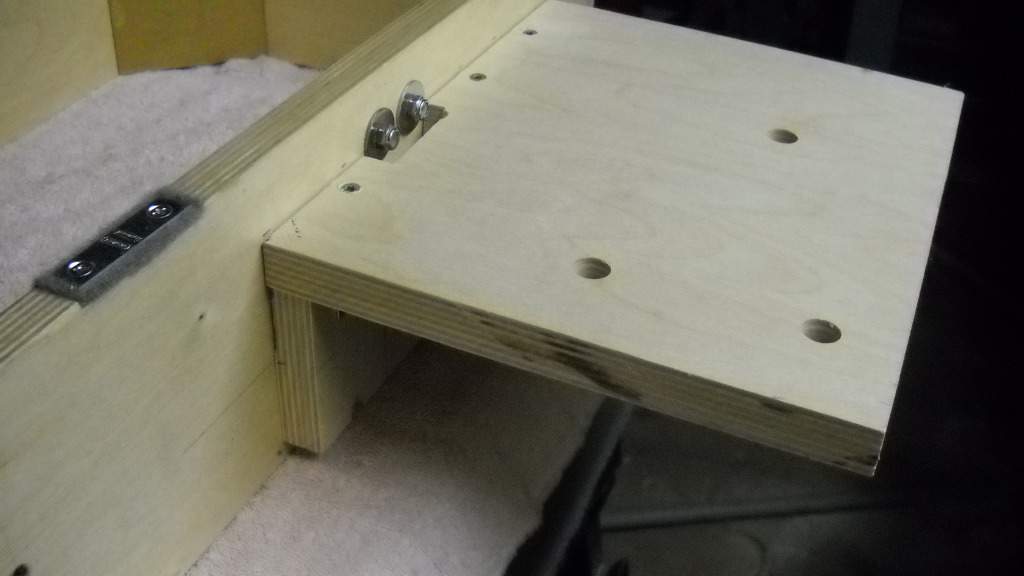
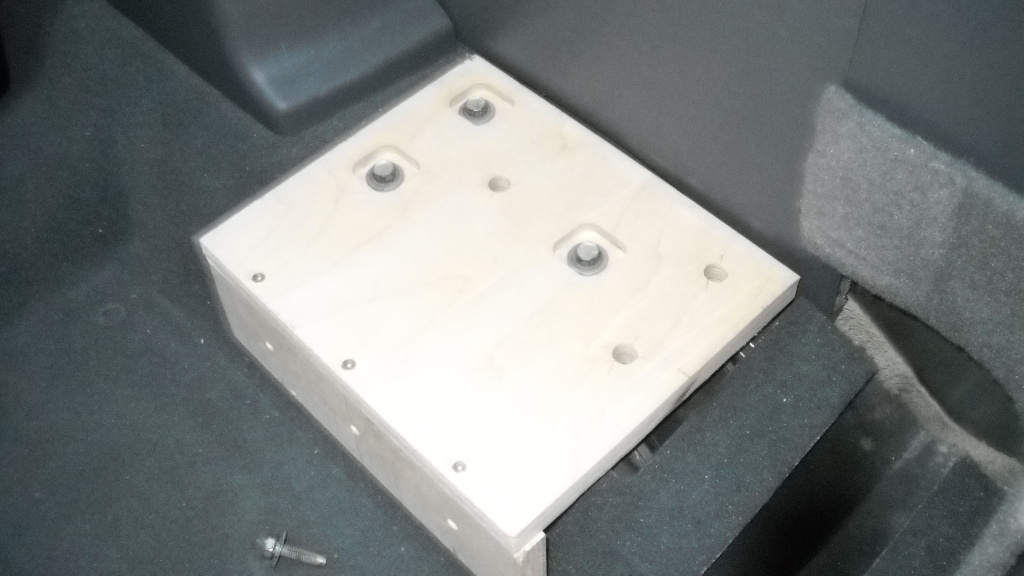
I also used a router to recess the bolts into the mounts to avoid having to buy longer bolts. This also left enough clearance for the finishing panels that come later. You can see those, along with the holes that I drilled backwards, in this next pic.
Mount in place:
NOW--I probably got ahead of myself a bit in last night's post.
Since I already have a box that I know fits, I was able to cheat a bit; I recommend that you build the box carcass, then buld the mounting plates, but DON'T drill the holes to attach the mounts to the box yet. Get the plates bolted in the truck first, snug them down, then set the box in the truck. Get the box centered and situated where it wants to be, then mark the outline of the mounts on the back of the box. Pull everything back out, line the mounts up with the marks, clamp them in place, and then drill the holes through the mounts and the back wall of the box. This way, you'll be fairly certain that it's going to fit right. Another tip: you can always drill your holes a little big-that way you'll have some "wiggle" room if you need it to get the fit right.
The pic above is the passenger-side, but they are mirror images of each other, so once you have one "drilled", you can flip it over and use the holes to mark the other one. Since that picture is pretty clear, I'll use it to give you the hole layout---"A" is the side closest in the pic, "B" is the back edge (right side of pic".
Measure in 1-1/2" from "A" and mark a line parallel to "A". From "B", measure up 1-1/8" and 4-1/8" along the line and mark. These are the center points for 2 of the mounting holes.
Measure 6-1/2" in from "A" and mark another line parallel to "A". Measure up 2-3/4" from "B" and mark-this is the center point for the 3rd hole.
Use a center punch or awl to mark your center points to keep the drill bit from walking, then drill with a 1/2" forstner bit.
Once the holes are drilled, take the mount out to your truck and see how the holes line-up with the jump seat holes; if they're good, mark and drill the other side.
I also used a router to recess the bolts into the mounts to avoid having to buy longer bolts. This also left enough clearance for the finishing panels that come later. You can see those, along with the holes that I drilled backwards, in this next pic.
Mount in place:
NOW--I probably got ahead of myself a bit in last night's post.
Since I already have a box that I know fits, I was able to cheat a bit; I recommend that you build the box carcass, then buld the mounting plates, but DON'T drill the holes to attach the mounts to the box yet. Get the plates bolted in the truck first, snug them down, then set the box in the truck. Get the box centered and situated where it wants to be, then mark the outline of the mounts on the back of the box. Pull everything back out, line the mounts up with the marks, clamp them in place, and then drill the holes through the mounts and the back wall of the box. This way, you'll be fairly certain that it's going to fit right. Another tip: you can always drill your holes a little big-that way you'll have some "wiggle" room if you need it to get the fit right.
Joined: Dec 2009
Posts: 834
Likes: 3
From: Rutland VT
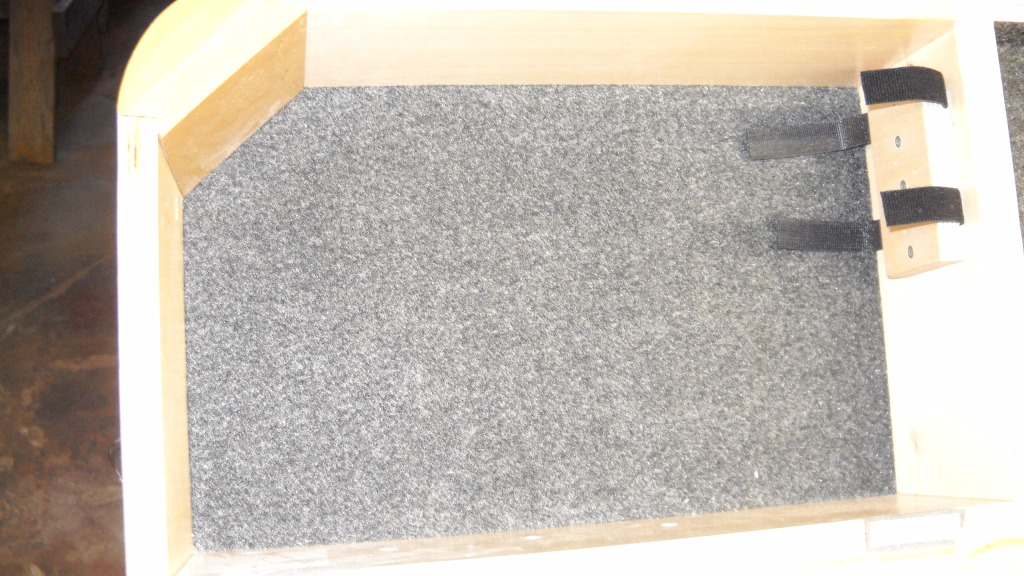
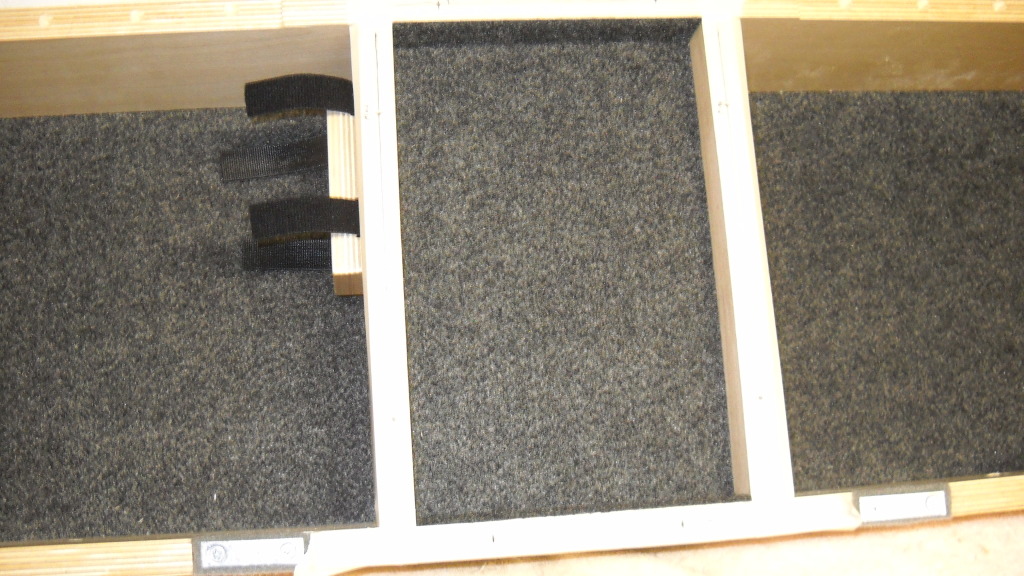
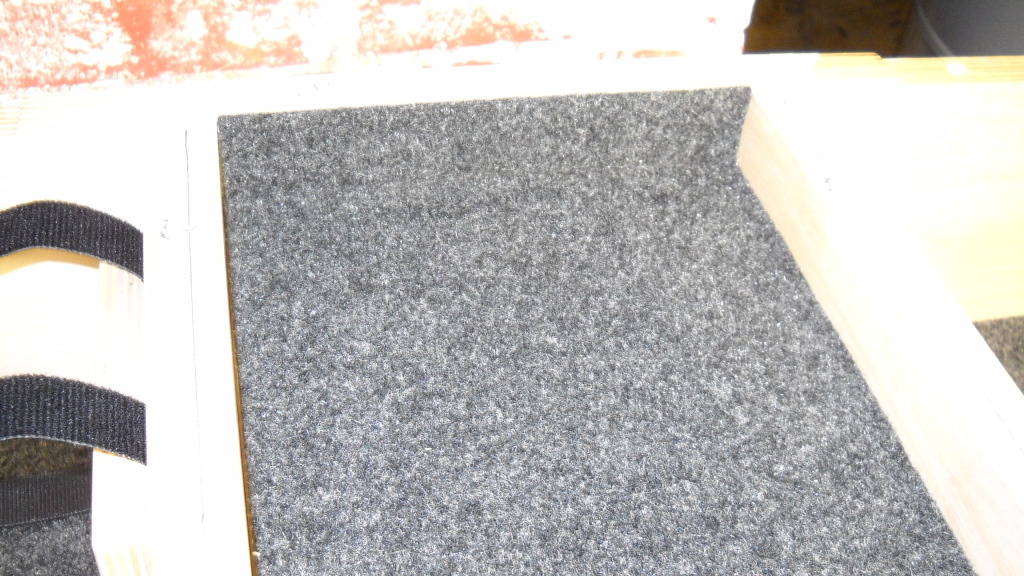
Got the bottoms carpeted and attached this morning. It was much easier doing it with the removable bottom panels than it was cutting the carpet to fit (on the old one). I simply cut the carpet to the rough size, sprayed the bottom panel and back of the carpet with 3M 77 spray adhesive, let it tack-up for about 5 minutes, then layed the carpet on and smotthed it-out with a plastic squeegee. After the bottoms dried for an hour or so, I measured 1/2" in from each edge and trimmed with a SHARP utility knife, then screwed them to the box.
Here's a tip for screws--use "Power Pro" torx head deck screws; torx won't cam-out (slip), and I've never broken the head off of one. Regular sheetrock screws will snap-off when they're screwed into the Baltic Birch plys.
It's supposed to be a little warmer this week, so i might be able to get the bedliner sprayed on the lids.
Last edited by VH5150; Mar 5, 2012 at 03:50 PM.
Joined: Dec 2009
Posts: 834
Likes: 3
From: Rutland VT
I decided to make an extra "hidden" compartment in the center section. I repositioned the blocking and added some carpet. I'll be using some pins to locate the false lid and some more rare earth magnets to hold it in place. I also drilled the mouting holes for the fire extinguisher and Maglite mounts.
You can also see the Velcro straps for the inverter mount.
You can also see the Velcro straps for the inverter mount.

Member

Joined: Dec 2011
Posts: 30
Likes: 0
From: edmonton
very nice work sir!
I'm sooo jealous of the festool... i saw the pictures and before i read the (borrowed from work) i was like i hate you.. your tools are better than mine... ha ha
anyways i love it, cant wait to see how it turns out.
If you have time can you compile a complete "cut list" in one easy spot for a guide for us less equiped
Joined: Dec 2009
Posts: 834
Likes: 3
From: Rutland VT
very nice work sir!
I'm sooo jealous of the festool... i saw the pictures and before i read the (borrowed from work) i was like i hate you.. your tools are better than mine... ha ha
anyways i love it, cant wait to see how it turns out.
If you have time can you compile a complete "cut list" in one easy spot for a guide for us less equiped
I'm sooo jealous of the festool... i saw the pictures and before i read the (borrowed from work) i was like i hate you.. your tools are better than mine... ha ha
anyways i love it, cant wait to see how it turns out.
If you have time can you compile a complete "cut list" in one easy spot for a guide for us less equiped


