
How-To: Explorer Center Console


Joined: Jun 2004
Posts: 24,936
Likes: 11
From: usa
How-To: Explorer Center Console
How-To author: Yellow_edge_4x4
Original thread: https://www.ranger-forums.com/forum2...r-console.html
Let the modding Begin!!
_________________________
How To: Explorer Center Console
Tools needed.
Explorer console
Drill
T55 troxes head
Hammer
Self tapping screws
Time.
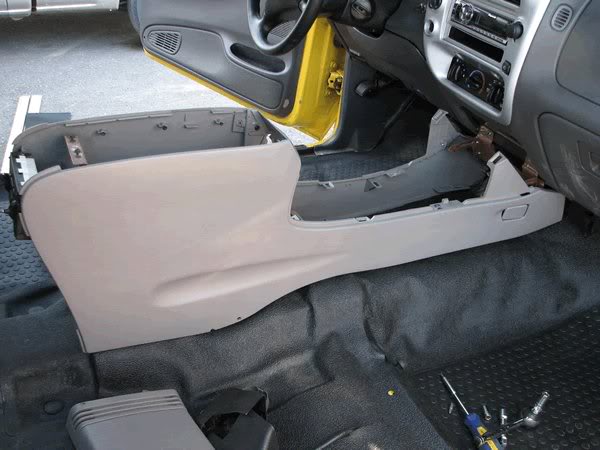
Start out by getting the old console and seats out.
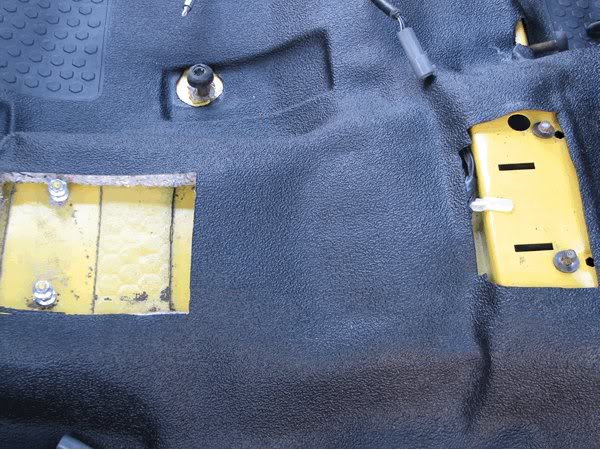
Remove the airbag and ash tray.
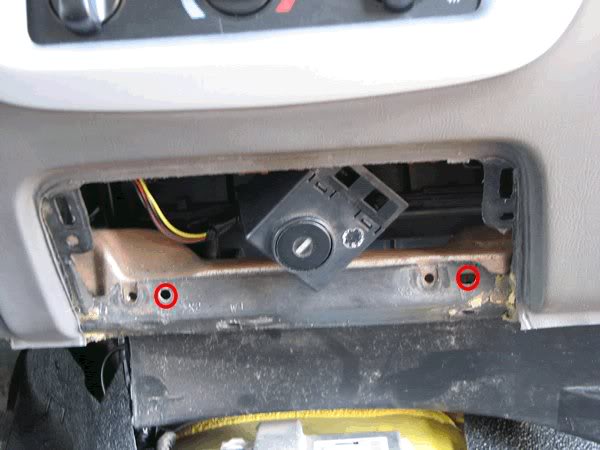
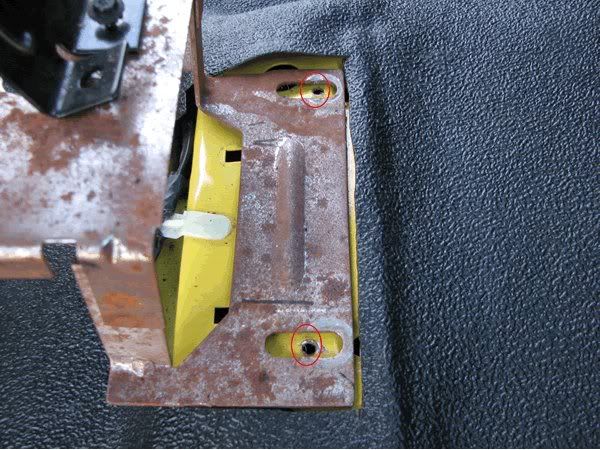
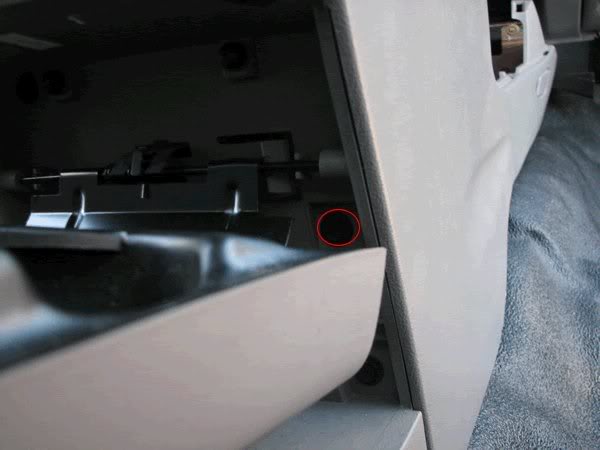
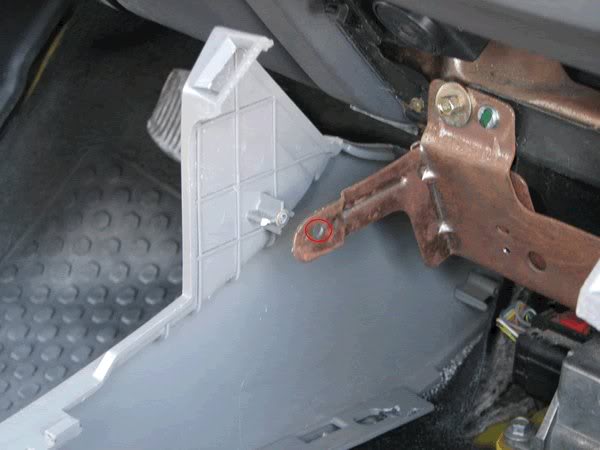
Grab the small front bracket for the explorer console. I folded the bottom to the top for it to fit.
Bolt it to the bar that the air bag and ash tray were. The red circles are where the studs of the bracket go.
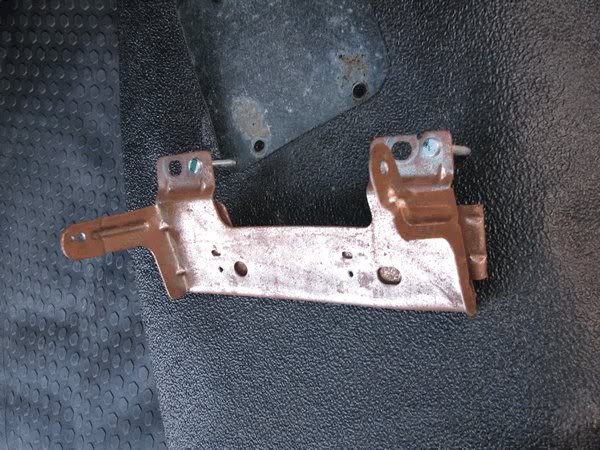
Next get the big bracket and lay it on the floor to see where you need to drill at.

As you can see I didnt drill in the right place the first time. lol
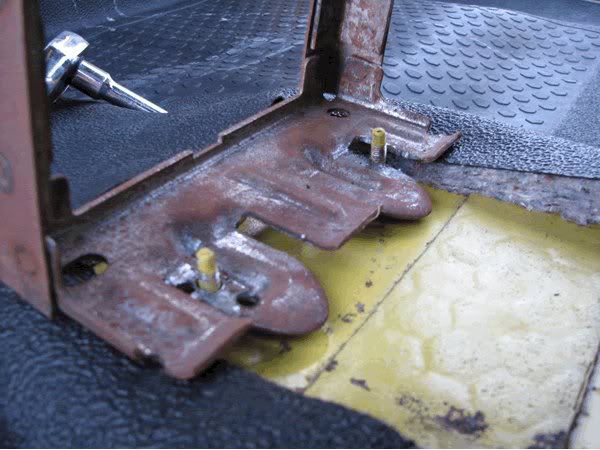
Next drill two holes for the front bracket and use self taping screws to bolt it down.
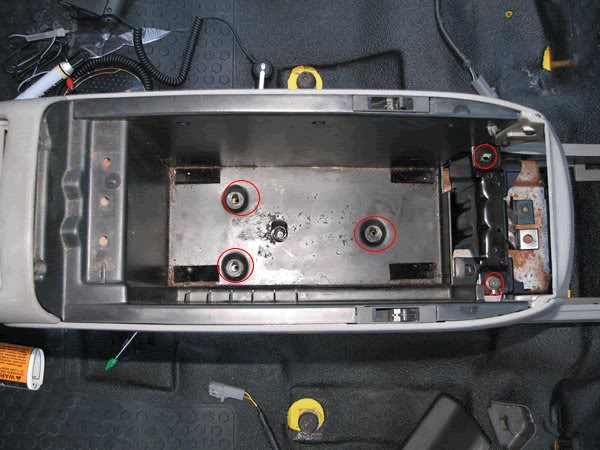
Take the shell of the console and lay it on the large bracket.
Now grab the rear temp controll and mount that to the shell.
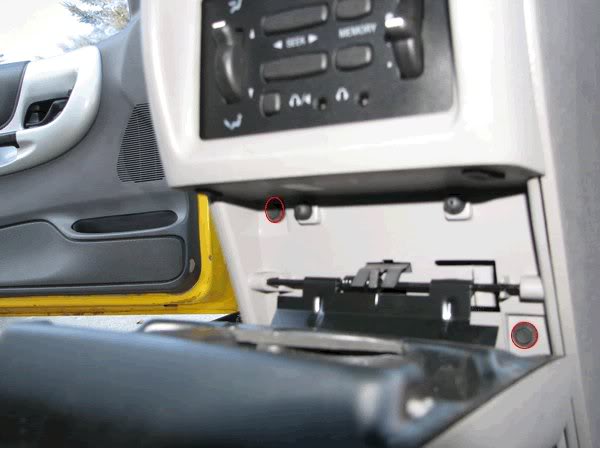
In red is where the bolts go.
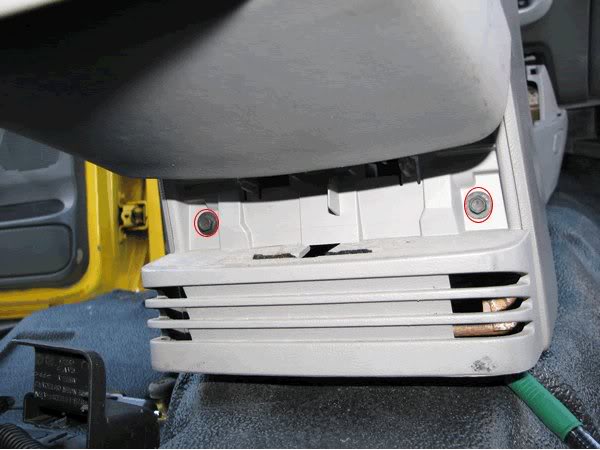
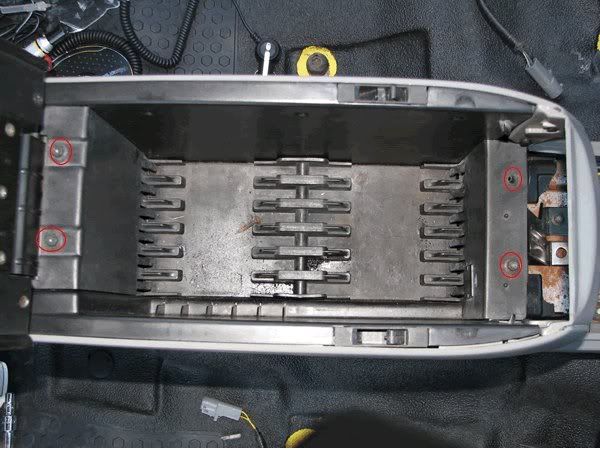
Grab the black plastic that goes inside the arm rest, Not the cd holder one. Bolt this down circled in red.
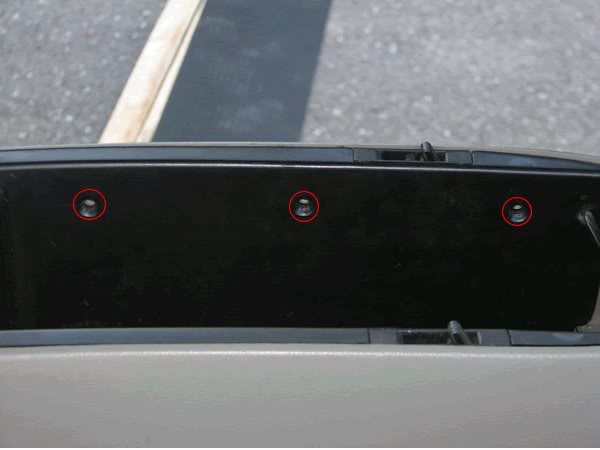
Screw the 6 screws on the top of the sides of the cubble holder.
Next screw the last two bolts in the the back trim, and ac controlls.

Take the cd holder and put it in the cubby and bolt down the 4 screws.
Mount the arm rest with two screws.
their the bottom two of the pic ^^
Bolt the two screws for the font down.
last step put the cup holders and the top cubby in and enjoy all the work youve done.

Original thread: https://www.ranger-forums.com/forum2...r-console.html
Let the modding Begin!!
_________________________
How To: Explorer Center Console
Tools needed.
Explorer console
Drill
T55 troxes head
Hammer
Self tapping screws
Time.
Start out by getting the old console and seats out.
Remove the airbag and ash tray.
Grab the small front bracket for the explorer console. I folded the bottom to the top for it to fit.
Bolt it to the bar that the air bag and ash tray were. The red circles are where the studs of the bracket go.
Next get the big bracket and lay it on the floor to see where you need to drill at.
As you can see I didnt drill in the right place the first time. lol
Next drill two holes for the front bracket and use self taping screws to bolt it down.
Take the shell of the console and lay it on the large bracket.
Now grab the rear temp controll and mount that to the shell.
In red is where the bolts go.
Grab the black plastic that goes inside the arm rest, Not the cd holder one. Bolt this down circled in red.
Screw the 6 screws on the top of the sides of the cubble holder.
Next screw the last two bolts in the the back trim, and ac controlls.
Take the cd holder and put it in the cubby and bolt down the 4 screws.
Mount the arm rest with two screws.
their the bottom two of the pic ^^
Bolt the two screws for the font down.
last step put the cup holders and the top cubby in and enjoy all the work youve done.
Last edited by 98liftedranger; Nov 27, 2011 at 09:56 PM.


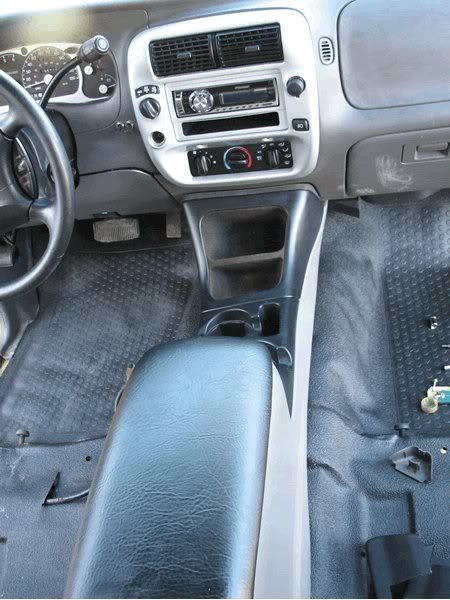
Just look at the picture and find the exact same one. The important detail is the shape that it connects at the dash, shown right below the cd player in this pic
Just go to the junkyard and find the exact same looking console. There's mountaineers and explorers that have diff consoles and it will be obvious they are not what you're looking for.
Just go to the junkyard and find the exact same looking console. There's mountaineers and explorers that have diff consoles and it will be obvious they are not what you're looking for.


Thread
Thread Starter
Forum
Replies
Last Post
jtkonieczny
Interior Semi-Tech
11
Nov 8, 2011 05:21 PM
gibsondale
General Ford Ranger Discussion
3
Apr 20, 2010 09:03 AM
Gearhead61
General Ford Ranger Discussion
4
Sep 11, 2005 06:13 PM


