
How-To: Sound Deaden Your Interior With Hushmat


How-To: Sound Deaden Your Interior With Hushmat
There has been lots of discussion about sound deader, but not too much about actually applying it or how much is needed. If you would like to sound deaden your truck, here is how.
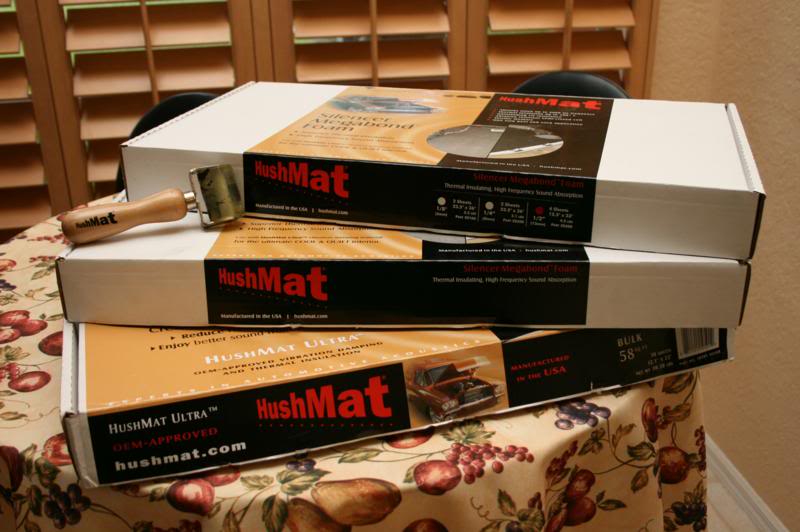
The first thing you're going to need is the materials themselves. I chose to go with Hushmat brand products for this tutorial. You will need about 100 sq ft or more of deadener, a roller to fully secure the deadener (HushMat now provides a Roller Tool to smooth out any wrinkles and provides a professional looking install every time), and optionally some closed cell foam. I used 2 packs of closed cell foam for the doors and some of the floor.
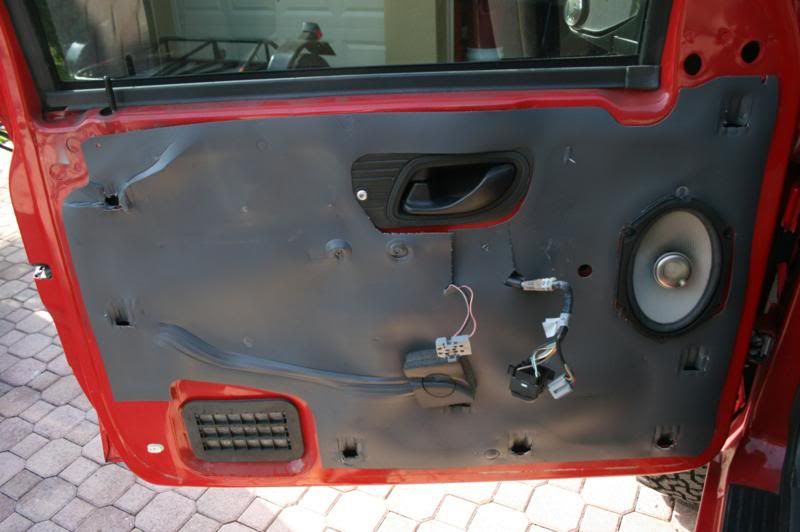
First thing we're going to do is the front doors. Remove the door panels from them.
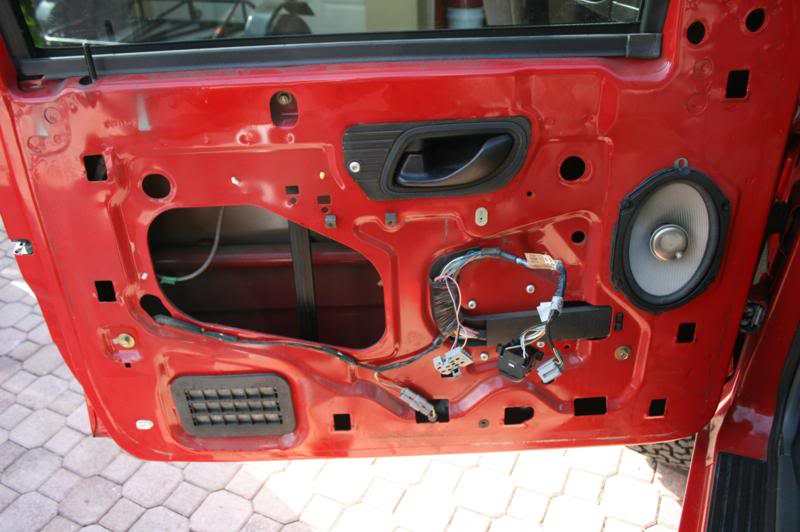
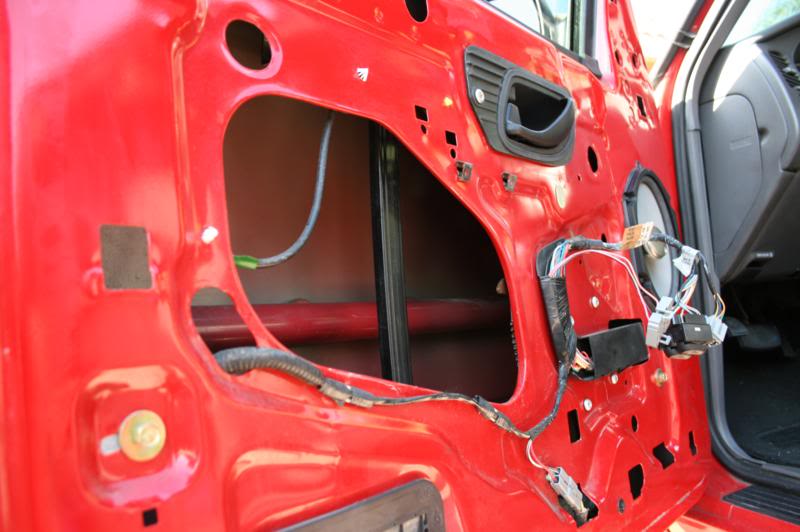
Take the vapor barrier off and throw it away.
The outer door skin must be covered in deadener fully. You need to cut the pieces up and use the access panel to install it through.
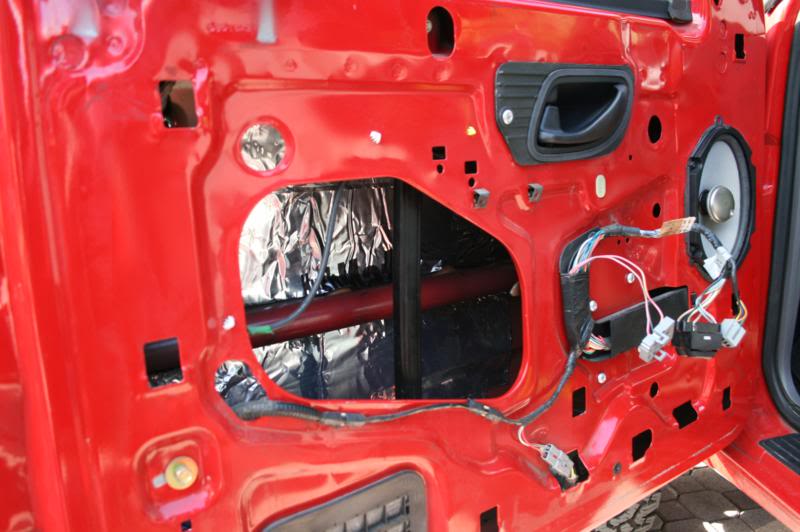
Deadener installed. You don't really need to use any on the impact bar since it is so thick.
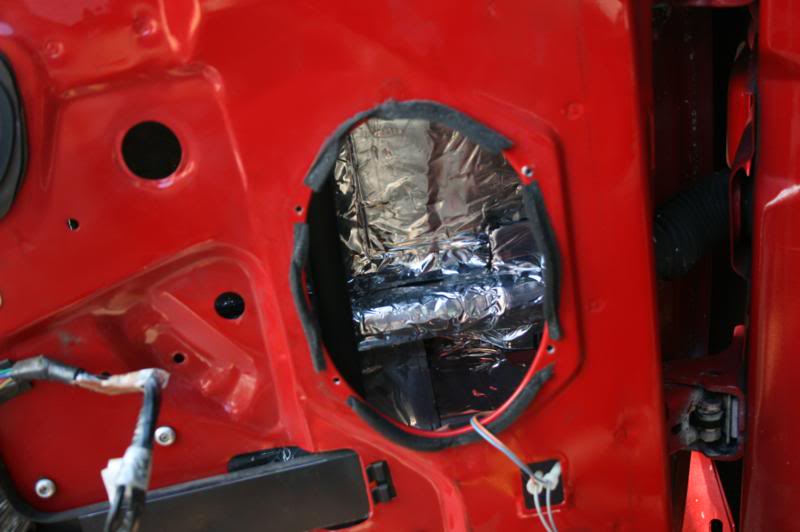
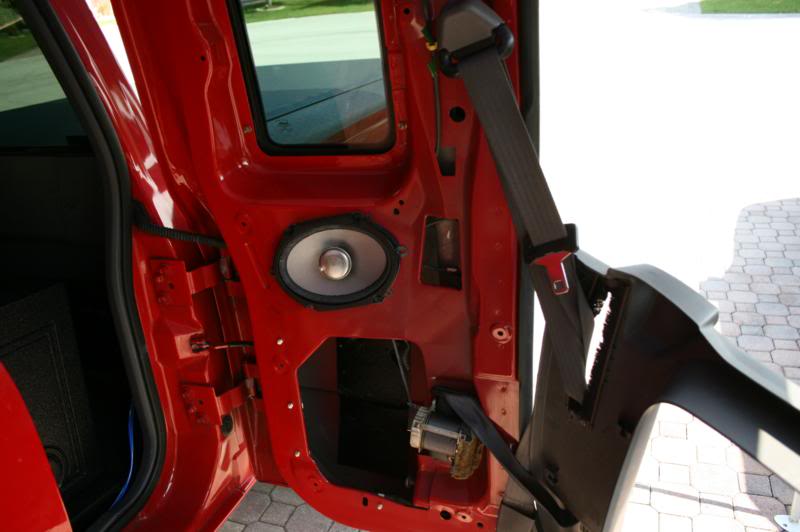
Now move on to the front of the inner door skin. Remove the speaker and install through the opening. You will notice I used some on the impact bar, since it is directly behind the speaker in this spot I would recommend using a small amount there.
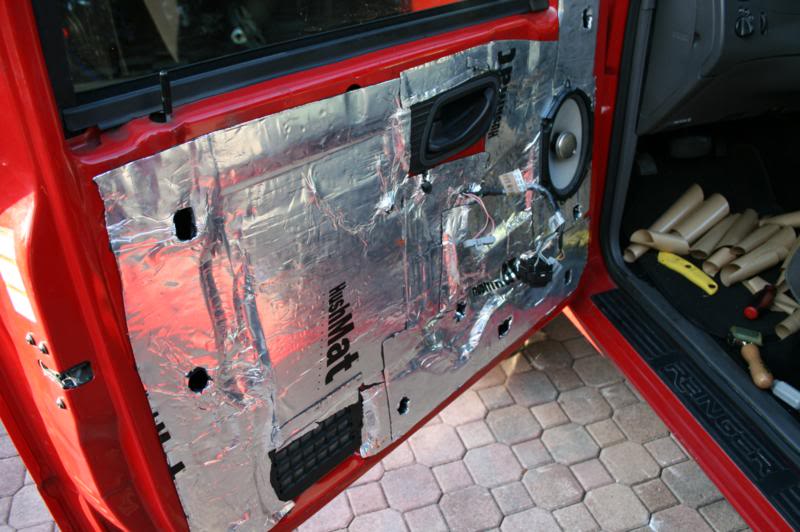
Now cover the inner door skin. As you can see I sealed and covered the entire main access hole. This helps with midbass response from the door speaker and made a big difference. I cut to shape and then attached some thin sheetmetal and covered it in deadener. You can seal off any other openings that are not used to hang the door panel.
Next we need to cover the door panels in the closed cell foam. This will help with road noise.
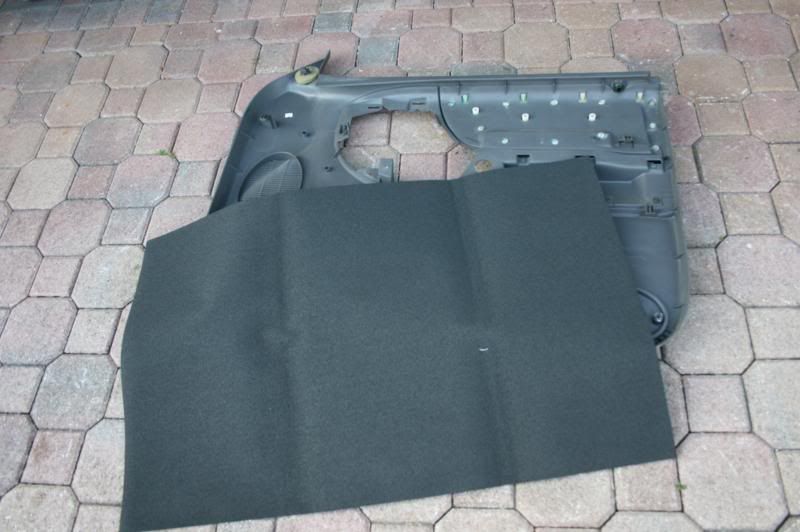
The foam is self adhesive so cut any openings out and then attach it. You can see I attached a couple pieces of the scrap I had to cut out. You can't have too much when it comes to this. Door is now done and ready to be put back. Repeat on other side.
Now we move on to the rear doors. You can kind of just let the door panel hang out of the way instead of removing the seatbelt to remove it.

Again, cover both the inner and outer door skin in deadener.

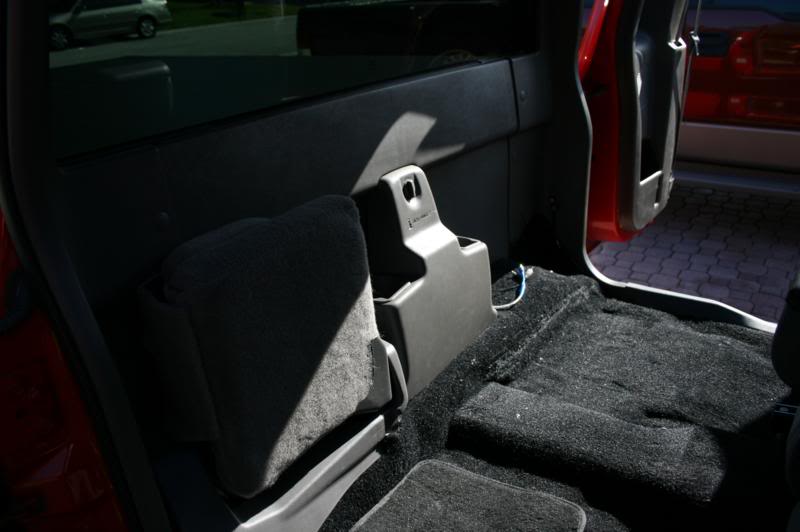
Cover the door panel in closed cell foam. It is a little more tricky than the front doors. My main focus was on the area inside of the little cubby. Now the back door is done. Repeat on the opposite side.
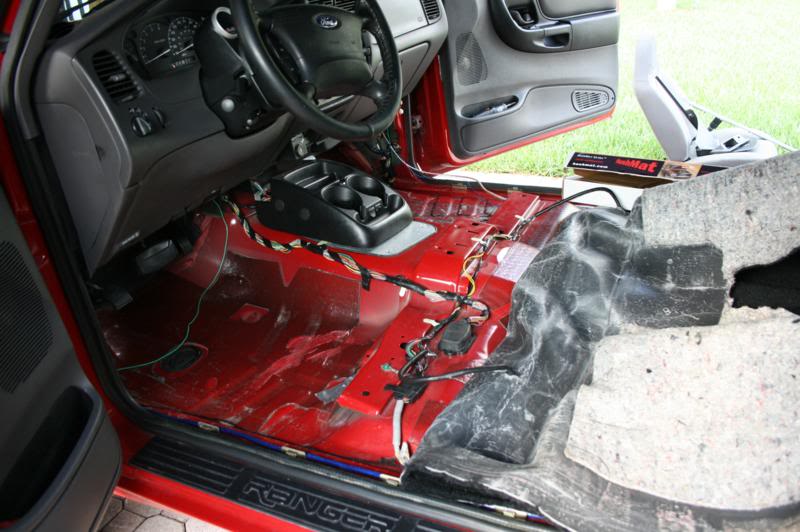
With the doors taken care of we can move onto the floor. I preferred folding back the carpet and doing it in two parts as opposed to removing the carpet completely. Vacuum the floor first. No other cleaning or surface prep is required with HushMat Ultra and the adhesion is guaranteed on every box.
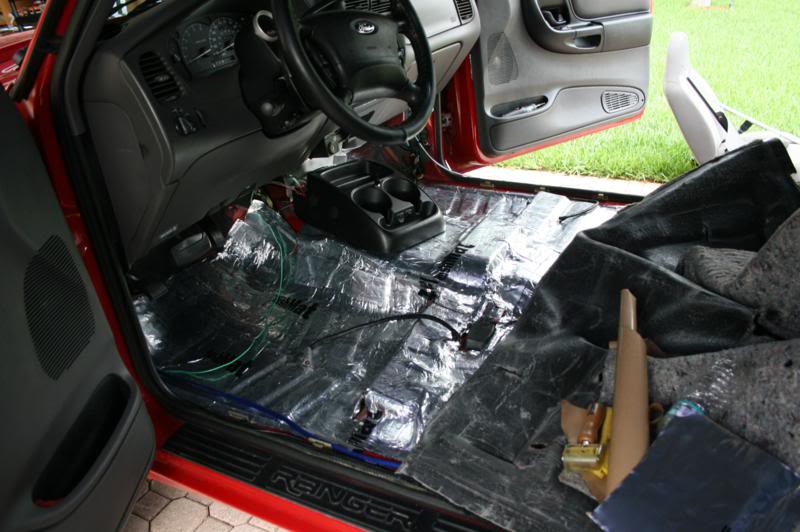
Apply your deadener. HushMat Ultra is so flexible it easily molds and adheres to the uneven floor pan.
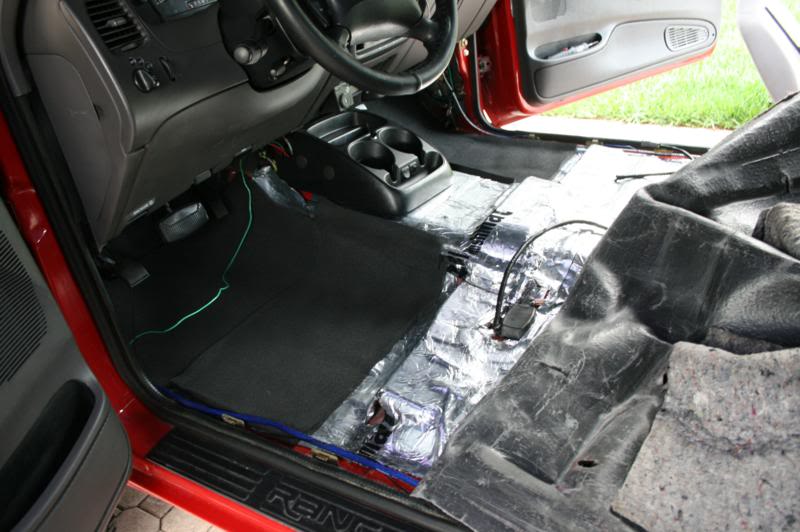
I put the closed cell foam up front to help with tire noise from the front tires. Now repeat for the back half of the floor.
Next up is the back wall. All of the trim must be removed.
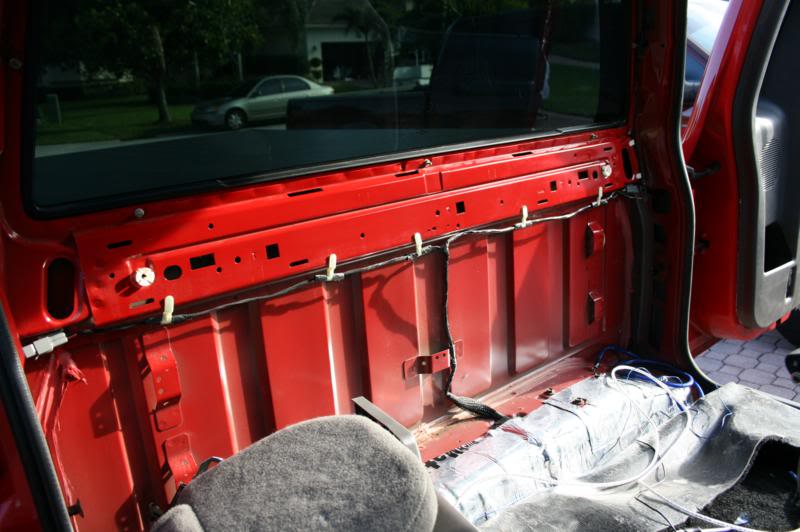
Trim removed.

Apply your deadener to the back wall, making sure not to cover the trim mounting points. Back wall is done, reinstall trim.
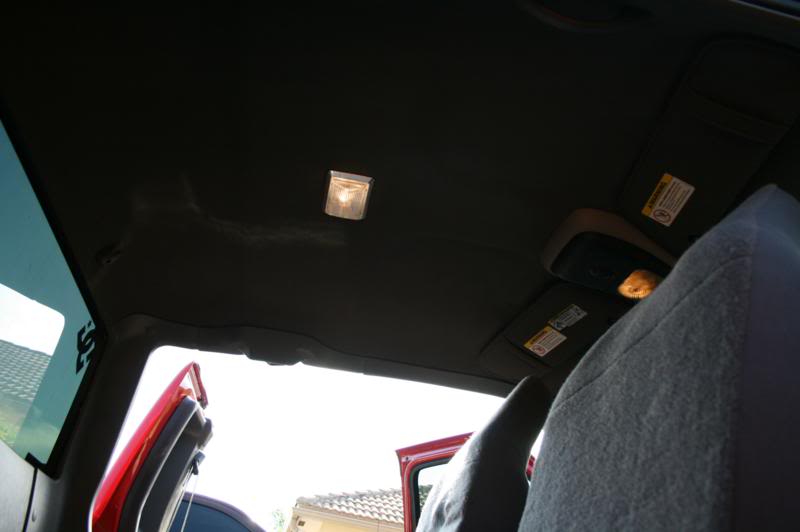
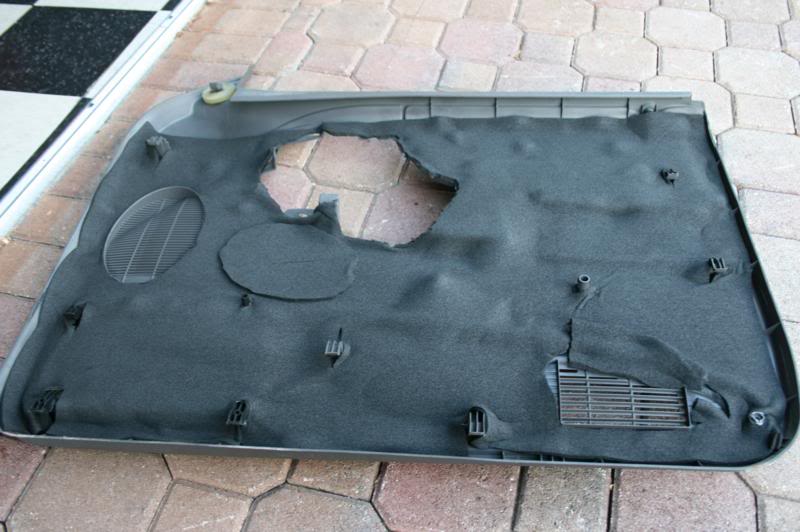
Finally we have the roof. The headliner must be removed now.
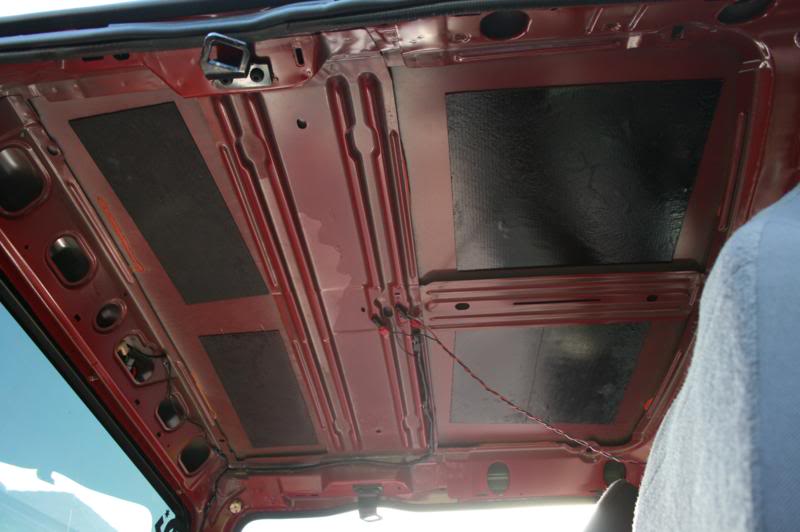
Headliner removed. You can see the laughable amount of OEM dampener.
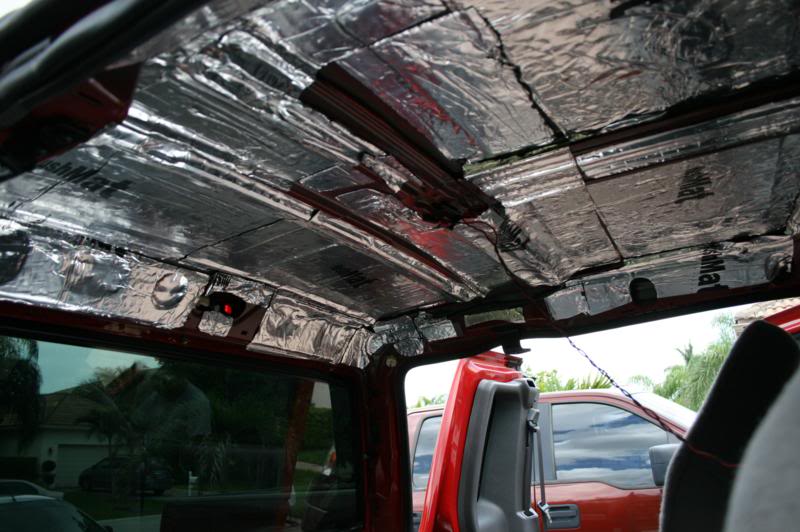
Cover with deadener. As you can see I didn't cover the roof as thoroughly as I did the rest of the truck. This is because I ran out of deadener. I would reccomend buying 110 square feet as opposed to 100 like I used. Reinstall the headliner and you are done.
The truck now feels much more solid driving down the road. The best way I can describe it is feeling like a new fullsize truck and not a ranger. It is much quieter inside as well. My midbass output is much much greater now and before the install my subwoofer was much quieter if I had the windows up versus down. Now it is about the same with the windows up as it is down, a definite improvement.
Here is a link to the deadener
Sound Dampening, Vibration Damping, Thermal Insulation for automotive applications - HUSHMAT.
And a link to the closed cell foam
Hushmat Silencer Megabond: Unparralled High Frequency Sound absorbing, and Thermal Insulating Foam, Absorbs exhaust noise, road noise and wind noise

The first thing you're going to need is the materials themselves. I chose to go with Hushmat brand products for this tutorial. You will need about 100 sq ft or more of deadener, a roller to fully secure the deadener (HushMat now provides a Roller Tool to smooth out any wrinkles and provides a professional looking install every time), and optionally some closed cell foam. I used 2 packs of closed cell foam for the doors and some of the floor.
First thing we're going to do is the front doors. Remove the door panels from them.
Take the vapor barrier off and throw it away.
The outer door skin must be covered in deadener fully. You need to cut the pieces up and use the access panel to install it through.
Deadener installed. You don't really need to use any on the impact bar since it is so thick.
Now move on to the front of the inner door skin. Remove the speaker and install through the opening. You will notice I used some on the impact bar, since it is directly behind the speaker in this spot I would recommend using a small amount there.
Now cover the inner door skin. As you can see I sealed and covered the entire main access hole. This helps with midbass response from the door speaker and made a big difference. I cut to shape and then attached some thin sheetmetal and covered it in deadener. You can seal off any other openings that are not used to hang the door panel.
Next we need to cover the door panels in the closed cell foam. This will help with road noise.
The foam is self adhesive so cut any openings out and then attach it. You can see I attached a couple pieces of the scrap I had to cut out. You can't have too much when it comes to this. Door is now done and ready to be put back. Repeat on other side.
Now we move on to the rear doors. You can kind of just let the door panel hang out of the way instead of removing the seatbelt to remove it.
Again, cover both the inner and outer door skin in deadener.
Cover the door panel in closed cell foam. It is a little more tricky than the front doors. My main focus was on the area inside of the little cubby. Now the back door is done. Repeat on the opposite side.
With the doors taken care of we can move onto the floor. I preferred folding back the carpet and doing it in two parts as opposed to removing the carpet completely. Vacuum the floor first. No other cleaning or surface prep is required with HushMat Ultra and the adhesion is guaranteed on every box.
Apply your deadener. HushMat Ultra is so flexible it easily molds and adheres to the uneven floor pan.
I put the closed cell foam up front to help with tire noise from the front tires. Now repeat for the back half of the floor.
Next up is the back wall. All of the trim must be removed.
Trim removed.
Apply your deadener to the back wall, making sure not to cover the trim mounting points. Back wall is done, reinstall trim.
Finally we have the roof. The headliner must be removed now.
Headliner removed. You can see the laughable amount of OEM dampener.
Cover with deadener. As you can see I didn't cover the roof as thoroughly as I did the rest of the truck. This is because I ran out of deadener. I would reccomend buying 110 square feet as opposed to 100 like I used. Reinstall the headliner and you are done.
The truck now feels much more solid driving down the road. The best way I can describe it is feeling like a new fullsize truck and not a ranger. It is much quieter inside as well. My midbass output is much much greater now and before the install my subwoofer was much quieter if I had the windows up versus down. Now it is about the same with the windows up as it is down, a definite improvement.
Here is a link to the deadener
Sound Dampening, Vibration Damping, Thermal Insulation for automotive applications - HUSHMAT.
And a link to the closed cell foam
Hushmat Silencer Megabond: Unparralled High Frequency Sound absorbing, and Thermal Insulating Foam, Absorbs exhaust noise, road noise and wind noise
Last edited by korey89; Jun 21, 2010 at 08:32 AM.


Question: What if you were unable to do this all at once? like you saved money and did the doors one weekend, a couple weeks later do the floor. Would it still make a difference if you just did the doors? Or just the floor?
I really want to do this, but don't have the cash to do it all at once
I really want to do this, but don't have the cash to do it all at once
Or is the full effect only noticed when its all finished?
if i remember right i looked it up online and it was like 500 or 600 bucks. I could be wrong but dont think i am
Member
Joined: Sep 2012
Posts: 115
Likes: 0
From: Ca
go to home depot and get some quick roof roll out roof repair stuff.. its 10% (just a guess) the price of that pro stuff and works almost as good.. a 9" wide roll 15' long is like $15 .. id say 10% price and 90% as effective is better way to go.. i couldnt find any quick roof when i went so i used window flashing.. similar stuff just thinner.. obviously the thicker the better to a certain extent.. heres pics of my bug i used it on


Thread
Thread Starter
Forum
Replies
Last Post
BlackRanger04
Interior Semi-Tech
13
Jan 27, 2011 08:50 PM
Mnemonic
General Technical & Electrical
25
Jul 3, 2005 06:29 PM


