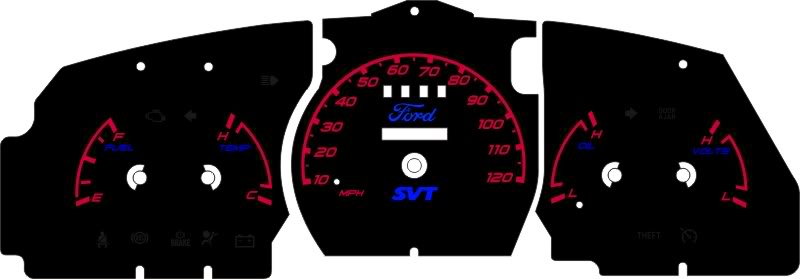
changing gauge face plates
#26
#28
Sorry man...I got my gauge face from ProCarParts.com

They're cheaper now ($42) than when I bought them (for $69.99)
They look like that because they're "Reverse Glow" (indiglo-style)
 click here
They're cheaper now ($42) than when I bought them (for $69.99)
They look like that because they're "Reverse Glow" (indiglo-style)
 click here
#29
I have been looking for some gauges for about 6 months now. The only ones that match up are the Nu Image #WG131, at least from what I could find. Does anyone have any nu image white face gauges installed and have pics in the dark when the light up? I don't want to spend $45-$65 for them then not like them.
Thanks
Thanks
#30
Best way I have seen and used is the Battery attached to the speed-o method, I am not sure who posted the method, I didn’t I just used it but it was easy.
There’s a procedure somewhere, I will look for it and post.
Someone help me out here, I can’t find the procedure to Cal the Speed-O…
Here is the Gauge Faces I will be using.

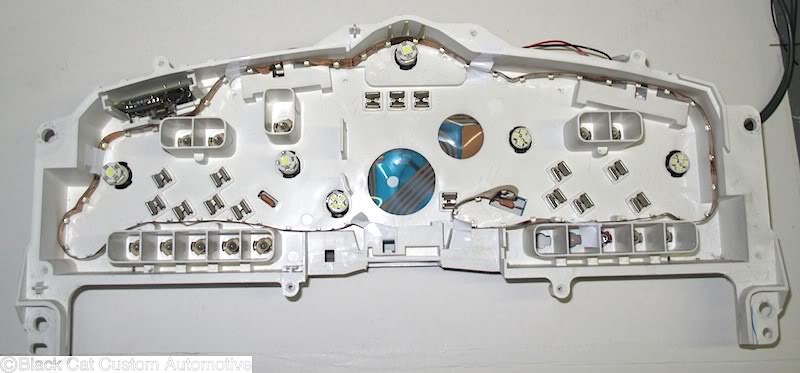
The lighting is another thing, working on strip of LEDs.

There’s a procedure somewhere, I will look for it and post.
Someone help me out here, I can’t find the procedure to Cal the Speed-O…

Here is the Gauge Faces I will be using.

The lighting is another thing, working on strip of LEDs.

Last edited by Scrambler82; 03-31-2010 at 05:22 PM. Reason: Added Pics.
#31
Instructions for those who have no idea...
So I ordered my gauge kit off cheaptruckparts.com about 2 weeks ago. These are NUIMAGE Gauges... They came in this past week and I finally got them installed last night. I have an 02 ranger edge and the dash is fairly easy to take apart. Sorry I didn't take pics but I can give a very good verbal explanation.
You will need a 7mm, 8mm, and 5mm or 6mm for this job.
First, on your center part of your dash where your radio is... just above your temp and air options is a piece of trim. There are 2 screws that hold that plastic piece of trim on and holds your radio in. Remove those 2 screws and set them to the side. Make sure you keep all of your screws separate as there are a lot of screws to remove.
Ok, no just below the steering wheel there is a piece of plastic trim. There are 2 screws on the bottom of this near the gas pedal and the other near the parking break. There are also 2 screws that hold the hood latch onto this plastic. You will need to remove all 4 of those. When you get these screws out, you will need to pull from the bottom up to remove this.
Once that is removed, there is a metal plate that needs to be removed. There are 5 bolts in this; 2 to the left of the steering wheel and 3 to the right of the steering wheel. Once you have that removed, then you can begin to unbolt the plastic around the cluster.
There are 2 bolts just behind the metal plate you just removed, one on each side of the steering wheel. Look at your cluster face, you will see 3 bolts that point toward the roof that you will need to remove. Once you remove those you will need to pull that piece of plastic off. It is a bit tricky and don't forget that you do have wiring attached to your headlight control and dimmer. This is why you had to pull the trim around the radio out. The best way to take the headlight switch and dimmer off is to unbolt/unscrew and remove them. You might find un-clipping them to be easier.
Once that is done, there are 4 bolts holding the cluster in with one on each corner. Once you remove those, slowly slide the cluster out. You will have 3 electrical clips in the back that you will need to remove. Once you unplug those you can remove the cluster.

There are 7 screws holding the plastic cover on. 3 across the top and 4 across the bottom. Remove those and you can access the face and needles. I used 2 very small screw drivers (since i was missing the needle removal tool) and put them directly across form each other. I slowly pried up and the needles popped off with a very great ease. To get the true blue effect, you must peal off the old gauges before putting on the new gauges. They come off very very easily at least in my case they did. I had everything replaced in 10 minutes. The fun part was lining up the needles again while it was running. I had to play with the speedometer while driving (did on my street since its a dead end).
But here are some more pics
when i put back in to get the needles right.

With the flash off so you can see the way it lights up

took last night after install :

What it looks like completely installed at night

What it looks like completely installed in the day time

I hope this helps anyone and everyone that thought about doing them! Good luck with them, mine was very very easy! I had done a kit before, but it was a cheap one that you didnt have to remove the needles on... and it screwed up shortly after installation because it was the neon. It was very very cheaply made. I am hoping to get some L.E.D. bulbs to install, to make it brighter.
Any questions just shoot me a message!
You will need a 7mm, 8mm, and 5mm or 6mm for this job.
First, on your center part of your dash where your radio is... just above your temp and air options is a piece of trim. There are 2 screws that hold that plastic piece of trim on and holds your radio in. Remove those 2 screws and set them to the side. Make sure you keep all of your screws separate as there are a lot of screws to remove.
Ok, no just below the steering wheel there is a piece of plastic trim. There are 2 screws on the bottom of this near the gas pedal and the other near the parking break. There are also 2 screws that hold the hood latch onto this plastic. You will need to remove all 4 of those. When you get these screws out, you will need to pull from the bottom up to remove this.
Once that is removed, there is a metal plate that needs to be removed. There are 5 bolts in this; 2 to the left of the steering wheel and 3 to the right of the steering wheel. Once you have that removed, then you can begin to unbolt the plastic around the cluster.
There are 2 bolts just behind the metal plate you just removed, one on each side of the steering wheel. Look at your cluster face, you will see 3 bolts that point toward the roof that you will need to remove. Once you remove those you will need to pull that piece of plastic off. It is a bit tricky and don't forget that you do have wiring attached to your headlight control and dimmer. This is why you had to pull the trim around the radio out. The best way to take the headlight switch and dimmer off is to unbolt/unscrew and remove them. You might find un-clipping them to be easier.
Once that is done, there are 4 bolts holding the cluster in with one on each corner. Once you remove those, slowly slide the cluster out. You will have 3 electrical clips in the back that you will need to remove. Once you unplug those you can remove the cluster.

There are 7 screws holding the plastic cover on. 3 across the top and 4 across the bottom. Remove those and you can access the face and needles. I used 2 very small screw drivers (since i was missing the needle removal tool) and put them directly across form each other. I slowly pried up and the needles popped off with a very great ease. To get the true blue effect, you must peal off the old gauges before putting on the new gauges. They come off very very easily at least in my case they did. I had everything replaced in 10 minutes. The fun part was lining up the needles again while it was running. I had to play with the speedometer while driving (did on my street since its a dead end).
But here are some more pics
when i put back in to get the needles right.

With the flash off so you can see the way it lights up

took last night after install :


What it looks like completely installed at night

What it looks like completely installed in the day time

I hope this helps anyone and everyone that thought about doing them! Good luck with them, mine was very very easy! I had done a kit before, but it was a cheap one that you didnt have to remove the needles on... and it screwed up shortly after installation because it was the neon. It was very very cheaply made. I am hoping to get some L.E.D. bulbs to install, to make it brighter.
Any questions just shoot me a message!
Thread
Thread Starter
Forum
Replies
Last Post
For Sale: Silver Face Gauge Cluster - IN
fishy2k8
OLD - Interior, Exterior, Electrical, & Misc.
16
05-26-2012 10:31 PM
MugenCRX04
OLD - Interior, Exterior, Electrical, & Misc.
33
01-29-2010 09:03 PM


 That is sweet!
  That would look good in my truck with my in-dash monitor. PLEASE, let me know.


