
tool box lock mod

Thread Starter
|
Member

Joined: Jan 2010
Posts: 206
Likes: 0
From: PBG, FL
Ok so I have a new idea that is to connect a door lock actuator to the lock in my tool box that when I unlock my truck the tool box will be unlocked and when I lock it it will lock as well any tips questions and comments are welcomed also if ya'll like the idea then ill do an installation how to and upload pics so let me know

Thread Starter
|
Member
Joined: Jan 2010
Posts: 206
Likes: 0
From: PBG, FL
Well guys.............................................. ...........................It works like a charm the only thing i didnt Like about the installation is that i had to drill a small hole in my bed OUCH!!!!!!! i hate drilling into the body but i got paint on their so its good and not going to corrode I have it so that the key is the fail safe so if i put it to the locked position then the actuator will retract and ill be able to open the toolbox also i can lock it with the original lock if im going to be leaving for a long trip or anything like that i will load the pics when i get home sorry it took me so long to repost i completely forgot i even started this thread all in all it took me 4 hours to install but it will take ya'll half the time if u have the instructions ill post up i will list materials and tools needed This mod is ALOT EASIER THAN IT SOUNDS (oh and btw the reason i had to drill a hole in my bed is so that i could hide the wire so that no one could reach it or tamper with it
first you have to remove your door panel this is done by removing 2 screws in the door beneath the handle and one screw behind the handle that screw into the metal on the door under the panel
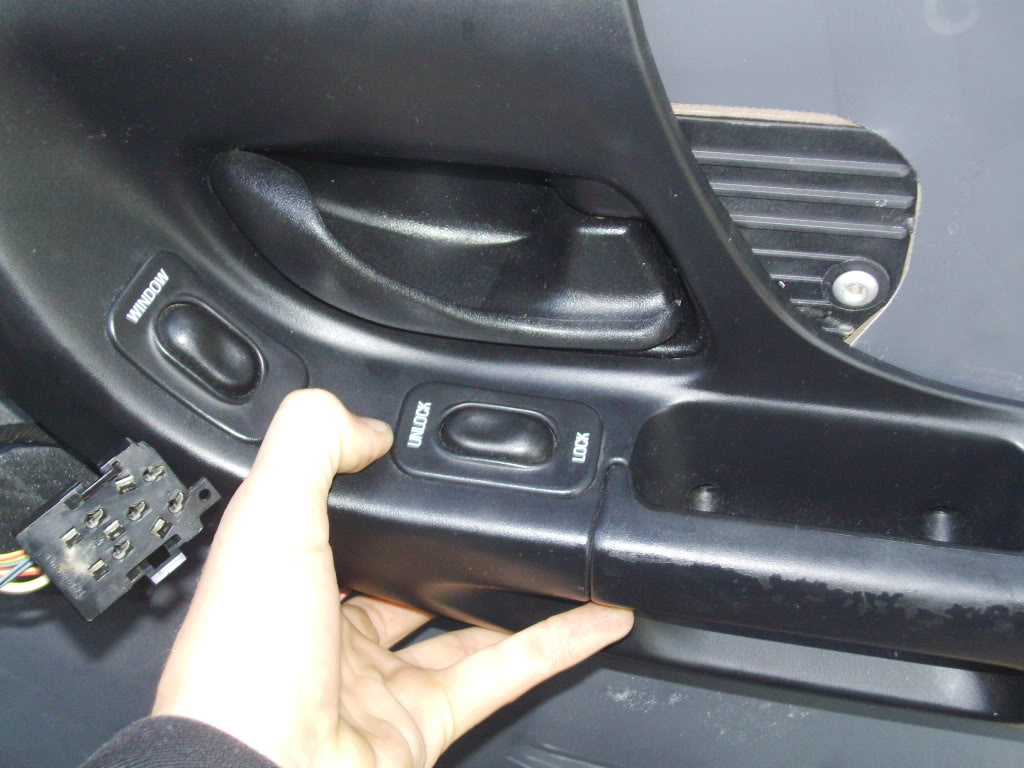
next remove the handle and the wiring harnesses that work your windows and door locks
next remove the door panel by pulling up on the panel and pulling away from the door it took a little bit of elbow grease also i found that having the door locked helps after you take off the panel place it in the bed or somewhere where it wolnt get damaged
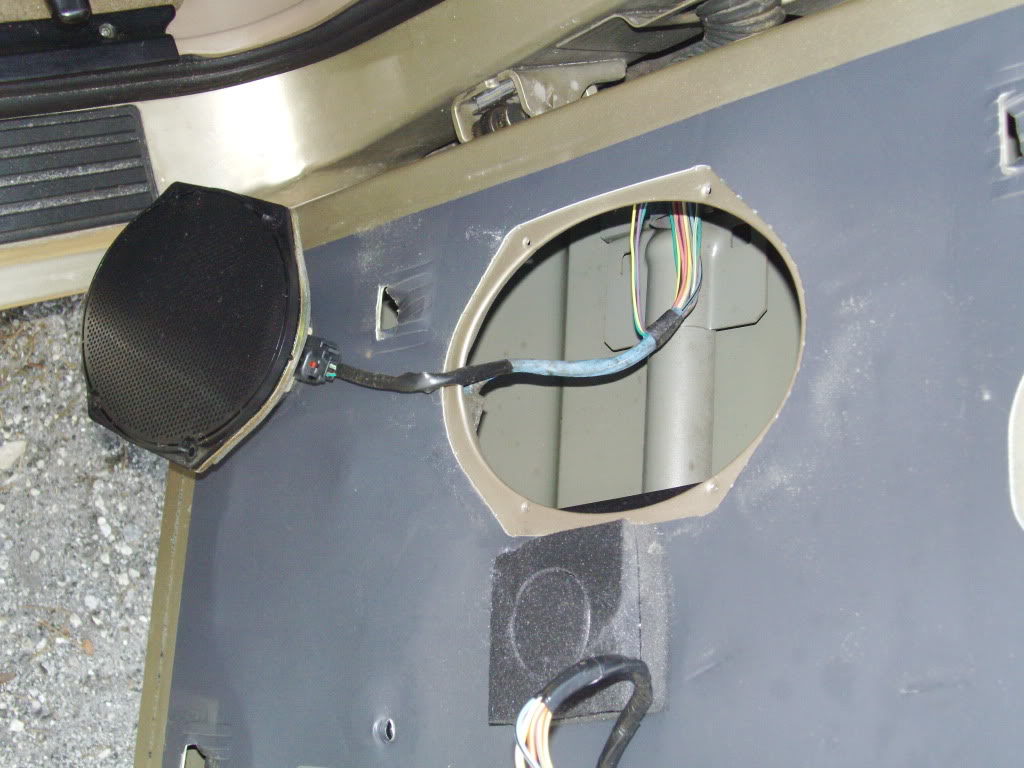
after the easy stuff is done remove the speaker from the door and unkooh the wiring harness once again put it in a safe place
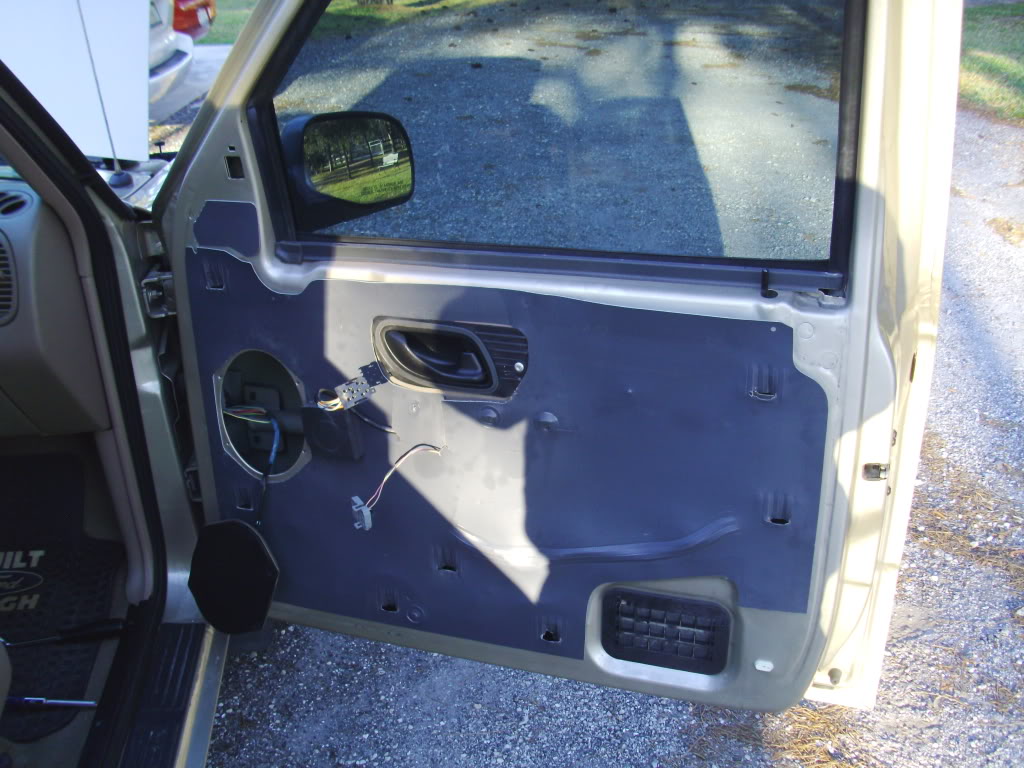
this is how the door should look after you finish those steps
Remove the panel that is on the right side of the passengers side foot well this is done by getting underneath the panel and pushing up it should just pop off on mine there were no fastners
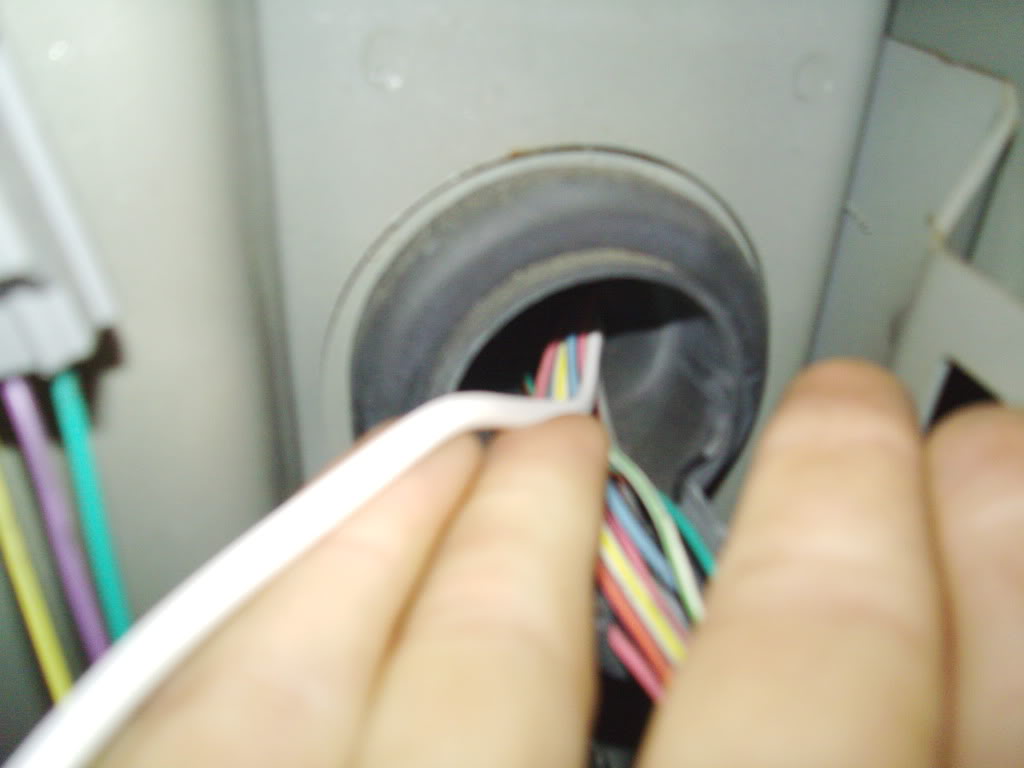
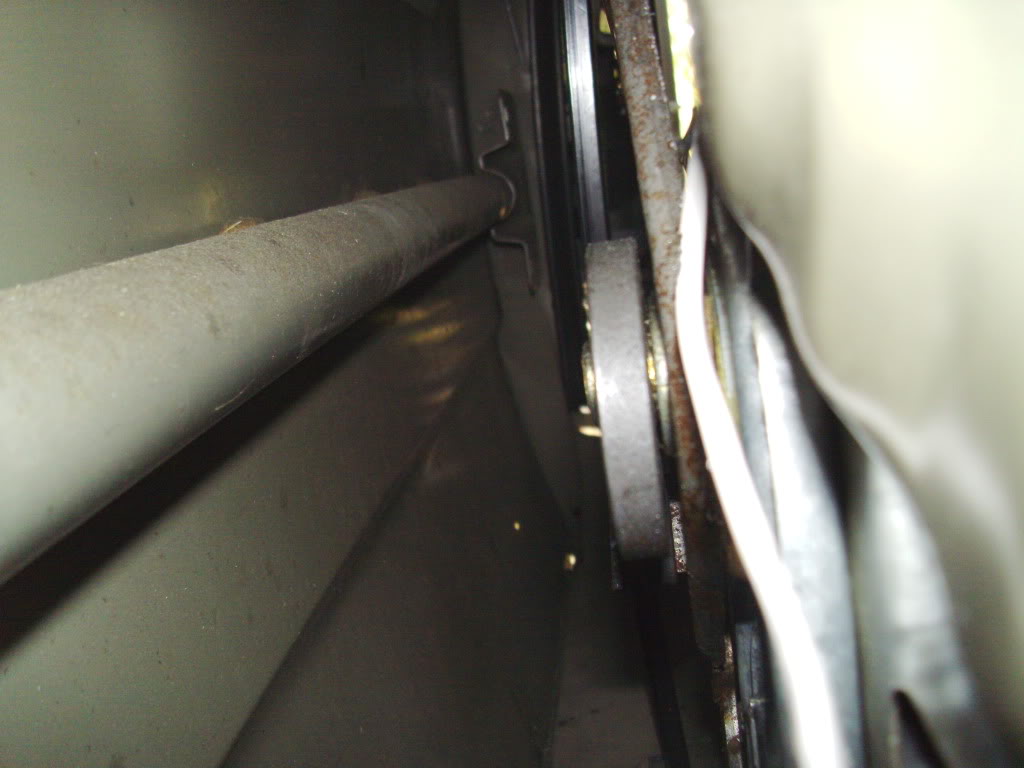
next you will have to run a length of wire from the inside of the door and through the gromett and into the cab the picture is how it looks when your viewing the gromett in the door from the hole where the speaker goes
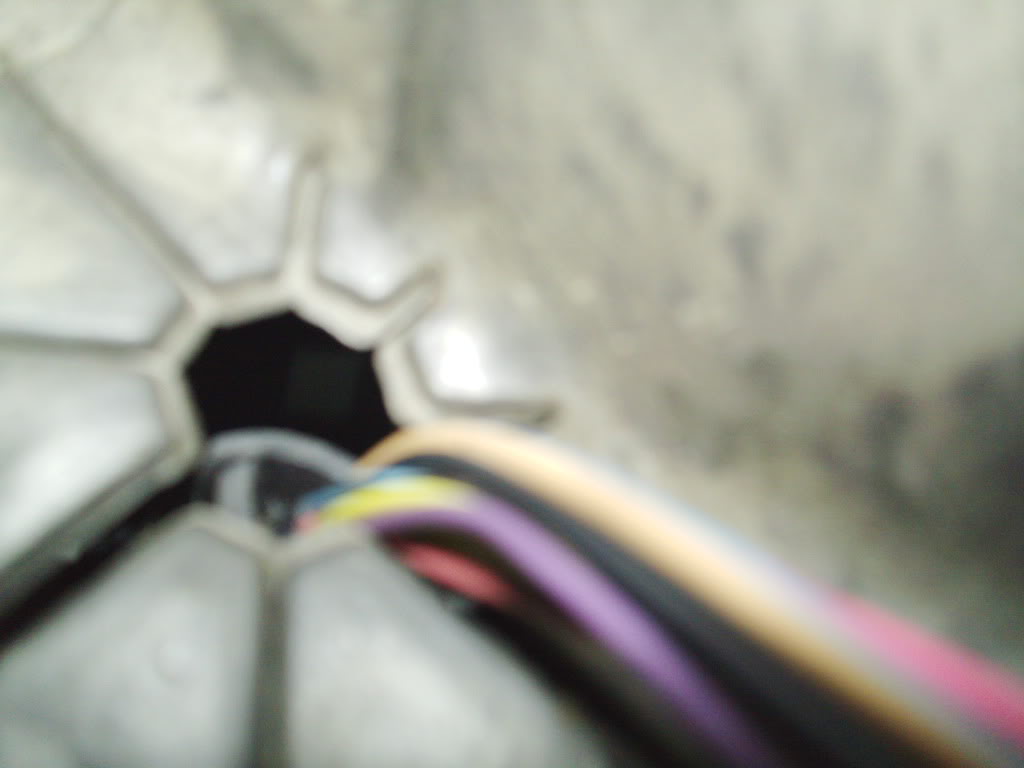
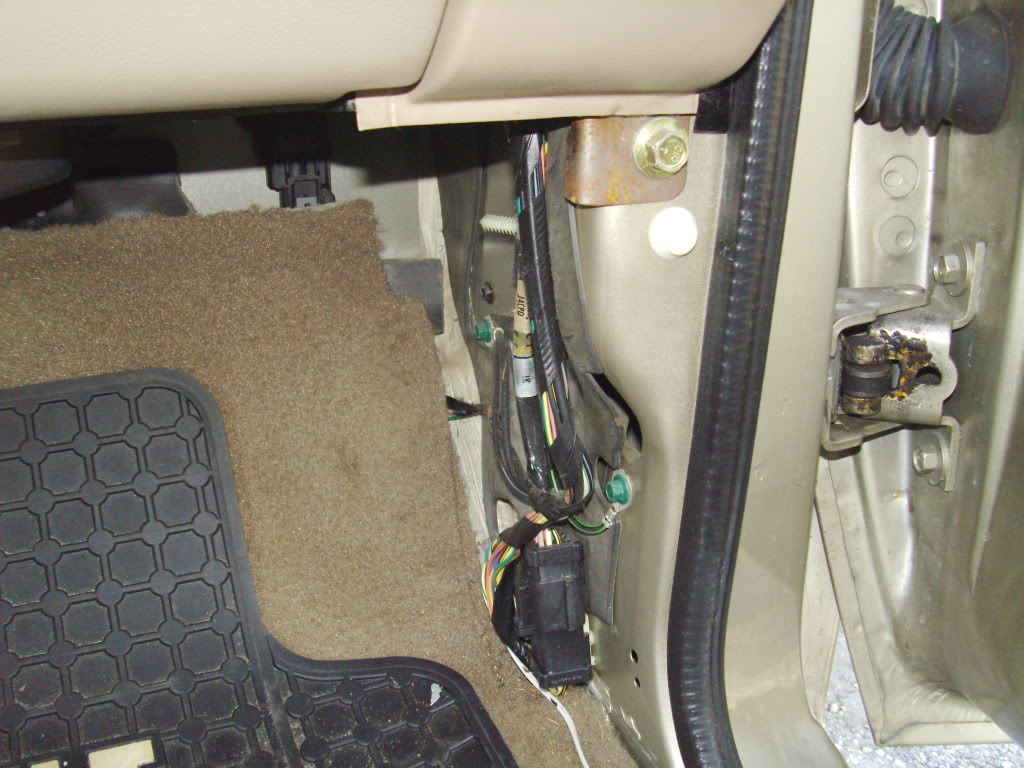
this is how the gromett looks from inside the cab you wil need to feed the wire through the gromett and into the cab its not very easy to do so good luck on that one
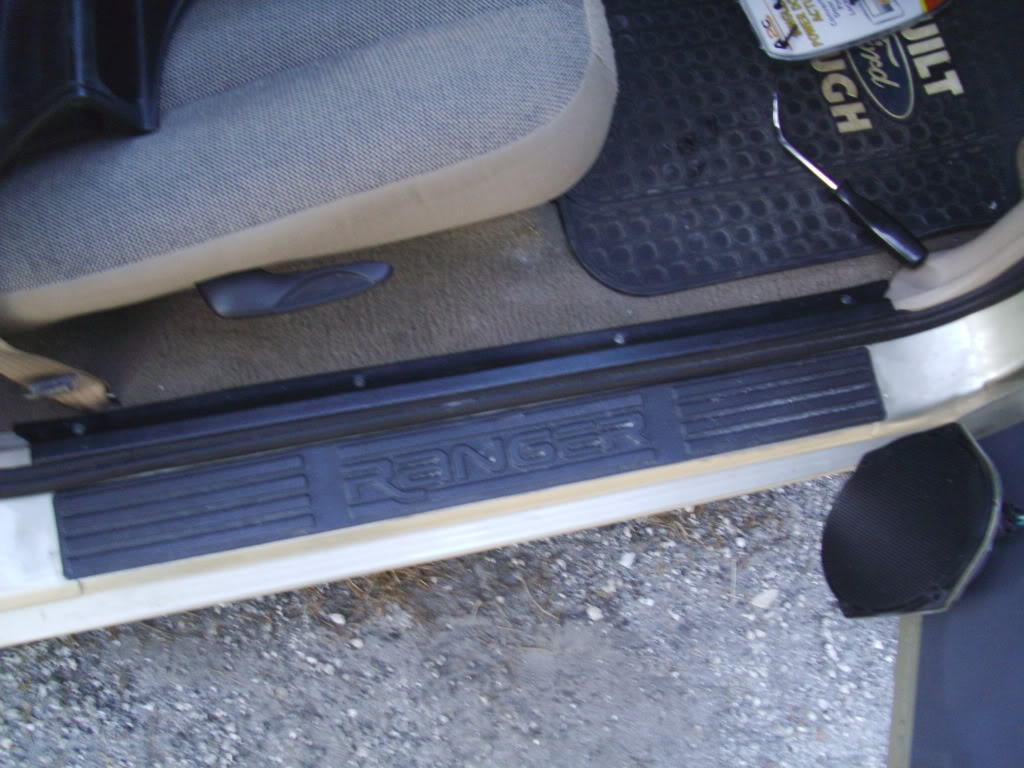
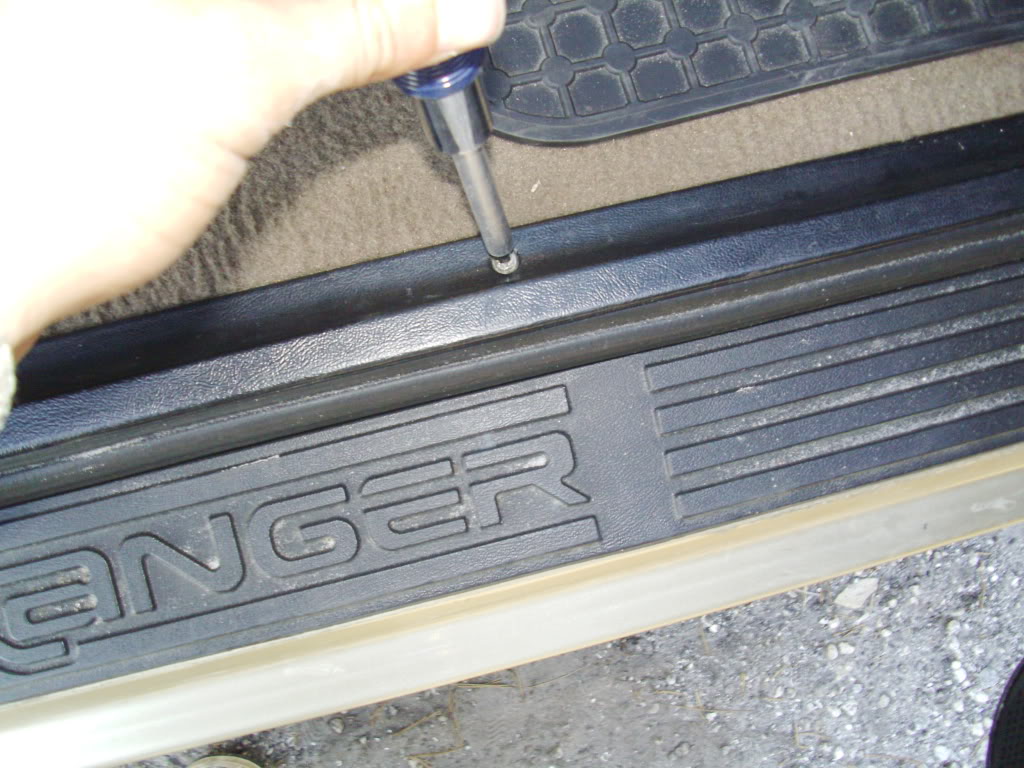
after that remove the piece that holds down the carpeting there were only four phillips head screws in it that held it down and it popped right up once removed. you will need to do this in order to hide the wire
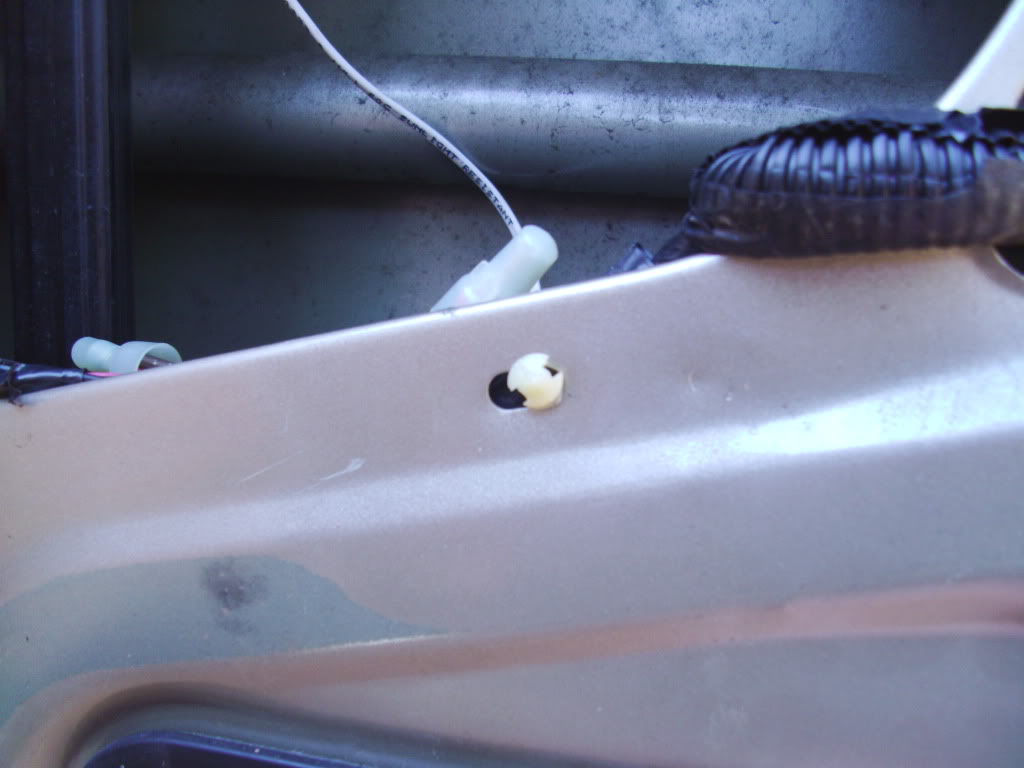
i forgot to take a picture of this but leave enough wire on the door side probably bout the length of the door then you will have to find the small rubber peace under the passenger side its like a plug that i use to run wires through just drill a small hole and feed the wire through but not big enough so that when your wheeling that water will come in (i will get pics of the plug but im sure you know what i mean when you look for it.)
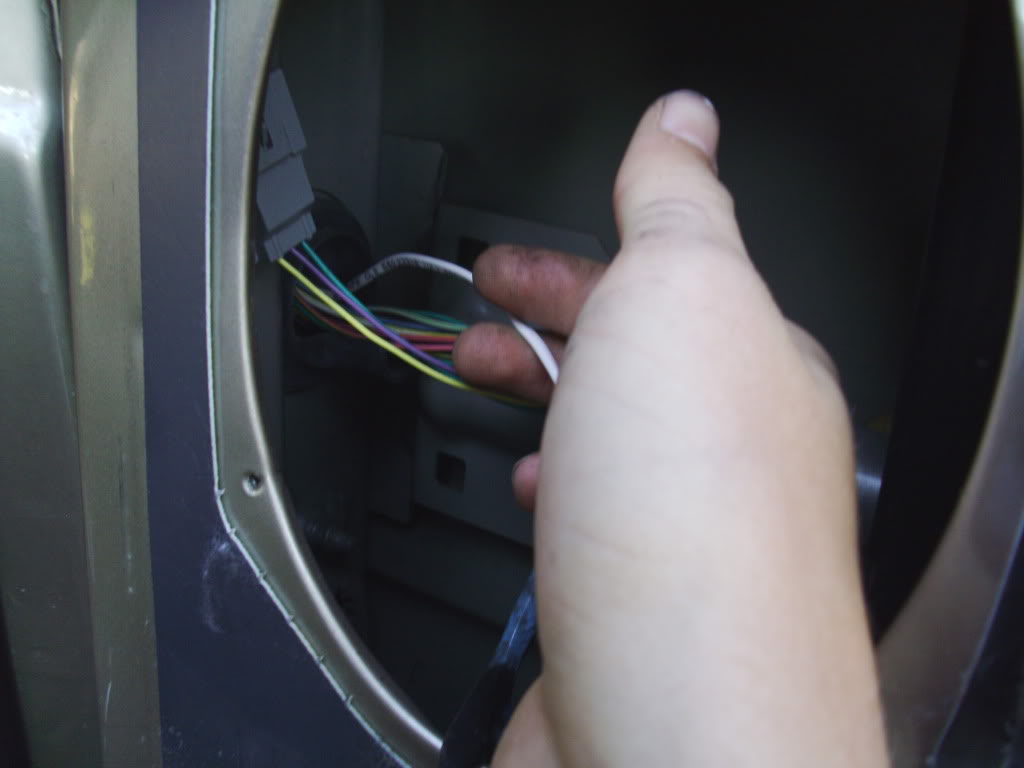
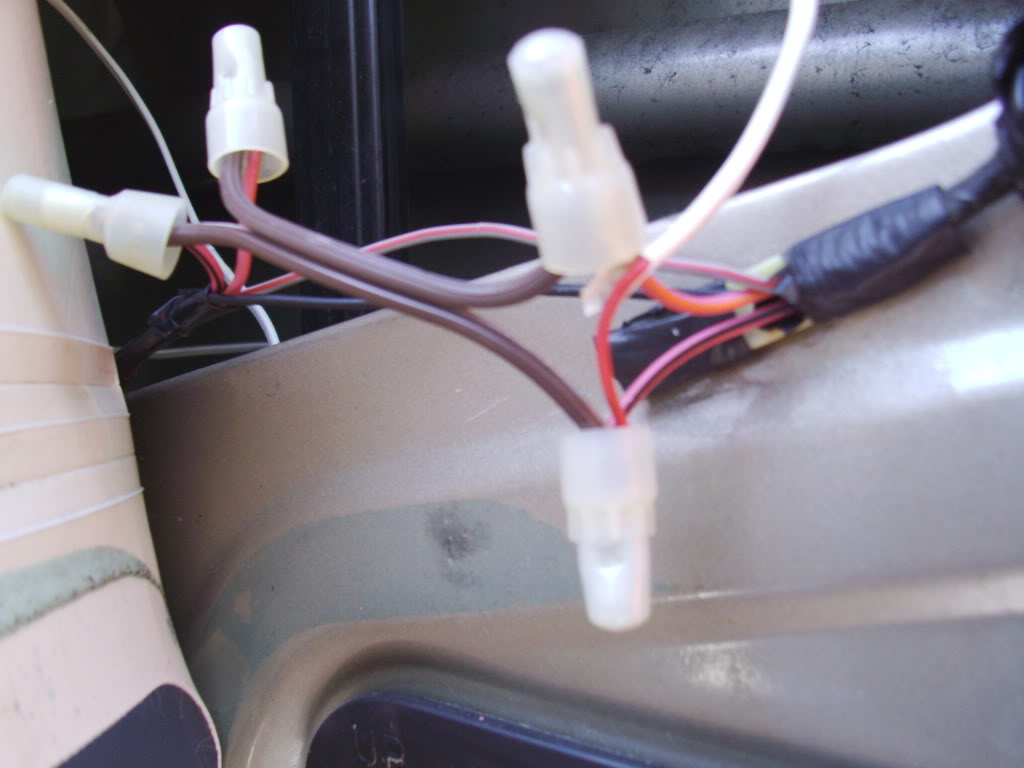
Next thing i did was wire up the door side first you will need to hide the wire in the door i did this by feeding it along the side of the door which face inside the cab but make sure the window will clear and not get caught up on the wire and not cut the wire .pick out the two red ones or pink i forget the color one will be solid and one will have a stripe
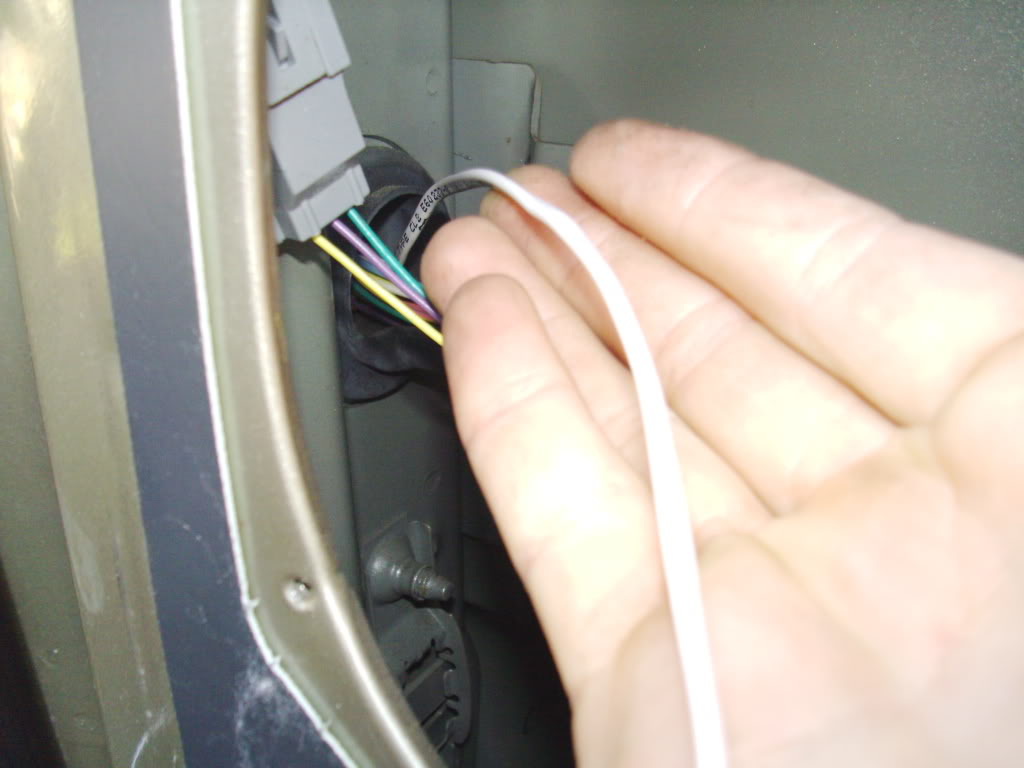
cut the two wires and attach your new wire to either pair like this
then make an extension so that no wires are to tight bu not to loose tie everything in and cap it all off.
next you should see like a push screw in which you should pull out and reverse so the wires are on the inside of the door
once all of that is done then check again your clearence reattatch the wiring harness so that you can roll down your widow and make sure that nothing gets caught or cut
next you wil have to run the wire to your tool box remember you will have to have to have fed the wire through the floor and out that plug then you can run the wire to your tool box this is the painful part but you will have to drill a hole through your bed in order to make the wire so no one can cut it and u'll be screwed after that run the wire into the toolbox and i also drilled a small hole for that too
next mounth the actuator
first you have to remove your door panel this is done by removing 2 screws in the door beneath the handle and one screw behind the handle that screw into the metal on the door under the panel
next remove the handle and the wiring harnesses that work your windows and door locks
next remove the door panel by pulling up on the panel and pulling away from the door it took a little bit of elbow grease also i found that having the door locked helps after you take off the panel place it in the bed or somewhere where it wolnt get damaged
after the easy stuff is done remove the speaker from the door and unkooh the wiring harness once again put it in a safe place
this is how the door should look after you finish those steps
Remove the panel that is on the right side of the passengers side foot well this is done by getting underneath the panel and pushing up it should just pop off on mine there were no fastners
next you will have to run a length of wire from the inside of the door and through the gromett and into the cab the picture is how it looks when your viewing the gromett in the door from the hole where the speaker goes
this is how the gromett looks from inside the cab you wil need to feed the wire through the gromett and into the cab its not very easy to do so good luck on that one
after that remove the piece that holds down the carpeting there were only four phillips head screws in it that held it down and it popped right up once removed. you will need to do this in order to hide the wire
i forgot to take a picture of this but leave enough wire on the door side probably bout the length of the door then you will have to find the small rubber peace under the passenger side its like a plug that i use to run wires through just drill a small hole and feed the wire through but not big enough so that when your wheeling that water will come in (i will get pics of the plug but im sure you know what i mean when you look for it.)
Next thing i did was wire up the door side first you will need to hide the wire in the door i did this by feeding it along the side of the door which face inside the cab but make sure the window will clear and not get caught up on the wire and not cut the wire .pick out the two red ones or pink i forget the color one will be solid and one will have a stripe
cut the two wires and attach your new wire to either pair like this
then make an extension so that no wires are to tight bu not to loose tie everything in and cap it all off.
next you should see like a push screw in which you should pull out and reverse so the wires are on the inside of the door
once all of that is done then check again your clearence reattatch the wiring harness so that you can roll down your widow and make sure that nothing gets caught or cut
next you wil have to run the wire to your tool box remember you will have to have to have fed the wire through the floor and out that plug then you can run the wire to your tool box this is the painful part but you will have to drill a hole through your bed in order to make the wire so no one can cut it and u'll be screwed after that run the wire into the toolbox and i also drilled a small hole for that too
next mounth the actuator
Last edited by OneTireFire; Mar 18, 2010 at 09:29 AM.
Thread Starter
|
Member
Joined: Jan 2010
Posts: 206
Likes: 0
From: PBG, FL
Well guys.............................................. ...........................It works like a charm the only thing i didnt Like about the installation is that i had to drill a small hole in my bed OUCH!!!!!!! i hate drilling into the body but i got paint on their so its good and not going to corrode I have it so that the key is the fail safe so if i put it to the locked position then the actuator will retract and ill be able to open the toolbox also i can lock it with the original lock if im going to be leaving for a long trip or anything like that i will load the pics when i get home sorry it took me so long to repost i completely forgot i even started this thread all in all it took me 4 hours to install but it will take ya'll half the time if u have the instructions ill post up i will list materials and tools needed This mod is ALOT EASIER THAN IT SOUNDS (oh and btw the reason i had to drill a hole in my bed is so that i could hide the wire so that no one could reach it or tamper with it

first you have to remove your door panel this is done by removing 2 screws in the door beneath the handle and one screw behind the handle that screw into the metal on the door under the panel


next remove the handle and the wiring harnesses that work your windows and door locks

next remove the door panel by pulling up on the panel and pulling away from the door it took a little bit of elbow grease also i found that having the door locked helps after you take off the panel place it in the bed or somewhere where it wolnt get damaged

after the easy stuff is done remove the speaker from the door and unkooh the wiring harness once again put it in a safe place
this is how the door should look after you finish those steps

Remove the panel that is on the right side of the passengers side foot well this is done by getting underneath the panel and pushing up it should just pop off on mine there were no fastners


next you will have to run a length of wire from the inside of the door and through the gromett and into the cab the picture is how it looks when your viewing the gromett in the door from the hole where the speaker goes

this is how the gromett looks from inside the cab you wil need to feed the wire through the gromett and into the cab its not very easy to do so good luck on that one


after that remove the piece that holds down the carpeting there were only four phillips head screws in it that held it down and it popped right up once removed. you will need to do this in order to hide the wire
i forgot to take a picture of this but leave enough wire on the door side probably bout the length of the door then you will have to find the small rubber peace under the passenger side its like a plug that i use to run wires through just drill a small hole and feed the wire through but not big enough so that when your wheeling that water will come in (i will get pics of the plug but im sure you know what i mean when you look for it.)

Next thing i did was wire up the door side first you will need to hide the wire in the door i did this by feeding it along the side of the door which face inside the cab but make sure the window will clear and not get caught up on the wire and not cut the wire .pick out the two red ones or pink i forget the color one will be solid and one will have a stripe
cut the two wires and attach your new wire to either pair like this

then make an extension so that no wires are to tight bu not to loose tie everything in and cap it all off.

next you should see like a push screw in which you should pull out and reverse so the wires are on the inside of the door
once all of that is done then check again your clearence reattatch the wiring harness so that you can roll down your widow and make sure that nothing gets caught or cut
next you wil have to run the wire to your tool box remember you will have to have to have fed the wire through the floor and out that plug then you can run the wire to your tool box this is the painful part but you will have to drill a hole through your bed in order to make the wire so no one can cut it and u'll be screwed after that run the wire into the toolbox and i also drilled a small hole for that too

next mounth the actuator
first you have to remove your door panel this is done by removing 2 screws in the door beneath the handle and one screw behind the handle that screw into the metal on the door under the panel
next remove the handle and the wiring harnesses that work your windows and door locks
next remove the door panel by pulling up on the panel and pulling away from the door it took a little bit of elbow grease also i found that having the door locked helps after you take off the panel place it in the bed or somewhere where it wolnt get damaged
after the easy stuff is done remove the speaker from the door and unkooh the wiring harness once again put it in a safe place
this is how the door should look after you finish those steps
Remove the panel that is on the right side of the passengers side foot well this is done by getting underneath the panel and pushing up it should just pop off on mine there were no fastners
next you will have to run a length of wire from the inside of the door and through the gromett and into the cab the picture is how it looks when your viewing the gromett in the door from the hole where the speaker goes
this is how the gromett looks from inside the cab you wil need to feed the wire through the gromett and into the cab its not very easy to do so good luck on that one
after that remove the piece that holds down the carpeting there were only four phillips head screws in it that held it down and it popped right up once removed. you will need to do this in order to hide the wire
i forgot to take a picture of this but leave enough wire on the door side probably bout the length of the door then you will have to find the small rubber peace under the passenger side its like a plug that i use to run wires through just drill a small hole and feed the wire through but not big enough so that when your wheeling that water will come in (i will get pics of the plug but im sure you know what i mean when you look for it.)
Next thing i did was wire up the door side first you will need to hide the wire in the door i did this by feeding it along the side of the door which face inside the cab but make sure the window will clear and not get caught up on the wire and not cut the wire .pick out the two red ones or pink i forget the color one will be solid and one will have a stripe
cut the two wires and attach your new wire to either pair like this
then make an extension so that no wires are to tight bu not to loose tie everything in and cap it all off.
next you should see like a push screw in which you should pull out and reverse so the wires are on the inside of the door
once all of that is done then check again your clearence reattatch the wiring harness so that you can roll down your widow and make sure that nothing gets caught or cut
next you wil have to run the wire to your tool box remember you will have to have to have fed the wire through the floor and out that plug then you can run the wire to your tool box this is the painful part but you will have to drill a hole through your bed in order to make the wire so no one can cut it and u'll be screwed after that run the wire into the toolbox and i also drilled a small hole for that too
next mounth the actuator
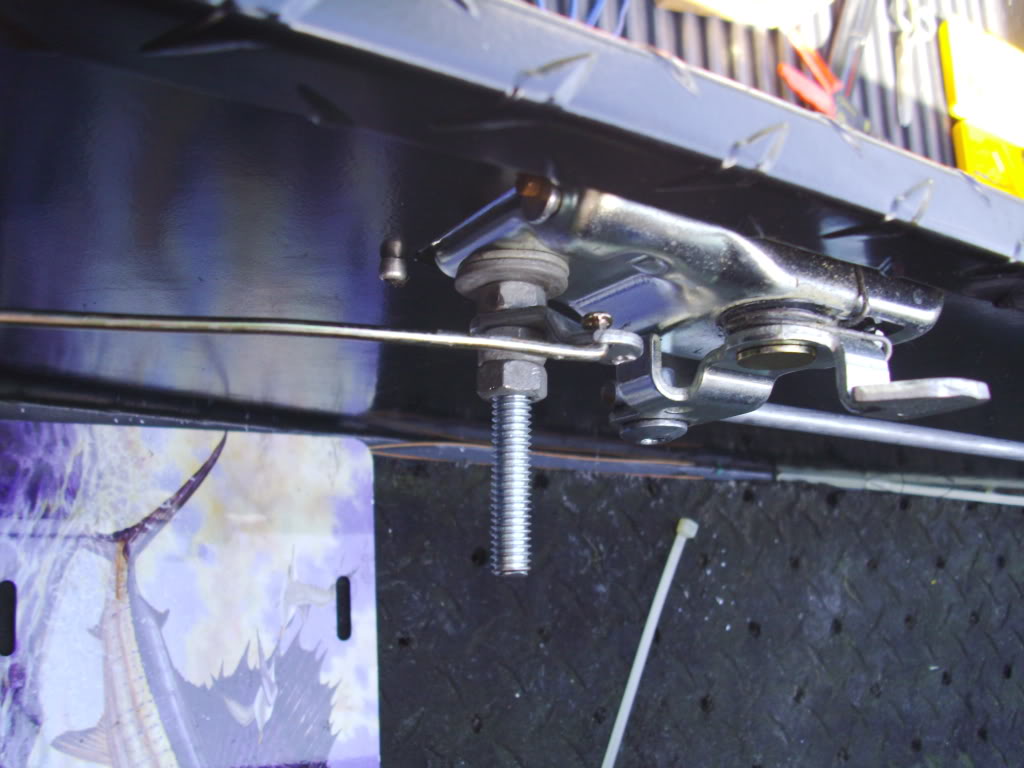
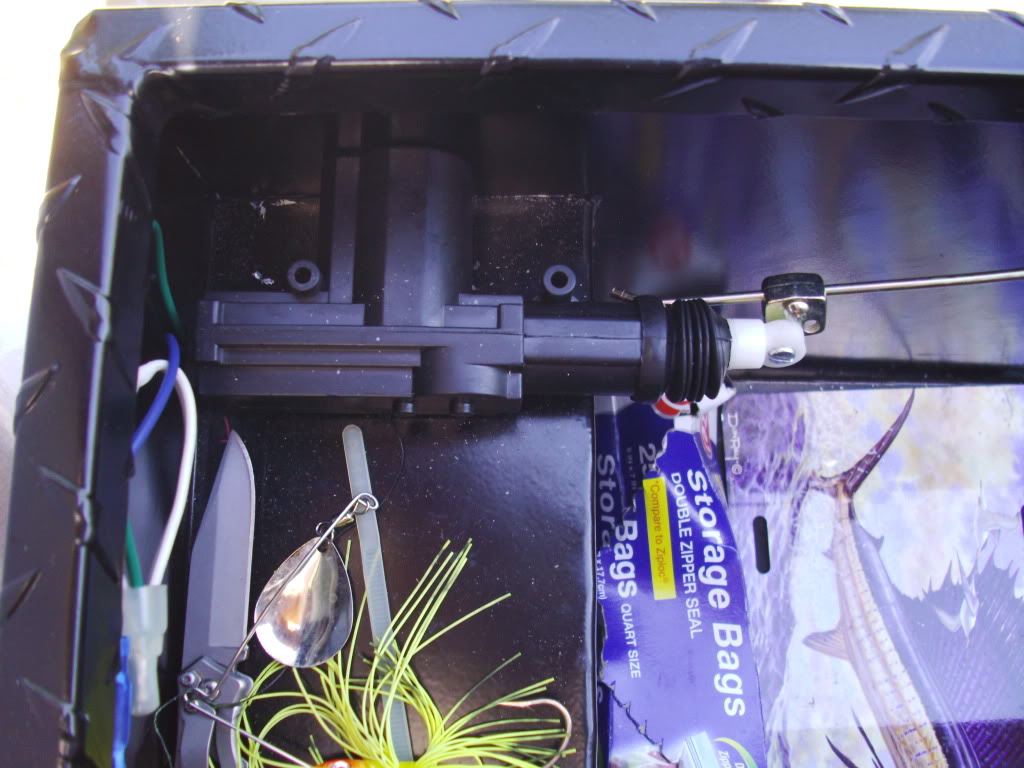
the locking mechanism is a carriage bolt that we drilled a hole for in the non key side of the tool box we drilled the hole slightly samller than the than the square shank of the bolt when i tightened the nut it firmly anchored to the box we then added the latch and two more nuts and tightened them against each other and not so much against the latch so the latch could swing freel but stay aligned
I know the description isnt the best but if anyone has any questions or comments then plz list them and ill take more photos[/QUOTE]

Thread
Thread Starter
Forum
Replies
Last Post
Want to Trade: Back Rack Tool Box Mounts for Mounts w/o Tool Box
Scrambler82
OLD - Interior, Exterior, Electrical, & Misc.
7
May 7, 2010 05:27 PM


