Project Logs For detailed builds specific to the Ford Ranger, one thread per vehicle please.

03 FX4 Level II SL 4" lift ready to begin

Thread Tools
 
Search this Thread
 
Old Nov 25, 2009
  #26  
zabeard's Avatar
who?
iTrader: (8)
Joined: Nov 2004
Posts: 26,044
Likes: 10
From: IN
cant wait to see it finished! its gonna look great.
 
Reply
Old Nov 25, 2009
  #27  
KLC's Avatar
KLC
RF Veteran
iTrader: (29)
Joined: Nov 2007
Posts: 13,115
Likes: 5
From: New Mexico
You'll like it! Can't wait to see it.
 
Reply
Old Nov 25, 2009
  #28  
squrll's Avatar
Thread Starter
|
Member
Joined: Nov 2009
Posts: 191
Likes: 0
From: fairfax va
yeah went from like 36" in the rear to 39 1/4" so that s about what I expected can't wait to get the new tires and wheels on herhope they will be here next week sometime
 
Reply
Old Nov 25, 2009
  #29  
squrll's Avatar
Thread Starter
|
Member
Joined: Nov 2009
Posts: 191
Likes: 0
From: fairfax va
I guess they are stacked on top of the factory blocks that the way they are supposed to be installed
I will more than likly get new spring at some point and time
 
Reply
Old Nov 25, 2009
  #30  
Downey's Avatar
RF Veteran
iTrader: (1)
Joined: Oct 2007
Posts: 8,470
Likes: 6
From: Muncy, PA
^^^ good to hear you are getting new springs in the near future i have seen stacked blocks turn bad
 
Reply
Old Nov 25, 2009
  #31  
Fx4wannabe01's Avatar
RF Veteran
iTrader: (23)
Joined: May 2005
Posts: 21,721
Likes: 17
From: Boring, Oregon
Stacked blocks is how superlift wants ya to do it. Tons of people havn't have any problems with it because they are cast blocks. I went the AAL and shackle route and it was perfect for 3" lift to level the truck out.


Anyway....only problem I see is those front crossmembers, you'll want the nut on the inside, facing eachother. Reason is you can't really check the torque on them with the lower control arms installed in the drop brackets. Or tighten them at all with the nut between the bracket and the LCA.

Good work...I like this thread.
 
Reply
Old Nov 26, 2009
  #32  
squrll's Avatar
Thread Starter
|
Member
Joined: Nov 2009
Posts: 191
Likes: 0
From: fairfax va
got the turkey in and had some free time

Well got the feast in and cooking and the wife let me go to the toy box and play until family showed up decided to re go over the rearend one more time made sure we had equal measurements on both sides changed routeing of vent line and secured it, basicaly loosened everything up and re did it from last night
 
Attached Thumbnails 03 FX4 Level II   SL 4" lift ready to begin-dscf1204.jpg   03 FX4 Level II   SL 4" lift ready to begin-dscf1207.jpg   03 FX4 Level II   SL 4" lift ready to begin-dscf1208.jpg  

Last edited by squrll; Nov 26, 2009 at 12:38 PM.

Reply
Old Nov 26, 2009
  #33  
95offroadx's Avatar
Member
Joined: Jan 2006
Posts: 454
Likes: 0
From: palmyra, pa
eww stacked blocks.. go to a junk yard and get some explorer leaf springs, they add 2-3" of lift and you wont have as bad axle hop/axle wrap
 
Reply
Old Nov 27, 2009
  #34  
squrll's Avatar
Thread Starter
|
Member
Joined: Nov 2009
Posts: 191
Likes: 0
From: fairfax va
more done tonight

Well worked all day came home ate some left over turkey ran to the store with Wife then out the garage
 
Attached Thumbnails 03 FX4 Level II   SL 4" lift ready to begin-dscf1215.jpg   03 FX4 Level II   SL 4" lift ready to begin-dscf1217.jpg   03 FX4 Level II   SL 4" lift ready to begin-dscf1218.jpg   03 FX4 Level II   SL 4" lift ready to begin-dscf1220.jpg   03 FX4 Level II   SL 4" lift ready to begin-dscf1221.jpg  

Reply
Old Nov 27, 2009
  #35  
KLC's Avatar
KLC
RF Veteran
iTrader: (29)
Joined: Nov 2007
Posts: 13,115
Likes: 5
From: New Mexico
Looks like it's coming along.
 
Reply
Old Nov 27, 2009
  #36  
squrll's Avatar
Thread Starter
|
Member
Joined: Nov 2009
Posts: 191
Likes: 0
From: fairfax va
got this far then

Sh** forgot to break nut for front axle loose put everything back together and loosened up both sides don't make that mistake when you all do yours then back to removeing the rest of this side will finish up the whole thing this weekend I think. Althought I will be cleaning and Painting as I reinstall that will consume sometime and really not in a big hurry
 
Attached Thumbnails 03 FX4 Level II   SL 4" lift ready to begin-dscf1221.jpg   03 FX4 Level II   SL 4" lift ready to begin-dscf1224.jpg   03 FX4 Level II   SL 4" lift ready to begin-dscf1228.jpg   03 FX4 Level II   SL 4" lift ready to begin-dscf1229.jpg   03 FX4 Level II   SL 4" lift ready to begin-dscf1231.jpg  

Reply
Old Nov 27, 2009
  #37  
Fx4wannabe01's Avatar
RF Veteran
iTrader: (23)
Joined: May 2005
Posts: 21,721
Likes: 17
From: Boring, Oregon
The way I do it is removing the entire knuckle, then removing the wheelbearing hub assy.

Coming along nicely
 
Reply
Old Nov 27, 2009
  #38  
KLC's Avatar
KLC
RF Veteran
iTrader: (29)
Joined: Nov 2007
Posts: 13,115
Likes: 5
From: New Mexico
Originally Posted by Fx4wannabe01
The way I do it is removing the entire knuckle, then removing the wheelbearing hub assy.
Same here.
 
Reply
Old Nov 28, 2009
  #39  
squrll's Avatar
Thread Starter
|
Member
Joined: Nov 2009
Posts: 191
Likes: 0
From: fairfax va
long day today

Well started bright and early today had a lot to do son was leaving to go back for more training and wife wanted me to run some errands but did get most of the kit installed
front end is just about done and will finish up Tor. bars in the morning,
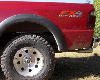
 
Attached Thumbnails 03 FX4 Level II   SL 4" lift ready to begin-dscf1232.jpg   03 FX4 Level II   SL 4" lift ready to begin-dscf1243.jpg   03 FX4 Level II   SL 4" lift ready to begin-dscf1268.jpg  
Reply
Old Nov 28, 2009
  #40  
effexfour's Avatar
Member
iTrader: (2)
Joined: Mar 2009
Posts: 866
Likes: 1
From: Edmonton, Alberta, Canada
Looks great! cant wait to see it done!
I'm Jealous,, haha mabey next year!
 
Reply
Old Nov 29, 2009
  #41  
squrll's Avatar
Thread Starter
|
Member
Joined: Nov 2009
Posts: 191
Likes: 0
From: fairfax va
Pitures of yesterday work

all right did not get to post most of these last night so thought I would through some on today
 
Attached Thumbnails 03 FX4 Level II   SL 4" lift ready to begin-dscf1232.jpg   03 FX4 Level II   SL 4" lift ready to begin-dscf1233.jpg   03 FX4 Level II   SL 4" lift ready to begin-dscf1234.jpg   03 FX4 Level II   SL 4" lift ready to begin-dscf1235.jpg   03 FX4 Level II   SL 4" lift ready to begin-dscf1239.jpg  

Reply
Old Nov 29, 2009
  #42  
squrll's Avatar
Thread Starter
|
Member
Joined: Nov 2009
Posts: 191
Likes: 0
From: fairfax va
and some more

I took lots of pics some did not come out as good as others here are some more
 
Attached Thumbnails 03 FX4 Level II   SL 4" lift ready to begin-dscf1242.jpg   03 FX4 Level II   SL 4" lift ready to begin-dscf1243.jpg   03 FX4 Level II   SL 4" lift ready to begin-dscf1251.jpg   03 FX4 Level II   SL 4" lift ready to begin-dscf1253.jpg   03 FX4 Level II   SL 4" lift ready to begin-dscf1254.jpg  

Reply
Old Nov 29, 2009
  #43  
squrll's Avatar
Thread Starter
|
Member
Joined: Nov 2009
Posts: 191
Likes: 0
From: fairfax va
and a few more

Then I am going out to finish it up garage should be warmed up by now :)
got to love have heat in the garage hope to have some finished pics up this afternoon
 
Attached Thumbnails 03 FX4 Level II   SL 4" lift ready to begin-dscf1255.jpg   03 FX4 Level II   SL 4" lift ready to begin-dscf1257.jpg   03 FX4 Level II   SL 4" lift ready to begin-dscf1261.jpg   03 FX4 Level II   SL 4" lift ready to begin-dscf1269.jpg   03 FX4 Level II   SL 4" lift ready to begin-dscf1258.jpg  

Reply
Old Nov 29, 2009
  #44  
RangerNDog's Avatar
Member
iTrader: (10)
Joined: Aug 2008
Posts: 1,958
Likes: 2
From: Harrisonburg, VA
Can't wait too see some finished pics.
 
Reply
Old Nov 29, 2009
  #45  
Fx4wannabe01's Avatar
RF Veteran
iTrader: (23)
Joined: May 2005
Posts: 21,721
Likes: 17
From: Boring, Oregon
Nice!! Seeing all these little pieces like bump stop drops, brake line extensions....is all making wish I went new so I could have all the little bits and pieces! lol.

You're making me wish I had a front factory skid. Thanks for that. lol!
 
Reply
Old Nov 29, 2009
  #46  
squrll's Avatar
Thread Starter
|
Member
Joined: Nov 2009
Posts: 191
Likes: 0
From: fairfax va
done and cleaned up

ok preety much done and back together washed off all the finger prints and took a few pictures here is one to give a idea will try to get into old postions for some before and after photos now just need some new shoes wrapped in some BFG km2's

 
Attached Thumbnails 03 FX4 Level II   SL 4" lift ready to begin-dscf1280.jpg  
Reply
Old Nov 29, 2009
  #47  
squrll's Avatar
Thread Starter
|
Member
Joined: Nov 2009
Posts: 191
Likes: 0
From: fairfax va
some before and after lift

The 1st picture is the before lift picture
the second is after lift picture tried to get
then into the same location for reference
 
Attached Thumbnails 03 FX4 Level II   SL 4" lift ready to begin-picture-2.jpg   03 FX4 Level II   SL 4" lift ready to begin-dscf1289.jpg  
Reply
Old Nov 29, 2009
  #48  
squrll's Avatar
Thread Starter
|
Member
Joined: Nov 2009
Posts: 191
Likes: 0
From: fairfax va
Coke and a Smile

Front almost two cans of Coke
Rear not quite as much but close
enough

Some other views
 
Attached Thumbnails 03 FX4 Level II   SL 4" lift ready to begin-dscf1287.jpg   03 FX4 Level II   SL 4" lift ready to begin-dscf1286.jpg   03 FX4 Level II   SL 4" lift ready to begin-dscf1290.jpg   03 FX4 Level II   SL 4" lift ready to begin-dscf1291.jpg  
Reply
Old Nov 29, 2009
  #49  
rangerboy101's Avatar
RF Veteran
iTrader: (5)
Joined: Aug 2007
Posts: 8,187
Likes: 3
From: Winchester, Va
Looks great! Now go get some 33's!
 
Reply
Old Nov 29, 2009
  #50  
MOTOunplugged's Avatar
Member
iTrader: (1)
Joined: Mar 2008
Posts: 759
Likes: 1
From: Covington, Georgia
throw on a body lift and 35's!
 
Reply


All times are GMT -6. The time now is 03:45 PM.