Project Budget Buster
#226
 08-26-2013


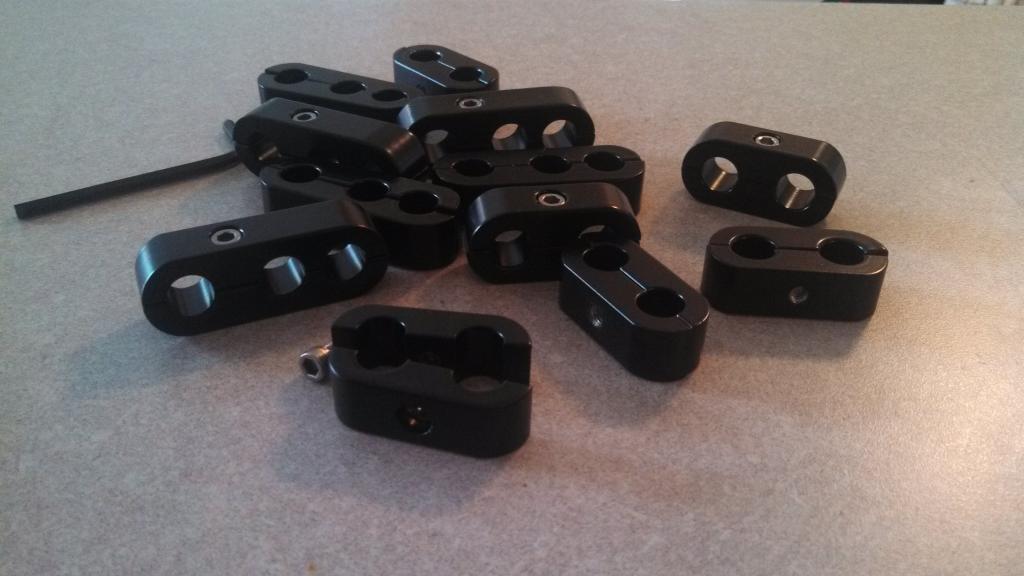
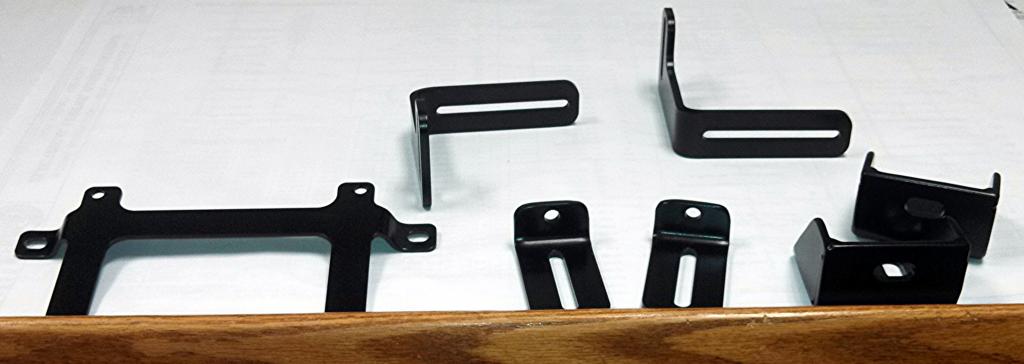
Well a few weeks ago I picked up my bumper brackets, light brackets & my spark plug wire separators from the powdercoater.
Everything is my nice satin black color (20% gloss).
All of these wire separators used to be the standard bright billet aluminum (DUI Billet Aluminum Wire Loom) - but I wasn't having that! lol
I figured since I needed all the brackets powdercoated anyways, I might as well get around to finally getting the separators coated & installed at the same time.
#227
08-26-2013
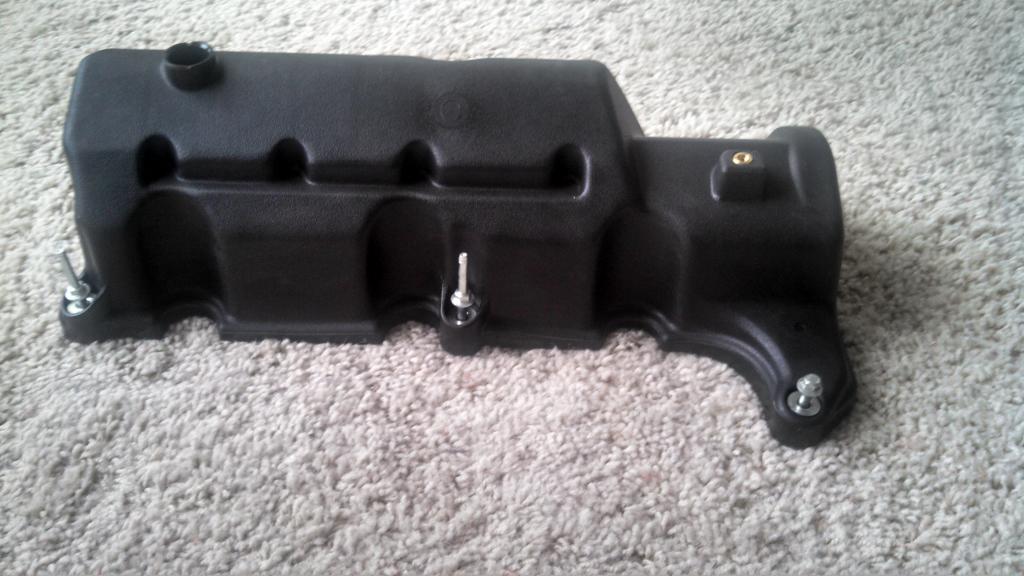
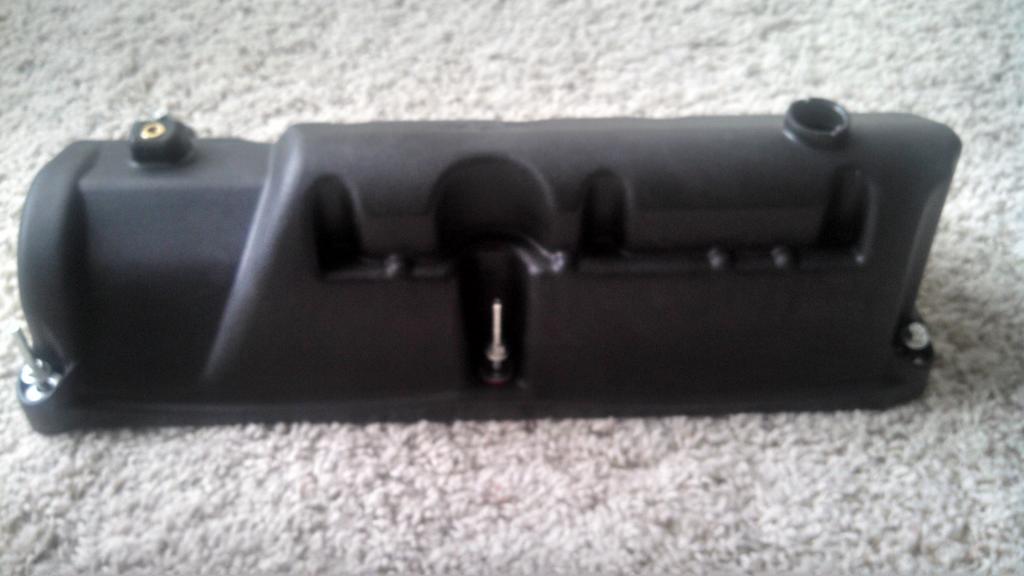
Although it's related to the supercharger install - I purchased some 2010 4.0 Mustang valve covers in an effort to move the oil fill cap to the drivers side - allowing for a 'direct shot' to the throttle body with my intake.
At the time it was only a punt as to whether they would even work or not - but I found out Saturday that they do.
They only needed some rather minor modifications to the PCV valve & crankcase ventilation system.
2010 Mustang 4.0 SOHC:
Part #7H2Z-6582-A = Valve Cover - Driver Side
Part #7H2Z-6582-B = Valve Cover - Passenger Side
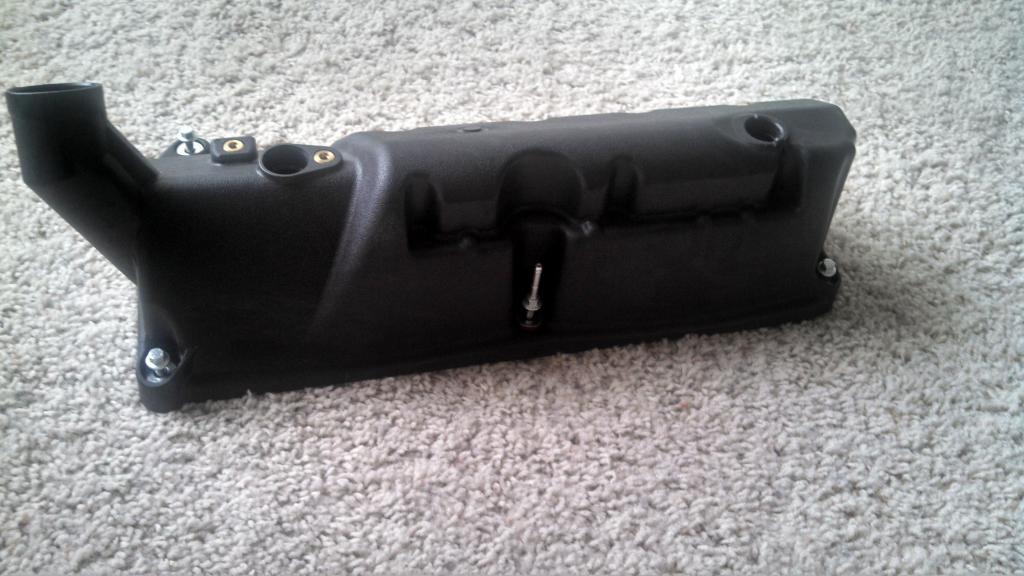
#228
08-26-2013
The other week I got a little 'bored' & I found out that you can swap the 2004-2006 style steering wheel onto my 2003, I figured why not. It was something I haven't done yet! :D
I absolutely despised those damn cruise 'pods' on my 2003 wheel.
Just in case some people are part number type guys (like me). Here are the official Ford part numbers for some of the swap components:
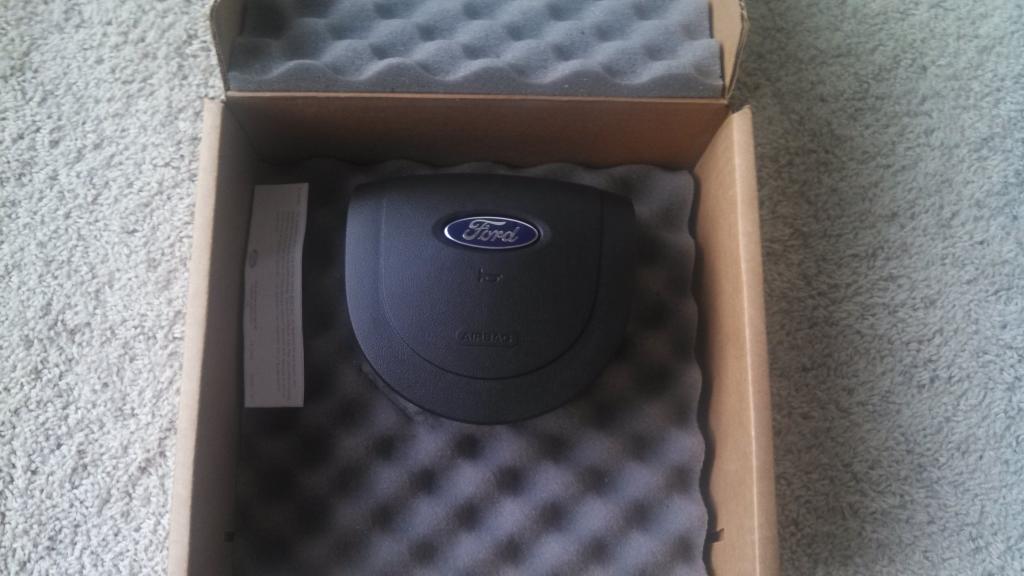
2004-2006 OEM airbag setup: 4L5Z-10043B13-AAA
2004-2006 Steering wheel complete w/ cruise buttons (Upgraded Black Leather): 6L5Z-3600-AA
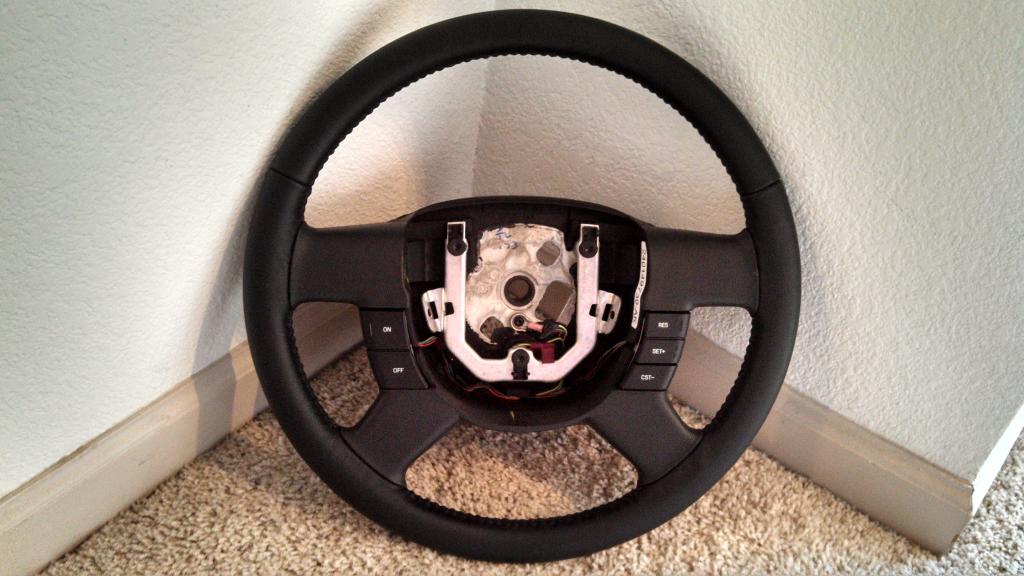
I absolutely despised those damn cruise 'pods' on my 2003 wheel.
Just in case some people are part number type guys (like me). Here are the official Ford part numbers for some of the swap components:
2004-2006 OEM airbag setup: 4L5Z-10043B13-AAA
2004-2006 Steering wheel complete w/ cruise buttons (Upgraded Black Leather): 6L5Z-3600-AA

#231
08-27-2013
#232
08-27-2013
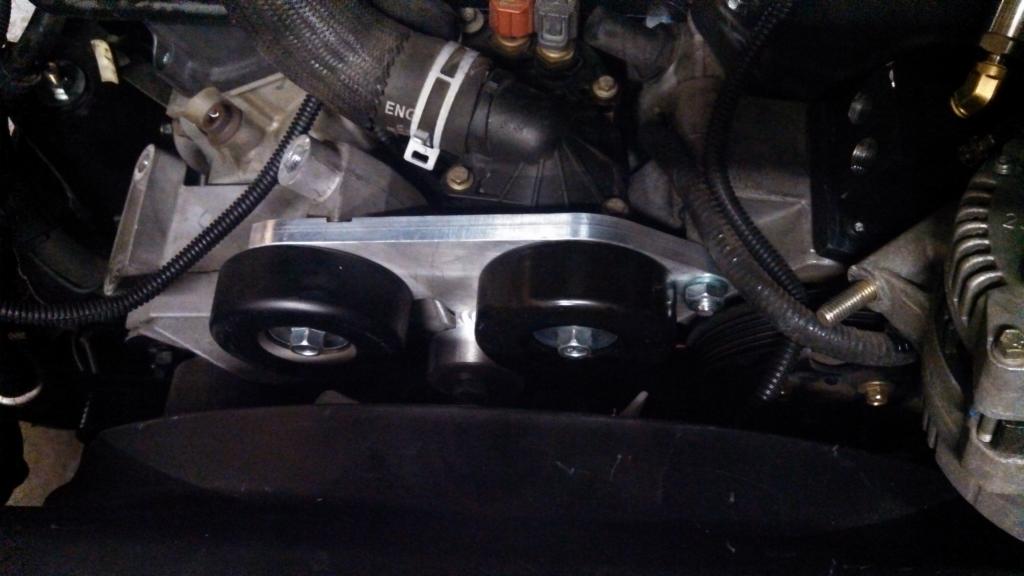
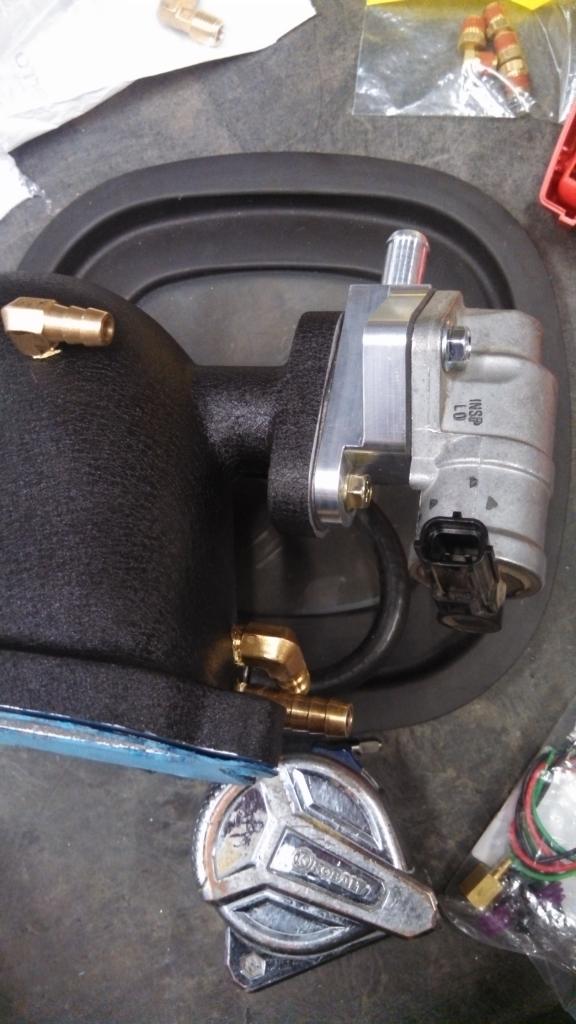
Here are some of the details as to how I mounted my idle air control valve.
Unlike the factory throttle body housing, my 75mm Accufab throttle body doesn't have provisions for the factory IAC mounting setup.
However, my 2003 doesn't have an EGR system, so I was able to find a nice machined aluminum IAC relocation system that actually uses the former EGR port on the M90 supercharger intake (IAC Relocation - Cobra Engineering)
I was going to have to block-off the EGR port anyway, so I figured I might as well use it for the new location of the IAC. Besides rewiring the factory connection, all I have to do is route a line from the intake tube (pre-throttle body) to the port on the IAC adapter & it should work like the factory setup.
#233
08-27-2013

#234
08-27-2013
Nah...Some of those pictures make it look further along than it really was.
A decent list of general 'housekeeping' type items still need to be finished.
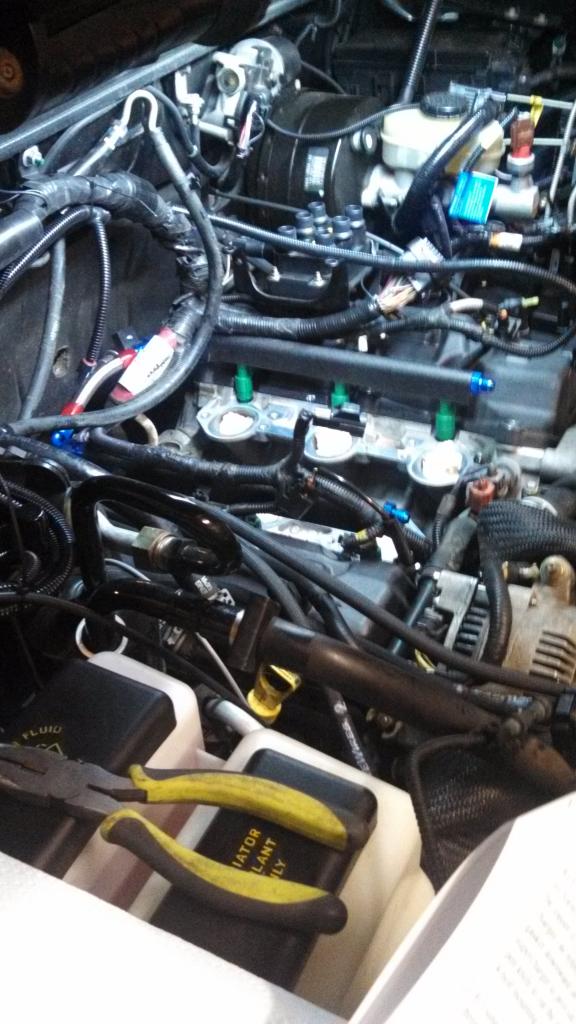
Working on the 'custom' mounting brackets for the throttle & cruise setup. I also need to make one for the miscellaneous items that were secured by the valve covers.
I've also grabbed the couple AN fitting adapters this morning that were stopping the entire fuel side from being wrapped up.
Then I still have to deal with the intake system itself & all the vacuum lines that attached to it.
Still have to mount the nozzle in the air intake & route the tubing for the water/methanol injection system.
Also have random wiring I need to modify/cleanup.
I do have my handheld tuner & laptop here with me - so I'm hopeful that tonight I'll be able to at least fire it up - worst case it will be in the morning tomorrow.
If I was a betting man - I would take 'the over' & assume the 1st key turn will be tomorrow.
A decent list of general 'housekeeping' type items still need to be finished.
Working on the 'custom' mounting brackets for the throttle & cruise setup. I also need to make one for the miscellaneous items that were secured by the valve covers.
I've also grabbed the couple AN fitting adapters this morning that were stopping the entire fuel side from being wrapped up.
Then I still have to deal with the intake system itself & all the vacuum lines that attached to it.
Still have to mount the nozzle in the air intake & route the tubing for the water/methanol injection system.
Also have random wiring I need to modify/cleanup.
I do have my handheld tuner & laptop here with me - so I'm hopeful that tonight I'll be able to at least fire it up - worst case it will be in the morning tomorrow.
If I was a betting man - I would take 'the over' & assume the 1st key turn will be tomorrow.
Last edited by logan03CO; 08-27-2013 at 10:58 AM.

#236
08-27-2013
Thanks man!
As far an numbers go, I'm not really looking for a 'razors edge' type increase or anything given the fact I'm double lifted & running 35's.
It was an interesting learning experience no matter what. Plus, it also confirms that I'm addicted to it!
My tuner is anticipating a drivetrain loss as high as 33%-44% due to my setup & tires. But no matter what - it will be a healthy increase over what it's got now!
Most people with a supercharger state they fall right about 210-225hp to the wheels for people with a 'normal' tire setup - meaning approximately 260-270ish @ the crank (assuming a 20% drivetrain loss).
After a quick evaluation of my setup, my tuner is thinking I will land right about 300-320hp at the crank (depending on final boost levels since I'm at 5,000' above sea level). Then I'll take an ***-whooping due to my tires when it comes to the wheel horsepower number. LOL
#237
08-27-2013
#238
08-27-2013
Yeah, feel free to blame me - I can take it!

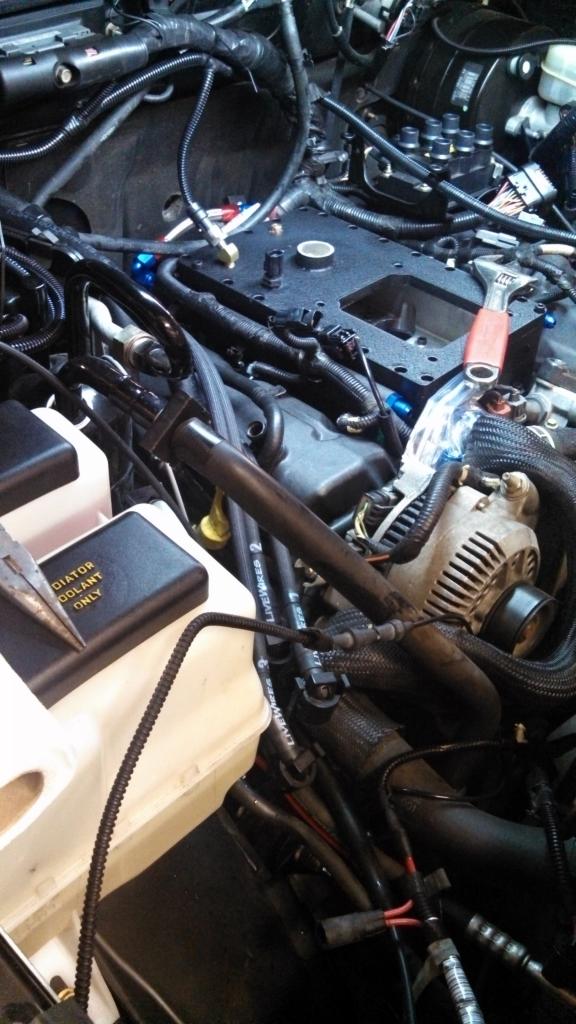
Tonight's Update:
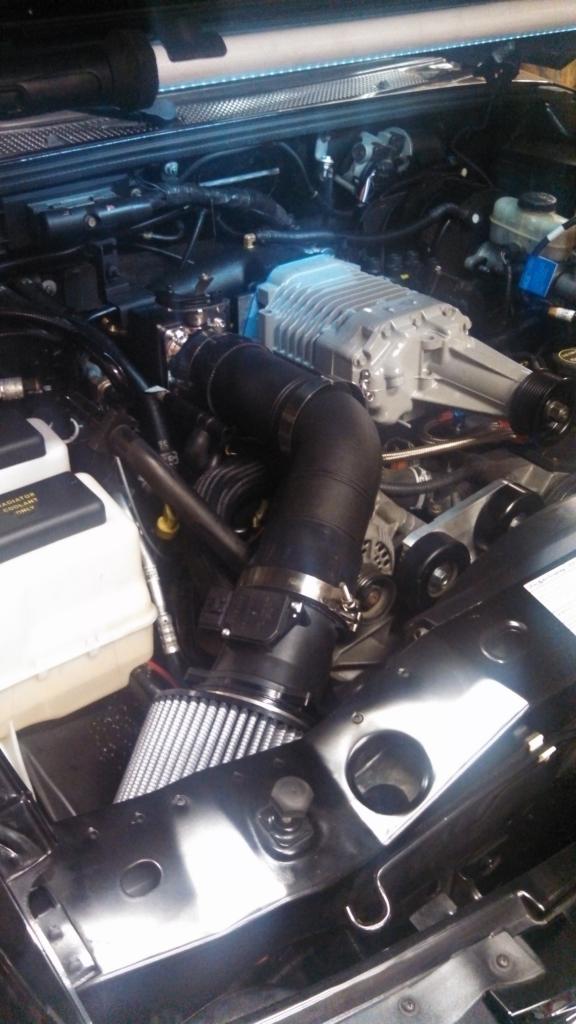
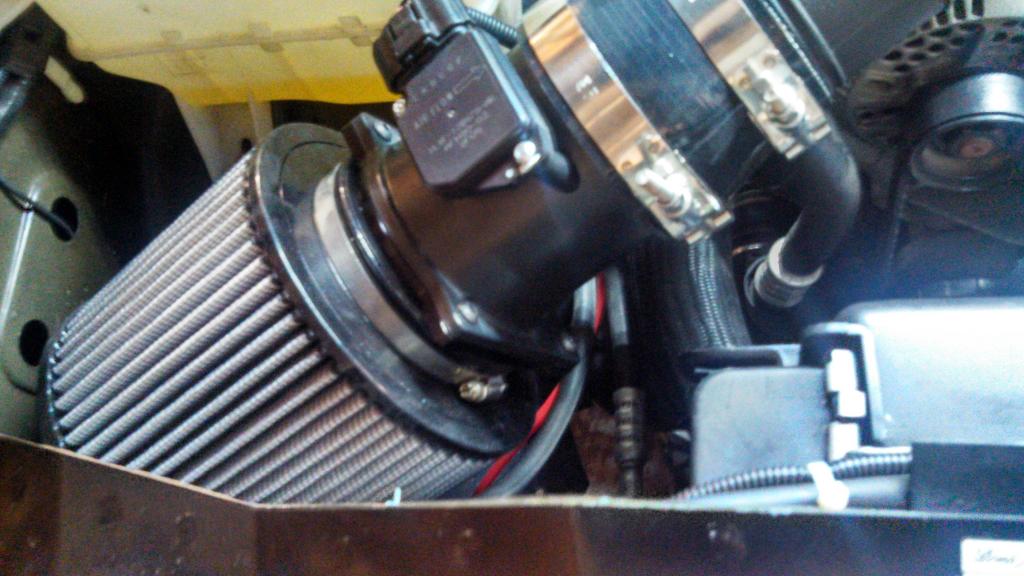
We have the air intake mocked in place right now. Everything is looking perfect. Nice straight shot into the throttle body with only a single 45* fitting to tuck the filter in the lower corner. I'm using the alternator bolt as a mounting place to secure it.
I think it provides a nice clean install.
We still need to finish routing the vacuum lines that attached to the intake.
Still have to mount the nozzle in the air intake & route the tubing for the water/methanol injection system.
Finished fuel line routing:
Final mounting of the supercharger, throttle body setup w/ first mockup of the air intake tube:

#240
08-28-2013
I might mess with it down the road, but I haven't looked into it much - I'm pretty happy with the JBA headers & Magnaflow catback setup.
It seems pretty 'tight' down there, I'm not sure how much it would really help overall (I'd assume a person would still want to have an x pipe or something anyway).
Plus, I would have to make sure I can still pass the 'lovely' emission requirements here.
It seems pretty 'tight' down there, I'm not sure how much it would really help overall (I'd assume a person would still want to have an x pipe or something anyway).
Plus, I would have to make sure I can still pass the 'lovely' emission requirements here.
Last edited by logan03CO; 08-28-2013 at 05:47 AM.
#241
08-28-2013
We are getting close to that 1st turn of the key....
The Gatorback belt is on, the injection nozzle is mounted & the intake is fully installed.
As you can see, we have left the cruise control cable long until we know the shorter version will work correctly. After a short road test to verify - we should be able to trim the excess cable off.
We are grabbing the correct size allen wrench as I type - then we can install those plug wire separators.
After a final check of all the fittings, we should be good to install the custom tune & see if it will run (good enough for me to drive it to the dyno session in a few weeks).
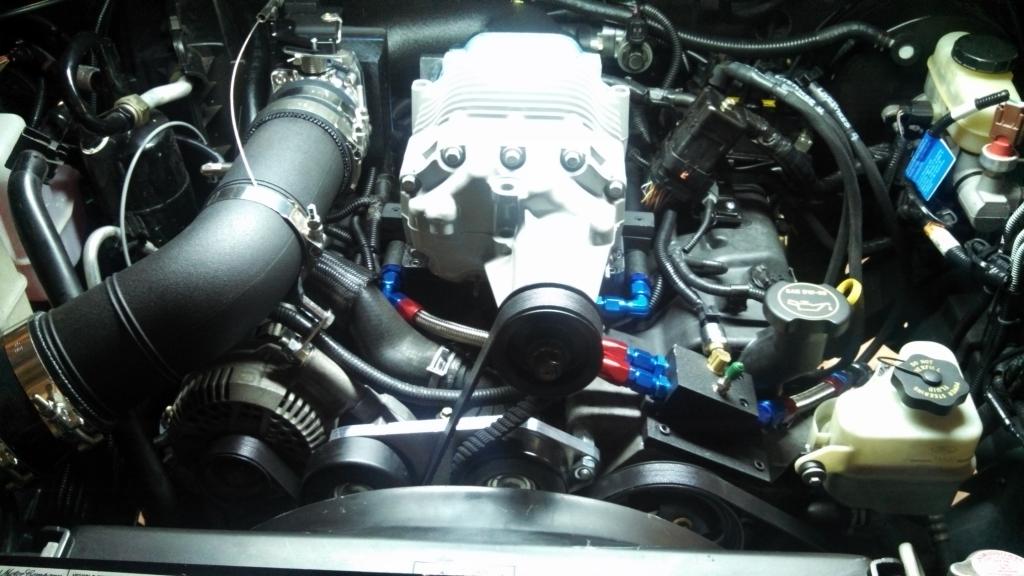
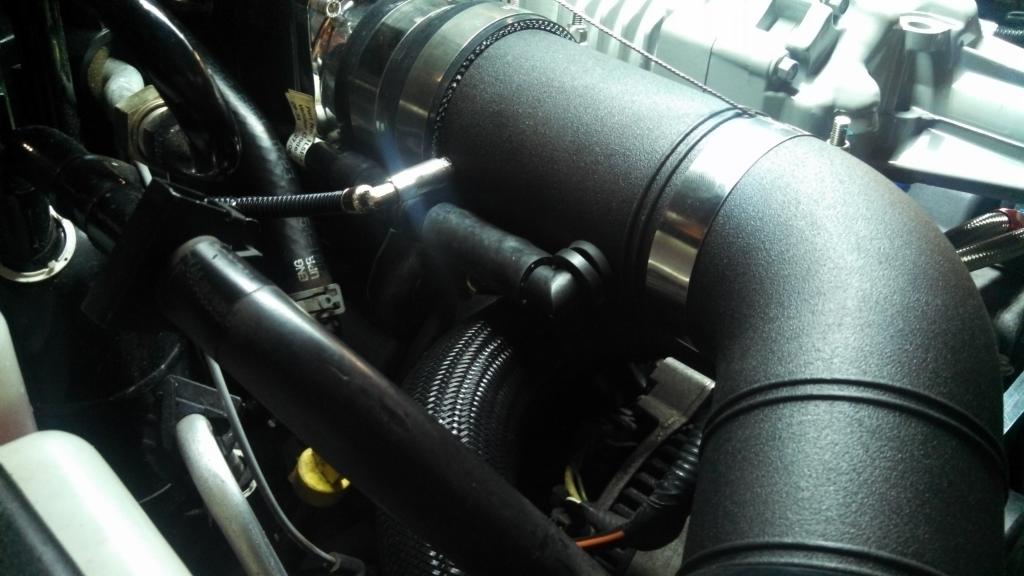
#243
08-28-2013
#244
08-28-2013
Well, it's alive!!
No leaks & everything checks out fine!
After I loaded the base tune from Don LaSota, it started right up & without any issues.
The light road test went well - good increase in acceleration (especially given my 35's), more importantly no 'check engine lights' or anything.
I'll be taking it very easy until I can have my tuning session - I just want to get it home & into the garage until my appointment.
#246
08-28-2013
#247
08-29-2013
Well after the drive home (about 35 miles) there are some 'bugs' that need to be worked out (to be expected I guess).
I have a 'rattle' at partial throttle during acceleration @ random RPM's (often at 2,000) - I'm hoping it's just something to do with the throttle cable modifications we did, but I have a feeling it could be pinging (I suck at sounds).
So I'm at a stop & I start accelerating, then once it's starts - it's almost 100% repeatable though. Light pressure on the pedal & it's makes the rattle - the second I let off, it stops. Also, the sound is loud - like I'd bet it can easily be heard outside of the truck. I stuck my head out the window while driving in town, and I could hear it clearly.
I'll have to check exactly when it makes the noise - but I have a feeling it's only doing it when under load, so I'm starting to believe it's pinging (any thoughts?).
Which I guess isn't a horrible thing since it's going for a complete custom tune in a couple weeks & I won't have to drive it much at all between now & then. He should be able to clear everything up.
Also, I found out I have my meth injection coming on way, way, wayyyy too early.
My low fluid warning light came on after like 10 miles of driving. So by the time I got home, I used about 2/3rds of the stock windshield washer fluid reservoirs worth of 'Boost Juice' - which runs $8/Gallon!
Luckily, it's a simple adjustment as to when the injection starts flowing (based on MAF voltage). Again, the tuner should be able to dial this all in for me - but I'm changing the activation voltage to be higher for starters.
The install wasn't bad at all for what it was. If a person was just installing the base kit 'as-is' from RPCaster it's a rather simple setup. By design, you’re not changing very much.
On the other hand, my version of the install was a little more 'in-depth', and required a fair amount of research on components (prior to the install) & fabrication of some custom items.
I'll be honest; the kit from Ron needed more modifications that I would have anticipated. Some were known to me (and understandable) - since we were upgrading/modifying his kit, but other things that we left 100% alone (like the dual pulley kit) needed some 'massaging' as well.
Nothing crazy or too in-depth, but if people are thinking even the base kit is a simple 'socket set only' install - it isn't.
We had to widen holes on mounting brackets to get them to fit correctly, file a bunch of pieces down, pipe dope was all over the place, & there was a fair amount of metal shaving & oil still in the fuel rails & fuel distribution block (from his pipe threading). Some of the aluminum machining looked rather 'rough' (mostly the non-visible side, but still). Luckily we were checking for these things & cleaned everything up as we went.
Like I said, it wasn't anything crazy & it's a good lesson to expect the unexpected when doing any type of install.
Overall, it's a solid 'time tested' kit.
Last edited by logan03CO; 08-29-2013 at 05:47 AM.
#248
08-29-2013
I'll be honest; the kit from Ron needed more modifications that I would have anticipated. Some were known to me (and understandable) - since we were upgrading/modifying his kit, but other things that we left 100% alone (like the dual pulley kit) needed some 'massaging' as well.
Nothing crazy or too in-depth, but if people are thinking even the base kit is a simple 'socket set only' install - it isn't.
We had to widen holes on mounting brackets to get them to fit correctly, file a bunch of pieces down, pipe dope was all over the place, & there was a fair amount of metal shaving & oil still in the fuel rails & fuel distribution block (from his pipe threading). Some of the aluminum machining looked rather 'rough' (mostly the non-visible side, but still). Luckily we were checking for these things & cleaned everything up as we went.
Like I said, it wasn't anything crazy & it's a good lesson to expect the unexpected when doing any type of install.
Overall, it's a solid 'time tested' kit.
#249
08-29-2013
Just minor 'adjustments'.
I chalked it up to the fact these aren't mass produced kits made by a machine over & over. So they aren't all exactly the same, every time.


