


Safari Pacific MX2 Buildip


Thread Starter
|
Member

Joined: Jul 2008
Posts: 115
Likes: 0
From: Temecula, CA
Now its time to get back to work.
Today I started to tackle the wheel wells. Since I want to keep the little curve, where the body line rolls into the back of the cab, I cut those pieces from the cab.

The small portion to the bottom is the little curve I mentioned above. Roughly cutting the two pieces to fit I then clamp them into place.

No backing material was used to weld this up. As you can see, things got a bit ugly.

I repeat on the driver side pieces.

After welding the driver side, I realize the angle was way off. I replace the part cut off from the wheel well edge.

Today I started to tackle the wheel wells. Since I want to keep the little curve, where the body line rolls into the back of the cab, I cut those pieces from the cab.
The small portion to the bottom is the little curve I mentioned above. Roughly cutting the two pieces to fit I then clamp them into place.
No backing material was used to weld this up. As you can see, things got a bit ugly.
I repeat on the driver side pieces.
After welding the driver side, I realize the angle was way off. I replace the part cut off from the wheel well edge.
Thread Starter
|
Member
Joined: Jul 2008
Posts: 115
Likes: 0
From: Temecula, CA
Grinding off the welds I smooth the edges.

Next I cut a extra piece of 18 gauge steel to reinforce the curve. Unfortunately I didn't snap a photo until I was finished. You can see the slight bulge where the reinforcing strip was welded on though.

Next I cut a extra piece of 18 gauge steel to reinforce the curve. Unfortunately I didn't snap a photo until I was finished. You can see the slight bulge where the reinforcing strip was welded on though.


Thread Starter
|
Member
Joined: Jul 2008
Posts: 115
Likes: 0
From: Temecula, CA
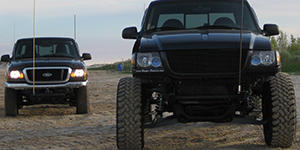
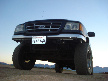
Wanting a better picture of the body line curves, I went outside into the sunlight. With better lighting they don't look half bad.

Next I dry fit the passenger side onto the body panel. I have to push the panel inward to align with the door.

I make my trimming marks


Then I trim and clean up the sharp edges.

Next I dry fit the passenger side onto the body panel. I have to push the panel inward to align with the door.
I make my trimming marks
Then I trim and clean up the sharp edges.
Thread Starter
|
Member
Joined: Jul 2008
Posts: 115
Likes: 0
From: Temecula, CA
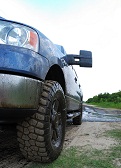
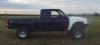
Going in the same fashion I use a strip of 16 gauge steel behind the seams. Tack welded wheel well curve into place.

After tack welding, I tie a piece of string to hold the panel in place.

I finish up welding the passenger side and repeat on the driver side.


After tack welding, I tie a piece of string to hold the panel in place.
I finish up welding the passenger side and repeat on the driver side.




same here dude. that is some serious fab work. you definately turned it up to 11 with that mod


Thread Starter
|
Member
Joined: Jul 2008
Posts: 115
Likes: 0
From: Temecula, CA
Onto the roof... I start by creating a pattern for the curve. The old groove where the roof and side meets will be rounded as well.

With the pattern in hand and some sheet steel I head over to another shop. There I get the metal for the roof rolled as well as the wheel well pieces.


Back at the shop I start to dry fit the rolled piece. Roof is very rusty!

With the swamp coolers rusting out all the exposed metal I decide to prep everything for primer.

With the pattern in hand and some sheet steel I head over to another shop. There I get the metal for the roof rolled as well as the wheel well pieces.
Back at the shop I start to dry fit the rolled piece. Roof is very rusty!
With the swamp coolers rusting out all the exposed metal I decide to prep everything for primer.
Thread Starter
|
Member
Joined: Jul 2008
Posts: 115
Likes: 0
From: Temecula, CA
Along with prepping for paint I remove all stickers and clean off the glue.

Primer shows all the small tweeks in the metal.

Painted the roof and leaving a small gap to weld onto.

I sanded and painted all the inside pieces as well.


Primer shows all the small tweeks in the metal.
Painted the roof and leaving a small gap to weld onto.
I sanded and painted all the inside pieces as well.


Thread Starter
|
Member
Joined: Jul 2008
Posts: 115
Likes: 0
From: Temecula, CA
Thanks all!
-----
After finishing up primering I resume completing the curve of the cab. First I clean up the edges for backing strips.

Using some fancy unistrut and visegrips I clamp down the roof and side panel. The unistrut kept all the sheet steel flat while I added the packing strip.

Placing the pre-curved steel over the gab I mark cut points.

After shearing off one side I double check the second cut's location.

Now I need to create the tapered edge to meet with the old molding groove.

-----
After finishing up primering I resume completing the curve of the cab. First I clean up the edges for backing strips.
Using some fancy unistrut and visegrips I clamp down the roof and side panel. The unistrut kept all the sheet steel flat while I added the packing strip.
Placing the pre-curved steel over the gab I mark cut points.
After shearing off one side I double check the second cut's location.
Now I need to create the tapered edge to meet with the old molding groove.


