Safari Pacific MX2 Buildip

Member

Joined: Mar 2008
Posts: 648
Likes: 0
From: New Brighton, PA
Hey Travis. Great job on the mods so far. I just checked out your web site and all I can say is "wow". I'm so jealous that you got to do that North America trip. Love all the pics. I've always wanted to tackle the Dalton Highway and the Dempster Highway That goes from Yukon to the Northwest Territories. Good luck on your next trip. I'll keep an eye on this thread.

Thread Starter
|
Member
Joined: Jul 2008
Posts: 115
Likes: 0
From: Temecula, CA
Onto the roof...
Since I'll be creating a completely new roof section I'll need to meet the stock curve. To accomplish this I start with some scrap 3/4 inch plywood. I then measure the front section of the roof's curvature. From the measurements I create and ark on the plywood. Then I rough cut with a bandsaw and clean up with a belt sander.

Now I create a wooden frame to hold the arc molds in place and at the right hight.

Verifying the two pieces are the correct hight I place a strait metal bar across the gap.

Next I cut a piece of 20 gauge steel to fit into the gap. I cut 2 inches longer than I need to rough fit everything and slide it under the current roof sections

The roof is marked then cut to fit. As you can see from the additional line I messed up, luckily I caught it before I started to cut. Measure twice, cut once!!!

Since I'll be creating a completely new roof section I'll need to meet the stock curve. To accomplish this I start with some scrap 3/4 inch plywood. I then measure the front section of the roof's curvature. From the measurements I create and ark on the plywood. Then I rough cut with a bandsaw and clean up with a belt sander.
Now I create a wooden frame to hold the arc molds in place and at the right hight.
Verifying the two pieces are the correct hight I place a strait metal bar across the gap.
Next I cut a piece of 20 gauge steel to fit into the gap. I cut 2 inches longer than I need to rough fit everything and slide it under the current roof sections
The roof is marked then cut to fit. As you can see from the additional line I messed up, luckily I caught it before I started to cut. Measure twice, cut once!!!
Thread Starter
|
Member
Joined: Jul 2008
Posts: 115
Likes: 0
From: Temecula, CA
More of the same overlapping backing to weld on.

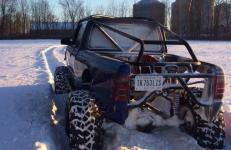
Roof welded into place. Since there is a lot of room for warping, I'll be taking a day or two to weld this up. I start by running spot welds a few inches apart. Over time I will continue to spot weld between the other welds until its fully welded.

While between welding the roof, I start to get ready to work on the wheel well of the cab.

More in a day or two...
Roof welded into place. Since there is a lot of room for warping, I'll be taking a day or two to weld this up. I start by running spot welds a few inches apart. Over time I will continue to spot weld between the other welds until its fully welded.
While between welding the roof, I start to get ready to work on the wheel well of the cab.
More in a day or two...






Thread Starter
|
Member
Joined: Jul 2008
Posts: 115
Likes: 0
From: Temecula, CA
Show me the money :D hehe I had though once I'm finished about producing these, but its a lot of work. Material cost isn't much, but my time would rack up fast.
Thread Starter
|
Member
Joined: Jul 2008
Posts: 115
Likes: 0
From: Temecula, CA
To fill in the upper side panel, I start with constuction paper roughly cut and taped in place.

From the inside I trace where the pattern should be cut. After Cutting I tape it into place for a dry fitting.

Once the pattern is correct I trace onto sheet steel and cut out the filler panel.

At the bottom of the panel there is a small curve that I will have to recreate. I mark the top, bottom and middle of the curves position. You can also see the backing strips that I've been making to merge the bodywork together.

From the inside I trace where the pattern should be cut. After Cutting I tape it into place for a dry fitting.
Once the pattern is correct I trace onto sheet steel and cut out the filler panel.
At the bottom of the panel there is a small curve that I will have to recreate. I mark the top, bottom and middle of the curves position. You can also see the backing strips that I've been making to merge the bodywork together.




Thread Starter
|
Member
Joined: Jul 2008
Posts: 115
Likes: 0
From: Temecula, CA
Thanks! Yep, the top of the roof is all welded up. I need to grind the welds flush then create the curve from the roof to the side panels.