Project Logs For detailed builds specific to the Ford Ranger, one thread per vehicle please.

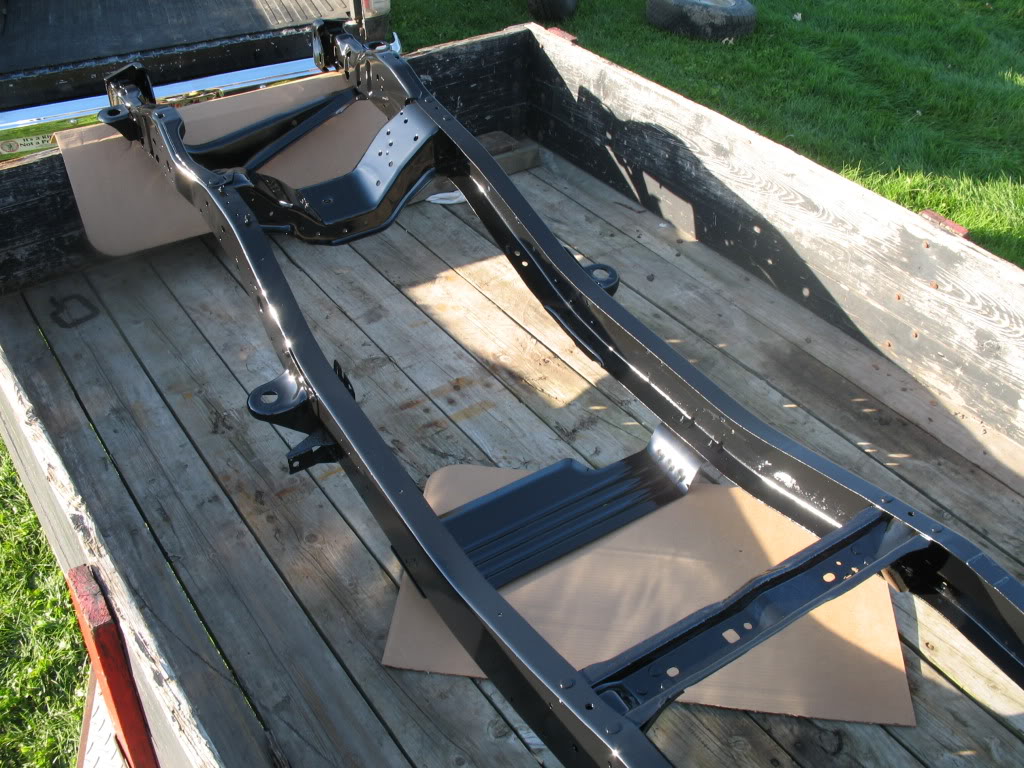
93 ford ranger complete rebuild from bare frame with SAS

Old Sep 24, 2010
  #101  
mcramer15's Avatar
Thread Starter
|
Member
Joined: Jun 2010
Posts: 8
Likes: 0
From: Alma Center, WI
Before and after sandblasting the front axles

Name:  downsized_0924101058.jpg
Views: 476
Size:  22.0 KB
Name:  downsized_0924101059a.jpg
Views: 436
Size:  24.5 KB
Name:  downsized_0924101059.jpg
Views: 415
Size:  25.4 KB
Name:  downsized_0924101447b.jpg
Views: 383
Size:  25.4 KB
Name:  downsized_0924101447a.jpg
Views: 374
Size:  23.7 KB
Name:  downsized_0924101447.jpg
Views: 397
Size:  24.0 KB
 
Reply
Old Oct 2, 2010
  #102  
mcramer15's Avatar
Thread Starter
|
Member
Joined: Jun 2010
Posts: 8
Likes: 0
From: Alma Center, WI
Axles Painted

got all my axles blasted and painted

Name:  IMG_1824.jpg
Views: 399
Size:  150.2 KB
Name:  IMG_1823.jpg
Views: 386
Size:  126.9 KB
Name:  IMG_1822.jpg
Views: 411
Size:  126.4 KB
Name:  IMG_1821.jpg
Views: 388
Size:  146.0 KB
Name:  IMG_1820.jpg
Views: 393
Size:  134.3 KB
Name:  IMG_1819.jpg
Views: 394
Size:  150.4 KB
 
Reply
Old Oct 3, 2010
  #103  
ranger4.0's Avatar
Member
iTrader: (1)
Joined: Jul 2009
Posts: 3,922
Likes: 2
From: cambridge, ontario
those axles look great after paint... now get them under the truck
 
Reply
Old Oct 3, 2010
  #104  
mcramer15's Avatar
Thread Starter
|
Member
Joined: Jun 2010
Posts: 8
Likes: 0
From: Alma Center, WI
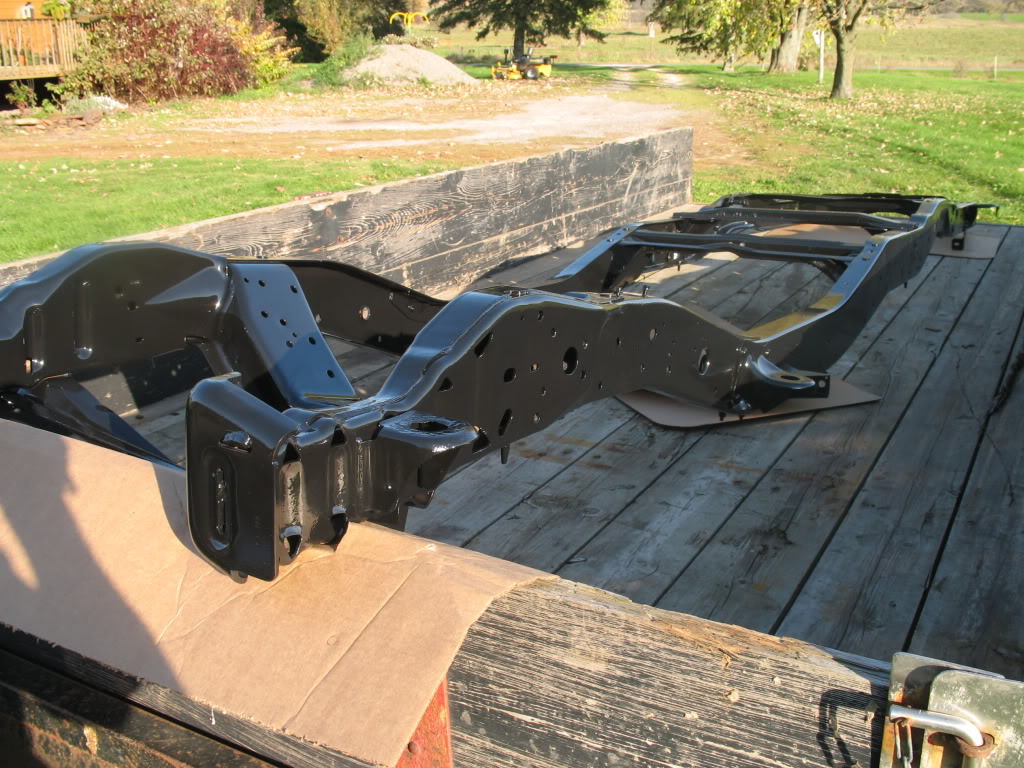
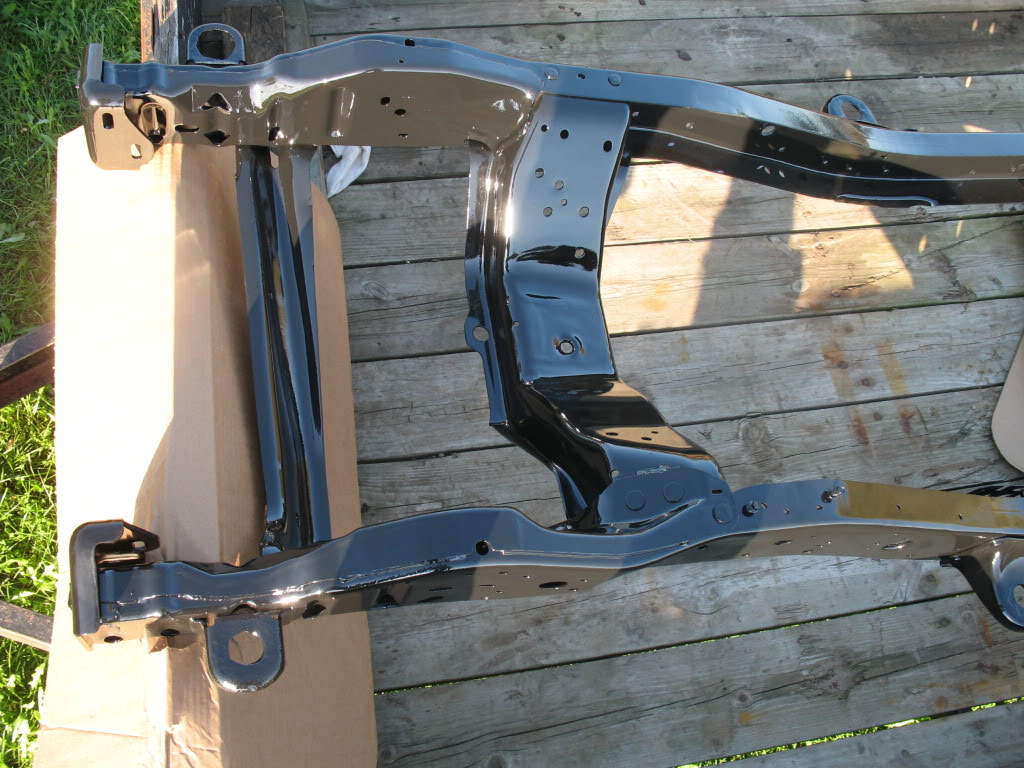
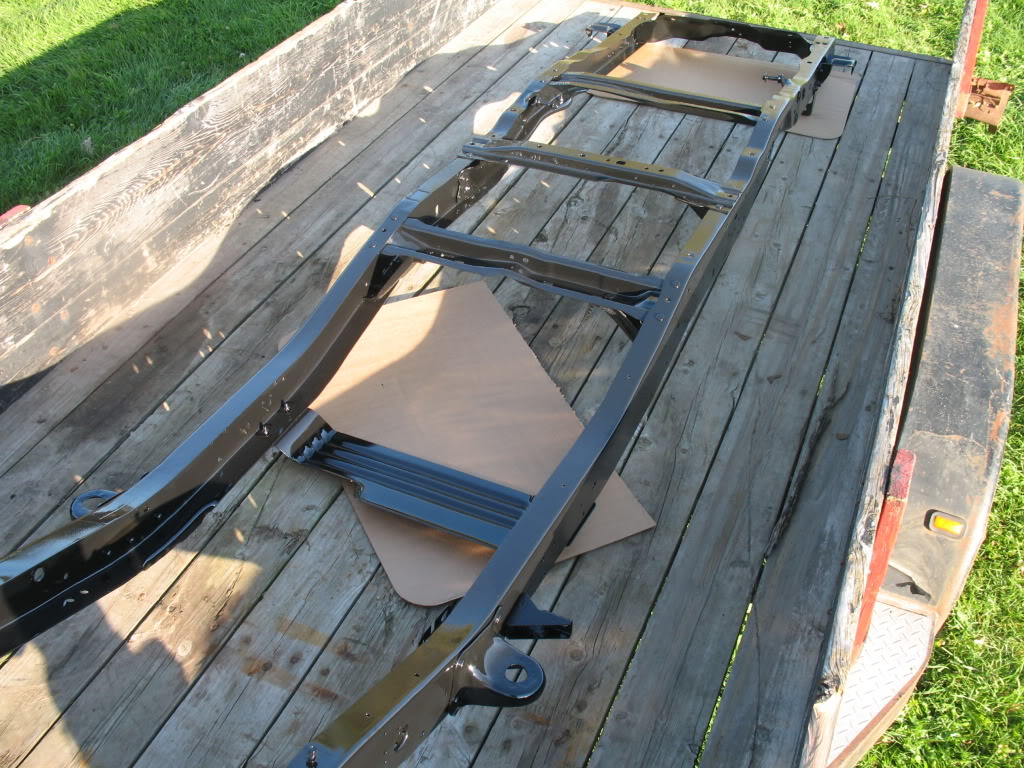
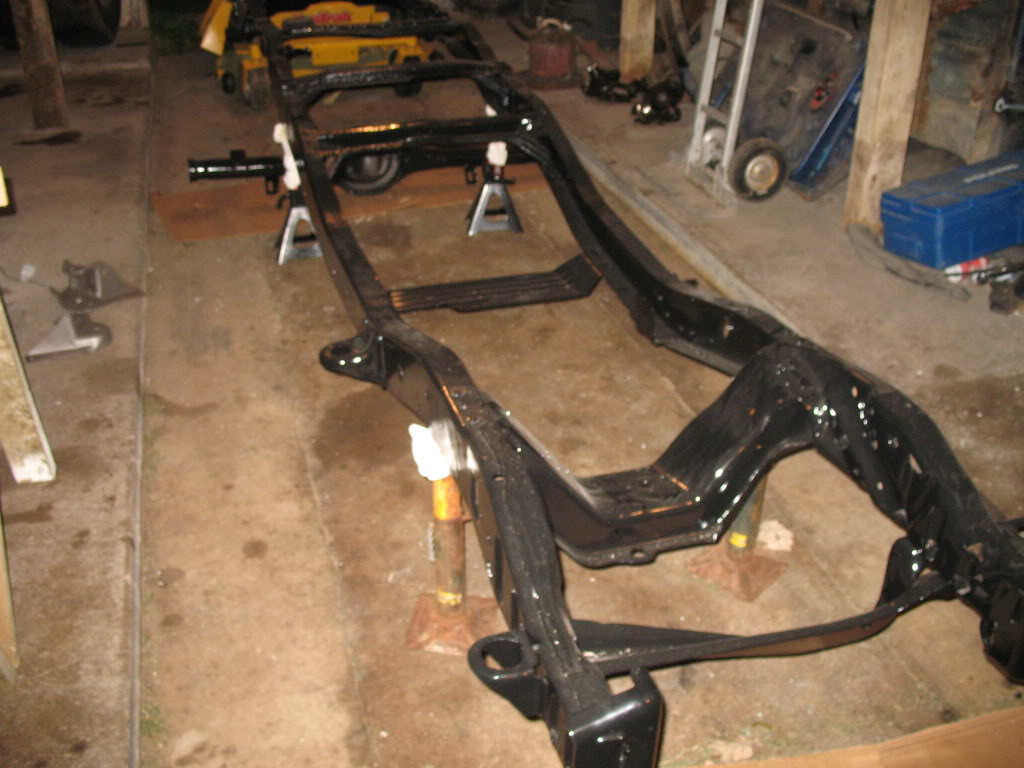
Ya i am working on it. Waiting to get the frame blasted and painted. The place i am doing it at has been really busy so they havent been able to do it. but hopefully some time in the next two weeks.
 
Reply
Old Oct 11, 2010
  #105  
mcramer15's Avatar
Thread Starter
|
Member
Joined: Jun 2010
Posts: 8
Likes: 0
From: Alma Center, WI
Frame is Painted!

Finally got the frame blasted and painted. i will get better pictures next weekend.

Name:  IMG_1844-1.jpg
Views: 341
Size:  198.1 KB
Name:  IMG_1842.jpg
Views: 479
Size:  162.8 KB
Name:  IMG_1841-1.jpg
Views: 409
Size:  210.3 KB
Name:  IMG_1840.jpg
Views: 518
Size:  226.0 KB
Name:  IMG_1836.jpg
Views: 415
Size:  128.0 KB
Name:  IMG_1844.jpg
Views: 761
Size:  198.1 KB
Name:  IMG_1843.jpg
Views: 411
Size:  139.9 KB
Name:  IMG_1839.jpg
Views: 412
Size:  106.0 KB
Name:  IMG_1838.jpg
Views: 442
Size:  183.0 KB
Name:  IMG_1835.jpg
Views: 405
Size:  94.0 KB
Name:  IMG_1834.jpg
Views: 393
Size:  113.8 KB

And my new coils
Name:  IMG_1829.jpg
Views: 341
Size:  134.8 KB

Sorry if there is to many pics
 
Reply
Old Oct 11, 2010
  #106  
Downey's Avatar
RF Veteran
iTrader: (1)
Joined: Oct 2007
Posts: 8,470
Likes: 6
From: Muncy, PA
nice dude looks great
 
Reply
Old Oct 11, 2010
  #107  
mcramer15's Avatar
Thread Starter
|
Member
Joined: Jun 2010
Posts: 8
Likes: 0
From: Alma Center, WI
Thanks Man!
 
Reply
Old Oct 11, 2010
  #108  
Ardy's Avatar
Member
Joined: Aug 2010
Posts: 276
Likes: 0
From: Windsor NS
This is going to be a fantastic build!
 
Reply
Old Nov 1, 2010
  #109  
mcramer15's Avatar
Thread Starter
|
Member
Joined: Jun 2010
Posts: 8
Likes: 0
From: Alma Center, WI
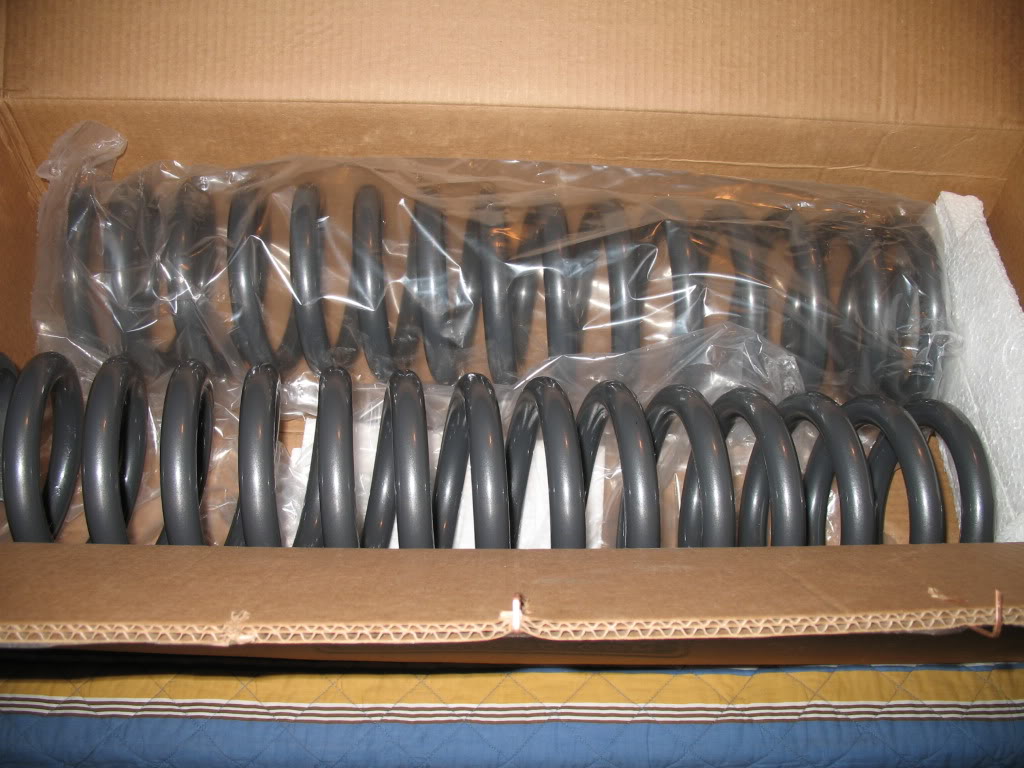
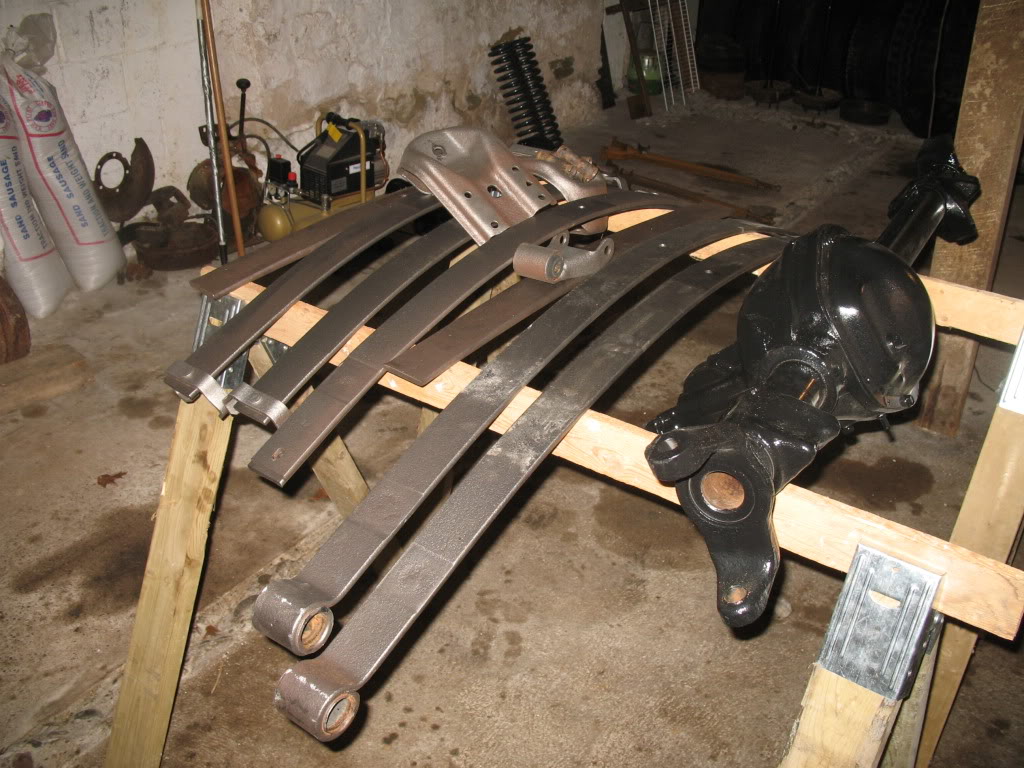
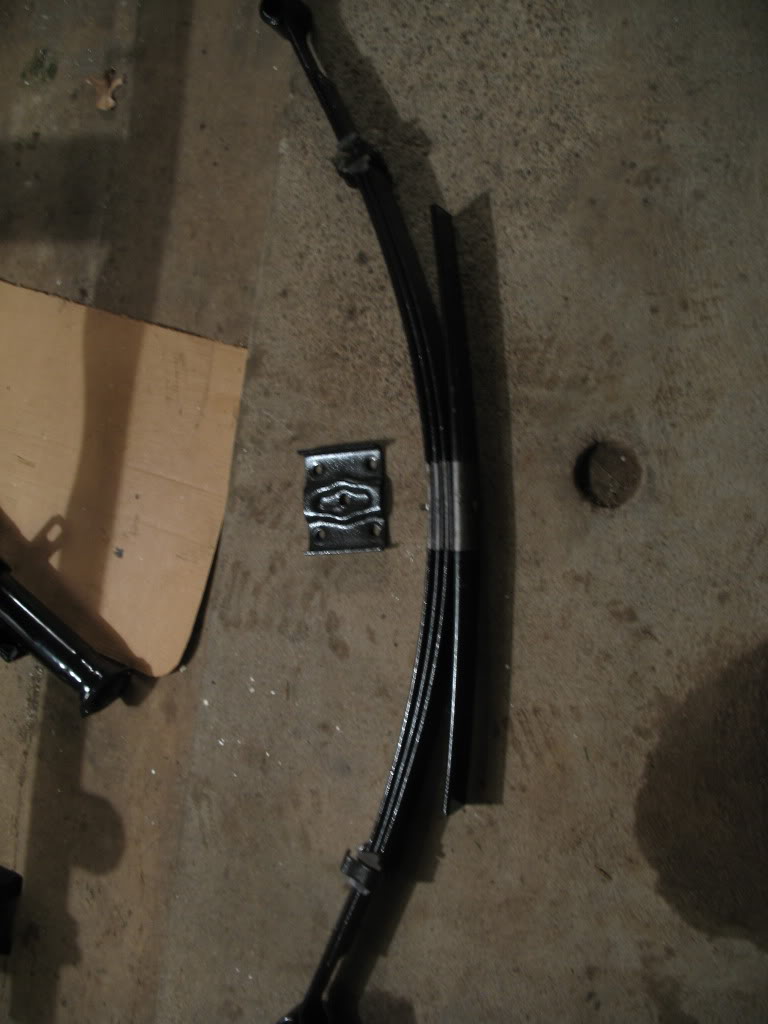
I got some 63 in. Chevy leaf springs and got them blasted. i will be getting them painted soon. other then that i havent been able to do too much besides cleaning transmission and transfer case parts. i have just about all that painted and almost together.

Name:  IMG_1871.jpg
Views: 384
Size:  172.5 KB
Name:  IMG_1869.jpg
Views: 437
Size:  170.2 KB
Name:  IMG_1868.jpg
Views: 363
Size:  104.0 KB
Name:  IMG_1867.jpg
Views: 394
Size:  153.3 KB
Name:  IMG_1866.jpg
Views: 409
Size:  167.0 KB
 
Reply
Old Nov 1, 2010
  #110  
mcramer15's Avatar
Thread Starter
|
Member
Joined: Jun 2010
Posts: 8
Likes: 0
From: Alma Center, WI
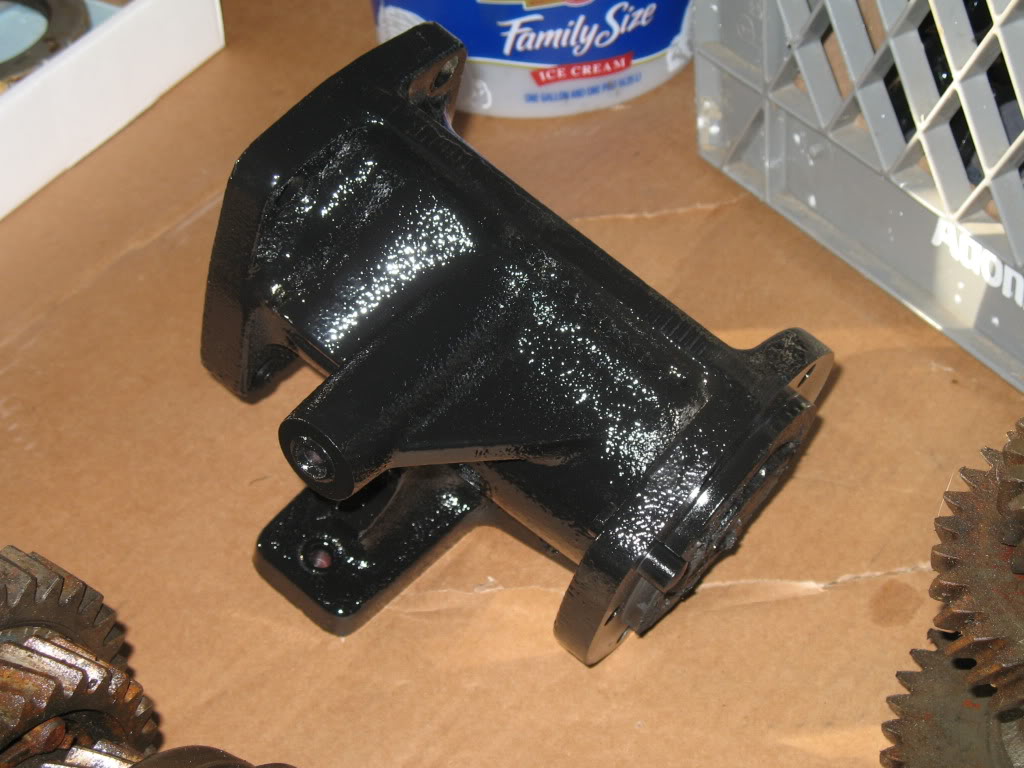
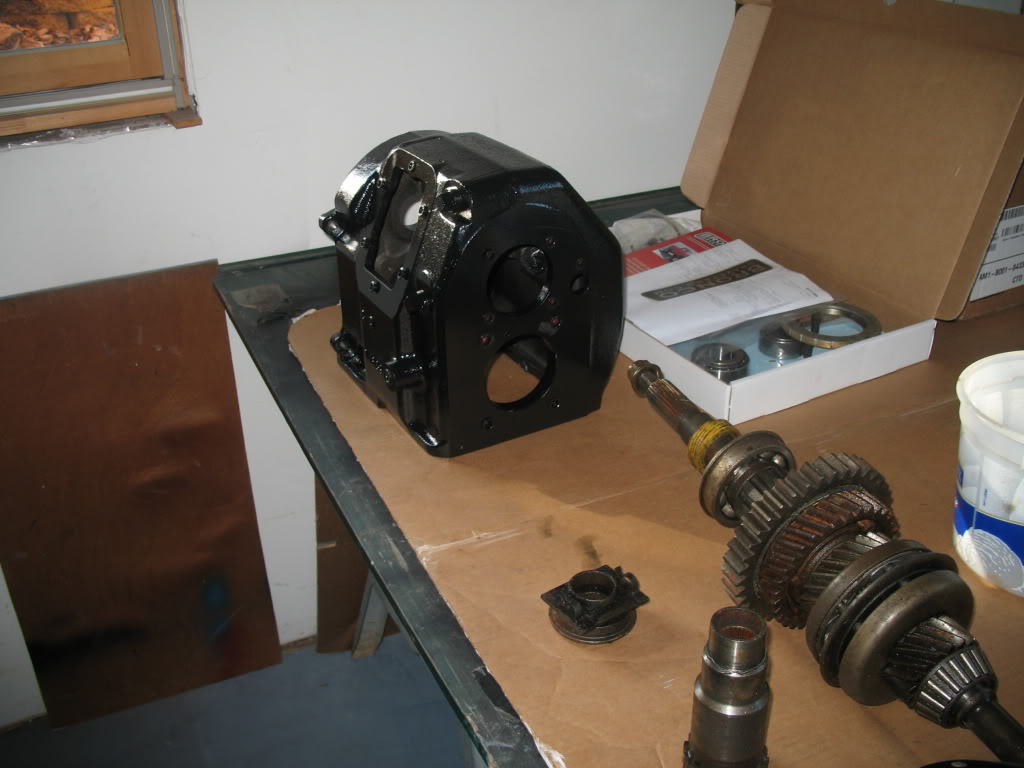
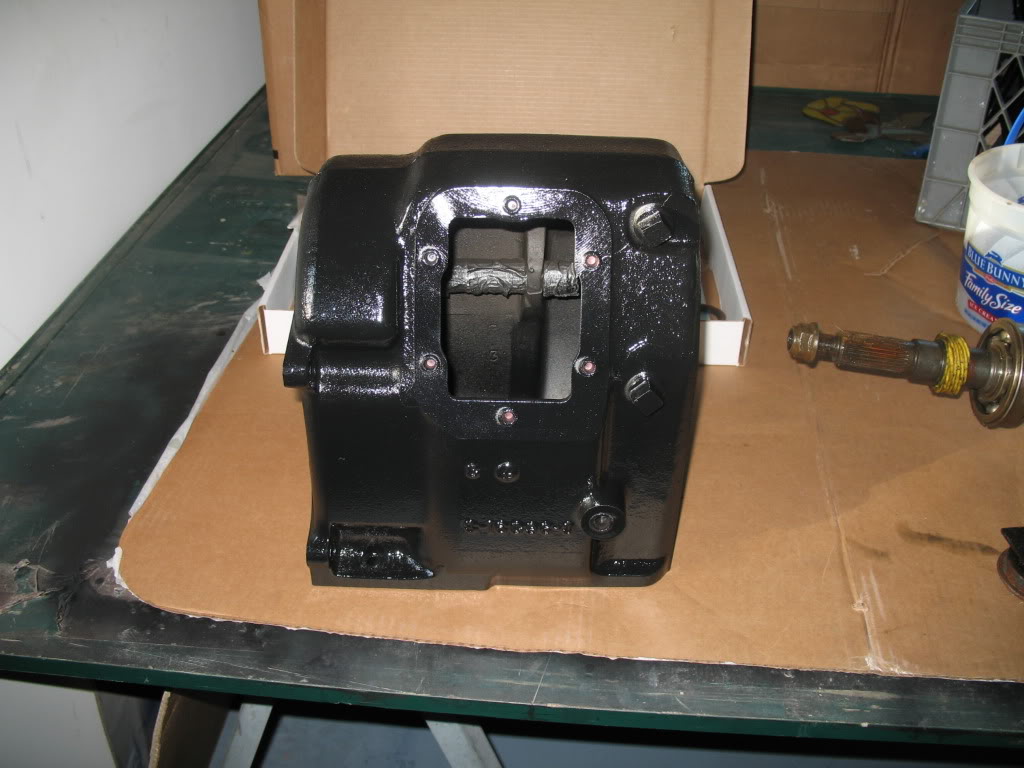
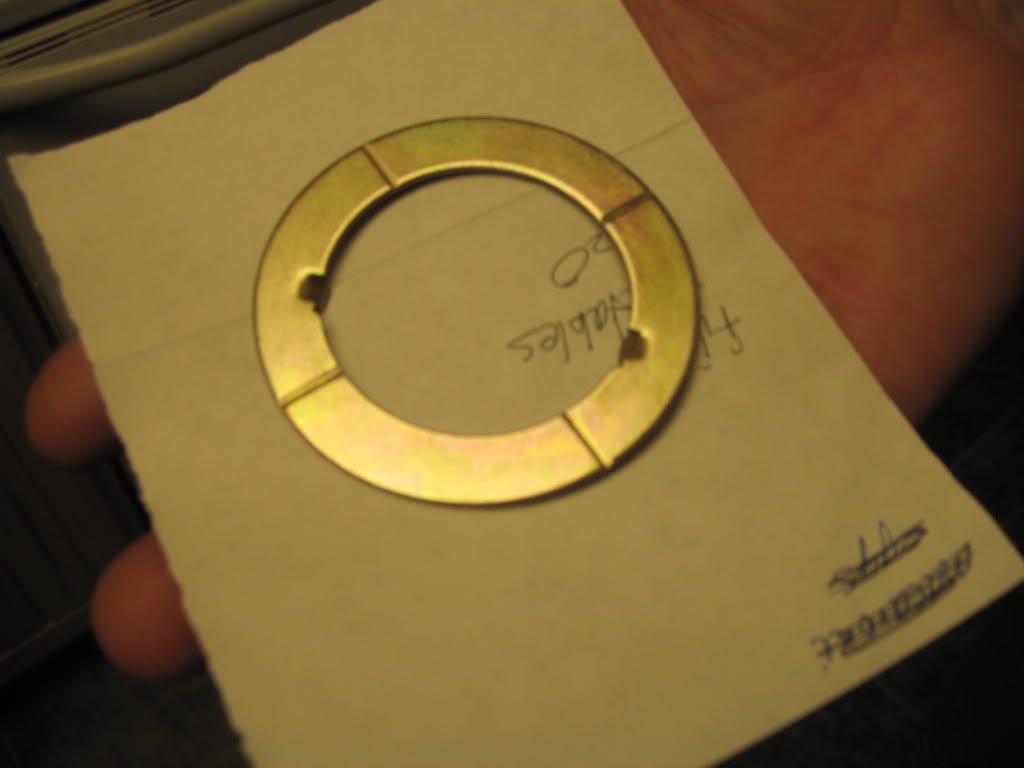
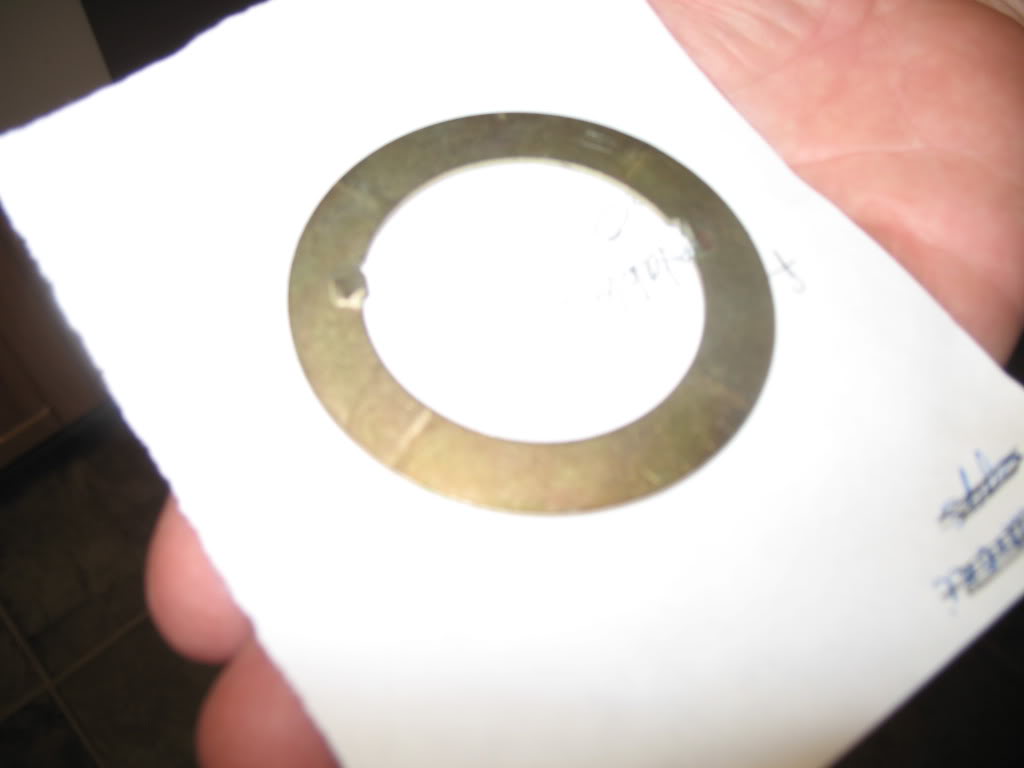
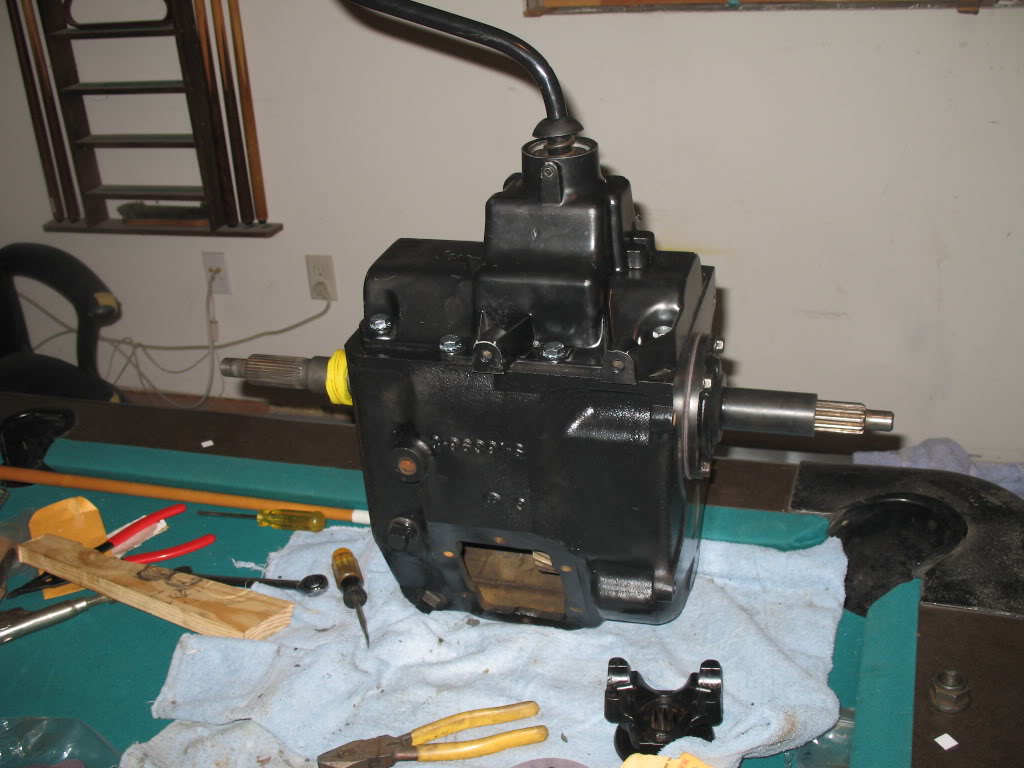
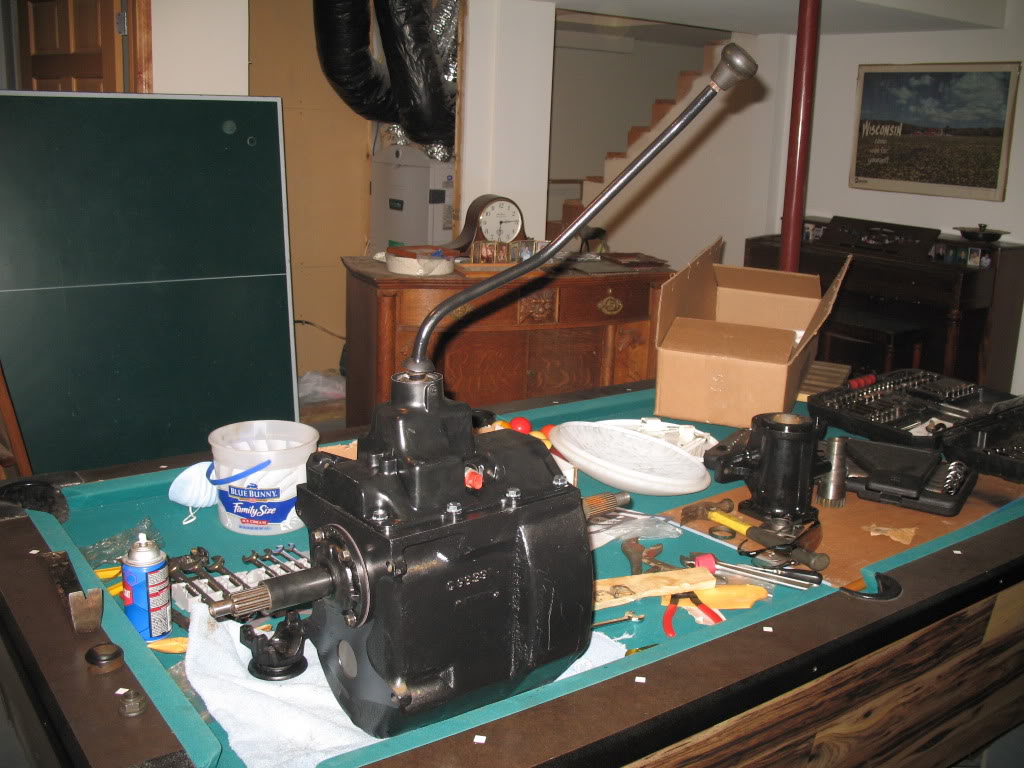
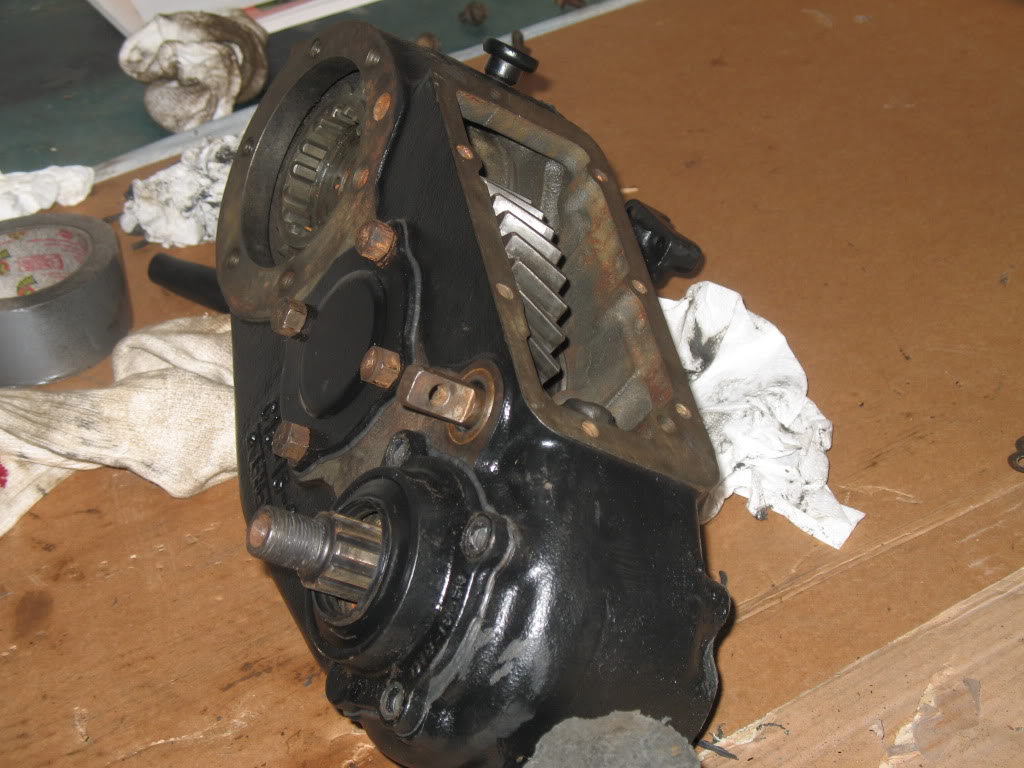
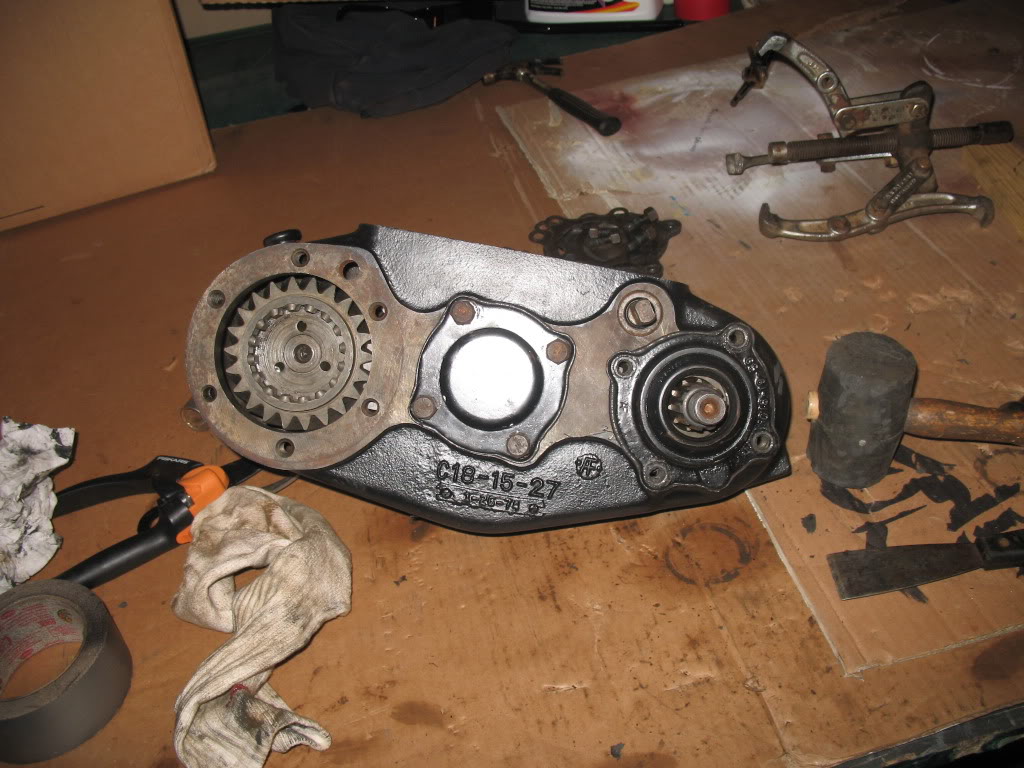
I had gotten a NP435 transmission rebuild kit and had taken my transmission all apart. i managed to keep everything in the right order except one piece. Can anyone please tell me what this is and where is goes. all the diagrams i find on the internet dont have good enough pictures and i dont know the name of the part. so if you can tell me what it is or where it goes that would be great. Thanks!

Name:  IMG_1865.jpg
Views: 339
Size:  47.2 KB
Name:  IMG_1864.jpg
Views: 346
Size:  41.9 KB
 
Reply
Old Nov 6, 2010
  #111  
comunistico's Avatar
Member
Joined: Nov 2008
Posts: 1,319
Likes: 0
From: san jose, Costa Rica
looking good! nice progress. and dont worry about the pics. the more the better!
 
Reply
Old Nov 8, 2010
  #112  
mcramer15's Avatar
Thread Starter
|
Member
Joined: Jun 2010
Posts: 8
Likes: 0
From: Alma Center, WI
Transmission and transfer case pretty much put all back together.

Name:  IMG_1877.jpg
Views: 395
Size:  107.7 KB
Name:  IMG_1874.jpg
Views: 385
Size:  141.2 KB
Name:  IMG_1876.jpg
Views: 388
Size:  125.4 KB
Name:  IMG_1875.jpg
Views: 376
Size:  148.8 KB
 
Reply
Old Nov 28, 2010
  #113  
Fonly's Avatar
Member
Joined: Mar 2010
Posts: 50
Likes: 0
From: GP
Anything as of yet?

Can't wait to see this thing done.
 
Reply
Old Nov 28, 2010
  #114  
ranger4.0's Avatar
Member
iTrader: (1)
Joined: Jul 2009
Posts: 3,922
Likes: 2
From: cambridge, ontario
im looking forward to seeing this one completed
 
Reply
Old Nov 28, 2010
  #115  
mcramer15's Avatar
Thread Starter
|
Member
Joined: Jun 2010
Posts: 8
Likes: 0
From: Alma Center, WI
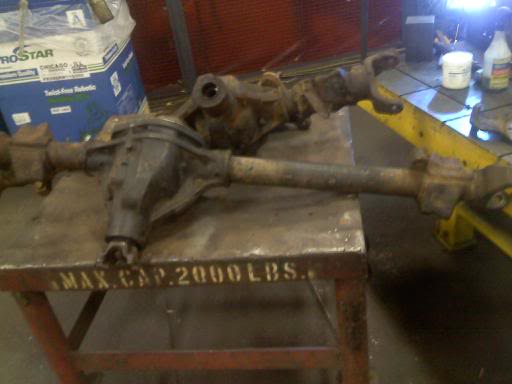
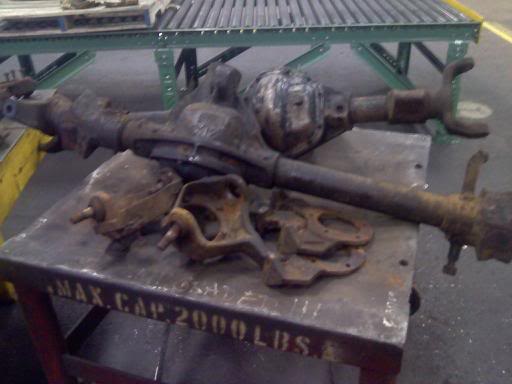
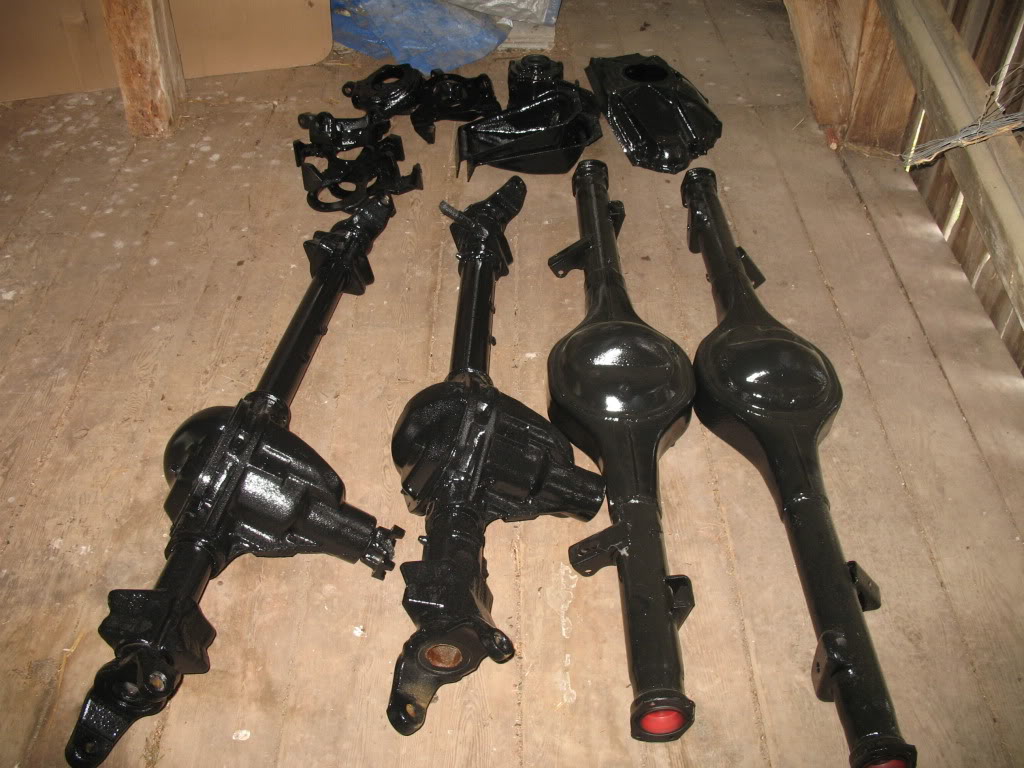
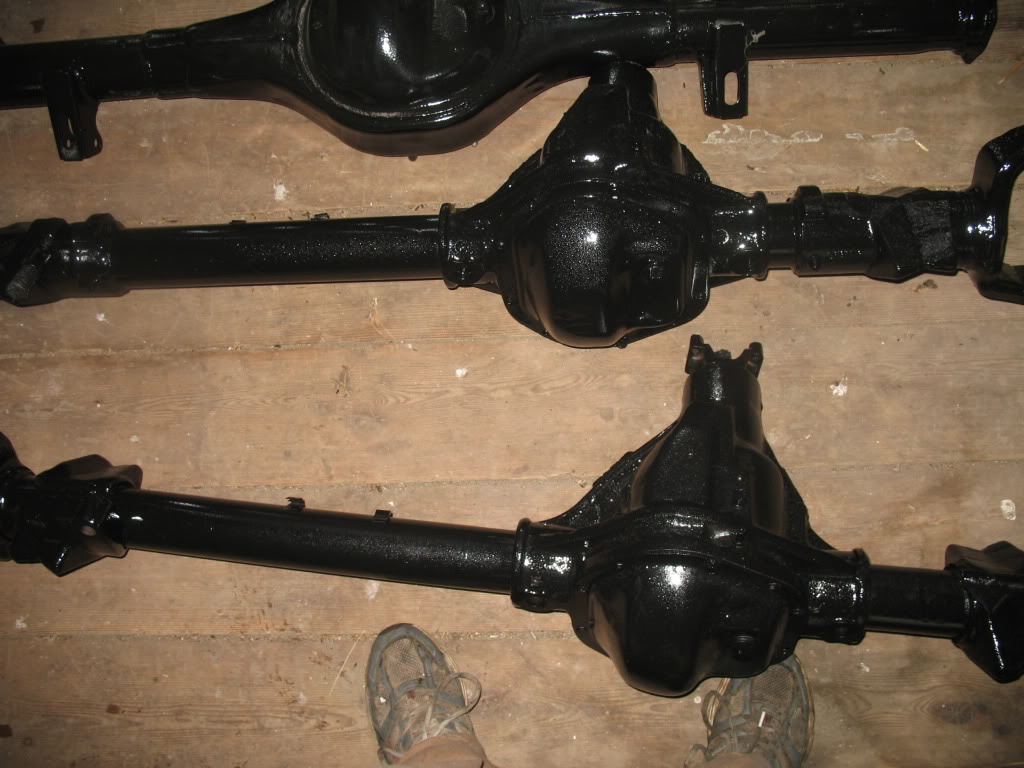
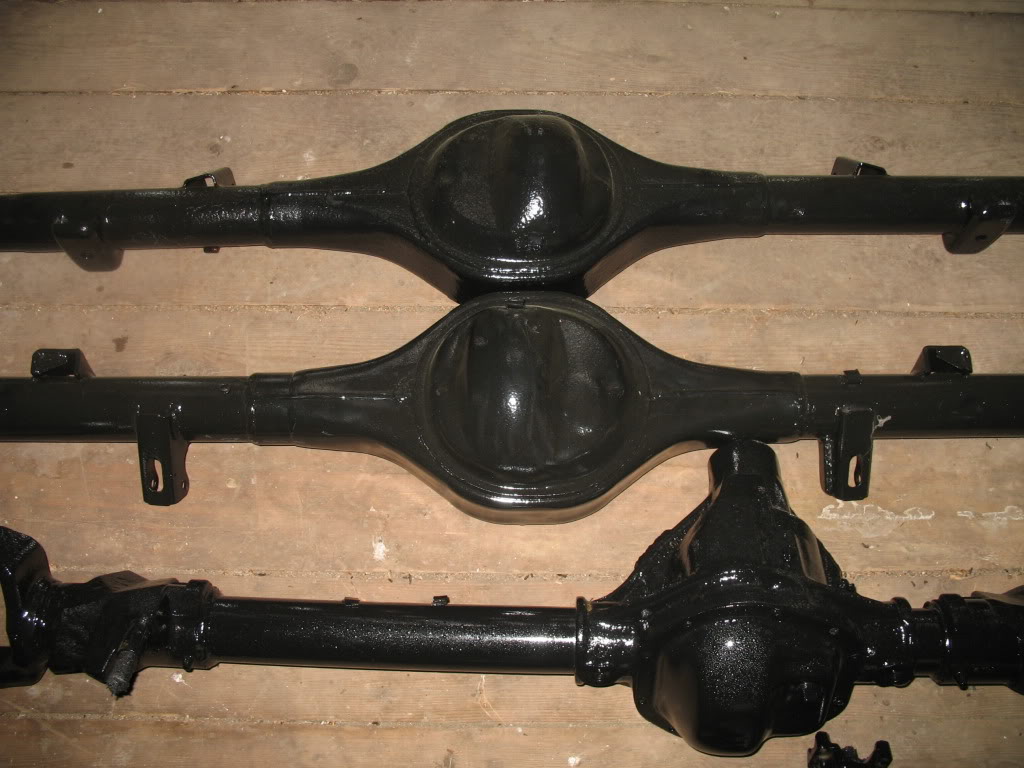
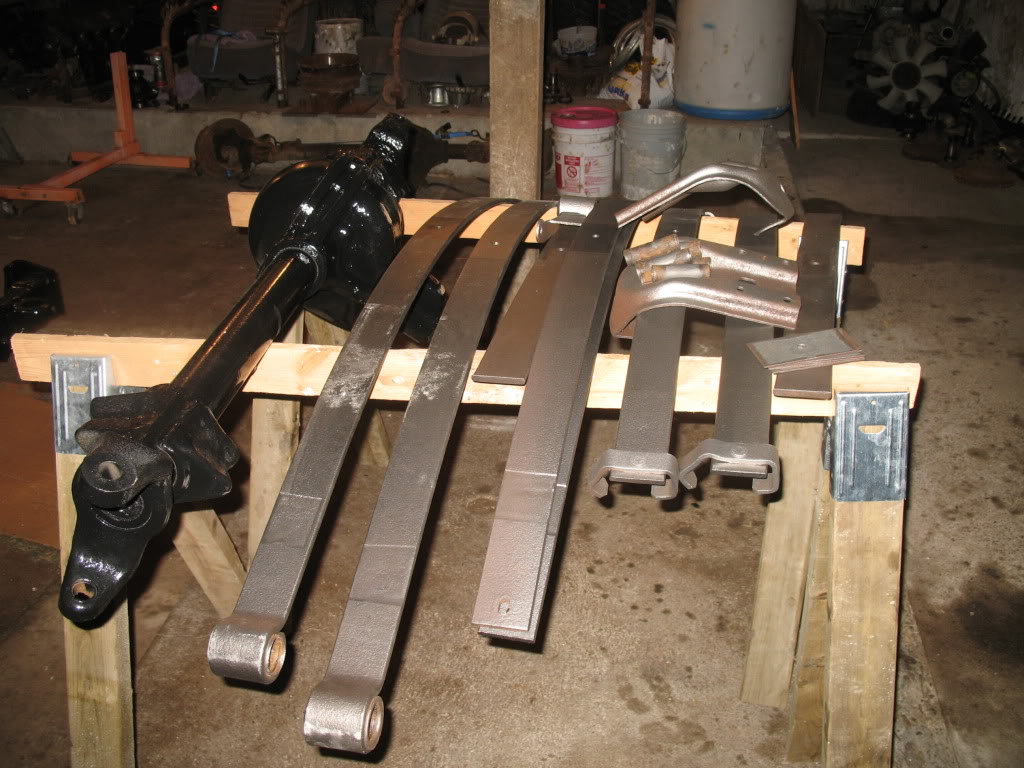
Sorry guys i havent gotten a whole lot done. I have had to wait on getting parts that i need to continue the rebuild. What i have gotten done is my leaf spring painted and put back together. Also i have my front leaf hanger repositions and all bolted up. I am currently waiting on my leaf spring bushings so i can put the leaf springs on. Once i get these on i need to measure the correct distance for where the leaf springs sit on the axle and then cut them off and re-weld them with the correct distance. Once i get those welded back on i will be sending them off to get them rebuilt with new seals and bearings and the correct spacers for the different gears i will be putting in them. I am also trying to get tubing to extend my radius arms and get some plate cut out to strengthen them up. Once again sorry the process is so slow. I wish i could get it done faster.

Name:  IMG_1892.jpg
Views: 394
Size:  76.8 KB
Name:  IMG_1896.jpg
Views: 356
Size:  49.2 KB
Name:  IMG_1898.jpg
Views: 406
Size:  125.5 KB
 
Reply
Old Dec 7, 2010
  #116  
mcramer15's Avatar
Thread Starter
|
Member
Joined: Jun 2010
Posts: 8
Likes: 0
From: Alma Center, WI
I was thinking i might buy a new cab if i find a good deal for one. Will an extended cab fit on a regular cab frame?
 
Reply
Old Dec 11, 2010
  #117  
morris's Avatar
RF Veteran
iTrader: (5)
Joined: Feb 2008
Posts: 7,841
Likes: 2
From: South Detroit.
you'd have to cut into the floor of the extended cab. there is a raised portion of the frame for the bed and you have to compensate for that. it happens closer to the front of the frame on a reg cab since they are shorter.
i've seen it done in another thread (maybe from another site) so i can't give a link to it.sorry i forget where i saw it. i do remember seeing pics of that guy cutting the floor out at the rear of the cab.
 
Reply
Old Dec 11, 2010
  #118  
mcramer15's Avatar
Thread Starter
|
Member
Joined: Jun 2010
Posts: 8
Likes: 0
From: Alma Center, WI
Originally Posted by morris
you'd have to cut into the floor of the extended cab. there is a raised portion of the frame for the bed and you have to compensate for that. it happens closer to the front of the frame on a reg cab since they are shorter.
i've seen it done in another thread (maybe from another site) so i can't give a link to it.sorry i forget where i saw it. i do remember seeing pics of that guy cutting the floor out at the rear of the cab.
Alright, it sounds like i will stick with my regular cab. Thanks for the info.
 
Reply
Old Jan 15, 2011
  #119  
mcramer15's Avatar
Thread Starter
|
Member
Joined: Jun 2010
Posts: 8
Likes: 0
From: Alma Center, WI
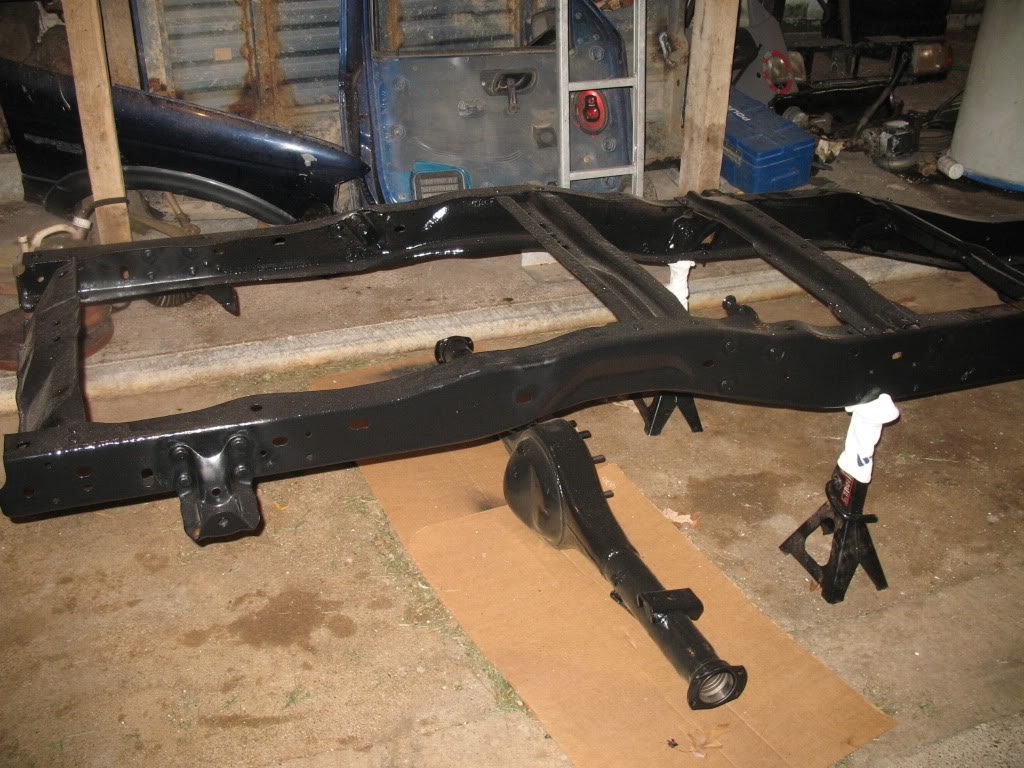
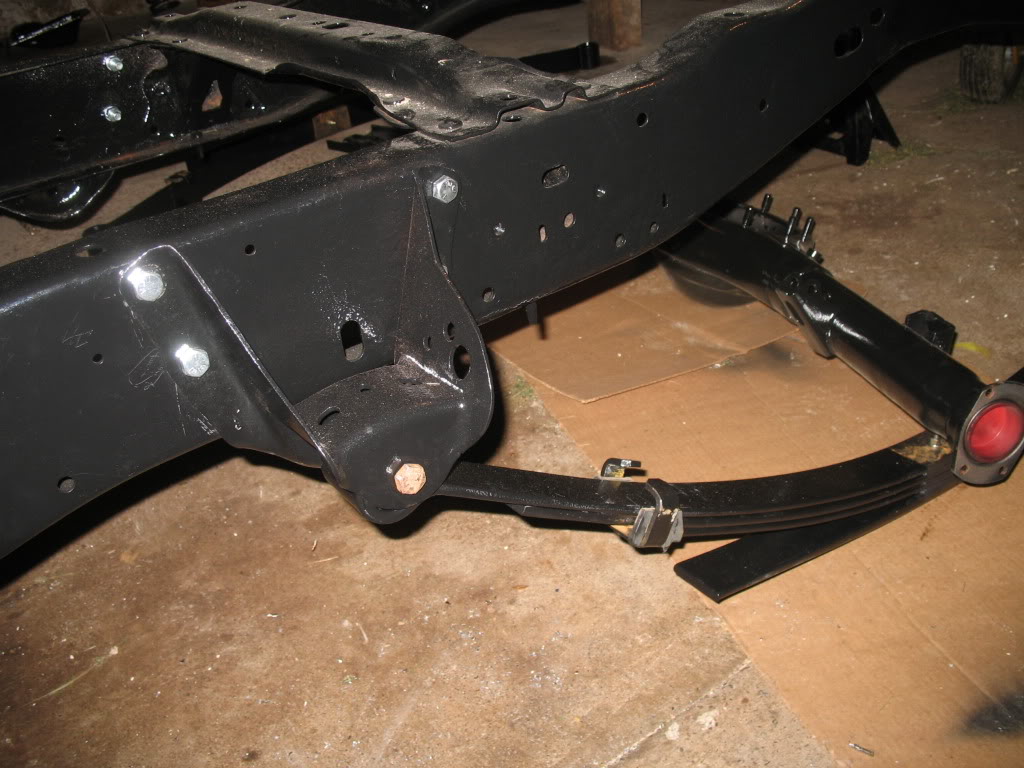
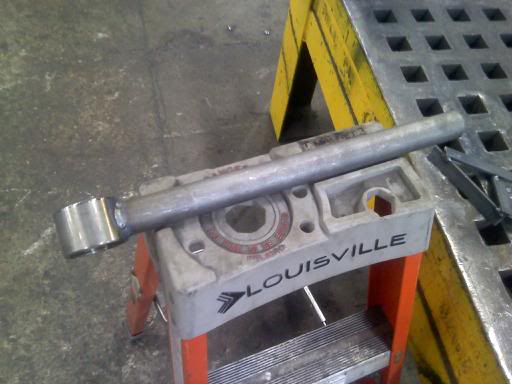
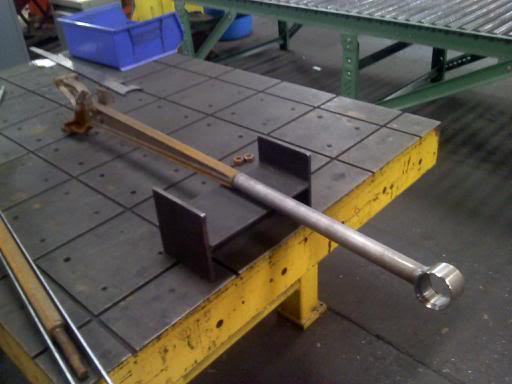
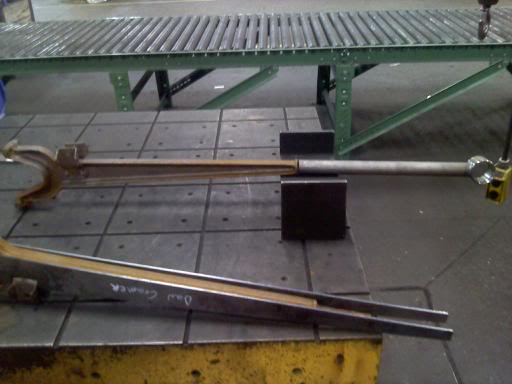
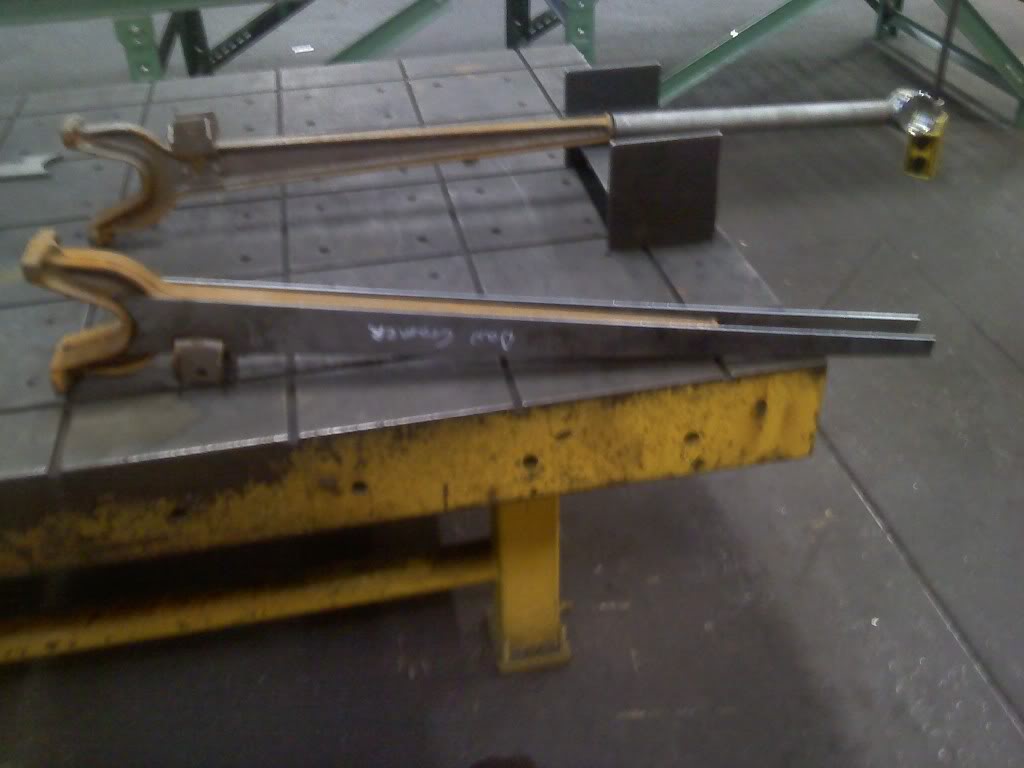
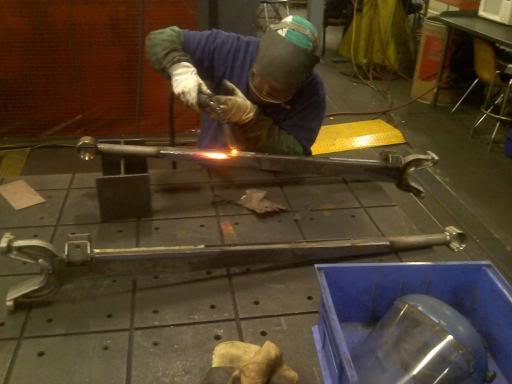
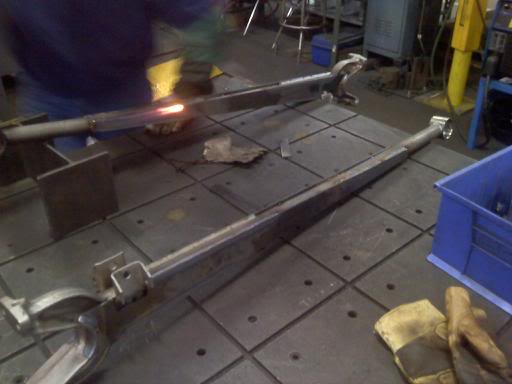
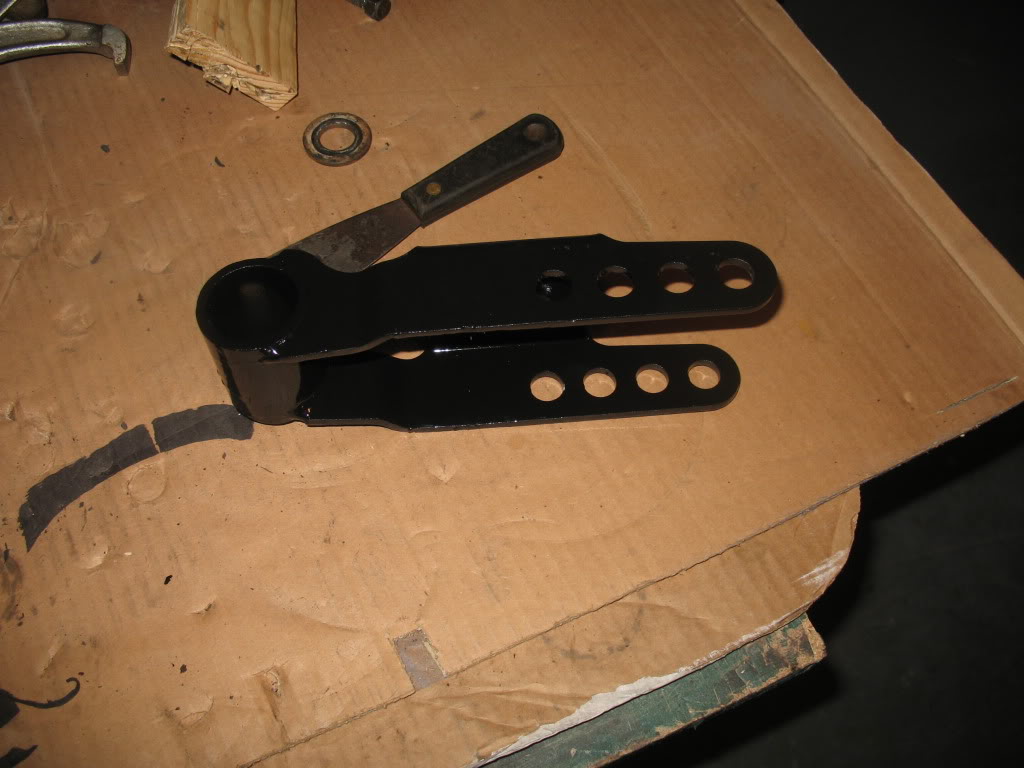
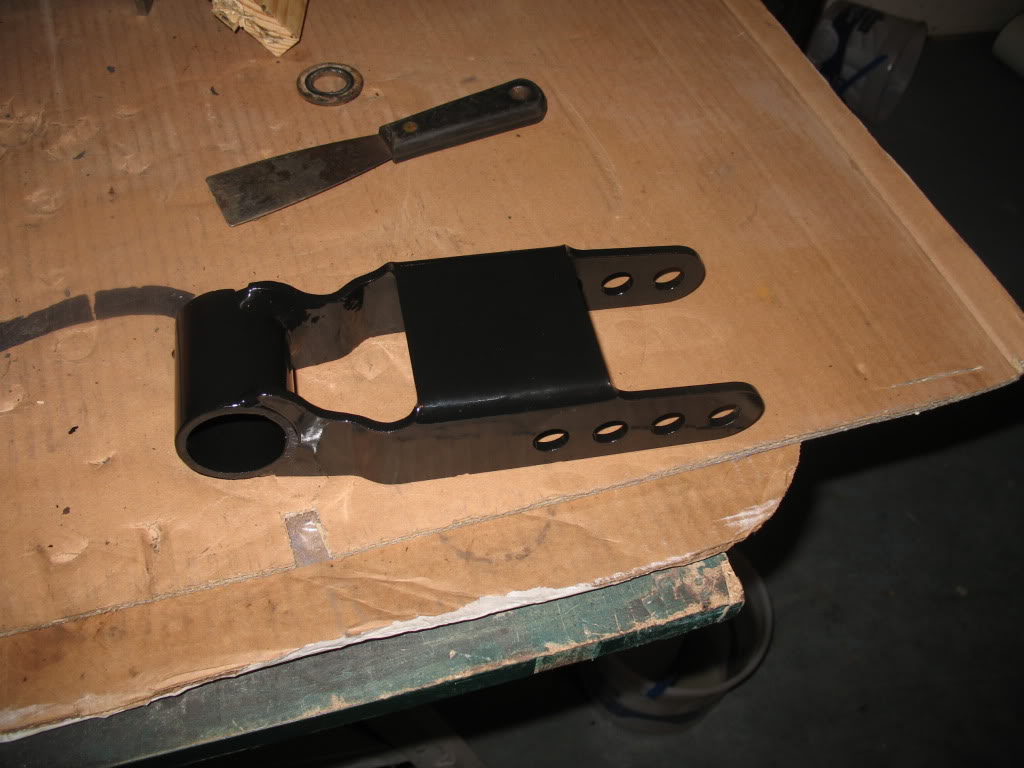
I finally got to do some more work on my truck this weekend. sorry its been so long since my last update. Here's what i have gotten done. Friday i got to go and beef up my radius arms. I designed some plates that would fit with profile of the arm and extend back and tie into the extensions.

Name:  downsized_0114111150.jpg
Views: 368
Size:  28.4 KB
Name:  downsized_0114111150a.jpg
Views: 377
Size:  29.4 KB
Name:  downsized_0114111152.jpg
Views: 386
Size:  26.2 KB
Name:  downsized_0114111152a.jpg
Views: 338
Size:  25.9 KB
Name:  0114111152b.jpg
Views: 356
Size:  56.0 KB
Name:  downsized_0114111314.jpg
Views: 351
Size:  23.9 KB
Name:  downsized_0114111313.jpg
Views: 364
Size:  22.8 KB
Name:  downsized_0114111315.jpg
Views: 342
Size:  26.2 KB
Name:  downsized_0114111315a.jpg
Views: 390
Size:  24.6 KB

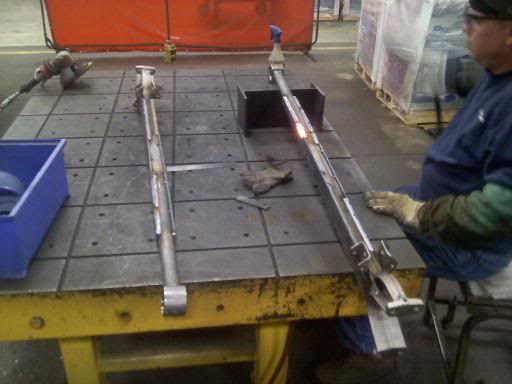
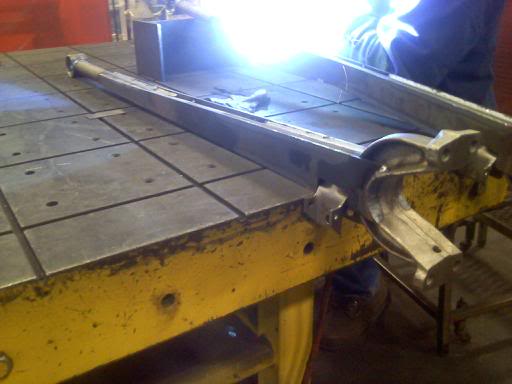
Friday night i rebuilt my rear brakes for my ford 9 in. and then Saturday morning i was able to put my extended shackles on to complete my 64 in. leaf spring shackle flip. Also i was able to measure the correct distance between the leaf springs in order to relocate the leaf spring mounting pads on my axle.

Name:  IMG_1957.jpg
Views: 344
Size:  173.8 KB
Name:  IMG_1958.jpg
Views: 396
Size:  194.8 KB
Name:  IMG_1961.jpg
Views: 339
Size:  184.0 KB
Name:  IMG_1960.jpg
Views: 390
Size:  96.0 KB
Name:  IMG_1959.jpg
Views: 382
Size:  100.8 KB
Name:  IMG_1964.jpg
Views: 356
Size:  163.1 KB
Name:  IMG_1966.jpg
Views: 645
Size:  148.1 KB
Name:  IMG_1965.jpg
Views: 361
Size:  112.8 KB
Name:  IMG_1963.jpg
Views: 381
Size:  99.6 KB

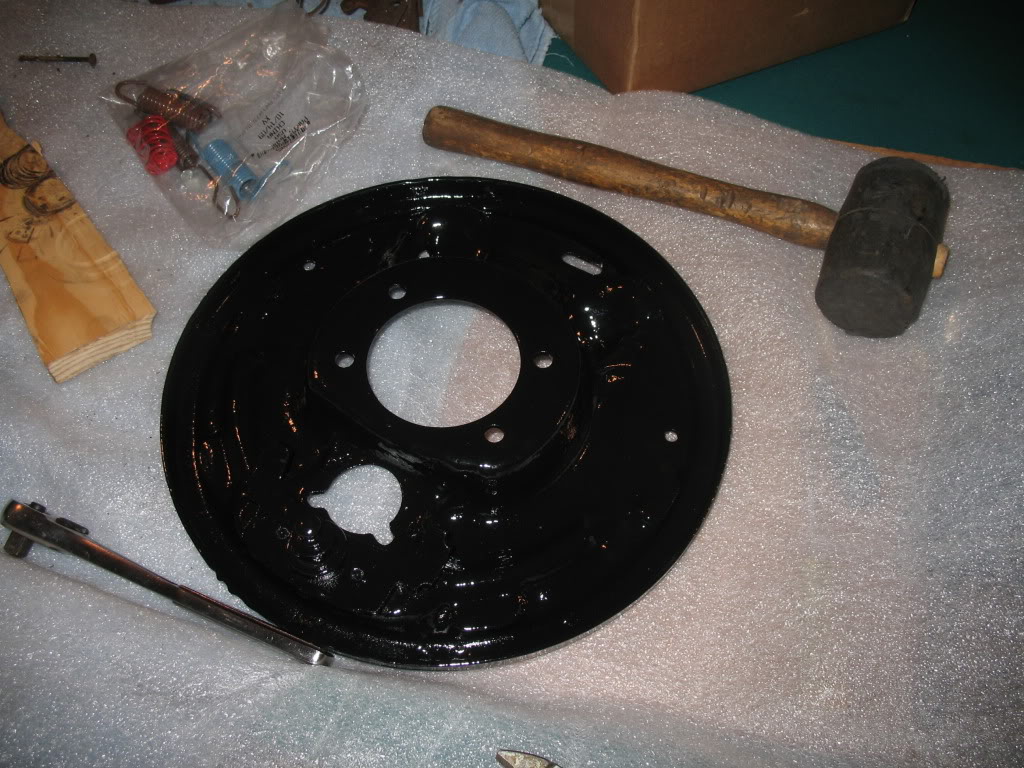
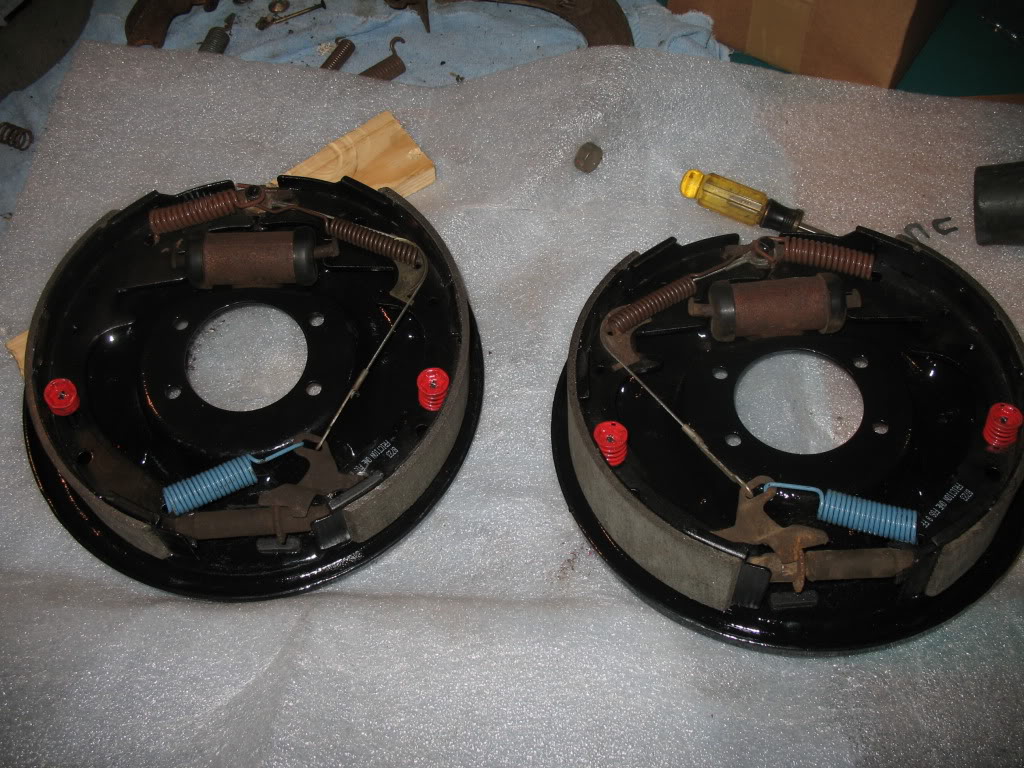
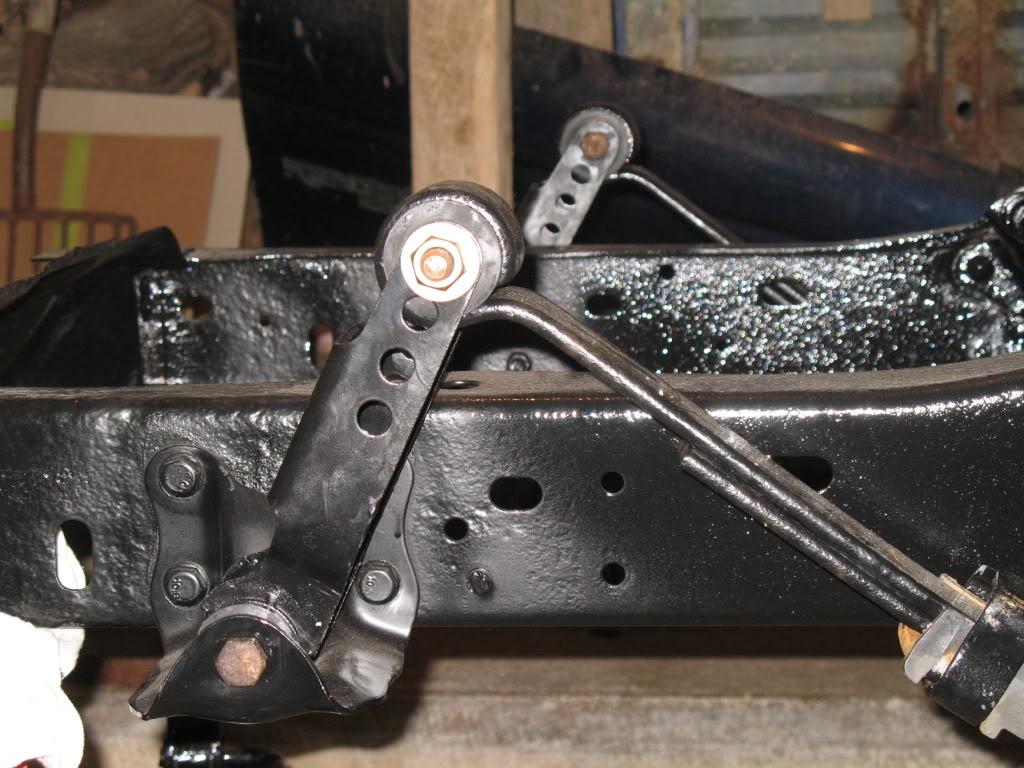
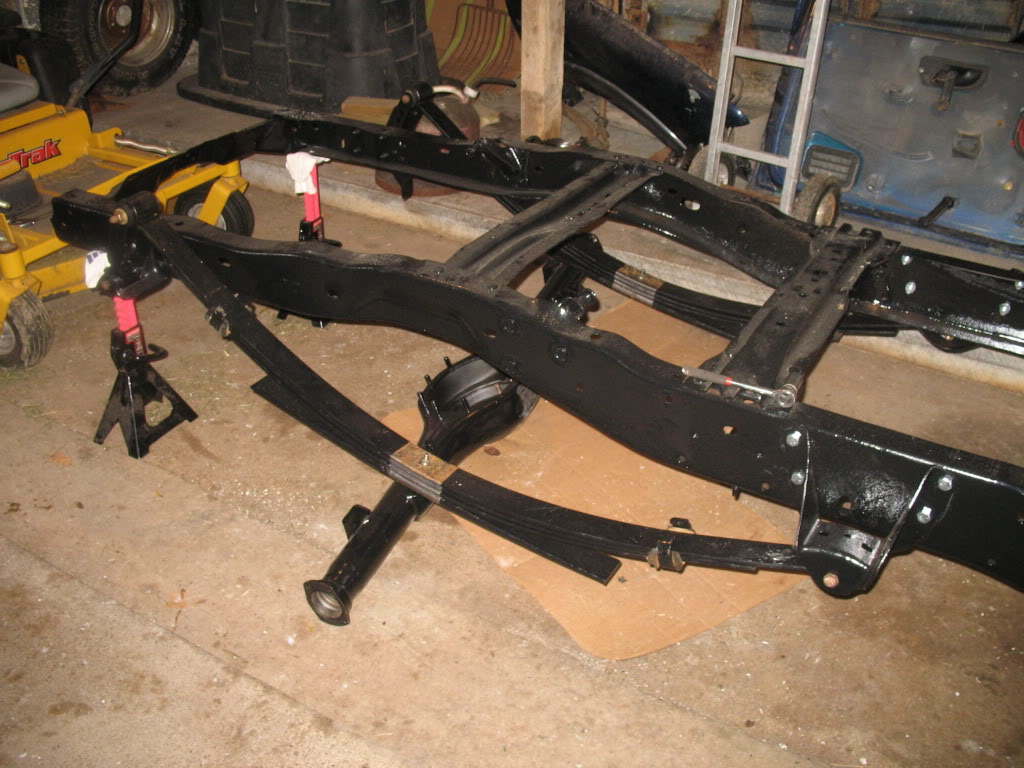
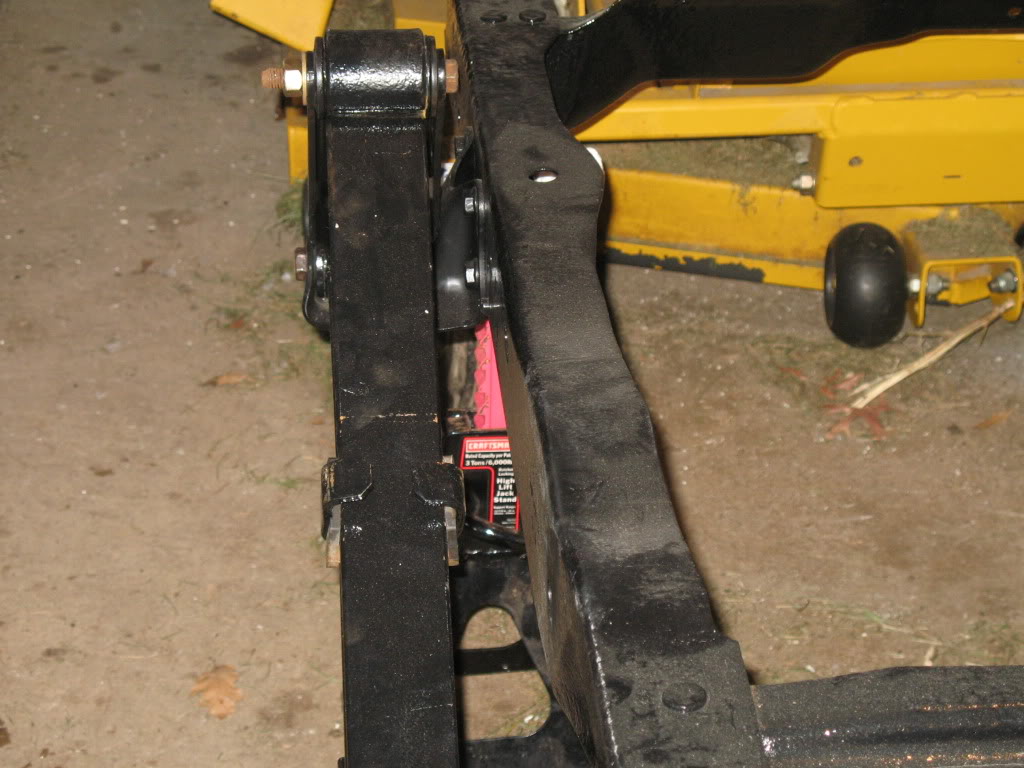
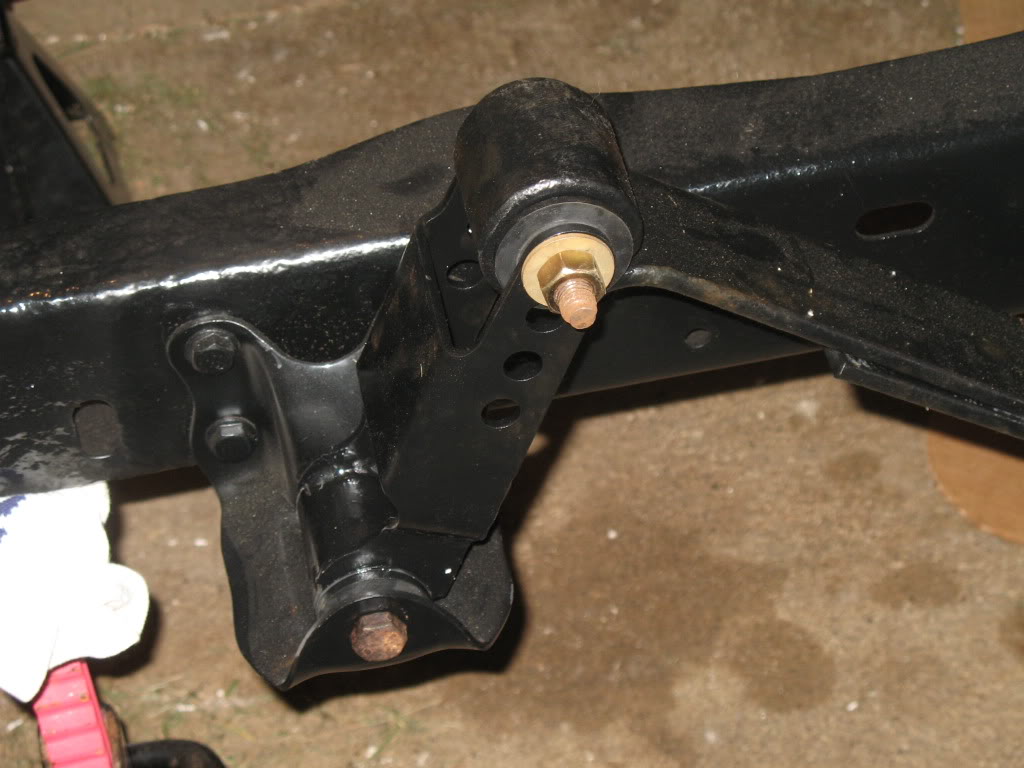
If you happen to see something wrong with this setup please inform me. Thanks.
 
Reply
Old Jan 16, 2011
  #120  
Ardy's Avatar
Member
Joined: Aug 2010
Posts: 276
Likes: 0
From: Windsor NS
Looks so good!
 
Reply
Old Jan 16, 2011
  #121  
mcramer15's Avatar
Thread Starter
|
Member
Joined: Jun 2010
Posts: 8
Likes: 0
From: Alma Center, WI
Thanks!
 
Reply
Old Jan 16, 2011
  #122  
Downey's Avatar
RF Veteran
iTrader: (1)
Joined: Oct 2007
Posts: 8,470
Likes: 6
From: Muncy, PA
plz tell me you are using all grade 8 hardware on your suspension parts
 
Reply
Old Jan 17, 2011
  #123  
mcramer15's Avatar
Thread Starter
|
Member
Joined: Jun 2010
Posts: 8
Likes: 0
From: Alma Center, WI
Originally Posted by Downey
plz tell me you are using all grade 8 hardware on your suspension parts
Well the bolt are the original so i dont know if they were grade 8 or not. and the nuts i bought are grade 8 so i beleive its all good.
 
Reply
Old Jan 21, 2011
  #124  
mcramer15's Avatar
Thread Starter
|
Member
Joined: Jun 2010
Posts: 8
Likes: 0
From: Alma Center, WI
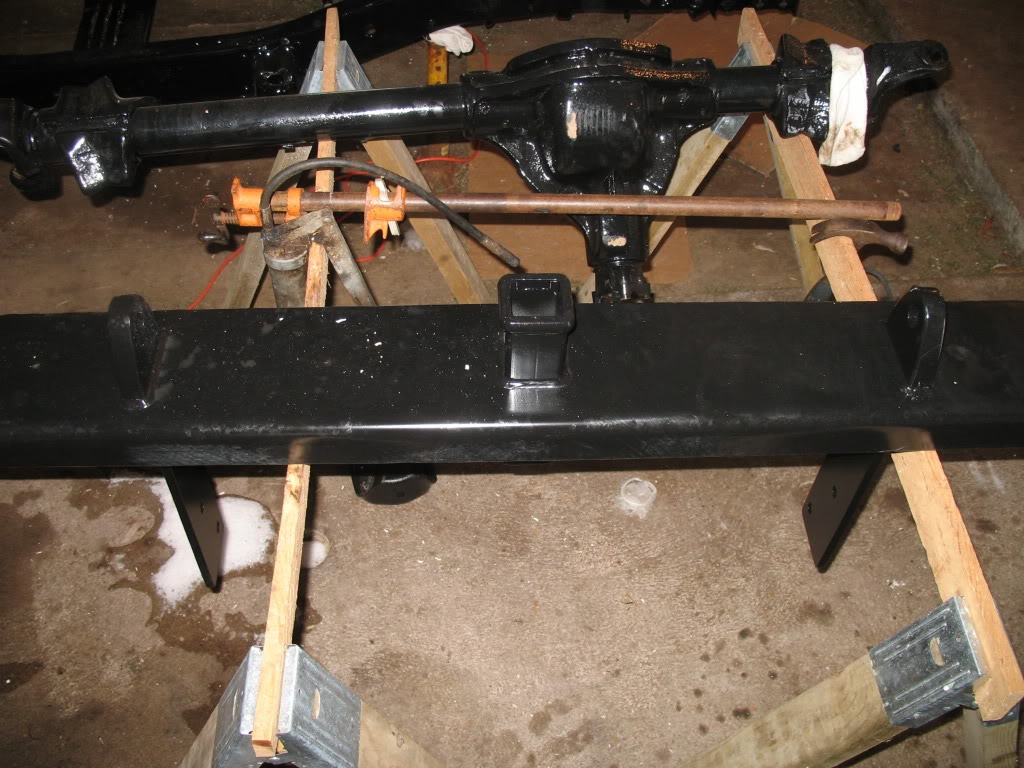
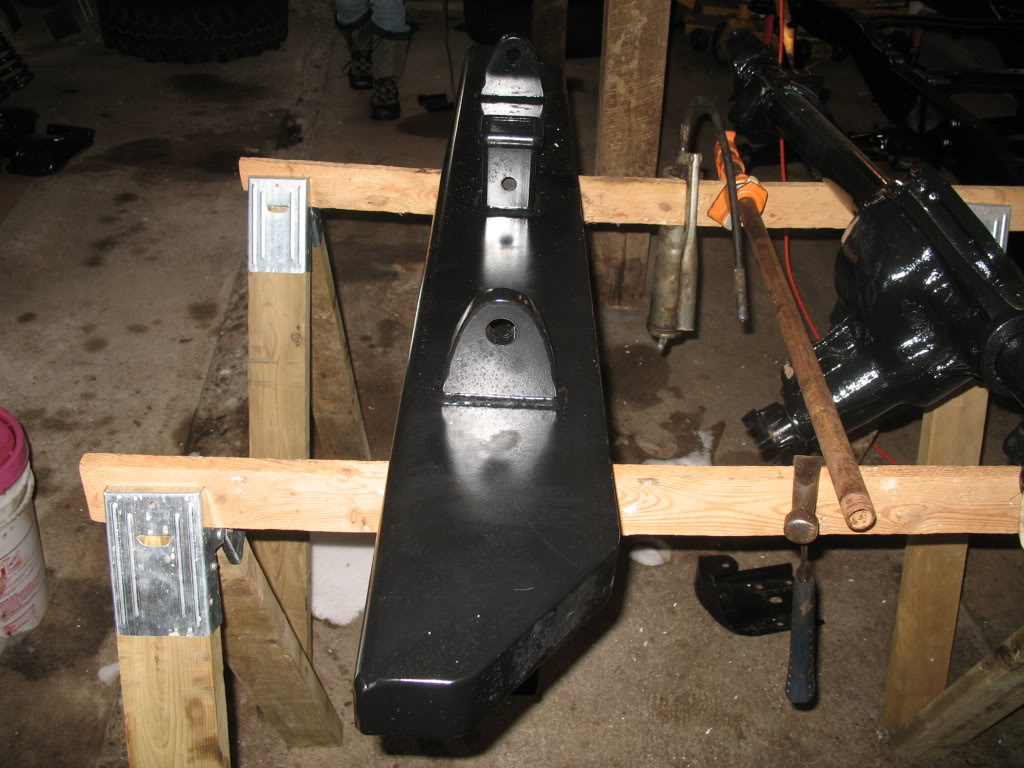
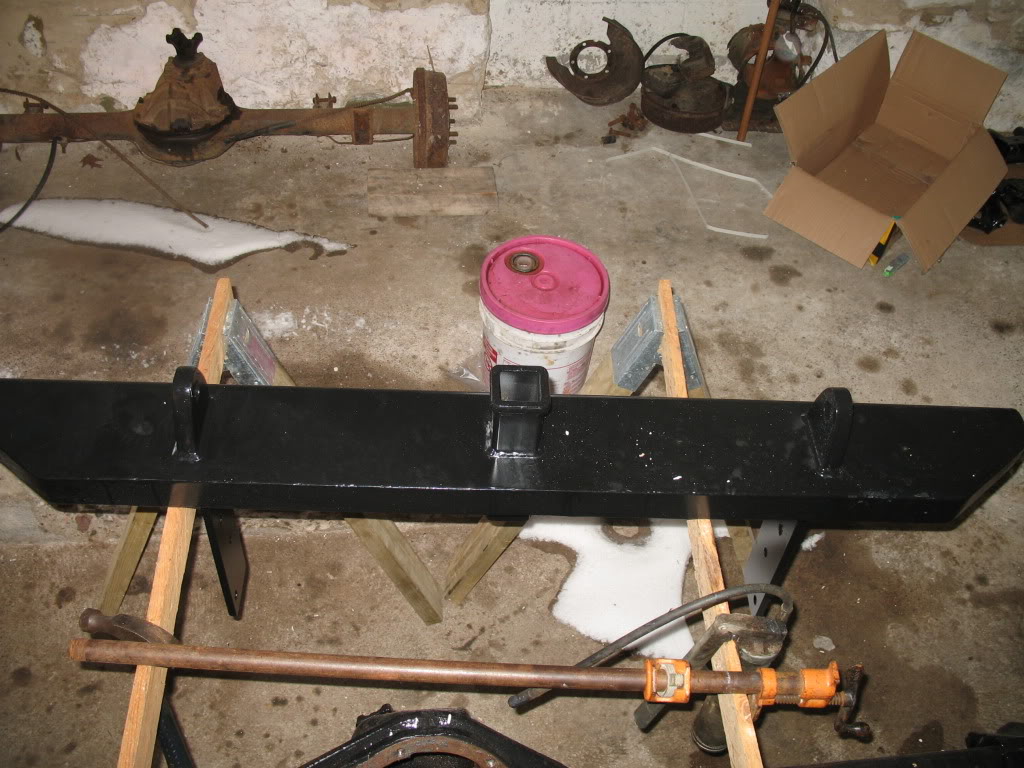
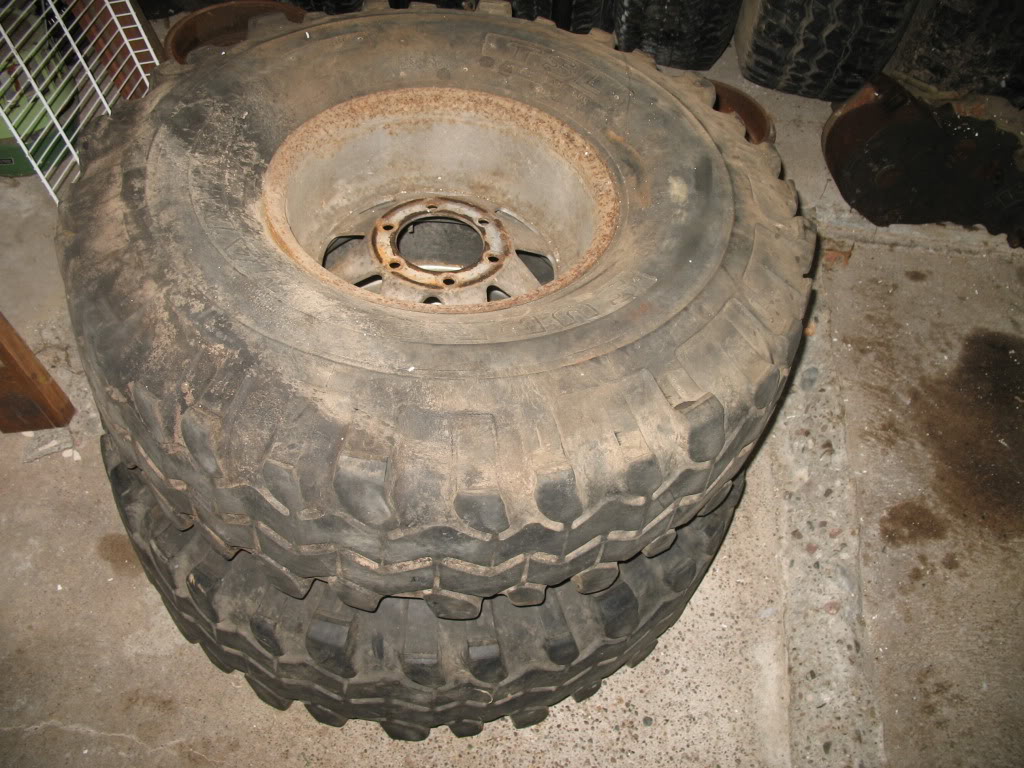
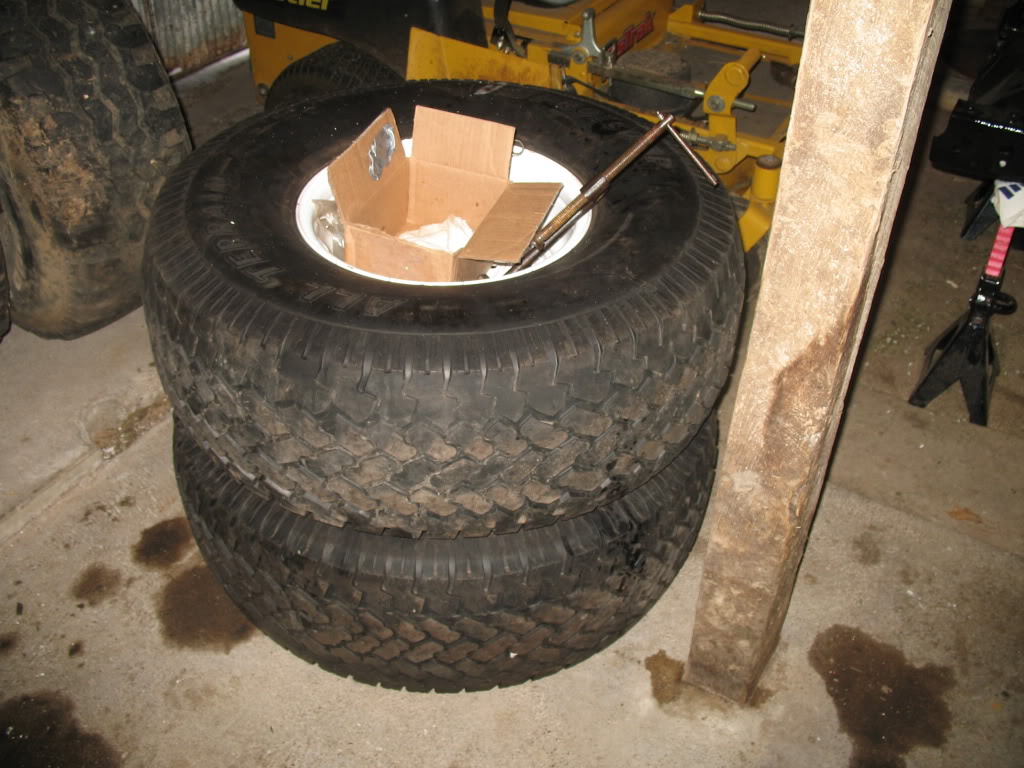
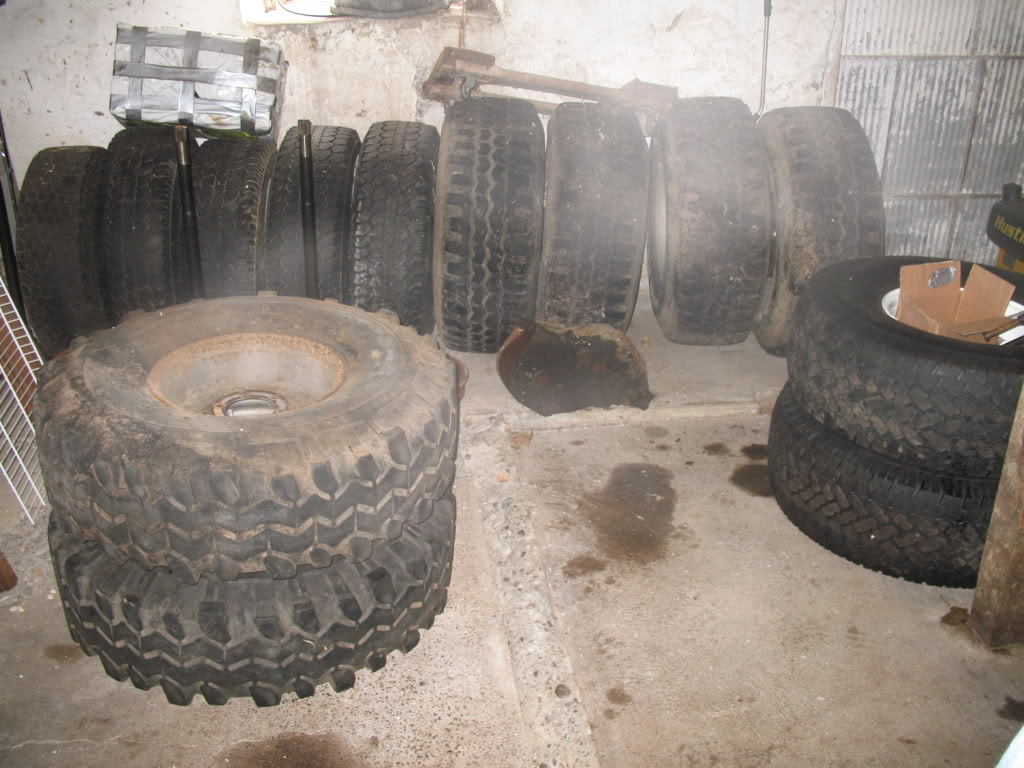
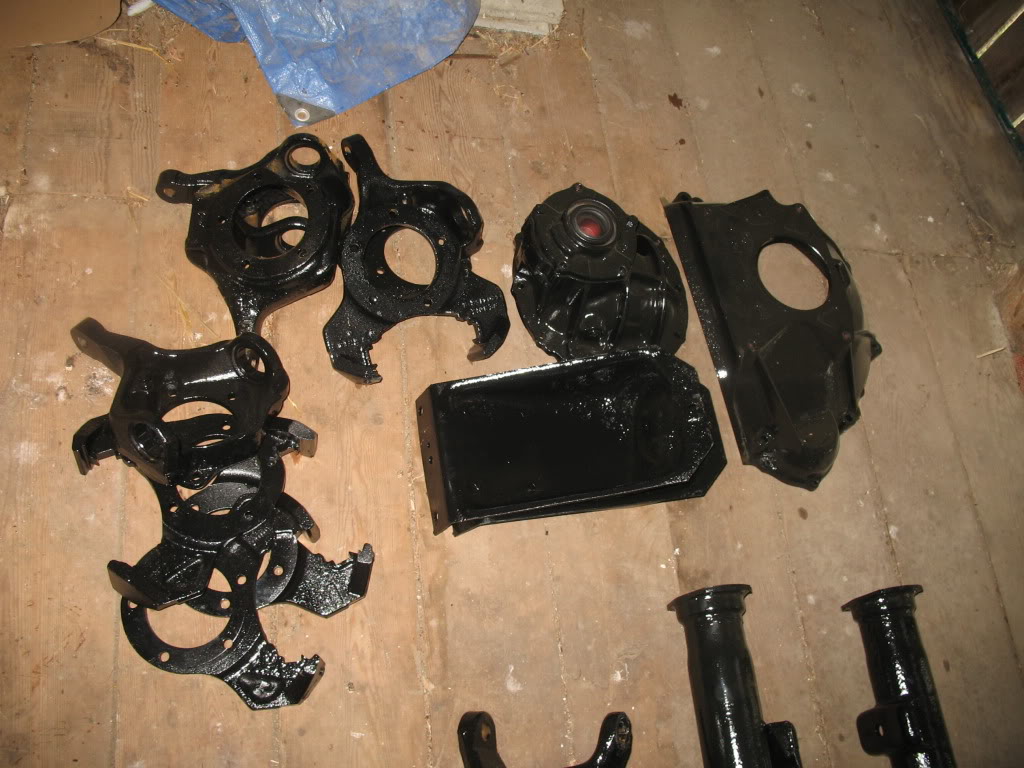
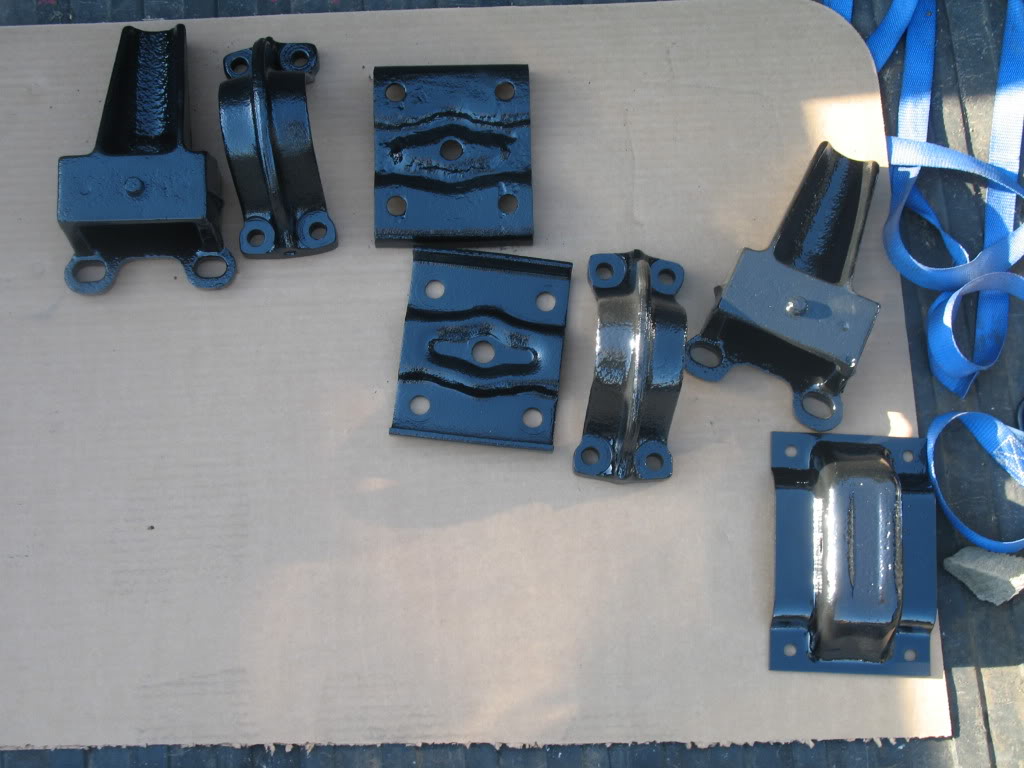
This weekend i got my axle leaf spring mounts moved in to the correct width along with getting my radius arms blasted so they should be painted this next week. I also got some pictures taken of my bumper which is now painted and a few tires i picked up.

Name:  IMG_1967.jpg
Views: 375
Size:  164.4 KB
Name:  IMG_1968.jpg
Views: 376
Size:  124.6 KB
Name:  IMG_1969.jpg
Views: 351
Size:  159.0 KB
Name:  IMG_1970.jpg
Views: 363
Size:  160.4 KB
Name:  IMG_1971.jpg
Views: 397
Size:  140.5 KB
Name:  IMG_1972.jpg
Views: 356
Size:  143.3 KB
 
Reply
Old Jan 22, 2011
  #125  
mcramer15's Avatar
Thread Starter
|
Member
Joined: Jun 2010
Posts: 8
Likes: 0
From: Alma Center, WI
If you cant tell... I cant afford to buy new tires... these will do for now
 
Reply

Thread Tools
Search this Thread

All times are GMT -6. The time now is 12:03 AM.