
Wingman's 2002 Xlt Build

Thread Starter
|
Member

Joined: Jun 2011
Posts: 382
Likes: 1
From: Burlington, MA
New custom 06+ tails courtesy of Pedro. Excuse the crooked bumper. I also scored a butt load of led's from him too (brake lights, blinkers, bed lights, third brake light and plate lights). i'll take pics when it's dark.


Already made a set of new tails for myself lol they'll be on next week. Keeping the truck for now to haul the new toy around
the chances of that happening are very slim but I may be able to do it at some point lol


Thread Starter
|
Member
Joined: Jun 2011
Posts: 382
Likes: 1
From: Burlington, MA
thanks man :) I'm really happy with the wheel/tire combo too. so far they are holding up great. the a/t's have done fine in everything i've thrown at them.
haha thanks, i try and keep it looking nice. gotta keep up with it since it's an 02 and the weather takes a toll. I'm getting some body work done soon, maybe some painting done too.
haha thanks, i try and keep it looking nice. gotta keep up with it since it's an 02 and the weather takes a toll. I'm getting some body work done soon, maybe some painting done too.
Thread Starter
|
Member
Joined: Jun 2011
Posts: 382
Likes: 1
From: Burlington, MA
Did a few things to the truck recently...
Got a bed matt and repainted the bed liner

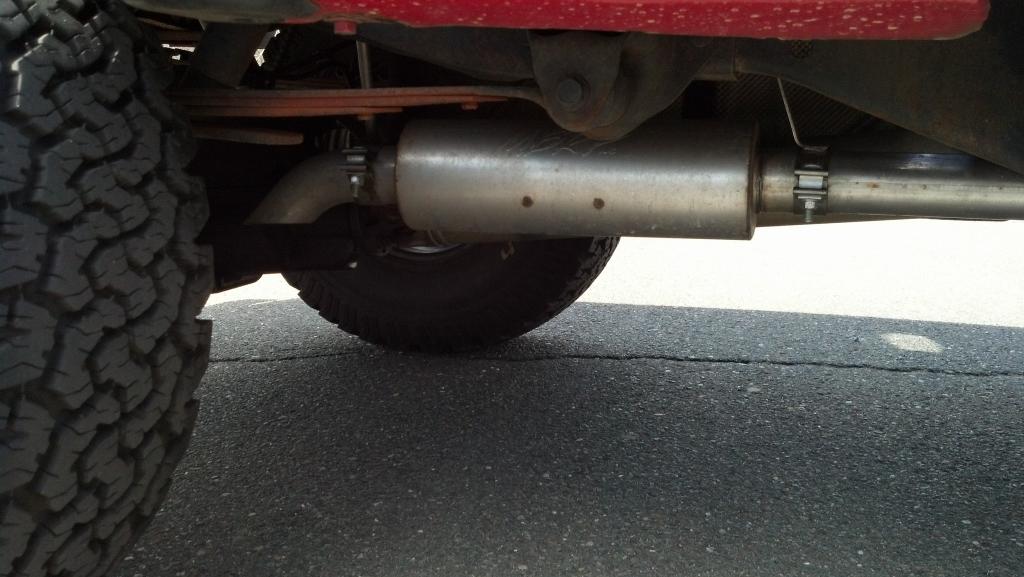
Got an MBRP catback exhaust
replaced the three bulbs in my dome light with cool white leds as well as my glove box


And the most major thing I had done was the body work. My rear quarter panels were rusting out so i got them redone and got my passenger side rear door completely replaced because of the severe rust damage.


There is a slight difference in the color in the back but all in all I am very happy with it.
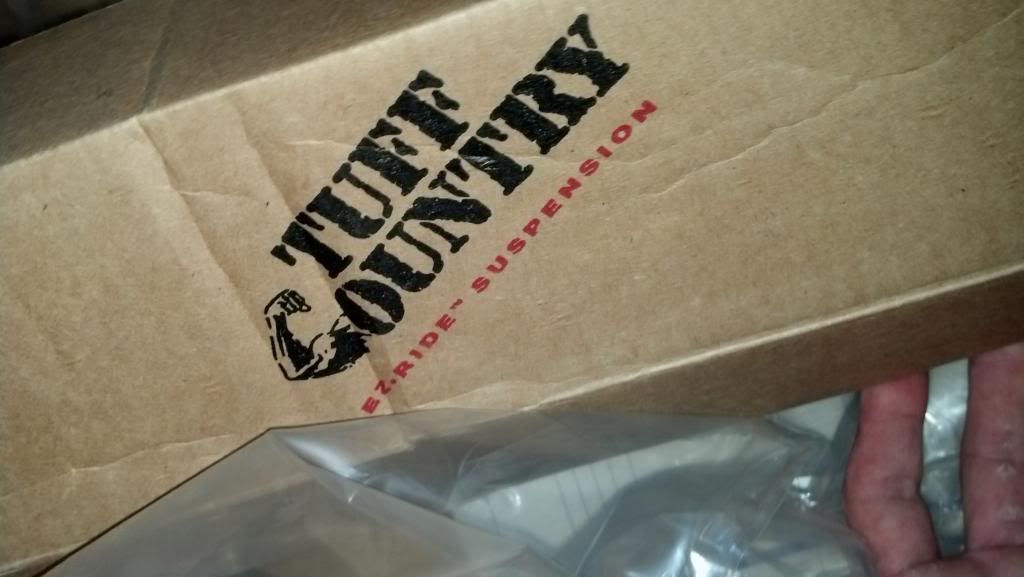
oh yea, I'm lifting it up more! I got 2 inch aal for the rear and camber kits for the front to help with the alignment after i crank the tbars some more.
Got a bed matt and repainted the bed liner

Got an MBRP catback exhaust

replaced the three bulbs in my dome light with cool white leds as well as my glove box


And the most major thing I had done was the body work. My rear quarter panels were rusting out so i got them redone and got my passenger side rear door completely replaced because of the severe rust damage.


There is a slight difference in the color in the back but all in all I am very happy with it.
oh yea, I'm lifting it up more! I got 2 inch aal for the rear and camber kits for the front to help with the alignment after i crank the tbars some more.

Last edited by Wingman108; Sep 9, 2013 at 08:24 PM.


Nice build. So this is the guy Pedro shows pics of his with! lol. I dig the exhaust too. And DAMN YOU with those taillights. lol.
Yeah that Bed Armor CRAP is CRAP. It's like black paint with rubbery specs scattered about....not building up texture. I only tried it 'cause it was $30 after rebates and discounts. I covered mine up with Herculiner this summer and I'm VERY pleased with the results.
Yeah that Bed Armor CRAP is CRAP. It's like black paint with rubbery specs scattered about....not building up texture. I only tried it 'cause it was $30 after rebates and discounts. I covered mine up with Herculiner this summer and I'm VERY pleased with the results.
Thread Starter
|
Member
Joined: Jun 2011
Posts: 382
Likes: 1
From: Burlington, MA
Nice build. So this is the guy Pedro shows pics of his with! lol. I dig the exhaust too. And DAMN YOU with those taillights. lol.
Yeah that Bed Armor CRAP is CRAP. It's like black paint with rubbery specs scattered about....not building up texture. I only tried it 'cause it was $30 after rebates and discounts. I covered mine up with Herculiner this summer and I'm VERY pleased with the results.
Yeah that Bed Armor CRAP is CRAP. It's like black paint with rubbery specs scattered about....not building up texture. I only tried it 'cause it was $30 after rebates and discounts. I covered mine up with Herculiner this summer and I'm VERY pleased with the results.

Thread Starter
|
Member
Joined: Jun 2011
Posts: 382
Likes: 1
From: Burlington, MA
So I finally got around to installing my subwoofer. The problem was, it became much more of a project than i anticipated. So I started with a kicker 10 inch subwoofer and enclosure that was kinda big. My original vision was to somehow mount a low profile sub box to the back wall. After realizing that was a lost cause I came up with this shelf idea.
You can see here after the jump seat was taken out, the floor is exposed and isn't level. Oh and I had to cut my rear cupholder jack cover to fit the sub.

THE SHELF WAS BORN
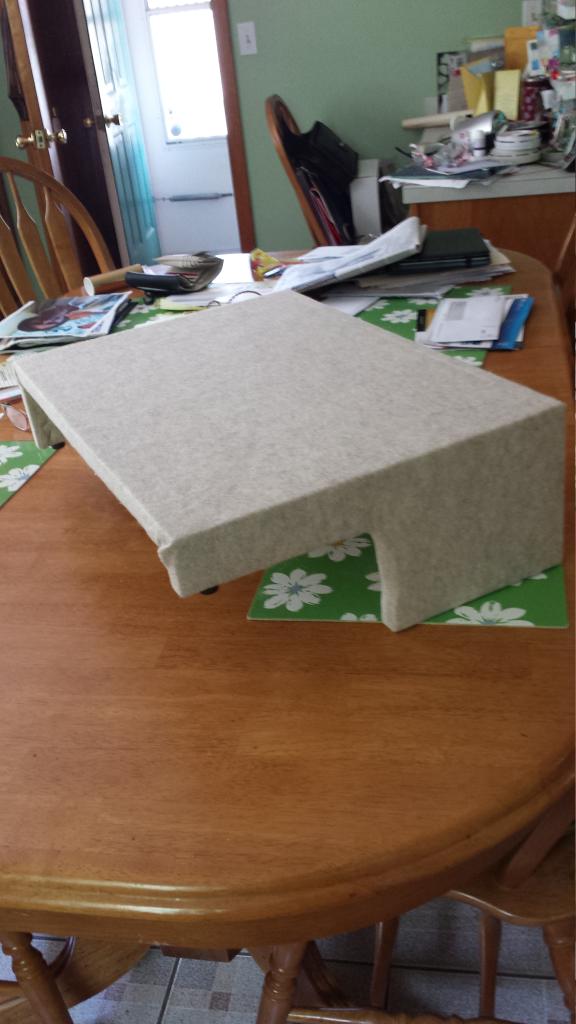

I screwed both the amp and sub into the shelf using the brackets that they supplied.

You can see here after the jump seat was taken out, the floor is exposed and isn't level. Oh and I had to cut my rear cupholder jack cover to fit the sub.

THE SHELF WAS BORN


I screwed both the amp and sub into the shelf using the brackets that they supplied.


Member
Joined: Jun 2014
Posts: 74
Likes: 0
From: gallipolis ohio
I just used the 97 cent cans from home depot, flat black ones on my old truck. It holds up really well. POR15 is meant to be applied to rusted surfaces so if your frame isn't bad, I wouldn't really bother. My current truck is undercoated so I don't have to worry for a while lol
the ones from home depot are made in the same warehouse as rustoleum. I'll stick with those and not walmart ones.
Thread Starter
|
Member
Joined: Jun 2011
Posts: 382
Likes: 1
From: Burlington, MA
Started my new front end project the other day with Pedro.

phase one: fit the new bumper, install new headlights and paint and install new grill. The new valence and bumper still need paint at this point but we ran out of daylight.

Phase two: Paint valence satin black with Krylon Fusion paint (3 coats), color match paint the new bumper (3 coats red, 4 coats clear).


All put back together.

had to paint my running boards because my new bumper made how faded they really were stand out lol.

All cleaned up.


Thread
Thread Starter
Forum
Replies
Last Post
straightedge
Wheels & Tires Semi-Tech
20
Sep 30, 2005 06:31 PM


