Project Logs For detailed builds specific to the Ford Ranger, one thread per vehicle please.

92 Ranger Build

Thread Tools
 
Search this Thread
 
Old Dec 25, 2009
  #176  
INT3RC3PTOR's Avatar
RF Veteran
iTrader: (4)
Joined: Jul 2005
Posts: 8,201
Likes: 2
From: Minnesooooota
nice man!
 
Reply
Old Dec 25, 2009
  #177  
Shaklakan's Avatar
Thread Starter
|
Member
Joined: Jan 2008
Posts: 1,100
Likes: 0
From: La Habra CA
oh yes and as soon as i get the chance im going to the auto parts store and buying a air chisel and going to town on those coil buckets!!!! Then the engine cage gets bolted on and coilovers mounted adjusted and then driving to work!!!
 
Reply
Old Dec 29, 2009
  #178  
Shaklakan's Avatar
Thread Starter
|
Member
Joined: Jan 2008
Posts: 1,100
Likes: 0
From: La Habra CA
Just got back from getting the coilovers, and engine cage!! Going to start the prep tomorrow!
 
Reply
Old Dec 29, 2009
  #179  
Quasi242's Avatar
Member
Joined: Jun 2008
Posts: 155
Likes: 0
From: Tucson, AZ
Congrats! Sounds like you have a large project ahead of you. You should like the ride of the coil overs.
 
Reply
Old Dec 30, 2009
  #180  
Shaklakan's Avatar
Thread Starter
|
Member
Joined: Jan 2008
Posts: 1,100
Likes: 0
From: La Habra CA
Originally Posted by Quasi242
Congrats! Sounds like you have a large project ahead of you. You should like the ride of the coil overs.
I actually do i am welding on some plates to the engine cage to make it bolt on and then un riveting the coil buckets and sanding down the frame to bare metal after the engine cage is bolted on im going to weld it on and mount the coilovers then i should be good to go! Ill try to stay updated in here. Hopefully it goes well.
 
Reply
Old Dec 30, 2009
  #181  
Quasi242's Avatar
Member
Joined: Jun 2008
Posts: 155
Likes: 0
From: Tucson, AZ
Good luck. Removing the rear hanger rivets was one of the toughest parts of my axle/rear leaf spring swap. I used an angle grinder to remove the heads and then tried to push them through with a hydraulic hammer/punch (no dice). I then used a long rod as a punch and a sledge hammer. That combo flexed the frame away from the hangers and the hangers fell free. Continuing the same approach on the remaining rivets caused the exposed shaft to mushroom out. So once again I had to attack them with an angle grinder, removing more material until they were flush with the frame. After that, the long rod/sledge hammer finished the work. Each of the rivets went ballistic when the finally broke free. I have read that others have not been that tough, but mine were.
 
Reply
Old Dec 30, 2009
  #182  
Shaklakan's Avatar
Thread Starter
|
Member
Joined: Jan 2008
Posts: 1,100
Likes: 0
From: La Habra CA
My rear hanger rivets were so easy lol. The toughest rivet i have ever had to remove was a ball joint rivet on a dodge durango those were stupid.
 
Reply
Old Jan 6, 2010
  #183  
Shaklakan's Avatar
Thread Starter
|
Member
Joined: Jan 2008
Posts: 1,100
Likes: 0
From: La Habra CA
Coilovers were sent out Monday and im waiting on them to come back but until then i stripped the engine bay clean!!!
Name:  1262836102.jpg
Views: 226
Size:  50.4 KB
 
Reply
Old Jan 8, 2010
  #184  
Shaklakan's Avatar
Thread Starter
|
Member
Joined: Jan 2008
Posts: 1,100
Likes: 0
From: La Habra CA
Well just got done ripping out the coils and getting the coil bucket rivets notched out to make it easier on the air hammer. But im off to work pics tonight!!!!
 
Reply
Old Jan 9, 2010
  #185  
Shaklakan's Avatar
Thread Starter
|
Member
Joined: Jan 2008
Posts: 1,100
Likes: 0
From: La Habra CA
Picked up my new welder!!!!

Its an old Linde welder. About 30 years old and it still lays down beautiful welds.

Name:  1263066689.jpg
Views: 212
Size:  42.3 KB
 
Reply
Old Jan 10, 2010
  #186  
Shaklakan's Avatar
Thread Starter
|
Member
Joined: Jan 2008
Posts: 1,100
Likes: 0
From: La Habra CA
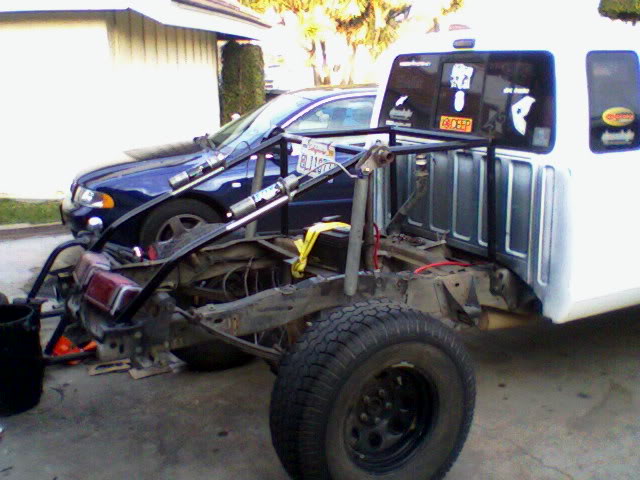
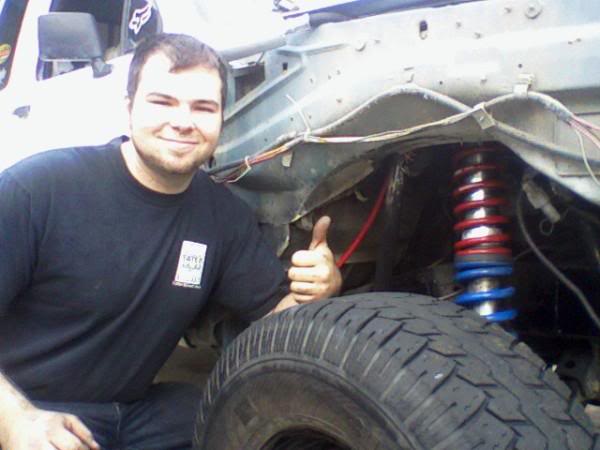
Well i got one of the sides of the engine cage welded on and one coil bucket ripped off didnt have much time before i ran out of light today. Heres some suspension cycling pics.
Name:  1263186581.jpg
Views: 220
Size:  25.5 KB

I think my truck had to go lol
Name:  1263186580.jpg
Views: 193
Size:  12.9 KB
 
Reply
Old Jan 11, 2010
  #187  
Shaklakan's Avatar
Thread Starter
|
Member
Joined: Jan 2008
Posts: 1,100
Likes: 0
From: La Habra CA
Well put down some plates for the tubes to weld to. And just to let you guys know this weld was in the process of being grinded down to be gone over again the end result was much better.
Name:  1263252458.jpg
Views: 213
Size:  46.5 KB

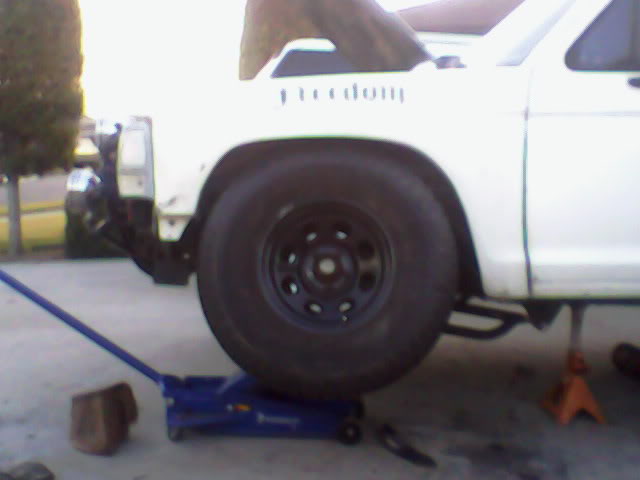
Heres a pic of the truck at full bump!
Name:  1263252472.jpg
Views: 210
Size:  45.3 KB

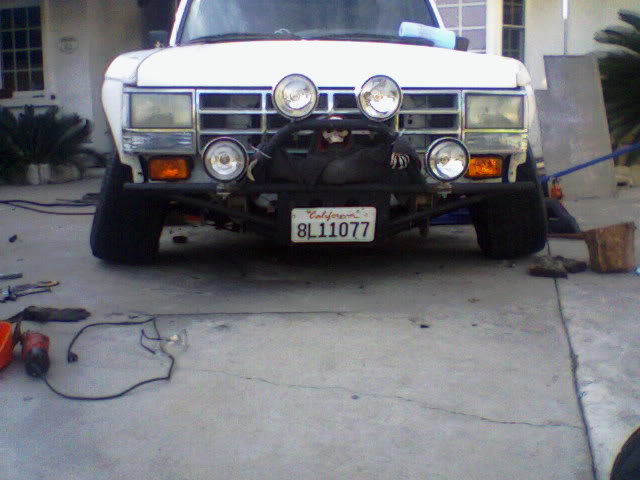
Got the engine cage all welded up and ready for coilovers. The hard part is over now time ot bump and strap it.
 
Reply
Old Jan 23, 2010
  #188  
Shaklakan's Avatar
Thread Starter
|
Member
Joined: Jan 2008
Posts: 1,100
Likes: 0
From: La Habra CA
Well the rain is over with for now. Flapper wheeled the rust off today and wd40'ed the bed cage so it won't rust before i can finish building it. Finished up routing the intake to its new home. Battery is being wired up tomorrow. Ill take some pics of the new intake setup and some process of moving the battery to the back of the truck.
 
Reply
Old Jan 24, 2010
  #189  
Shaklakan's Avatar
Thread Starter
|
Member
Joined: Jan 2008
Posts: 1,100
Likes: 0
From: La Habra CA
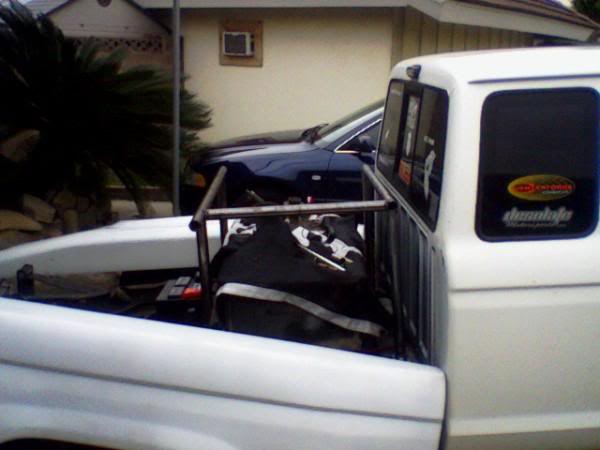
Well the battery move went awesome i had all the right parts and it went together pretty fast. Only thing left to do is cnc cut the battery hold down box at school and weld it all together here are some pics.
Name:  1264392854.jpg
Views: 226
Size:  48.1 KB

And a action shot of me cutting out the battery tray.
Name:  1264390933.jpg
Views: 207
Size:  26.7 KB
 
Reply
Old Jan 26, 2010
  #190  
Shaklakan's Avatar
Thread Starter
|
Member
Joined: Jan 2008
Posts: 1,100
Likes: 0
From: La Habra CA
Got the truck on all fours kinda.
Name:  1264540750.jpg
Views: 216
Size:  50.9 KB
 
Reply
Old Jan 26, 2010
  #191  
seed60's Avatar
RF Veteran
iTrader: (15)
Joined: Jun 2008
Posts: 5,584
Likes: 0
From: Mooresville, NC
Love the stance!! Can't wait to see it finished.
 
Reply
Old Jan 26, 2010
  #192  
whippersnapper02's Avatar
RF Veteran
iTrader: (1)
Joined: Sep 2006
Posts: 7,415
Likes: 4
From: Earth, Milky Way Galaxy
Looks sweet man.
 
Reply
Old Jan 26, 2010
  #193  
Shaklakan's Avatar
Thread Starter
|
Member
Joined: Jan 2008
Posts: 1,100
Likes: 0
From: La Habra CA
Yah we are moving right along with everything the only thing left to finish is the bedcage which is like half maybe 40% done. Cutting the shock mounts out tomorrow.

Name:  l_2320564546b44de7b235425a879fd732.jpg
Views: 207
Size:  39.7 KB
Name:  l_93277f56c9e742fbaf5155bb02f9b2ff.jpg
Views: 250
Size:  21.6 KB
Name:  l_38f5f9ca498b40faa7d4ff0939ebf1c9.jpg
Views: 264
Size:  32.0 KB
Name:  l_de04ec53562a43798fd59f0e9d8a9b55.jpg
Views: 198
Size:  28.0 KB
Name:  l_317c57417e0446f4b0f6137906d2dbac.jpg
Views: 233
Size:  34.3 KB
 
Reply
Old Jan 26, 2010
  #194  
87xlt's Avatar
Member
Joined: Jun 2008
Posts: 876
Likes: 3
From: In my truck!
Truck looks badass man!
 
Reply
Old Jan 26, 2010
  #195  
Shaklakan's Avatar
Thread Starter
|
Member
Joined: Jan 2008
Posts: 1,100
Likes: 0
From: La Habra CA
And that black hunk of junk with the pirate flag on it is a 23 gal fuel cell. Gonna wire wheel it and paint it red before plumbing it.
 
Reply
Old Jan 26, 2010
  #196  
seed60's Avatar
RF Veteran
iTrader: (15)
Joined: Jun 2008
Posts: 5,584
Likes: 0
From: Mooresville, NC
You need a bender!!
 
Reply
Old Jan 26, 2010
  #197  
Demo1986's Avatar
Member
Joined: Feb 2009
Posts: 423
Likes: 0
From: Long Beach, CA
looks good man. i didnt know you had this thread. you've done a lot of changes since last time i saw your truck. keep it up
 
Reply
Old Jan 26, 2010
  #198  
Shaklakan's Avatar
Thread Starter
|
Member
Joined: Jan 2008
Posts: 1,100
Likes: 0
From: La Habra CA
Originally Posted by seed60
You need a bender!!
wanna buy me one? Its gonna have some bends in it. I know someone willign to let me rent there bender lol.
 
Reply
Old Jan 29, 2010
  #199  
Shaklakan's Avatar
Thread Starter
|
Member
Joined: Jan 2008
Posts: 1,100
Likes: 0
From: La Habra CA
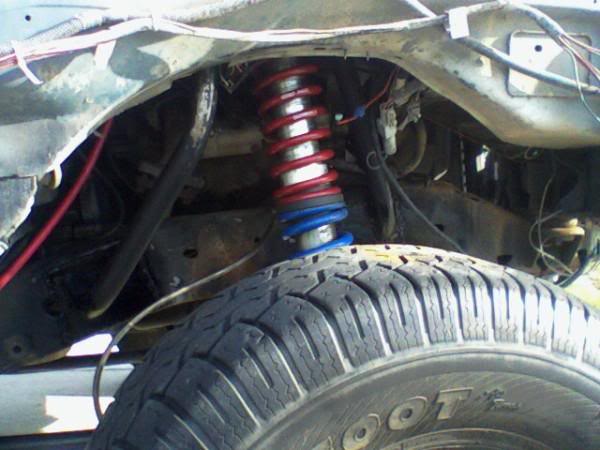
Well the truck is on all fours we have the rear shock mounts done i just need to plate them in to strengthen them. Then we need to finish up some of the tubing work on the bedcage but right now it is pretty driveable during the day because of the lack of a license plate light lol. So for the first time in a month and some days i will be driving the truck to work!!!
 
Reply
Old Feb 3, 2010
  #200  
Shaklakan's Avatar
Thread Starter
|
Member
Joined: Jan 2008
Posts: 1,100
Likes: 0
From: La Habra CA
So here is what the bedcage looks like so far.
Name:  1265215907.jpg
Views: 1669
Size:  57.8 KB

It is coming together quite nicely. Im really pleased with how professional it turned out. Still got to add some support tubes though.
 
Reply


All times are GMT -6. The time now is 08:13 AM.