
Project Search and Rescue


Tackled my Dual battery swap, was not easy but not super hard either. the biggest challenge was getting the old battery tray cut out and moving the ABS controller to clear the second battery.
Here is the old tray cut out and painted

New tray installed, you can see where the rad support needed to be clearanced.

Test fitting

More test fitting

New batteries in

All done and operational.


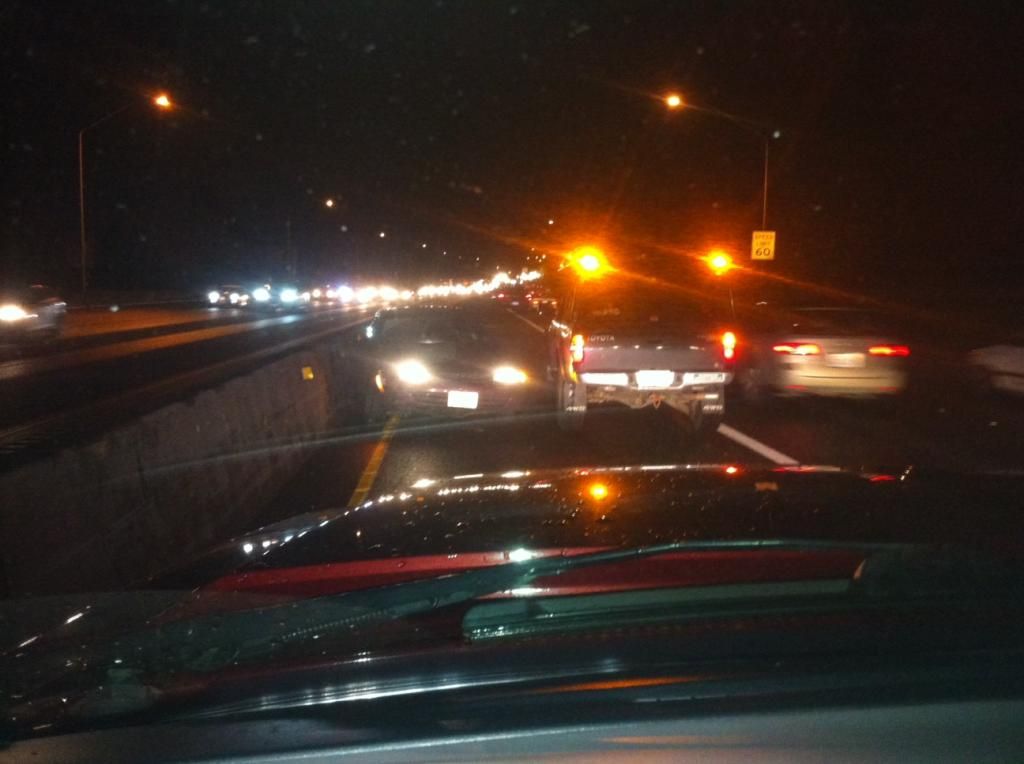
This guy spun out on the free way after getting cut of by a van, broke the axle shaft right off, I stopped to make sure he was ok and to get traffic moving around him until state patrol arrived. After a few minutes, a buddy from Search and Rescue showed up too.
Here is the old tray cut out and painted
New tray installed, you can see where the rad support needed to be clearanced.
Test fitting
More test fitting
New batteries in
All done and operational.
This guy spun out on the free way after getting cut of by a van, broke the axle shaft right off, I stopped to make sure he was ok and to get traffic moving around him until state patrol arrived. After a few minutes, a buddy from Search and Rescue showed up too.
Last edited by mikerider; Dec 15, 2012 at 08:05 PM.
have the all the wiring upgraded, a 200 amp alternator, and now the dual yellow tops so electrically I am set!

Nice job on setting all that up and the truck looks good.
It is best to use two of the same kind of batteries in an application like this but the Blue battery, although not a yellow top, is a deep cycle and a starting battery, so it might have worked.
Me I wouldn’t have wanted to find out if there is a difference.
It is best to use two of the same kind of batteries in an application like this but the Blue battery, although not a yellow top, is a deep cycle and a starting battery, so it might have worked.
Me I wouldn’t have wanted to find out if there is a difference.
Nice job on setting all that up and the truck looks good.
It is best to use two of the same kind of batteries in an application like this but the Blue battery, although not a yellow top, is a deep cycle and a starting battery, so it might have worked.
Me I wouldn�t have wanted to find out if there is a difference.
It is best to use two of the same kind of batteries in an application like this but the Blue battery, although not a yellow top, is a deep cycle and a starting battery, so it might have worked.
Me I wouldn�t have wanted to find out if there is a difference.
The batteries are isolated with a 200 amp continuous duty solenoid, so they will not drain each other when the truck is off. the solenoid is on a SPDT switch in the cab that connects the batteries when the truck is running, center is off fro full isolate and then I have a by pass to connect the batteries when the truck is off but I need more power.
Thanks!
The batteries are isolated with a 200 amp continuous duty solenoid, so they will not drain each other when the truck is off. the solenoid is on a SPDT switch in the cab that connects the batteries when the truck is running, center is off fro full isolate and then I have a by pass to connect the batteries when the truck is off but I need more power.
The batteries are isolated with a 200 amp continuous duty solenoid, so they will not drain each other when the truck is off. the solenoid is on a SPDT switch in the cab that connects the batteries when the truck is running, center is off fro full isolate and then I have a by pass to connect the batteries when the truck is off but I need more power.
Is that a Painless setup ?
I was looking at that also, wondered how they work ?
On the separation of the batteries, do they charge together ?
it is wired just like the painless one however
http://www.therangerstation.com/tech...nstruction.pdf
yes the batteries do charge together, when the switch is in auto mode the relay triggers in
"run", so I get more power for starting and both batteries charge when the truck is running. then with the selector switch I can switch to off or on continuously.
I saw the relay and then you mentioned the SPST Sw so I thought of the Painless setup.
Nice stuff.
Are you a Amateur Radio Operator ?
It helps when there is an alternate communication method, especially when you get far in the woods.
I do the Communications side of Search and Rescue also a lot of the Community Service Stuff but all along the lines of Communications.
Great Truck, good luck with future project.
Ok so I'm still looking for some clarification on how you have this working.... Both batteries charge from the alternator at all times?
and both batteries can be used for starting if you need it, but they don't have to be?
And apart from that... what do you have each battery powering? one for the truck and one for auxiliary accessories?
What I want to do is basically have two batteries in isolated electrical systems, one for the truck and maybe some extra stuff, and one for the audio system and some other auxiliary accessories, without putting ANY drain on the starting battery. This is possible with the relay you have?
I have a 230A alternator, I'm assuming my isolater needs to match that? would 200A be ok?
And also curious where you got those terminals, what kind they are?
to trigger the relay I have a 3 position switch in the cab, (on/off/on Single Pole Double Throw SPDT)
"center" position is off on the switch, this provides no current to the solenoid and issolates the batteries, only the primary battery is charged in this position, ideal for winching so I still have a fully charged battery for running the truck when I am done.
"Up" position is auto, this is connected to a fused 12v source that is hot when the key is in the run position. so in this mode as soon as I turn the key the solenoid engages linking the batteries together to provide more starting power and the alternator will charge both batteries when the truck is in run.
"Down" position is ON, this position is feed by a fused 12v lead from the second battery, this can be used for self jump starting if the first battery is dead, or if the truck is stalled out underwater and I need the extra power to winch the truck out.
the way my set up is wired ALL of my electrical draw (accessories lights radios winch) is on the primary battery, this way the second battery is always charged and ready to go.
read up on this thread for info on what you can do.
How to make a cheap isolated dual-battery setup for $50 - Expedition Portal
as far as terminals and parts check out RJM injection
RJM Injection Tech — Battery Cable Parts
hopefully that clarifies things for you. you can run the same set up I have with all the draw on the primary battery then you can basically "self jump start" with the second battery when the solenoid is engaged.
I saw the relay and then you mentioned the SPST Sw so I thought of the Painless setup.
Nice stuff.
Are you a Amateur Radio Operator ?
It helps when there is an alternate communication method, especially when you get far in the woods.
I do the Communications side of Search and Rescue also a lot of the Community Service Stuff but all along the lines of Communications.
Great Truck, good luck with future project.
Nice stuff.
Are you a Amateur Radio Operator ?
It helps when there is an alternate communication method, especially when you get far in the woods.
I do the Communications side of Search and Rescue also a lot of the Community Service Stuff but all along the lines of Communications.
Great Truck, good luck with future project.
you and I had this discussion already in this thread I think lol, ya I am a HAM, KF7VJI, my Icom 5021 is transmits and receives on HAM freqs as well. plus I have my dual band hand held, so lots of radio power when needed.
Both great batteries I had a Red Top in the truck before the dual yellows and I have a Red Top in my Explorer. just depends on what you need the yellow tops are great if you have loots of draw with the engine off, the reds are great if you just need the most CCA to start the truck.
It was a great Christmas for the truck, got a go light from my wife and had time to install my new fog lights and front flood lights.
truck in winter mode (Dirty)

New lights

ON

here is the golight spun around via the wireless remote control

Go light on, this thing is amazingly bright,

New morimoto 35w ss Ballasts TRS relay harness and 3k bulbs

also got some new LED turn signal bulbs.

now have lots of light! just need to replace my reverse lights with LED and replace my daylighters with some longer range HID floods.
truck in winter mode (Dirty)
New lights
ON
here is the golight spun around via the wireless remote control
Go light on, this thing is amazingly bright,
New morimoto 35w ss Ballasts TRS relay harness and 3k bulbs
also got some new LED turn signal bulbs.
now have lots of light! just need to replace my reverse lights with LED and replace my daylighters with some longer range HID floods.

the lights are all mounted on tabs welded to the basket.
Update: played in the snow and broke some stuff,
first thing I fixed my superlift skid plate, for some reason superlift thinks spacing the plate down 1.5 in to sit bellow the cross memebrs is a good idea
so I notched the plate, got some shorter bolts and this is the result,

sits much higher up
then we have had some interesting search and rescue missions, getting a team to one are we got an excursion sunk in the snow

that was fun to get out... not

some of the rigs


then we did some snow wheeling today.
overall the snow was cooperative and all the trucks did great. as with most snow runs it was drive until you cant drive any more then spend 2 hours turning every one around. today was no different.
Airing down getting ready to make fresh tracks

Onward we go, ruts were established but there was 8in of fresh in all the tracks

Blake and Josh

it was deep...

all the rigs

where Blake finally could go no further. (he was sad)

my rig

Josh helping Blake out to give me more room to turn.

dug in and needed some help getting out so out came the winch!

out of the first hole and in to the second the snow warmed up and we started to sink

More winching happened that Blake and Josh have pics of but I got turned around.
after I tore up the snow we were able to get Blake turned around with some wheel spin and pushing.
then it was Josh's turn he dug into some ruts and we tried out a super yanker from one of the jeep guys that came by. that ended with josh turned around and me now 2wd...
I haven't torn into it yet but think the bumpstop deflected and let the suspension over bump and pop the inner tripod joint out of the diff side socket.
so I had to use josh as a winch anchor to pull myself out and slowly make my way down the hill. luckilly the jeeps did a good job packing in the ruts so we made it out a a brisk 5mph.
got down to the road and called Brendon to come load the truck up, we aired up tires re packed gear and BS'd for an hour or so until my ride showed up and we got it loaded up to head home.


carnage pics to follow... it was a great time.
----------
Moral of the story thank god for friends with flat beds...
first thing I fixed my superlift skid plate, for some reason superlift thinks spacing the plate down 1.5 in to sit bellow the cross memebrs is a good idea
so I notched the plate, got some shorter bolts and this is the result,
sits much higher up
then we have had some interesting search and rescue missions, getting a team to one are we got an excursion sunk in the snow
that was fun to get out... not
some of the rigs
then we did some snow wheeling today.
overall the snow was cooperative and all the trucks did great. as with most snow runs it was drive until you cant drive any more then spend 2 hours turning every one around. today was no different.
Airing down getting ready to make fresh tracks
Onward we go, ruts were established but there was 8in of fresh in all the tracks
Blake and Josh
it was deep...
all the rigs
where Blake finally could go no further. (he was sad)
my rig
Josh helping Blake out to give me more room to turn.
dug in and needed some help getting out so out came the winch!
out of the first hole and in to the second the snow warmed up and we started to sink
More winching happened that Blake and Josh have pics of but I got turned around.
after I tore up the snow we were able to get Blake turned around with some wheel spin and pushing.
then it was Josh's turn he dug into some ruts and we tried out a super yanker from one of the jeep guys that came by. that ended with josh turned around and me now 2wd...
I haven't torn into it yet but think the bumpstop deflected and let the suspension over bump and pop the inner tripod joint out of the diff side socket.
so I had to use josh as a winch anchor to pull myself out and slowly make my way down the hill. luckilly the jeeps did a good job packing in the ruts so we made it out a a brisk 5mph.
got down to the road and called Brendon to come load the truck up, we aired up tires re packed gear and BS'd for an hour or so until my ride showed up and we got it loaded up to head home.
carnage pics to follow... it was a great time.
----------
Moral of the story thank god for friends with flat beds...
Member


Joined: May 2010
Posts: 2,322
Likes: 2
From: Lawrence, Kansas
I would assume the space between the skid is for when you do hit something, the skid gets beat up rather then transferring the force to the crossmember. Just my thoughts.
Bummer about the truck. Should be up and running in no time knowing how you work.
Bummer about the truck. Should be up and running in no time knowing how you work.
Got the CV replaced tonight and also started to rework my Limit straps. also put my new toy to use.
Miller 211

My last set up was 100% bolt on and worked OK but I managed to bend my mounting clevises to the point of not being functional.

so now that I have a welder I changed them up
New vs old ( you can see the bend in the lower mounted clevis.)
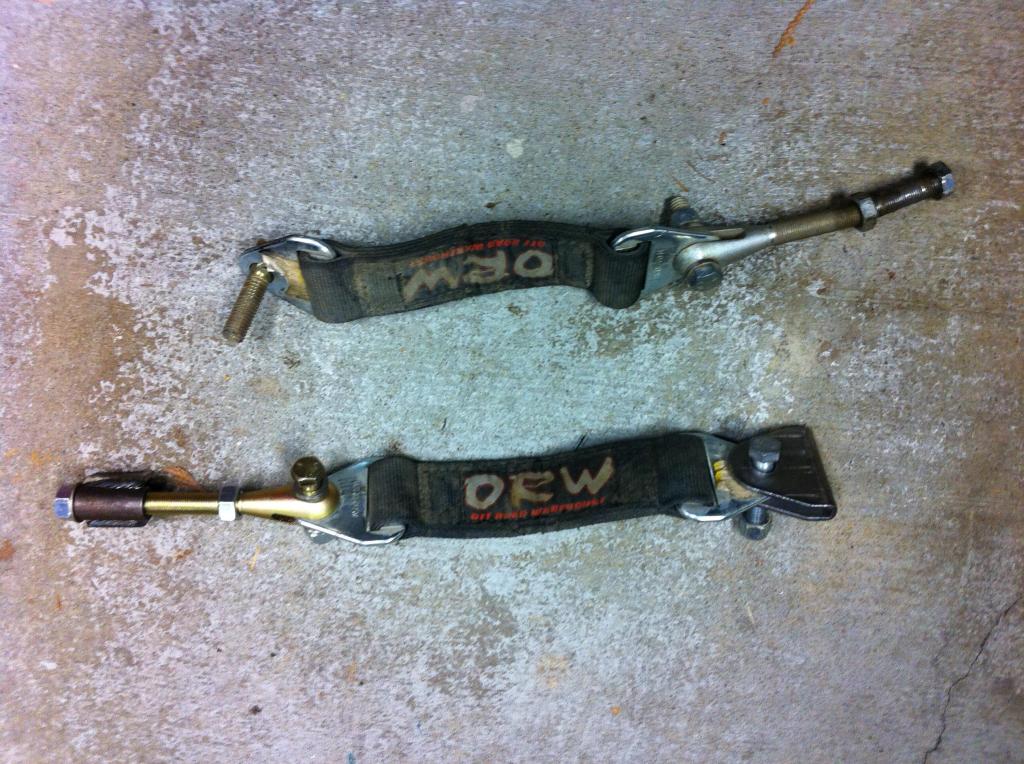
the new set up uses a sleeve and standoffs that is welded to the frame next to the shock tower support bracket.
Lower tab mounted and burned in

all painted and tight ( this should be much more robust.)

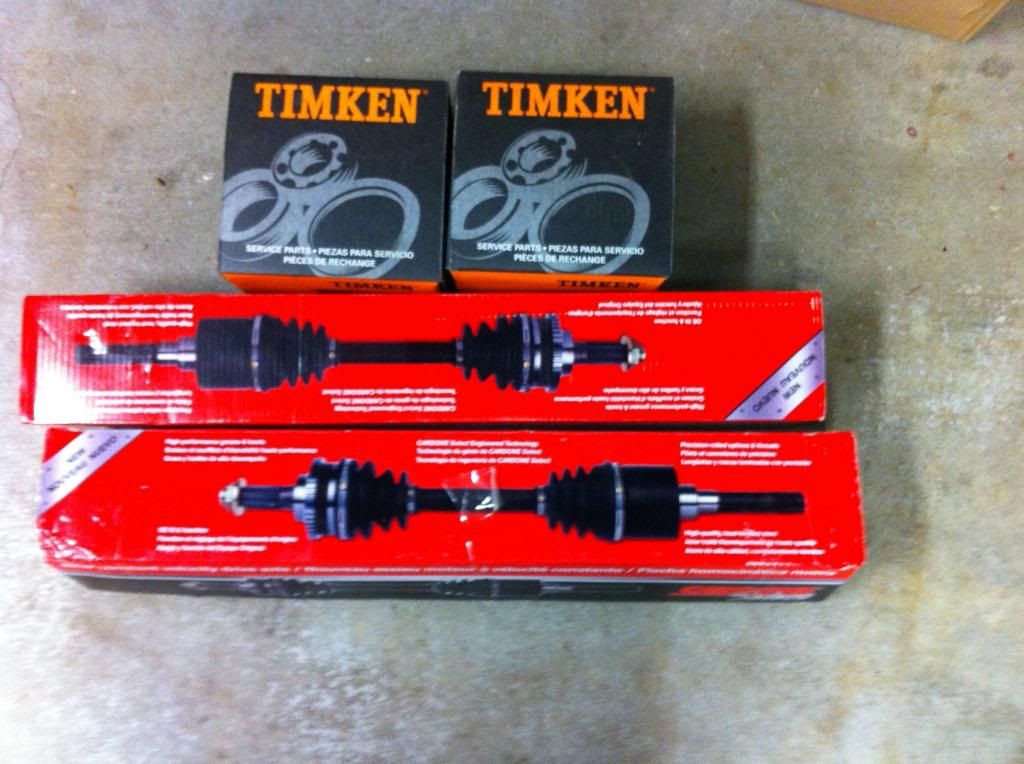
New Parts, figured while I was replacing 1 CV I might as well do both and replace the wheel bearings at the same time.
out with the old

In with the new (its amazing what some degreaser and a wipe down will do, it is black under all the dirt!)

Miller 211
My last set up was 100% bolt on and worked OK but I managed to bend my mounting clevises to the point of not being functional.
so now that I have a welder I changed them up
New vs old ( you can see the bend in the lower mounted clevis.)
the new set up uses a sleeve and standoffs that is welded to the frame next to the shock tower support bracket.
Lower tab mounted and burned in
all painted and tight ( this should be much more robust.)
New Parts, figured while I was replacing 1 CV I might as well do both and replace the wheel bearings at the same time.
out with the old
In with the new (its amazing what some degreaser and a wipe down will do, it is black under all the dirt!)


