


The "What did you do to your Ranger today" thread

Member
Joined: Sep 2017
Posts: 174
Likes: 1
From: Valdosta, GA.

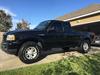
Waxed up the Ranger today, I don't think she'd ever seen wax! Looks much better now, but I was afraid to use my buffer. I hate seeing the swirls on black vehicles. Maybe i'll build up the courage to use it next time!

Member
Joined: Sep 2017
Posts: 174
Likes: 1
From: Valdosta, GA.
That just may work, maybe I'll do the tailgate or something first. haha, thanks for the tip.

Member
Joined: Nov 2017
Posts: 1
Likes: 0
From: johnstown,pa.
 billberwind
I had a massive engine failure and had a ford long block remanufactured engine installed about three weeks ago. since then you can drive an hour or sometimes several hours and when you slow down and then start to accelerate the engine stumbles and bucks then is ok then stumbles and bucks. I'm wondering if the heat from the engine failure could have damaged the spark plugs and wires or the coil pack since these were used of the overheated old engine ?
Last edited by billberwind; Nov 4, 2017 at 10:37 PM. Reason: forgot tuck year 2006 42,000

Member
Joined: Aug 2015
Posts: 588
Likes: 4
From: Evansville, Indiana
@billberwind: I would think that if any of these reused parts were at fault, they would be consistently causing a problem... not just intermittently. If you don't have a scan tool, take it to an auto parts store. Most of them have a scanner they will connect to your truck free of charge. That might give you insight on what is causing the problem.
Member
Joined: Sep 2017
Posts: 174
Likes: 1
From: Valdosta, GA.
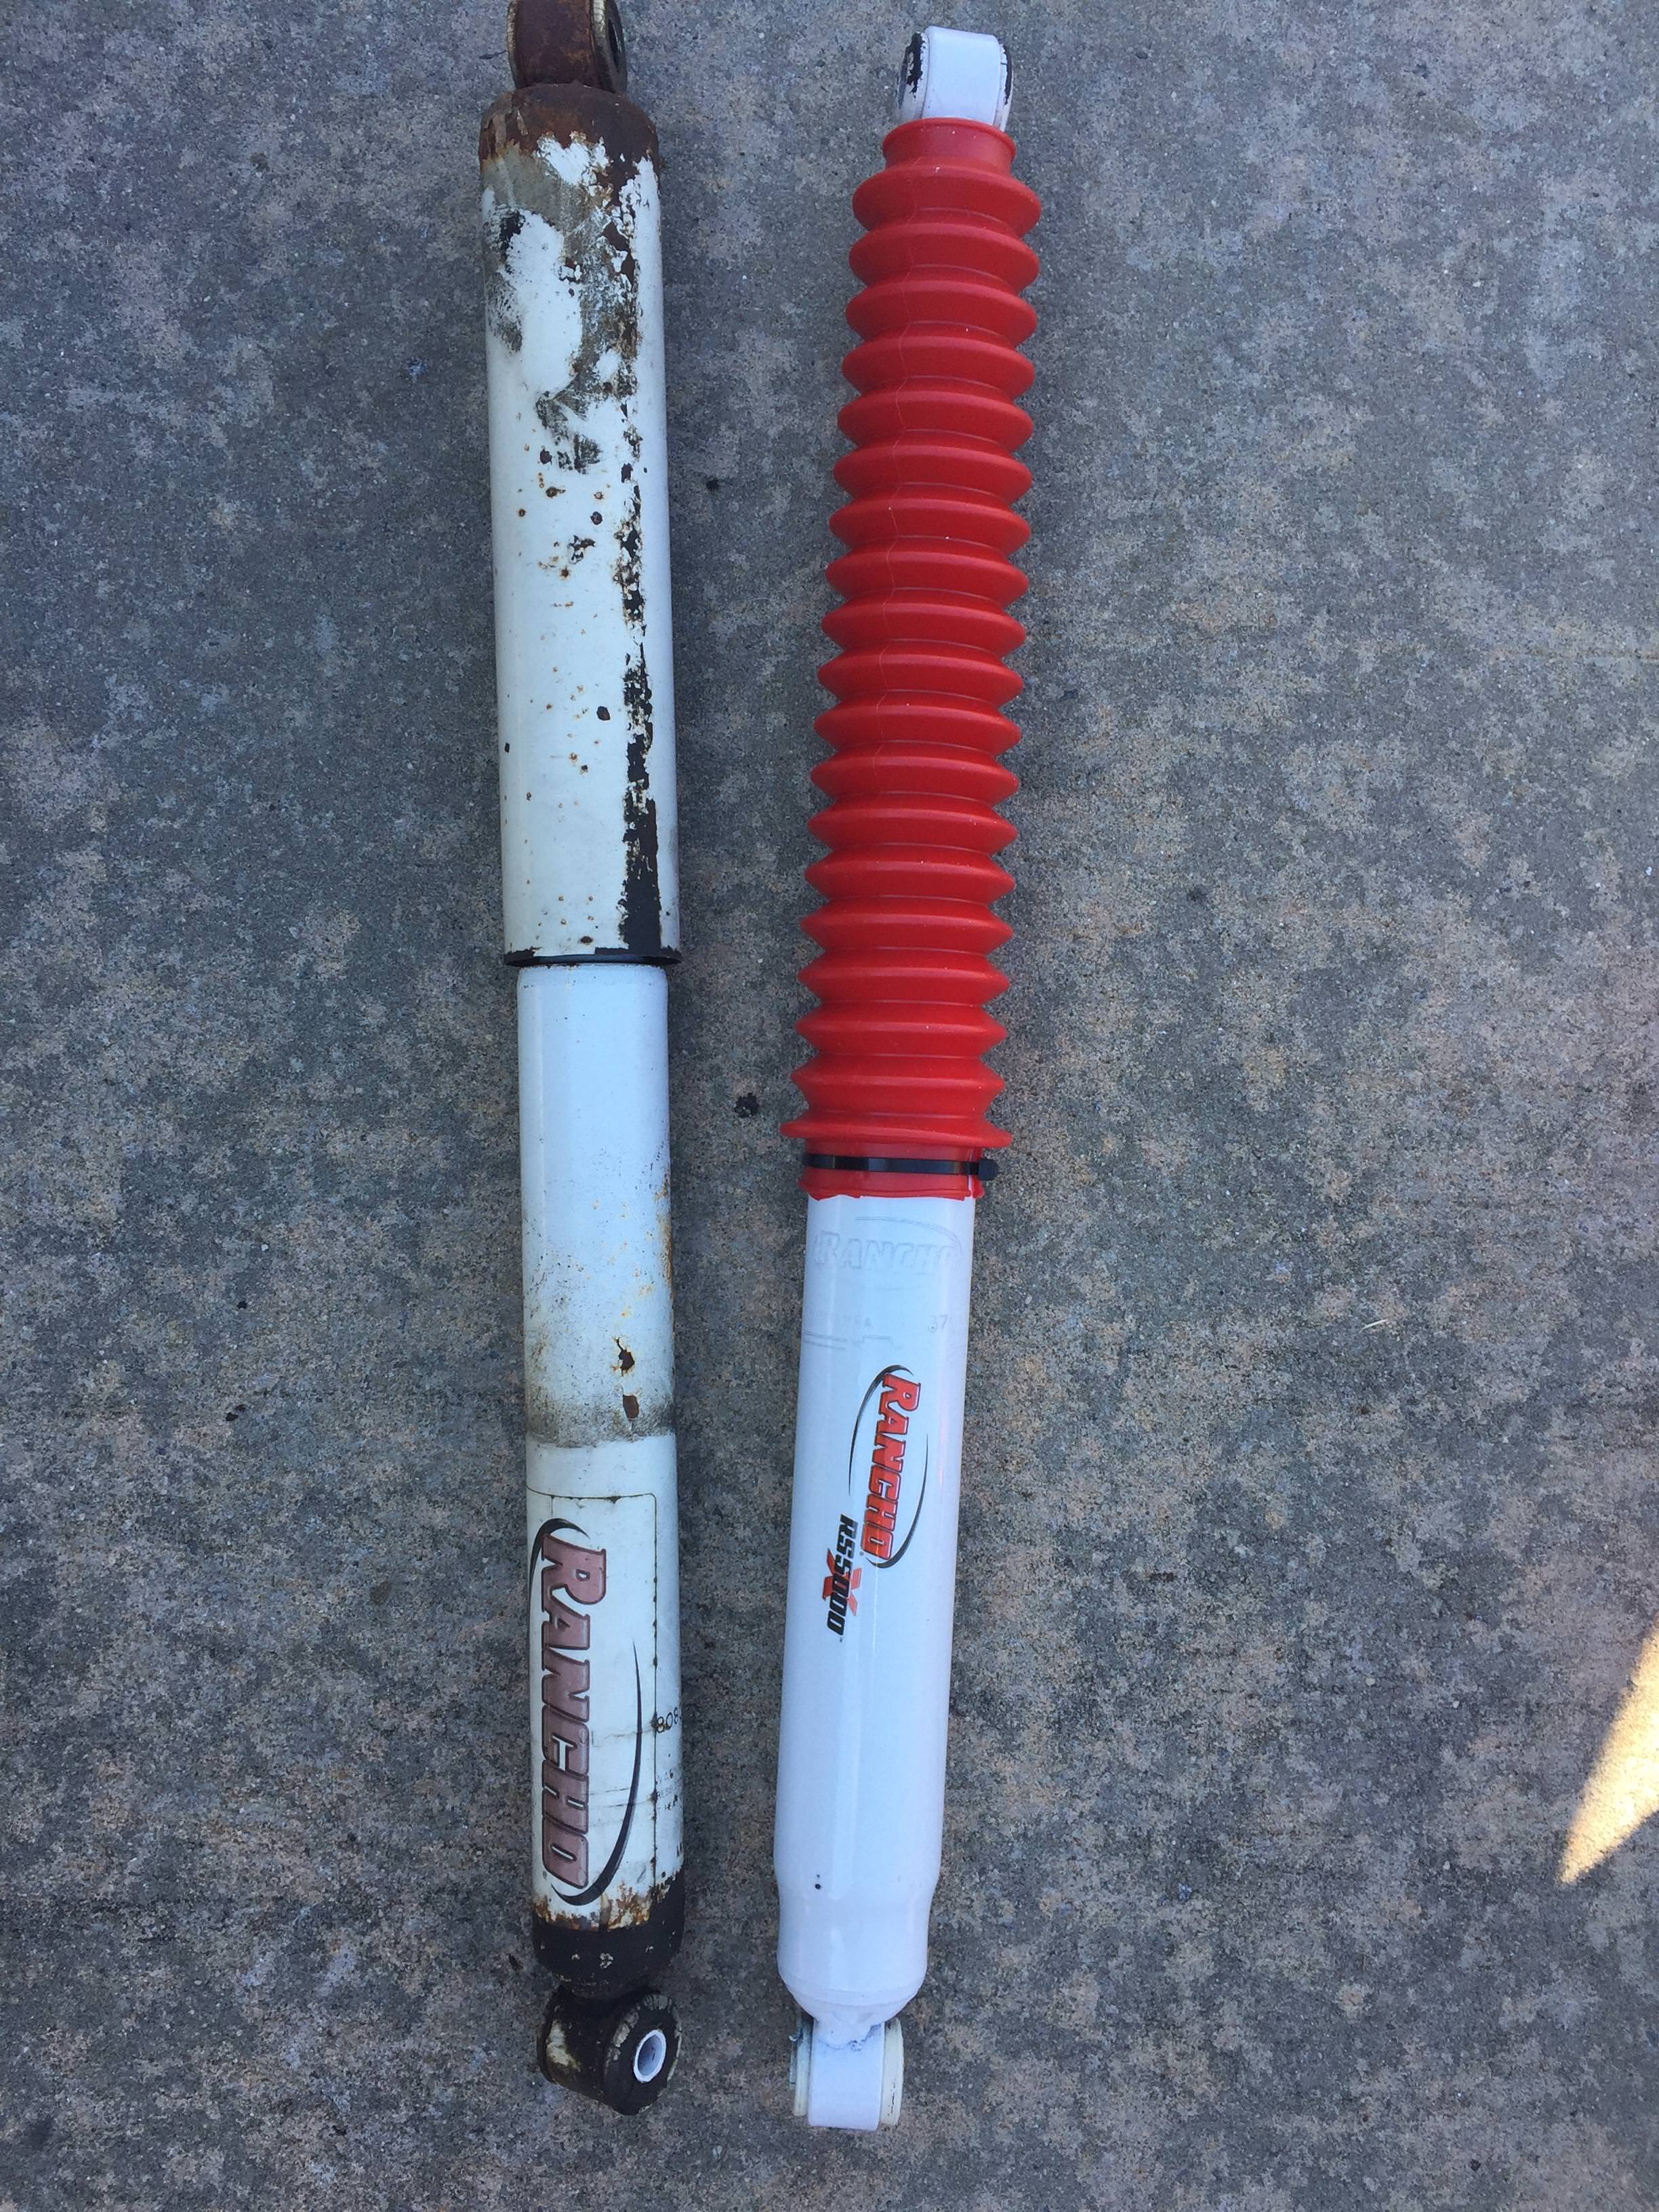
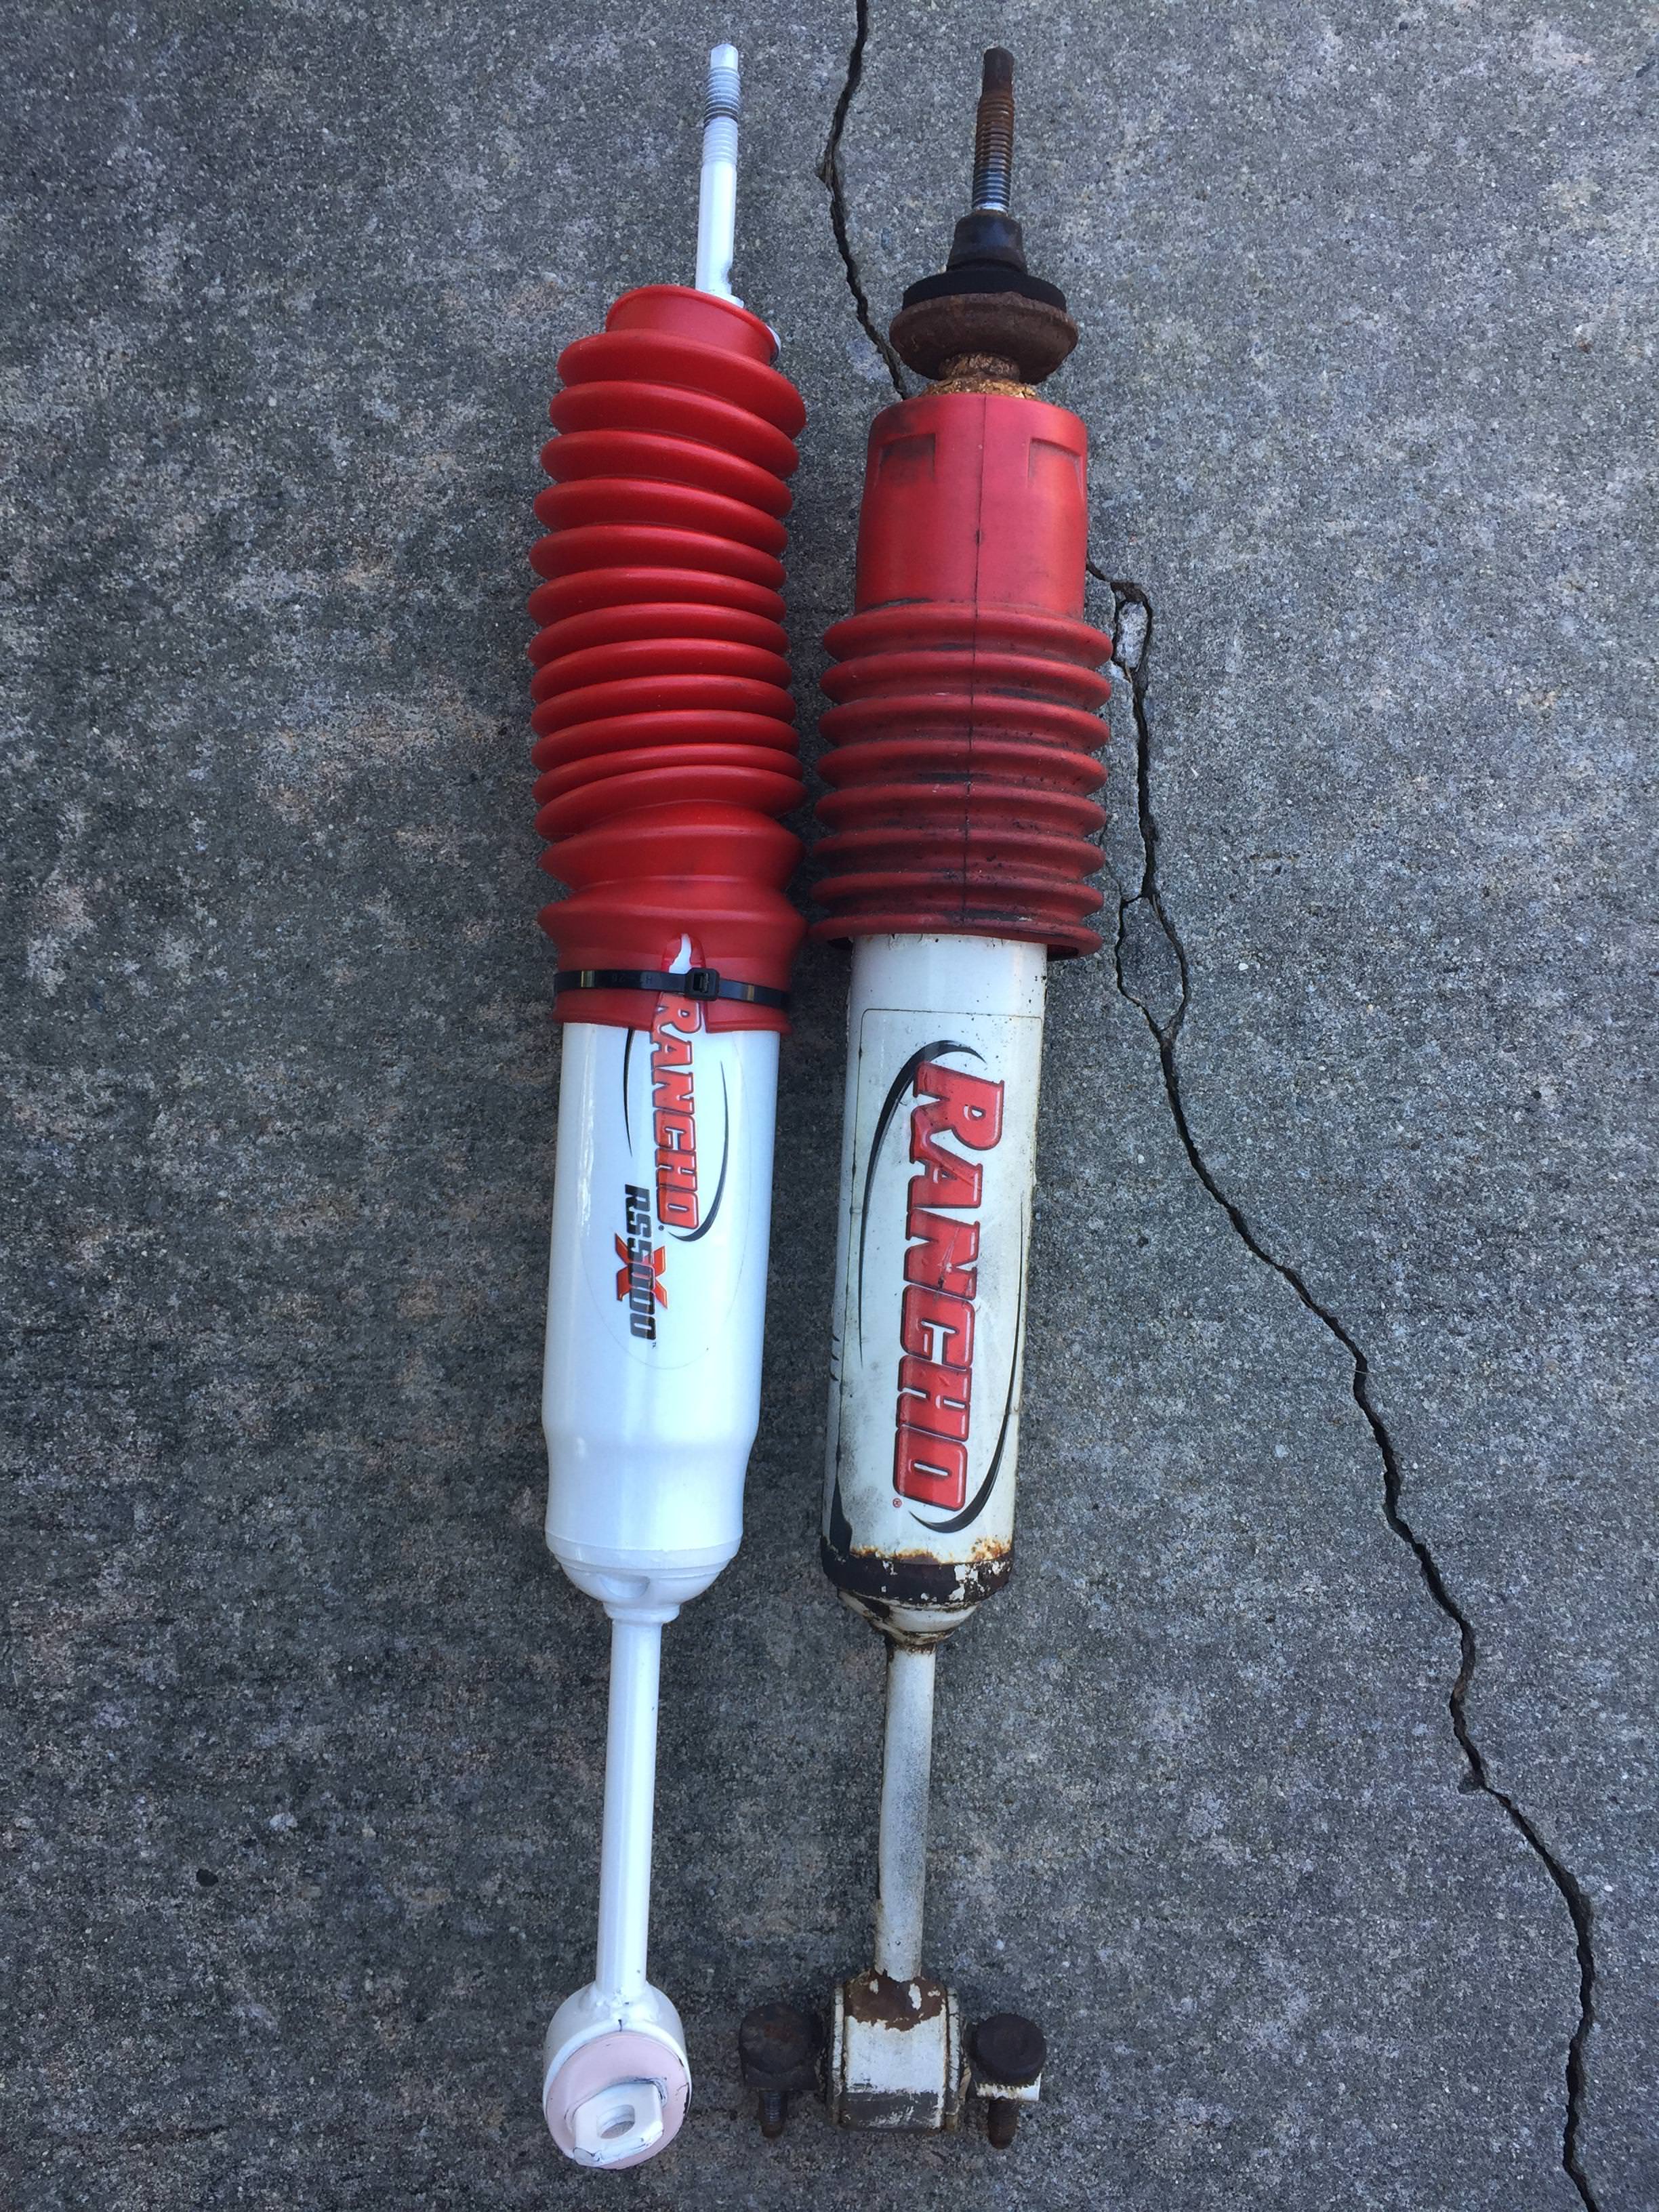
Threw the new Rancho's on my truck today. The other ones were shot for sure, with only 57K on the odometer. Funny that the stock Rancho's all have "Motorcraft" on them, so I would imagine they're valved a bit different than stock Rancho's. I only drove it around the neighborhood and I can definitely tell the difference.
Rears:
Fronts:
I had to drop the spare tire to get to one of the rear upper bolts. The spare wheel was a bit rusty so I wire brushed it, taped it off, and rattle-canned it black.
Next on the list, pre-keys with matching OEM rear blocks.
Rears:
Fronts:
I had to drop the spare tire to get to one of the rear upper bolts. The spare wheel was a bit rusty so I wire brushed it, taped it off, and rattle-canned it black.
Next on the list, pre-keys with matching OEM rear blocks.

Member
Joined: Feb 2016
Posts: 213
Likes: 0
From: Lowell, MA
Yeah, i can buy the actual handles that go underneath, can't get the trim though.
I pulled a single passenger side trim from a 2003 at picknpull, it has slightly different lines where the A pillar meets the roof line, but not bad, but the two rear clips, whilst they clip in, cause the piece to stand out from the roof line by about a thumbs width, no idea what is going on there.
The reason i only have the passenger side, is the truck was a roll over, drives side was flattened down and the trim piece split length-ways.
I pulled a single passenger side trim from a 2003 at picknpull, it has slightly different lines where the A pillar meets the roof line, but not bad, but the two rear clips, whilst they clip in, cause the piece to stand out from the roof line by about a thumbs width, no idea what is going on there.
The reason i only have the passenger side, is the truck was a roll over, drives side was flattened down and the trim piece split length-ways.

Member
Joined: May 2012
Posts: 23
Likes: 0
From: Lorain OH
Sat down with my latest a 2000 xcab that had a passenger front bearing going out and driving me crazy. Swapped out a rotor from a 97 with frame issues. After it and I went out and picked up some mowers from a friend and then went to the scrap and picked up a couple more. The fun part of all this is the bed you watch shake in the mirror as going down the road.
Dont laugh guys but I love these trucks cause of their durability and longevitiy, starting with my 97 no frills beast that started with 18900 and currently at 278000 over 8 years and I dont keep a vehicle its as faithful my mr. ranger.
Dont laugh guys but I love these trucks cause of their durability and longevitiy, starting with my 97 no frills beast that started with 18900 and currently at 278000 over 8 years and I dont keep a vehicle its as faithful my mr. ranger.
Member
Joined: Sep 2011
Posts: 724
Likes: 7
From: NOVA

Figured I'd use the remaining amount of 3m wrap I had so I wrapped my a-pillars and mustang dome housing. I haven't installed anything yet but I'm wondering if the a-pillars are going to look out of place once bolted back up and the rear b-pillars are gray... I am tempted to use the duplicolor vinyl/plastic spray that I used for the head visors to make them black but not sure or not...
I thought about ordering my vinyl but honestly I don't think I want to.
-Nigel
I thought about ordering my vinyl but honestly I don't think I want to.
-Nigel
Member
Joined: Sep 2017
Posts: 174
Likes: 1
From: Valdosta, GA.
I got some new tires today. I went to Goodyear to check out some Duratracs and they had some Wrangler Authority's that were lighter, better looking and cheaper. So I went with those.
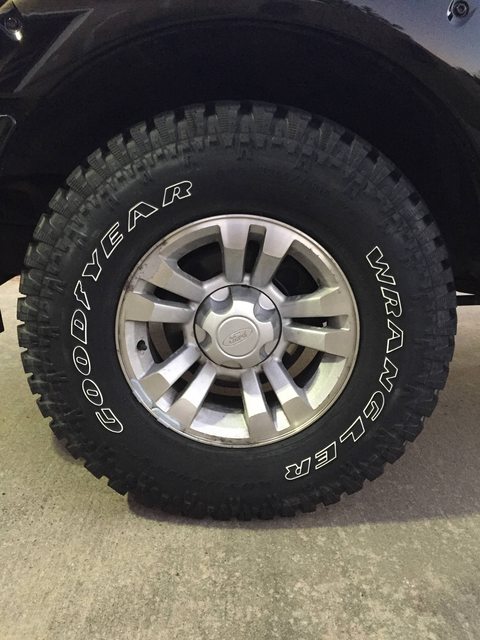
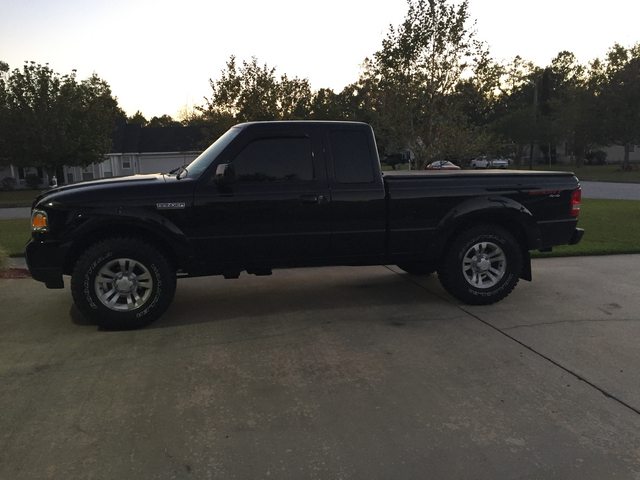
Definitely more aggressive then the Wrangler RTS's that were on there. I went with 265/75R16s. It did rub slightly at a gas station but I already have pre keys and older lift blocks to throw on to add 1.25". Maybe that'll be a job for tomorrow.
Definitely more aggressive then the Wrangler RTS's that were on there. I went with 265/75R16s. It did rub slightly at a gas station but I already have pre keys and older lift blocks to throw on to add 1.25". Maybe that'll be a job for tomorrow.
Member
Joined: Sep 2017
Posts: 174
Likes: 1
From: Valdosta, GA.
Thanks man!
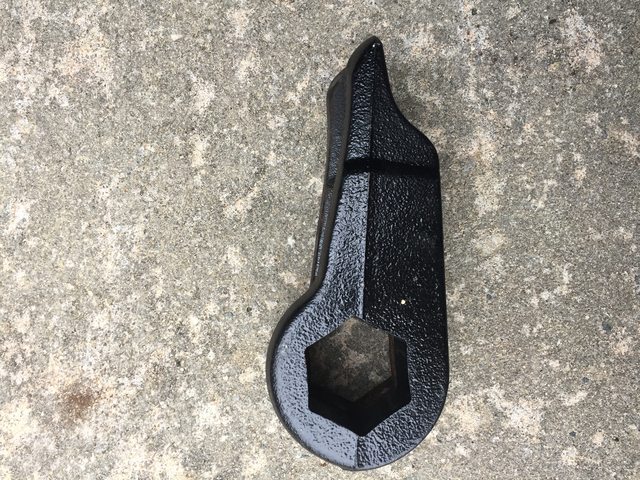
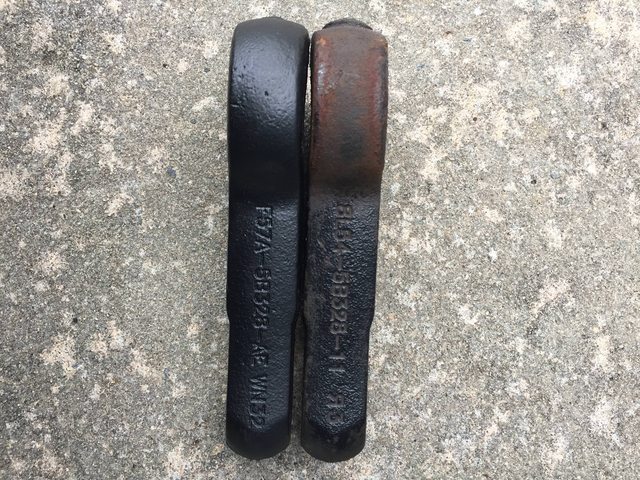
Today I threw on the pre-keys I got from Dewey and it was easier than I thought. With the torsion bolts screwed in the same amount as stock (22 turns) it added 1.25" to the front. I compared the keys and there's only a tiny bit of difference, barely noticeable. They're only clocked a degree or two different. They're exactly the same otherwise. The old ones are the rusty ones, I painted the "new" ones to be nice and perty.
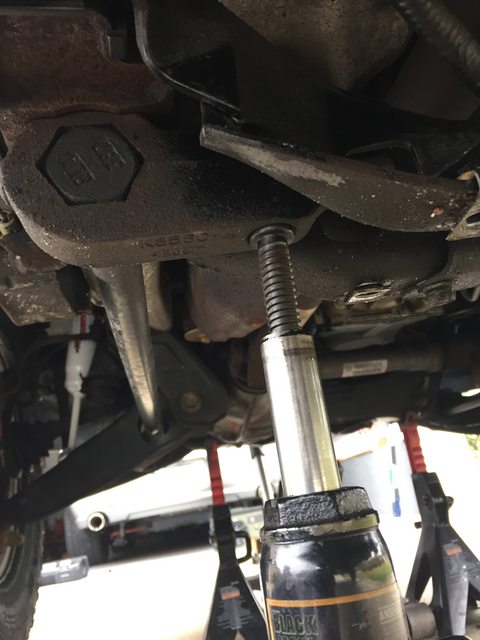
Also, I watched several videos on people using 2-jaw pullers to remove their keys. Don't do that, there's a special puller/clamp that is really expensive, but is the safest. I used a bottle jack and it was quick and easy. It never felt sketchy and I wasn't scared of anything snapping and hitting me.
removing the old key with a bottle jack...
I also tried to throw on some 2.5" rear blocks I got from a member on here (vs my 1.25" stockers), the blocks are fine but I need to find different hardware. I guess he had the 28-spline rear end which is 2.875" wide, I have the 31-spline rear end which is 3.25" wide. So the u-bolts wont work.
For anyone else doing this, here's a link for some good u-bolts for the 2.5" blocks on the 8.8" with 31-spline axles.
U Bolt, 3 5/8" X 5/8" X 10" - RuffStuff Specialties
Its weird, but it actually doesn't look like the front is up much higher than the rear. Measuring proves otherwise though. I want it to "settle" for a few days before I get an alignment.
Today I threw on the pre-keys I got from Dewey and it was easier than I thought. With the torsion bolts screwed in the same amount as stock (22 turns) it added 1.25" to the front. I compared the keys and there's only a tiny bit of difference, barely noticeable. They're only clocked a degree or two different. They're exactly the same otherwise. The old ones are the rusty ones, I painted the "new" ones to be nice and perty.
Also, I watched several videos on people using 2-jaw pullers to remove their keys. Don't do that, there's a special puller/clamp that is really expensive, but is the safest. I used a bottle jack and it was quick and easy. It never felt sketchy and I wasn't scared of anything snapping and hitting me.
removing the old key with a bottle jack...
I also tried to throw on some 2.5" rear blocks I got from a member on here (vs my 1.25" stockers), the blocks are fine but I need to find different hardware. I guess he had the 28-spline rear end which is 2.875" wide, I have the 31-spline rear end which is 3.25" wide. So the u-bolts wont work.
For anyone else doing this, here's a link for some good u-bolts for the 2.5" blocks on the 8.8" with 31-spline axles.
U Bolt, 3 5/8" X 5/8" X 10" - RuffStuff Specialties
Its weird, but it actually doesn't look like the front is up much higher than the rear. Measuring proves otherwise though. I want it to "settle" for a few days before I get an alignment.
Member
Joined: Sep 2017
Posts: 174
Likes: 1
From: Valdosta, GA.
Got a better "consolette" from FastCubeSolver. Before and after pics...
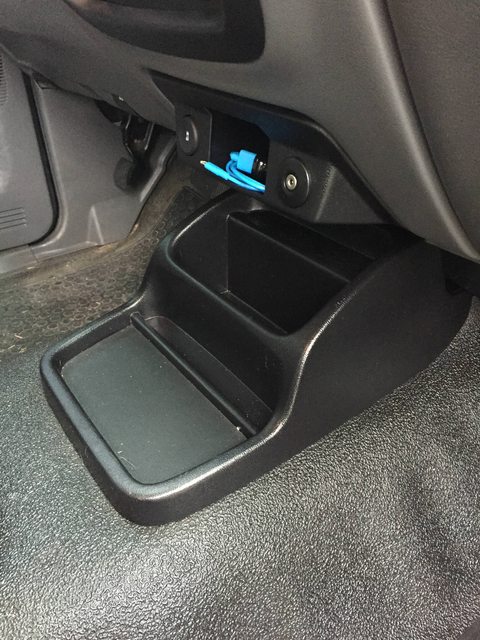
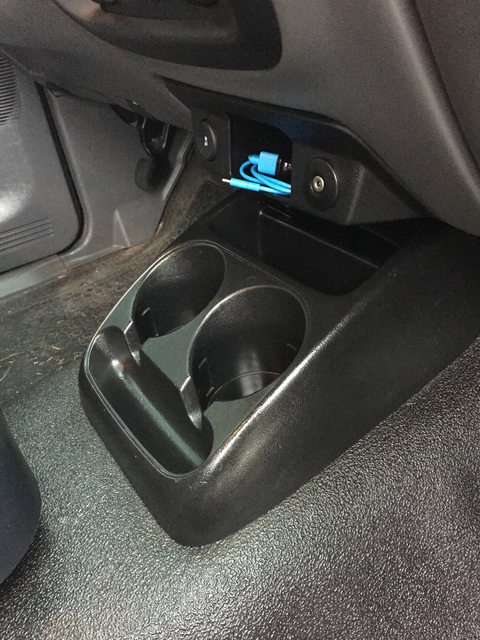
Now I just have to find the cup holder inserts.
The before console doesn't make sense. Anything you put in there slides out. It doesn't require a mount underneath though like the second one. For that reason it was probably $.13 cheaper and saved Ford millions.
Now I just have to find the cup holder inserts.
The before console doesn't make sense. Anything you put in there slides out. It doesn't require a mount underneath though like the second one. For that reason it was probably $.13 cheaper and saved Ford millions.
Member
Joined: Sep 2017
Posts: 174
Likes: 1
From: Valdosta, GA.
So today I drove about 25 miles to help the new keys settle in. I got home and measured the "lift" again. It was about 3/4" higher than with the standard keys. I have blocks that will add 1.25" to the rear, so I'll likely have to crank the bars some more to make it sit level. Then I can shoot for an alignment.


Member
Joined: Sep 2017
Posts: 174
Likes: 1
From: Valdosta, GA.
I threw on the 2.5" blocks I got from FastCubeSolver along with the 5/8" 3.25x10" U-bolts I got online. I had to elongate the holes in the upper plate slightly with a Dremmel to get the larger u-bolts to fit. After that, I cranked the torsion bolts up front.
I'm thinking I didn't get much lift out of the pre-keys once they settled. They're probably 2 turns from being maxed and they're still not even with the extra 1.25" I added in the rear.
It was almost dark when I got done so I didn't take an after pic yet.
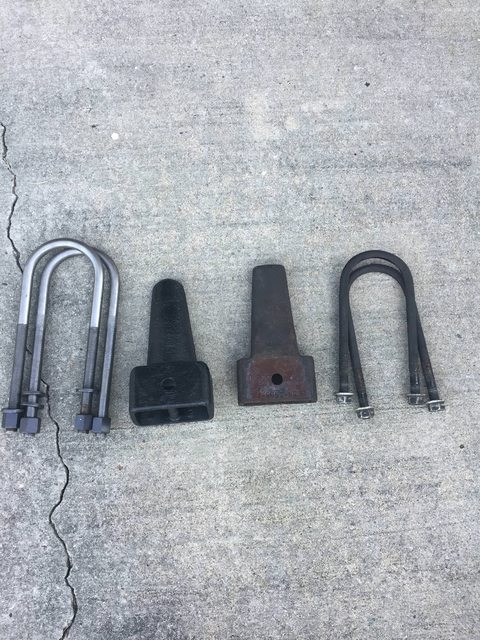
Heres the old vs. the "new"
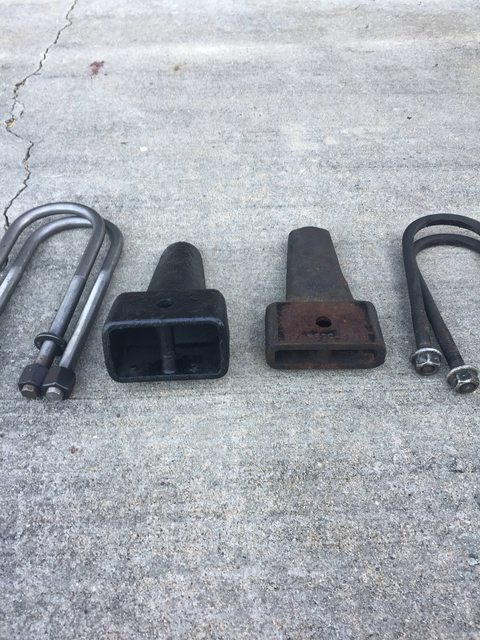
Here's the top plate, you can see where I started to Dremmel the hole slightly. It needed a little more grinding after this pis though.
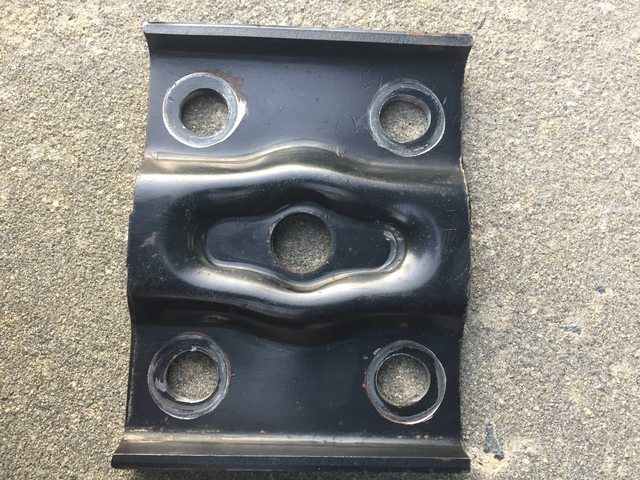
Once I dial in the torsion screws I'll get an alignment. I don't want to mess up the brand new tires.
I'm thinking I didn't get much lift out of the pre-keys once they settled. They're probably 2 turns from being maxed and they're still not even with the extra 1.25" I added in the rear.
It was almost dark when I got done so I didn't take an after pic yet.
Heres the old vs. the "new"
Here's the top plate, you can see where I started to Dremmel the hole slightly. It needed a little more grinding after this pis though.
Once I dial in the torsion screws I'll get an alignment. I don't want to mess up the brand new tires.
Member
Joined: Sep 2017
Posts: 174
Likes: 1
From: Valdosta, GA.
I did the air box mod today, pretty simple. The box was a PITA to get out though. I had to wedge a screwdriver underneath to get it out. Otherwise, pretty simple.
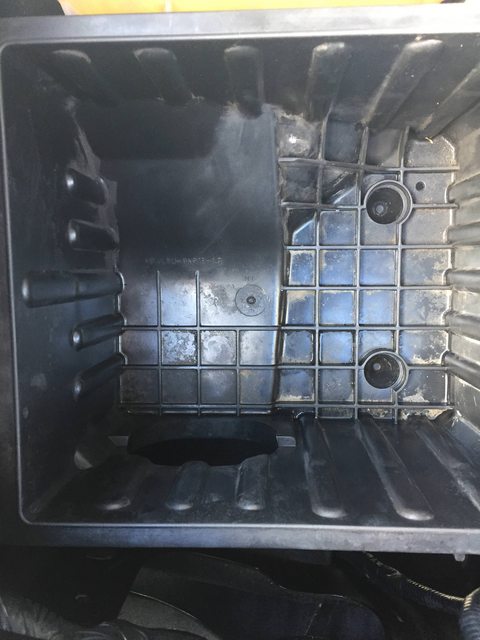
Once I completed that I drained the transfer case and painted the skid plate to freshen it up. Then refilled the t-case with some synthetic ATF and reinstalled the skid plate.
Here's the final after pre-keys and 2.5" rear blocks.
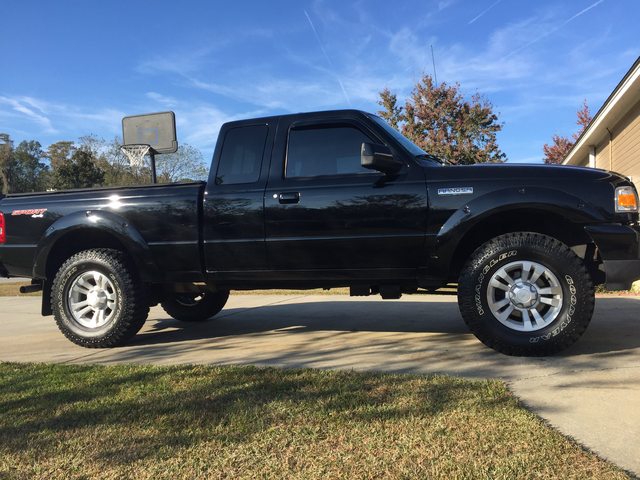
Once I completed that I drained the transfer case and painted the skid plate to freshen it up. Then refilled the t-case with some synthetic ATF and reinstalled the skid plate.
Here's the final after pre-keys and 2.5" rear blocks.

Member
Joined: Apr 2012
Posts: 55
Likes: 2
From: San Carlos, CA
I took photos of the new 5-inch backup monitor I bought to replace a 3.5-inch monitor.
I plan to submit a more detailed account of backup camera installation and wiring, with photos. Backup camera and monitor bought from Tadi Brothers. Monitor and camera (mounts to rear bumper with license plate bolts) are digital wireless.
The camera gets its power from the left reverse light wire above the rear bumper. Monitor power is taken from black/pink reverse light wire at a connector in the engine compartment. This feeds to an auxiliary power plug in the cab. The monitor mounts to the rear view mirror with RAM mounts. RAM mounts are much better than the mount supplied with the monitor.
I plan to submit a more detailed account of backup camera installation and wiring, with photos. Backup camera and monitor bought from Tadi Brothers. Monitor and camera (mounts to rear bumper with license plate bolts) are digital wireless.
The camera gets its power from the left reverse light wire above the rear bumper. Monitor power is taken from black/pink reverse light wire at a connector in the engine compartment. This feeds to an auxiliary power plug in the cab. The monitor mounts to the rear view mirror with RAM mounts. RAM mounts are much better than the mount supplied with the monitor.


