When you click on links to various merchants on this site and make a purchase, this can result in this site earning a commission. Affiliate programs and affiliations include, but are not limited to, the eBay Partner Network.
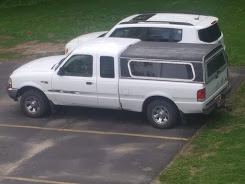
New chapter... Traded up my baby:
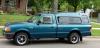
Farewell 2000 Ford Ranger xlt
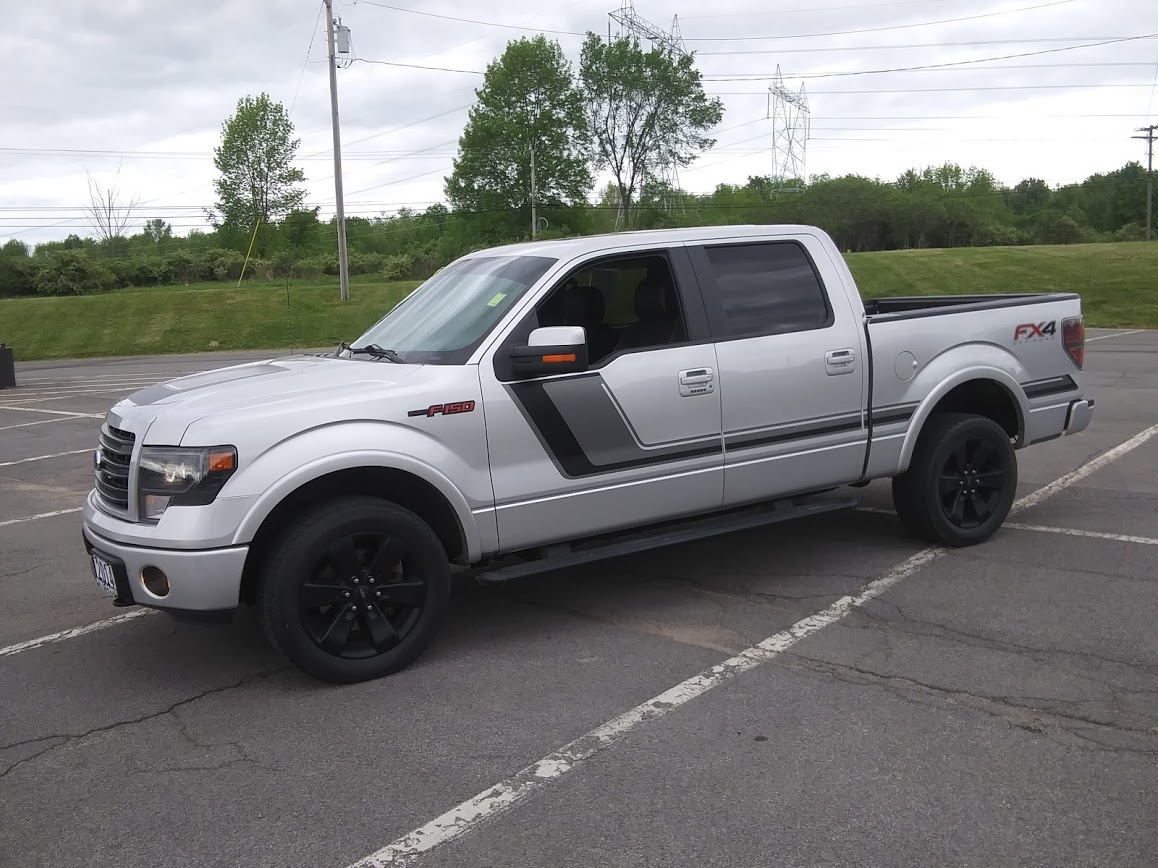
for a new one:
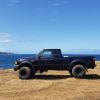
Always wanted something from the F100 line, finally can afford one. 2016 F-150 FX4, new baby has so many bells 'n whistles compared to the old Ranger.
New chapter... Traded up my baby:
Farewell 2000 Ford Ranger xlt
for a new one:
Always wanted something from the F100 line, finally can afford one. 2016 F-150 FX4, new baby has so many bells 'n whistles compared to the old Ranger.
That looks like an '09 to '14 truck, or are the headlights on the FX4 '16 just the old style?
got an update on my flatbed from the shop thats doing it......this thing is going be be a beast.
Looking good !
What is the weight of the flat bed going to be vs the standard Ranger.
If more, are there plans for additional support, bigger springs.
If you go larger springs, more leafs, make sure the spring supports are up to the task too; the OEM Spring Perches are just about up to the task of what the Ranger could carry with stock springs.
Looking good !
What is the weight of the flat bed going to be vs the standard Ranger.
If more, are there plans for additional support, bigger springs.
If you go larger springs, more leafs, make sure the spring supports are up to the task too; the OEM Spring Perches are just about up to the task of what the Ranger could carry with stock springs.
Wanted to see it done !
Ltr
Its all channel iron, the bed deck is going to be 1x6" PT lumber, and a headache rack made out of tube and expanded steel, i dunno the weight off the top of my head, but the guys at the shop said it wouldnt be much more than a factory bed.
Its all channel iron, the bed deck is going to be 1x6" PT lumber, and a headache rack made out of tube and expanded steel, i dunno the weight off the top of my head, but the guys at the shop said it wouldnt be much more than a factory bed.
Hard to believe it will weigh in at a little more than an OEM Bed but I am not building it !
Do you think the 1x6 PT will be sturdy enough for the span between the channel stock ?
Hard to believe it will weigh in at a little more than an OEM Bed but I am not building it !
Do you think the 1x6 PT will be sturdy enough for the span between the channel stock ?
I like the looks good design.
Ltr
i never really carry that much weight in the bed anyway.....at most some steel i snag from jobsites (angle iron, the occasional wide flange beam, steel cable). Usually its just my camping gear. If im gunna put something heavy in the back i could make some channel iron pieces to put in the stake pockets and then get some dunnage from work 4×4" oak/maple to run across the bed....we use that stuff to support literal tons of steel and ive only ever seen it snap once.
Just for ***** and giggles I installed some UV (black light) LEDs behind the instrument cluster and climate control. I don't plan on leaving them there too long as they don't provide great visibility. I guess I just got bored being under house arrest/quarantine. I have blue, light blue, and white LEDs for the instrument cluster- I just haven't decided which I like best. Regardless of the color, I hate the hot and cold spots the bulbs create. I thought of soldering in LED strips to provide consistent lighting, but haven't found a product that looks like it would work with minimal modifications. Any suggestions?
I'm working on the dash with only the speed-0, no tach, I like the simplicity of it, not cluttered !
I ordered a new face for the dash with just the speed-o and the HVAC Panel with RED as the major color, I have the HVAC Panel already in and am working on the lighting for the dash; as of now I have run a strip of LEDs around the outer edge of the housing attached the power from the regular dash lights, put the faces in place and checked for coverage, but there are some dark spot. I'm thinking maybe some LED Bulbs but with the ends frosted or sanded to defuse the light.
The problem with your hot spots and everyone else's that uses the OEM Gauge Faces and lighting, IS the positioning of the OEM Dash Lights and you need to eliminate the OEM Lights and use the LED Strips as you said you were looking into.
I also have added new ***** on the HVAC, headlight switch and the 4x Switch, I added red indicator dot that are translucent but I am still figuring out how to wire up some LEDs to light each ****.
Also, I am thinking on a new panel under the HVAC Controls, maybe housing the 4x switch, and some 12 volt and USB connectors, along with some gauges if there is room.
My Ranger To-Do List is longer than my Honey-Do List... too many things to do !
Today I learned first hand why cv boots don't get repaired too often anymore.
I had a ripped cv boot and ripped lower ball joint boot on the passenger side, and a new set of lug nuts to install. Quick project I thought, one afternoon tops.
Flash forward to five hours later and I'm still beating on that sunofab***h cv joint. The clip finally gave and snapped, and it's all back together and sealed up, but I would have happily paid $100 to have skipped that fiasco.
To top it off, the axle shaft came out with the cv axle, so I had to deal with that thing flopping around while trying to get the joint apart. I would bet money that I'm gonna get a leak at either the axle seal or the inner boot or both soon. Should have just swapped the axle.
Welcome to 'Rustachusetts' lol i feel your pain.... (note to self NEVER take out bedliner...
ps: the conversion to flat bed is looking great!
Originally Posted by Rakk187
Took my tonneau cover off, and removed the bedliner in preparation for converting to a flatbed/stake body......finally got a good look at the extent of the rot.....
Last edited by 97ranger xlt; Jun 4, 2020 at 11:19 AM.
Welcome to 'Rustachusetts' lol i feel your pain.... (note to self NEVER take out bedliner...
ps: the conversion to flat bed is looking great!
oh dude, i was so bummed when i hopped up in my bed and was like "thats feeling kinda soft". I honestly feel that the plastic bedliner did nothing but trap moisture, which in turn started rotting the bed out from both ends so to speak. The truck was pretty pristine, i bought it in '18 with 60k miles on it.....im not even at 100k yet and the bed was done. Its ok though, now i'll have a flatbed fx4
Last couple days I ground out some rust from stone chips across the front of the roof and repainted the roof. I also found a rust-free 7 foot box 2 1/2 hours east of here that I will be picking up this week if all goes according to plan. I removed the cap and bed liner for the first time in 24 years and found the liner had worn off some bed paint and caused one small nasty rust spot - otherwise the inner bed structure is almost perfect - the cap rubbed through the paint on the back box corners and 2 spots on the top of the tailgate (hidden by rubber tape to seal the rear hatch) that I will need to repair. The cap has been hitting the cab and I want to fix that bey mounting the new box 1/2 inch farther back. How much "play" is there in the box mounting holes? I'm expecting I will need to grind out the holes in the frame or re-drill the frame? I was going to repair the box sides but the bottom rear corners are not available for the 7 footer, the points where the support struts fasten are rusted, and the wheel lips are starting to go through - so I'd be looking at about $600 in materials plus a LOT of time - so $1200 Canadian for a "southern tin" box doesn't seem out of line. I will have it and the Raifer fiberglass cap resprayed for another $1250. Had a LOT of "fun" getting the windows out of the cap - the holes were a "perfect fit" for the windows - BEFORE the extrusions bulged where the screws were installed - - - - - Took a lot of "convincing" to get them out without damage. When re-installed HOPEFULLY the leaks will be gone. Also ordered the double bulb style Ultra Seal mounting tape instead of the foam tape that constantly slips out. We will see how that works out. The bumpers need to be re-done too - found a local powder coater will shot blast and powder coat for what any of the local sandblasters want just to blast them - - -
That Flat Bed is looking great will be a good looking truck when you re done.
The Stretched metal on the headache rack area looks nice; I have some thinner version on mine but have never been happy with it; I will have to look into your idea.
I have some stretched metal I'm using on my welding table for shelving, hope I have enough left over.
Thanks for the idea.
Ltr
Added:
Does the Headache Rack area go above your cab ?
Why I ask, I have a mod'd Back Rack on my Steppie, and it is about an inch+ above the cab, enough so most items miss the cab when I carry things there and it is a win for sure.
That Flat Bed is looking great will be a good looking truck when you re done.
The Stretched metal on the headache rack area looks nice; I have some thinner version on mine but have never been happy with it; I will have to look into your idea.
I have some stretched metal I'm using on my welding table for shelving, hope I have enough left over.
Thanks for the idea.
Ltr
Added:
Does the Headache Rack area go above your cab ?
Why I ask, I have a mod'd Back Rack on my Steppie, and it is about an inch+ above the cab, enough so most items miss the cab when I carry things there and it is a win for sure.
Only the top corners extend above the cab slightly, i prefer this, as i often find myself barely squeezing into parking garages around jobsites as it is.
I also used the expanded steel to cover the back window for hillbilly logging reasons. I made about a 30' choker out of left over cable from a jobsite, along with some crosby clips to form the eyes.....i use it at my camp in NH to haul trees out of the woods with a 10k pintle hitch.....the last thing i want is that cable parting or the crosby clips slipping and that cable coming through my back window.
the deck is pressure treated cedar, more stake pockets are being added along the back so i can totally box off the bed if needed, and ive got some weldable D rings im going to add to the headache rack so i can secure my oxyacetylene tanks.