
Coilover Brackets by ME00stepside (NO LONGER AVAILABLE AS OF 7/23/2021)


Member

Joined: Apr 2016
Posts: 4
Likes: 0
From: Cary, North Carolina
Morris:
the ride height would be adjusted using the pre load correct? and you used standard eyelets? also last question I looked at fox shocks and was recommended the 5" travel, which coiler diameter? Im just wondering if anyone could give me an link of the ideal coilover that would work with my application.
Kyle

Member
Joined: Apr 2016
Posts: 20
Likes: 0
From: Huntington Beach
Fox 2.0 Pro Series 5" Travel Coilover Emulsion "Black Ends" *-FFox 980-02-000-A Ranger Valving
King 2.5" I.D. Springs 8" Length up to 14" length Standard Rates *-King Springs 2.5" SPR25-10-600
those are what it got.
King 2.5" I.D. Springs 8" Length up to 14" length Standard Rates *-King Springs 2.5" SPR25-10-600
those are what it got.
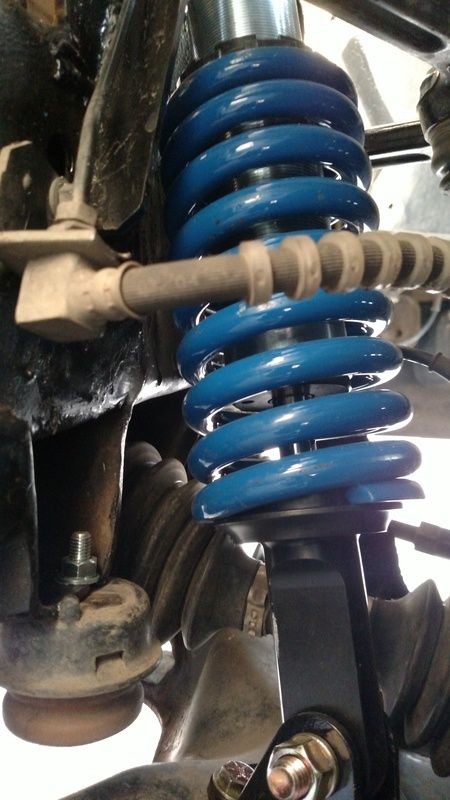
That's correct, preload sets ride height but it also sets ride. The more preload the more rough it'll ride.
I had extended eyelets. There's been some mention of them not fitting properly and some rubbing.
These were the exact ones on my truck.
I think they are the 2.0 ones jetmagee mentioned.
https://www.ranger-forums.com/suspen...-bl-wa-136917/
I had extended eyelets. There's been some mention of them not fitting properly and some rubbing.
These were the exact ones on my truck.
I think they are the 2.0 ones jetmagee mentioned.
https://www.ranger-forums.com/suspen...-bl-wa-136917/
Last edited by morris; Apr 29, 2016 at 09:15 PM.

Member
Joined: Dec 2015
Posts: 5
Likes: 0
From: Long Island NY
Hey guys im about to order up all my parts and brackets. Few questions i literally cant find on the internet. Iv done hours of research on this because i know repeated questions are very annoying! lol
1-Is there a complete write-up with step by step instructions out there?
2-If there is not, what angle is the top mount set at? as well as the gussets? I know the bottom mount is lined up with the previous shock mounting holes.
3- Bracket kit, complete shocks, limit straps, is that pretty much it?
4-Lastly, how long should your limit straps be? and where do you mount them? Iv scene many different mounting options but wont that effect the length of your strap? can you buy a strap to short or to long?
Thanks in advance!
Member
Joined: Apr 2016
Posts: 20
Likes: 0
From: Huntington Beach
1. there is no instruction write up
2. i figured it is the same as it was with the old shock. it all bolts up so it should align correctly to itslef.
3. paint i guess. i got new bump stops as well.
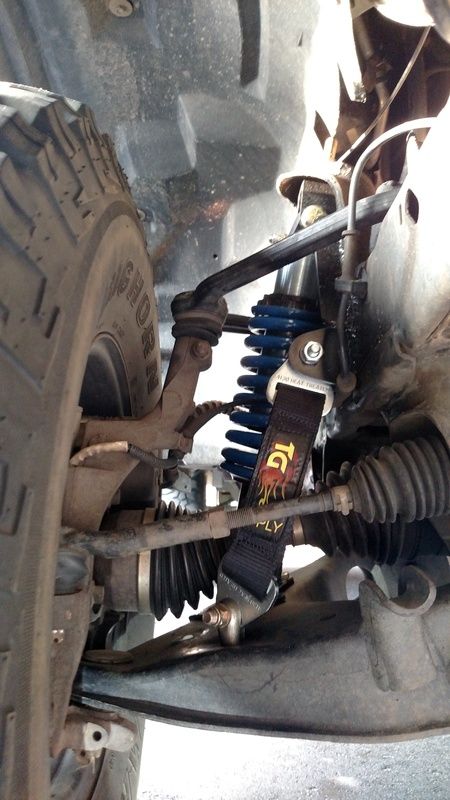
4. for stock height 8 inch straps have worked for others. you will have to look back at other pictures. get an adjustable clevis so you can change them to your liking.
2. i figured it is the same as it was with the old shock. it all bolts up so it should align correctly to itslef.
3. paint i guess. i got new bump stops as well.
4. for stock height 8 inch straps have worked for others. you will have to look back at other pictures. get an adjustable clevis so you can change them to your liking.
Last edited by jetmagee; May 3, 2016 at 09:41 PM.
Member
Joined: Oct 2015
Posts: 204
Likes: 0
From: croghan, ny

I live in upstate newyork. I run the shock wears. Theyre like 30$ in summit racing catalog. They put so much salt on our roads up here itsridiculous. I have to run them. I bought 14 inch long ones. That way it covers all the threads on the coilover.

Member
Joined: Apr 2016
Posts: 20
Likes: 0
From: Huntington Beach
Anyone who works at a shop who could give me a rough estimate on what the whole conversion would cost? including a lifted spindle swap. Im trying to have it done before i return from this deployment so i can enjoy it during leave.


Member
Joined: Dec 2009
Posts: 65
Likes: 0
From: Toronto, ON
Hey guys im about to order up all my parts and brackets. Few questions i literally cant find on the internet. Iv done hours of research on this because i know repeated questions are very annoying! lol
1-Is there a complete write-up with step by step instructions out there?
1-Is there a complete write-up with step by step instructions out there?
It's pretty complete with the exception of needing an update to the Daystar bump stops part because they are known to deflect and not do their job protecting your suspension. I'm still searching for the authoritative solution to this and will update with installation instructions once I've done it myself.

Hey guys, it's been a while since I've been on here, but I wanted to let you know that I've got a batch of these at the powdercoat shop right now. They should all be ready in about a week.
I've been doing these made to order, but I had to change shops, and it's too expensive to have them coated 1 or 2 at a time, so with the last few orders, I had about 5 extra made. They'll be ready to ship sometime next week.
As always, email is the best way to get me.
I've been doing these made to order, but I had to change shops, and it's too expensive to have them coated 1 or 2 at a time, so with the last few orders, I had about 5 extra made. They'll be ready to ship sometime next week.
As always, email is the best way to get me.
Member
Joined: Jul 2012
Posts: 17
Likes: 0
From: Littleton, CO
Hey all!
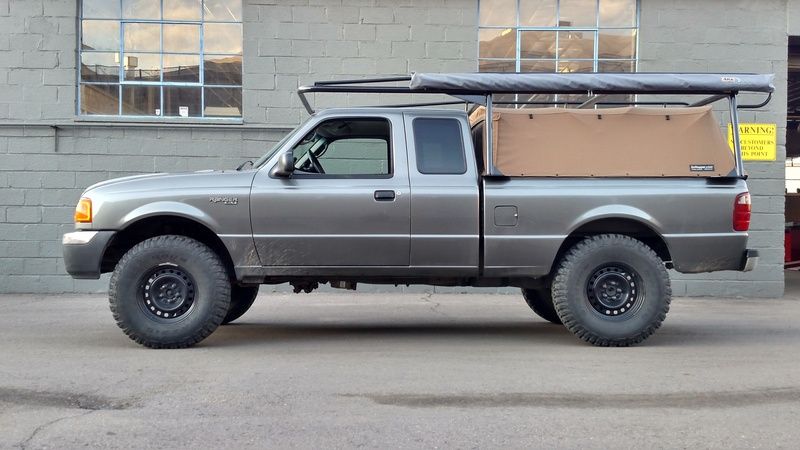
So i got my conversion done a week ago now, and im a bit concerned looking at everyone else's up travel that i may have the wrong shocks. My boxes from DSMS are marked 980-02-000, and I made sure to tell them that I do not have a superlift. Im running 600lb springs in case you are wondering.
So i got my conversion done a week ago now, and im a bit concerned looking at everyone else's up travel that i may have the wrong shocks. My boxes from DSMS are marked 980-02-000, and I made sure to tell them that I do not have a superlift. Im running 600lb springs in case you are wondering.


Two completely different coil designs! They are both stamped 600lb, but i doubt they are. Ride is good on the 700s, but i still had to preload them almost 2" to get the height I wanted. Besides that, I have put 30,000 mi on this setup, including a trip to canada, and a ton of hard trail driving, and I absolutley love it! Current state of things

Member
Joined: Dec 2009
Posts: 65
Likes: 0
From: Toronto, ON
Bracket Design Suggestion
Hey,
I'm still noodling the bump stop issue.
When you chop the bump stop bracket to clear the coilovers, you effectively relocate the rubber bump stop itself over an inch inboard from its stock location.
This makes things so the lower control arm only half catches the bump stop at full compression. This might be OK when you haven't superlifted. But if you have, it's why the longer Daystar bump stops apparently deflect, don't do their job and result in busted CV joints, and even broken shock shafts, according to others with first hand experience.
You could put a bump stop onto the shock shaft itself, like some have done, but it seems to me it's better to have a solution that protects the shock completely from the forces of bottoming out. Ford had it right by having the frame stop the LCA when it ventured too far.
You could try to stiffen the extended Daystar bump stop, or use a solid spacer with the stock rubber bump stop to minimize chances of it bending and sliding off the inner edge of the lower control arm at full compression. But this doesn't affect the root cause, which is that the bump stop and the surface it's supposed to meet with DON'T LINE UP.
***So here's the idea***
How about doing something to extend the surface of the lower control arm a bit so that it catches the bump stop full on and so it has nowhere to slide off at full compression?
When we install that lower coilover bracket, we're bolting on a pretty nice solid piece of flat steel that could accomplish this purpose rather nicely if it was extended inboard a few inches.
Shawn, what do you think about prototyping this tweak to the design? I'm happy to volunteer my truck as the guinea pig. Let me know what you think it would cost.
Pierre
Member
Joined: Dec 2009
Posts: 65
Likes: 0
From: Toronto, ON
That part of the LCA is pretty curvy, in three dimensions. I'd definitely mess it up, but then again I can't weld for s#!t. :-P
Member
Joined: Nov 2011
Posts: 266
Likes: 1
From: PA
Who ever you had well the gussets to the frame and shock tower, have them weld the LCA
Member
Joined: Dec 2009
Posts: 65
Likes: 0
From: Toronto, ON
Yeah, that's one option. But since I'd already be asking someone else to sort out the issue, why not ask the guy who can fix it for everyone else going forward?


